Philips Essence HD2580 User manual
- Category
- Toasters
- Type
- User manual
Page is loading ...
Page is loading ...
Page is loading ...
Page is loading ...
Page is loading ...

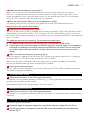
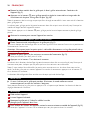
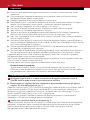
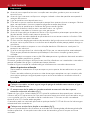
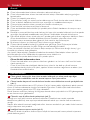
Important
◗ Read these instructions for use carefully before using the appliance and save them for future
reference.
◗ Check if the voltage indicated on the bottom of the appliance corresponds to the voltage in
your home before you connect the appliance.
◗ Connect the appliance to an earthed wall socket.
◗ Avoid touching the metal parts of the toaster, as they get very hot during toasting. Only touch
the controls and lift the appliance by its plastic body.
◗ Do not immerse the appliance or mains cord in water or other liquids.
◗ Only allow children to operate the toaster under close supervision.
◗ Never let the toaster operate unattended.
◗ Unplug the appliance before cleaning. Remove the plug by gripping the plug body and pulling it
from the socket. Never yank or twist the cord.
◗ Do not use the toaster under or near curtains or other flammable materials. Do not operate it
under wall cabinets. Please note that bread may burn.
◗ If a slice of bread gets stuck inside the toaster, unplug the appliance and allow it to cool down
before trying to remove the bread. Do not use a knife or a sharp tool, as these may cause
damage to the heating elements.
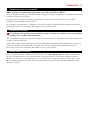
◗ This appliance is only intended for household use. It is not intended for commercial or industrial
use.
◗ If the mains cord is damaged, it must be replaced by Philips, a service centre authorised by
Philips or similarly qualified persons in order to avoid a hazard.
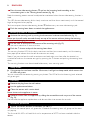
The appliance is only meant for toasting bread. Do not put any other ingredients in the appliance, as
this may lead to a hazardous situation.
Oversized foods, metal foil packages or utensils must not be inserted into the toaster, as this may
cause a fire or an electrical shock.
Immediately unplug the toaster if fire is observed.
Before using the toaster for the first time
- Remove any stickers and wipe the body and top of the toaster with a damp cloth.
- Let the toaster first complete one toasting cycle without inserting any bread to burn off any
dust that may have accumulated on the heating elements during storing.
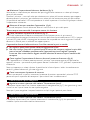
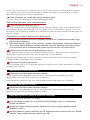
Toasting bread
1 Put the appliance in a safe place, away from fire hazards such as curtains, and insert the plug
into the wall socket.
After you have inserted the plug, the LEDs will blink quickly from left to right and back until the LED
of the third browning level starts to burn continuously to indicate that the toaster has reached its
initial setting. If the toaster has not been used for 10 minutes, it will go into sleep mode, which
means that all LEDs will go out.
You can re-activate the toaster by pressing any button.The LED of the last browning level selected
will go on again.
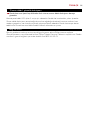
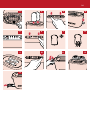
◗ You can adjust the length of the cord by winding part of it round the brackets in the base of
the appliance (fig. 1).
2 Put one or two slices of bread in the toaster (fig. 2).
The type of bread and the state of the bread have no effect on the end result. Frozen, defrosted,
fresh or old bread - the toaster's advanced sensor system always guarantees the same result.
Note:When you want to toast only one slice of bread, always put it in the front slot of the toaster
because of the location of the sensor.
ENGLISH6

3 Select the desired browning setting (fig. 3).
Select a low setting for lightly toasted bread and a high setting for a dark browning result.
Press the £ button once or several times to select a lower setting for lighter toast. Press the ¢
button to choose a higher setting for darker toast. On the control panel the LED of the chosen
setting will burn yellow to show the browning level selected.
4 Push the toasting lever down to turn the appliance on (fig. 4).
The toasting lever will only stay down if the appliance has been connected to the mains.
Keep an eye on the toaster while using it.
5 Monitoring the toasting process (fig. 5).
The LED of the browning setting selected stays on and the preheating light blinks red slowly.When
the preheating phase has finished, this LED will go out.The first yellow browning LED will start to
blink slowly and will continue to do so until the browning level has been reached.The toast pops up
when it is ready.
The appliance gets hot during toasting. Do not touch the metal parts.
◗ To remove smaller items, push the toasting lever a little further up (extra lift).
◗ If bread gets stuck inside the toaster, remove the plug from the wall socket, let the appliance
cool down completely and carefully remove the bread from the toaster. Do not use a knife
or another sharp metal tool to do this and do not touch the metal internal parts of the
toaster.
6 Adjust the toasting setting during toasting (fig. 6).
When the toaster is operating you can press the ¢ button to get darker toast or the £ button to
get lighter toast.The LED of the setting selected will burn yellow.
Note: when you adjust to a lower setting for lighter toast, the toast may pop up immediately
because the desired browning level has already been reached.
7 Interrupt the toasting process
You can stop the toasting process at any time by pressing the STOP button on top of the toaster.
The bread will pop up immediately.
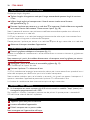
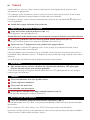
Toasting frozen bread
1 Follow the instructions in the 'Toasting bread' section.
The toaster has an automatic defrosting function (fig. 7), which guarantees that the result is the same
whether you use frozen or fresh bread.
Note: frozen bread will take longer to toast than fresh bread.
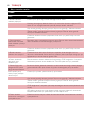
Reheating toasted bread
1 Follow the instructions in the 'Toasting bread' section.
The toaster has an automatic reheating function (fig.8), which will reheat your toast without making
it browner.
Toasting only one side
Perfect for bagels and baguettes.
1 Halve the bagels or baguettes lengthwise and shorten them to a length of max. 13 cm.
2 Put the bagel halves in the toaster with the sides to be toasted facing the outside of the
toaster (fig. 9).
ENGLISH 7

3 Press the one-side toasting button and set the browning level according to the
instructions given in the 'Toasting bread' section (fig. 10).
Note: the toasting process cannot be adjusted or monitored when the one-side toasting function is
used.
The LED for one-side toasting blinks slowly two times and then burns continuously until the toasted
bagel or baguette halves pop up.
You have to press the one-side toasting button
before every new one-side toasting cycle.
4 Push the toasting lever down to switch the appliance on.
Heating up rolls or croissants
1 Activate the warming rack by turning the bunwarmer knob counterclockwise (fig. 11).
Never put the rolls to be warmed directly on top of the toaster without placing the warming
rack to avoid damaging the toaster.
2 Put the rolls or croissants in the centre of the warming rack (fig. 12).
Do not warm more than 2 items at a time.
3 Push the Ô button and push the toasting lever down
The warming function LED blinks slowly two times and then burns continuously until the toasting
lever pops up to indicate that the rolls or croissants are ready.
Note: If you want to heat the rolls or croissants on both sides, turn them after the toaster has
switched off and turn the toaster on again by pressing the
Ô button and pushing the toasting lever
down.
The warming function must be activated before every new warming cycle.
Sleep mode
◗ If the toaster has not been used for 10 minutes, it will go into sleep mode, which means that
all LEDs will go out.
You can re-activate the toaster by pressing any button.The LED of the last browning level selected
will go on again.
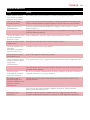
Cleaning
1 Remove the plug from the wall socket.
2 Let the appliance cool down.
3 Clean the toaster with a moist cloth.
Never immerse the appliance in water.
4 Remove crumbs from the appliance by sliding the removable crumb tray out of the toaster
(fig. 13).
Do not hold the appliance upside down and do not shake it to remove the crumbs.
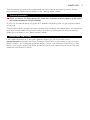
Overheat protection
1 Toaster will switch off when it overheats (at 100cC).
All LEDs on the control panel will go out for 2 seconds, the toasting lever will go up and the toast
will pop up.
The first and fifth LEDs will both blink until a temperature of 60cC has been reached inside the
toaster.
ENGLISH8

Then the toaster will reset to the ready mode and return to the last browning setting.You can
continue toasting. Follow the instructions in the 'Toasting bread' section.
Timeout protection
1 When the toaster has been toasting for more than 5 minutes without popping up the bread,
the timeout protection will be activated.
All LEDs on the control panel will go on for 2 seconds, the toasting lever will go up and the toast
will pop up.
Once the cause of the timeout has been removed and the toaster has cooled down, the toaster will
reset to the ready mode and will return to the last browning setting.You can continue toasting.
Follow the instructions in the 'Toasting bread' section.
Information and service
If you need information or if you have a problem, please visit the Philips Web site at
www.philips.com or contact the Philips Customer Care Centre in your country (you will find its
phone number in the worldwide guarantee leaflet). If there is no Customer Care Centre in your
country, turn to your local Philips dealer or contact the Service Department of Philips Domestic
Appliances and Personal Care BV.
ENGLISH 9

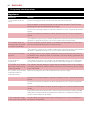
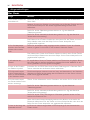
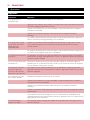
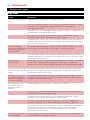
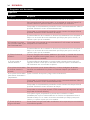
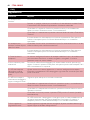
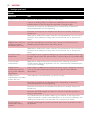
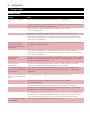
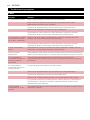
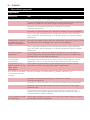
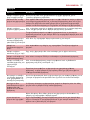
Answer
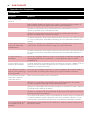
Check if the plug has been inserted into the wall socket properly.
Press any button to check if the sleep mode has been activated.The LED of the
browning level you last selected will go on again.
Check if the overheat protection has been activated. See the 'Overheat protection'
section.
Check if the timeout protection has been activated. See the 'Timeout protection'
section.
The electronic system of your toaster malfunctions. Have the toaster examined and
repaired or replaced by Philips or a service centre authorised by Philips.
Check if the bread has been placed in the toaster correctly.When you toast only
one slice of bread, always place it in the front slot.
The electronic system of your toaster malfunctions. Have the toaster examined and
repaired or replaced by Philips or a service centre authorised by Philips.
An intelligent sensor in the toaster establishes the type of bread and the state of
the bread. Frozen, defrosted, fresh or old bread - the sensor always guarantees the
same end result.
The electronic function of the toaster can be tested by pressing the STOP button
on top of the toaster for more than 3 seconds.All LEDs will go on in succession.
This indicates that the electronic system and the intelligent sensor of your toaster
are working properly.The LEDs will blink whenever you put the plug of the toaster
in the wall socket.
Remove the plug from the wall socket and then reinsert it again.
Check if the overheat protection has been activated. See the 'Overheat protection'
section.
Check if the timeout protection has been activated. See the 'Timeout protection'
section.
Check if the STOP button has been pressed longer than 3 seconds (electronics test
mode).
If the LEDs continue to blink or burn continuously, the electronic system probably
malfunctions. Have the toaster examined and repaired or replaced by Philips or a
service centre authorised by Philips.
You can adjust the length of the cord by winding part of it round the brackets in
the base of the appliance.
Question
1.The toaster does not
work.
2.The toaster does not
toast but pops the bread
up almost immediately.
3. How does the toaster
function?
4. Can I test the
electronics?
5.The LEDs of my toaster
blink when I put the plug
in the wall socket.
6.The LEDs of the toaster
continue to blink or
continue to burn.
7. Can I adjust the length
of the cord of the toaster?
Appliance
ENGLISH10
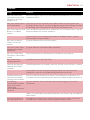
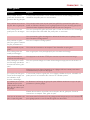
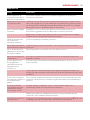
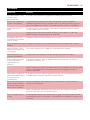
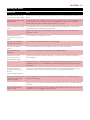
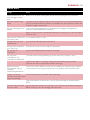
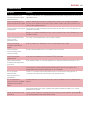
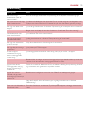
Frequently asked questions

Answer
This is only possible when you use the warming rack to warm rolls or croissants.
Yes, almost every kind of bread can be toasted. It is even possible to toast a
baguette by making use of the one-side toasting function. Bread that is too thick to
fit in the toaster can be cut lengthwise to make it fit into the toaster slot.
Yes, rolls can be toasted by using the warming rack on the toaster. See 'Warming
rolls or croissants'.
Bagels can be toasted by using the one-side toasting function. See the 'Toasting only
one side' section.
Yes, see the 'Toasting only one side' section.
Yes, follow the instructions in the 'Reheating toasted bread' section.
No, this toaster is not suitable for toasting sandwiches.
Yes, press the STOP button to cancel the toasting process.
Yes, the browning level can be adjusted during the toasting process by pressing the
¢ or £ buttons
Note: when you set the toaster to a lower browning setting, the bread may pop up
immediately because it has already reached the desired browning level.
This is normal, for the toaster has a fixed setting for warming rolls and croissants
which guarantees a perfect end result.
The intelligent sensor in the toaster can only detect one type of bread during a
toasting cycle.
Put two slices of the same kind of bread in the toaster. Follow the instructions in
the 'Toasting bread' section.
The one-side toasting function has been activated. Do not press the one-side
toasting button if you want both sides of the bread to be toasted.
Question
Is it possible to toast
without bread in the
toaster?
Do all kinds of bread fit in
the toaster?
Can I toast rolls or bagels?
Does the toaster have a
one-side toasting function?
Can I reheat toasted
bread?
Can I toast sandwiches
(e.g. with cheese)?
Can I interrupt the
toasting process?
Is it possible to change the
browning level while the
toaster is working?
I cannot change the
browning level when I use
the warming function.
I do not get the same end
result when I toast
different types of bread
toasted in one toasting
cycle.
One side of the toast has
not been toasted.
Toasting
ENGLISH 11
Page is loading ...
Page is loading ...
Page is loading ...
Page is loading ...
Page is loading ...
Page is loading ...
Page is loading ...
Page is loading ...
Page is loading ...
Page is loading ...
Page is loading ...
Page is loading ...
Page is loading ...
Page is loading ...
Page is loading ...
Page is loading ...
Page is loading ...
Page is loading ...
Page is loading ...
Page is loading ...
Page is loading ...
Page is loading ...
Page is loading ...
Page is loading ...
Page is loading ...
Page is loading ...
Page is loading ...
Page is loading ...
Page is loading ...
Page is loading ...
Page is loading ...
Page is loading ...
Page is loading ...
Page is loading ...
Page is loading ...
Page is loading ...
Page is loading ...
Page is loading ...
Page is loading ...
Page is loading ...
Page is loading ...
Page is loading ...
Page is loading ...
Page is loading ...
Page is loading ...
Page is loading ...
Page is loading ...
Page is loading ...
Page is loading ...
Page is loading ...
Page is loading ...
Page is loading ...
Page is loading ...
Page is loading ...
Page is loading ...
Page is loading ...
Page is loading ...
Page is loading ...
Page is loading ...
Page is loading ...
Page is loading ...

◗
(. 1).
2 (. 2).
.
, , -
.
: ,
.
3 (. 3).
.
£
.
.
4 (. 4).
.
.
5 (. 5).
.
, .
.
.
. .
◗ ,
(extra lift).
◗ , ,
.
.
6 (. 6).
¢
£ .
.
: ,
.
7
STOP . .
1 ' '.
,
.
: (. 7),
.
73
Page is loading ...

1 .
2 .
3 .
.
4
(. 13).
.
1 ( 100cC).
2 ,
.
60cC .
. .
' '.
1 5 ,
.
2 ,
.
,
. .
' '.
, Philips
www.philips.com Philips
( ).
,
Philips.
75
Page is loading ...
Page is loading ...
Page is loading ...
Page is loading ...
Page is loading ...
Page is loading ...
Page is loading ...
Page is loading ...
Page is loading ...
Page is loading ...
Page is loading ...
Page is loading ...

www.philips.com
4222 001 95413
u
-
 1
1
-
 2
2
-
 3
3
-
 4
4
-
 5
5
-
 6
6
-
 7
7
-
 8
8
-
 9
9
-
 10
10
-
 11
11
-
 12
12
-
 13
13
-
 14
14
-
 15
15
-
 16
16
-
 17
17
-
 18
18
-
 19
19
-
 20
20
-
 21
21
-
 22
22
-
 23
23
-
 24
24
-
 25
25
-
 26
26
-
 27
27
-
 28
28
-
 29
29
-
 30
30
-
 31
31
-
 32
32
-
 33
33
-
 34
34
-
 35
35
-
 36
36
-
 37
37
-
 38
38
-
 39
39
-
 40
40
-
 41
41
-
 42
42
-
 43
43
-
 44
44
-
 45
45
-
 46
46
-
 47
47
-
 48
48
-
 49
49
-
 50
50
-
 51
51
-
 52
52
-
 53
53
-
 54
54
-
 55
55
-
 56
56
-
 57
57
-
 58
58
-
 59
59
-
 60
60
-
 61
61
-
 62
62
-
 63
63
-
 64
64
-
 65
65
-
 66
66
-
 67
67
-
 68
68
-
 69
69
-
 70
70
-
 71
71
-
 72
72
-
 73
73
-
 74
74
-
 75
75
-
 76
76
-
 77
77
-
 78
78
-
 79
79
-
 80
80
-
 81
81
-
 82
82
-
 83
83
-
 84
84
-
 85
85
-
 86
86
-
 87
87
-
 88
88


Philips Essence HD2580 User manual
- Category
- Toasters
- Type
- User manual
Ask a question and I''ll find the answer in the document
Finding information in a document is now easier with AI
in other languages
- italiano: Philips Essence HD2580 Manuale utente
- français: Philips Essence HD2580 Manuel utilisateur
- español: Philips Essence HD2580 Manual de usuario
- Deutsch: Philips Essence HD2580 Benutzerhandbuch
- Nederlands: Philips Essence HD2580 Handleiding
- português: Philips Essence HD2580 Manual do usuário
- dansk: Philips Essence HD2580 Brugermanual
- Türkçe: Philips Essence HD2580 Kullanım kılavuzu
- svenska: Philips Essence HD2580 Användarmanual
- suomi: Philips Essence HD2580 Ohjekirja
Related papers
-
Philips HD2567 Owner's manual
-
-
-
-
Philips HD 2618 User manual
-
-
Philips HD2626 Owner's manual
-
Philips hd2611 55 User manual
-
-
Philips HD2650/70 User manual
