Sherwood CD-5505 Operating instructions
- Category
- CD players
- Type
- Operating instructions
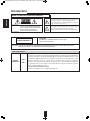
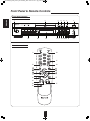
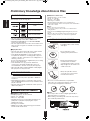
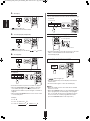
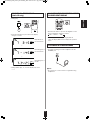
Sherwood CD-5505 compact disc player offers a versatile audio experience. Enjoy your favorite CDs and USB music files with ease. Playback options include random order, repeat play, and selecting a specific track or file. Elevate your listening pleasure with the option to adjust the brightness of the fluorescent display or connect headphones for private listening.
Sherwood CD-5505 compact disc player offers a versatile audio experience. Enjoy your favorite CDs and USB music files with ease. Playback options include random order, repeat play, and selecting a specific track or file. Elevate your listening pleasure with the option to adjust the brightness of the fluorescent display or connect headphones for private listening.


-
 1
1
-
 2
2
-
 3
3
-
 4
4
-
 5
5
-
 6
6
-
 7
7
-
 8
8
-
 9
9
-
 10
10
-
 11
11
-
 12
12
-
 13
13
-
 14
14
-
 15
15
-
 16
16
-
 17
17
-
 18
18


Sherwood CD-5505 Operating instructions
- Category
- CD players
- Type
- Operating instructions
Sherwood CD-5505 compact disc player offers a versatile audio experience. Enjoy your favorite CDs and USB music files with ease. Playback options include random order, repeat play, and selecting a specific track or file. Elevate your listening pleasure with the option to adjust the brightness of the fluorescent display or connect headphones for private listening.
Ask a question and I''ll find the answer in the document
Finding information in a document is now easier with AI
Related papers
-
Sherwood CD-772 Operating Instructions Manual
-
-
Sherwood CDC-5506 Operating Instructions Manual
-
-
-
-
Sherwood RD-705i Operating instructions
-
-
Sherwood CDC-5090C User manual
-
Sherwood RD-606I Operating instructions
Other documents
-
Philips AK 640 User manual
-
NAD C 538 User manual
-
 Hollywood VR-652 User manual
-
Anthem BLX 200 User manual
-
Ultrak 499 Stopwatch Operating instructions
-
Panasonic SCPM71SD Operating instructions
-
-
LG DKS-7100SQ User manual
-
Panasonic SCAK240 Operating instructions
-
