Page is loading ...

Quick Start Guide
English

MicroTrack II Quick Start Guide ‣ 1
English
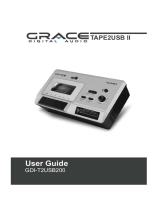
Congratulations on your purchase of M-Audio MicroTrack II: the easy-to-use solution for portable digital recording.
This Quick Start Guide will show you how to make your first recording, play it back, and transfer the audio file to your
computer. This guide also details the steps to install Audacity, the included audio editing program for Mac and PC,
which you can use for editing and converting your recorded files.
What’s in the Box
‣ MicroTrack II unit
‣ USB cable
‣ stereo “T” microphone
‣ 1/8” female to 1/8” male extension cable with
lapel clip
‣ earbuds
‣ protective bag
‣ USB power supply
‣ this Quick Start Guide
‣ CD-ROM containing the User Guide, test tones,
and Audacity editing software
Charging MicroTrack II
The MicroTrack II built-in battery ships with only a minimal charge and you must charge it from a power source
(your computer’s USB connection or the included power supply) before you can use it.
It is essential that you fully charge the MicroTrack II battery before using your new recorder. Failure to fully charge the
battery before first use can limit the capacity of the battery, lowering the total recording time of MicroTrack II.
To charge the battery, follow the steps below:
‣ Plug the smaller end of the supplied USB cable into the USB connector on the bottom of MicroTrack II.
‣ Plug the large end of the USB cable into the supplied USB power supply.
‣ Plug the USB power supply into a power outlet.
‣ An animated battery symbol will be displayed in the right upper corner of the LCD on MicroTrack II to indicate
that the device is being charged.
‣ When the battery is fully charged, the animation will stop, the battery symbol will appear solid, and a check
mark will be displayed next to the battery symbol, indicating that the charging process has finished.
‣ You can now disconnect MicroTrack II from the USB cable.

2 MicroTrack II Quick Start Guide
Formatting a Compact Flash Card or Microdrive
Compact Flash (CF) cards and Microdrives may need to be formatted before you can use them to record. To format
a card:
‣ Insert it into MicroTrack II and power the unit on.
➜ NOTE: If MicroTrack II is connected to its power supply or a computer’s USB port, then it will boot
into charge or host mode. Push the delete or power button to exit to normal operation mode.
‣ Once MicroTrack II has finished booting up, you will see the Main Menu. If the Main Menu does not appear,
press the [MENU] button on the left side of MicroTrack II.
‣ Push the [NAV] wheel up or down until “System” is highlighted. Press in on the [NAV] wheel to confirm the
selection.
‣ Similarly, select “Format Media” using the [NAV] wheel.
‣ The LCD will read “Format Media.” Confirm this action by pressing in on the [NAV] wheel again. The display will
read “Formatting Media” during this process.
‣ When formatting is complete, the display will read “Format complete.” At this point, MicroTrack will
automatically reboot. You can now record files to the CF card or Microdrive.
Making Your First Recording
While MicroTrack II can record from a wide variety of audio sources such as microphones, line-level devices, and
S/PDIF signals, this Quick Start Guide will illustrate how to make a recording from the supplied stereo
“T” microphone. Please refer to the User Guide provided on the CD-ROM for details on recording other input types.
➜ NOTE: This section assumes MicroTrack II is properly turned on, with a CF or Microdrive card inserted
and formatted. If you need instructions on how to do this, refer to the previous section of this guide.

MicroTrack II Quick Start Guide ‣ 3
English
Selecting an Input and Making Record Settings
‣ Connect the supplied stereo “T” microphone to the 1/8” microphone jack on the top of MicroTrack II.
‣ Use the [NAV] wheel on the right side to scroll down through the menu options until “Record Settings” is selected.
Press in on the [NAV] wheel to activate the Record Settings menu.
‣ Highlight “Input Source” from this menu, and press in on the [NAV] wheel to select it.
‣ The Input Source menu has three options. The first option is 1/8”. Select this item and press in on the [NAV] wheel.
This will select the 1/8” input as the recording source and will return you to the previous menu.
‣ Using the [NAV] wheel in the same fashion as described above, set the remainder of the options as follows:
• Encoder [WAV] • Sample Rate [44.1] • Bits [16] • Channels [Stereo]
‣ Once all of the above parameters are set, press the [MENU] button. This will exit the Record Settings menu and
return you to the Main Menu. Press the [MENU] button once more to leave the Main Menu and display the main
screen of MicroTrack II.
Setting Your Input Level
‣ Press the [REC] button. The volume meters on the main screen will show the input level being received through
the stereo “T” microphone. Try speaking and you should see the volume meters rise as you talk. If the meters are
not moving, double-check that MicroTrack II is set as described previously.
‣ Now set the recording level. You will probably see that while talking in a normal speaking voice, the input level
meters do not come close to reaching their maximum level. If a normal speaking voice is the source volume
you wish to record, the recording level should be increased. If, on the other hand, the sound source you wish to
record is loud, you may find it’s easy to make the meters reach full level. In this case, you will need to decrease the
recording level to avoid distorting your recording.
Use the [LEVEL] buttons to increase or decrease the recording level of the left and right channels such that the
meters almost reach their full level without going over. If the recording level is too high, the red LEDs above the
[LEVELS] buttons will blink, indicating that the recording will be distorted, or clipped.
‣ Once you have set your recording level, press the [DEL] button. While setting your levels, MicroTrack II was actually
already recording to a file. Pressing the [DEL] button and confirming by pressing the [DEL] button again will delete
the small file you just recorded.
➜ NOTE: The [Rec] button can also be configured to enter Record-Pause mode when first pressed. This
makes recording a small file while setting levels unnecessary. See the Options Menu section of the User
Guide on the included CD-ROM for more information on this.

4 MicroTrack II Quick Start Guide
Making a Recording
‣ Press the [REC] button, and MicroTrack II will immediately begin recording a new audio file.
‣ Speak into the microphone and record your voice for about 20 seconds. MicroTrack II will show the length of the
current recording and the remaining recording time in the lower-right corner of the screen (separated by “/”).
‣ When you want to stop recording, press the [REC] button again.
‣ When the recording has stopped, MicroTrack II will finish writing data to the CF card or Microdrive and will then set
the file to standby, making it ready for playback.
Playing Back Your Recording
Now that you have an audio file on the CF card or Microdrive, you can play it back using MicroTrack II. MicroTrack II
outputs audio through its RCA connections at the bottom of the unit and through the headphone output at the top
of the unit. This Quick Start Guide will illustrate how to use the supplied earbuds to monitor playback. If you wish to
use another output, refer to the User Guide on the CD-ROM.
‣ Plug the supplied earbuds into the 1/8” headphone jack on the top of MicroTrack II.
‣ Use the [VOLUME] button to set the output volume (shown as a wedge-shaped meter at the top of MicroTrack II
LCD display) to around 50%. This is a good place to start and will help prevent the headphone output from being
too loud and damaging your ears. Once audio playback begins, you can adjust the output volume to your taste.
‣ You should still be looking at the opened file you have just recorded. Press the [NAV] wheel in and the file will play.
However, if you exited to a different screen after recording, then you will need to press the [MENU] button and use
the [NAV] wheel to select “Files.” Then use the [NAV] wheel to select the file you just recorded. Push in on the [NAV]
wheel to start playback.
‣ While the file is playing, you can:
• Adjust the output volume using the [VOLUME] button.
• Return to the beginning of the file by pressing down once on the [NAV] wheel.
• Move forward or backward (seek) through the file by pressing and holding the [NAV] wheel up or down for
more than two seconds. Release the [NAV] wheel to return to normal playback.
• To pause playback, press in on the [NAV] wheel.

MicroTrack II Quick Start Guide ‣ 5
English
Transferring Your First Recording to Your Computer
Now that your first recording is saved on the CF card or Microdrive, you can copy this file from MicroTrack II to a
computer. Once on a computer, your recorded file will behave like any other audio file of the same type, allowing you
to rename, edit, and store the file in any location you wish.
‣ With your computer running and MicroTrack II powered off, connect the large end of the supplied USB cable to an
available USB jack on your computer.
‣ Connect the small end of the supplied USB cable to the USB connector on the bottom of MicroTrack II. MicroTrack
II will automatically boot into host mode (you will not be able to record or play files in this mode). The display will
read “M-Audio” and will show a USB symbol.
Windows XP
If you are using a Windows XP computer, then MicroTrack II will be detected as a Mass Storage Device upon first
connection. As a result, a “Found New Hardware Wizard” may open. Make sure “Install the software automatically
(Recommended)” is selected. Click “Next,” then “Finish” to complete the automatic installation.
➜ NOTE: You may also be presented with an additional “Can Windows connect to Windows Update
to search for software?” message. Select “No, not this time” and click “Next.”
A new Removable Disk will now appear under My Computer. Double click this disk image to view files stored on
MicroTrack II.
If files are present on the CF card or Microdrive, then Windows may display a “What do you want Windows to
do?” dialog. Selecting “Open folder to view files” and clicking OK is another means of viewing these files stored
on MicroTrack II.
Windows Vista
No extra installation steps are required if you are using a Windows Vista computer. MicroTrack II will be detected
as a Removable Disk upon connection and as a result, an AutoPlay dialog window will open. Click “Open folder to
view files” to view files stored on MicroTrack.
The files on MicroTrack II can also be accessed through the start menu. Click on “Computer” and then double-
click on the Removable Disk icon.

6 MicroTrack II Quick Start Guide
Mac OS X
Connecting the MicroTrack to a Macintosh OS X computer will cause a new hard drive icon to appear on the
desktop. Double-click this icon to view files stored on MicroTrack.
‣ To copy a file from the MicroTrack II CF card or Microdrive to your computer, simply drag the file to the desktop
of your computer, or to another location of your choice. When you drop the file in the desired location, it will
be copied to this new location. The original file will still remain on the CF card or Microdrive.
‣ To disconnect MicroTrack II from the computer, you will first need to “unmount” the virtual hard drive as
follows:
• For PC users, click on the “Safely Remove Hardware” icon located in the System Tray, which is in the
corner of the taskbar where the computer’s clock is displayed. After clicking the icon, click “Safely remove
USB Mass Storage Device” from the pop-up menu. In a few moments, a message will pop up stating that you
may now safely remove the hardware. You can now disconnect MicroTrack II.
• For Mac users, simply drag the virtual hard disk from the desktop to the trash can. Don’t worry—this does
not delete the contents of the MicroTrack II CF card or Microdrive. This will simply unmount the drive. When
the icon disappears, you can disconnect MicroTrack II.
Installing Audacity Editing Software
The MicroTrack II package includes a CD-ROM containing Audacity, an audio editing program for both Windows and
Mac. You can use this program to edit your recorded files, apply effects, and save them in a variety of formats. The
following directions detail the process of installing Audacity for each operating system.
Windows
‣ Insert the CD-ROM into your computer’s CD-ROM drive.
‣ The computer will automatically display the CD’s interactive welcome screen. If your computer fails to open
this window, you can manually open it by double-clicking the CD-ROM icon found inside My Computer.
‣ Select Audacity from the drop-down menu and click Install to begin the installation.
‣ Follow the installer’s on-screen directions.
‣ When the installation is complete, press Finish.
‣ Before starting Audacity, use your web browser to visit http://audacity.sourceforge.net to download all available
updates. This will ensure you get maximum performance from the program.
‣ Install the downloaded updates using the install directions supplied on the Web site.
‣ Audacity is now installed and ready to use.

MicroTrack II Quick Start Guide ‣ 7
English
Mac OS X
‣ Insert the CD-ROM into your computer’s CD-ROM drive.
‣ Double-click the CD icon when it appears on your desktop to view the contents of the CD.
‣ Double-click the “Open Me” icon to launch the CD’s interactive welcome screen.
‣ Select Audacity from the drop-down menu and click Install. A browse dialog opens, allowing you to choose
the folder where you would like Audacity to be installed.
‣ Click “Install here” to begin the copy process. After the installation is complete, a finder window will open that
shows you the installed Audacity folder.
‣ Before starting Audacity, use your web browser to visit http://audacity.sourceforge.net to download all available
updates. This will ensure you get maximum performance from the program.
‣ Install the downloaded updates using the install directions supplied on the
Web site.
‣ Audacity is now installed and ready to use.
User Guide
For more information regarding all of the functions of MicroTrack II (there are many not covered by this guide), please
refer to the User Guide contained on the CD-ROM. Place the CD-ROM in your computer’s CD-ROM drive. If you are
using a Mac, double-click the CD icon on your desktop and then double-click “Open Me.” If you are using a Windows
computer, simply wait until the interactive welcome screen opens automatically. Make sure MicroTrack II is selected
from the drop-down menu and then click “Learn.” You can read the manual on screen or print the pages if you prefer.
While you may have enough information to use MicroTrack II to record after reading this simple guide, we highly
recommend that you read through the entire User Guide to completely familiarize yourself with all of the features of
MicroTrack II.
Thank you and enjoy!

8 MicroTrack II Quick Start Guide
Warranty Terms and Registration
Warranty Terms
M-Audio warrants products to be free from defects in materials and workmanship, under normal use and
provided that the product is owned by the original, registered user. Visit www.m-audio.com/warranty for terms
and limitations applying to your specific product.
Warranty Registration
Immediately registering your new M-Audio product entitles you to full warranty coverage and helps M-Audio
develop and manufacture the finest quality products available. Register online at www.m-audio.com/register to
receive FREE product updates and for the chance to win M-Audio giveaways.
WARNING: This product contains chemicals, including lead, known to the State of California to cause cancer, and
birth defects or other reproductive harm. Wash hands after handling.
MicroTrack II
Tested to comply with
FCC standards
FOR HOME OR STUDIO USE
© 2007 Avid Technology, Inc. All rights reserved. Product features, specifications, system requirements and availability are
subject to change without notice. Avid, M-Audio and MicroTrack II are either trademarks or registered trademarks of Avid
Technology, Inc. All other trademarks contained herein are the property of their respective owners.

M-Audio USA 5795 Martin Rd., Irwindale, CA 91706
Technical Support
web: www.m-audio.com/tech
tel (pro products): (626) 633-9055
tel (consumer products): (626) 633-9066
fax (shipping): (626) 633-9032
Sales
e-mail: [email protected]
tel: 1-866-657-6434
fax: (626) 633-9070
Web www.m-audio.com
M-Audio U.K.
Floor 6, Gresham House, 53 Clarenden Road, Watford
WD17 1LA, United Kingdom
Technical Support
e-mail: [email protected].uk
tel:(Mac and PC support): +44 (0)1753 658630
Sales
tel: +44 (0)1923 204010
fax: +44 (0)1923 204039
Web www.maudio.co.uk
Benelux
Technical Support
Belgium: +32 22 54 88 93 Holland: +31 35 625 0097
M-Audio France
Floor 6, Gresham House, 53 Clarenden Road, Watford
WD17 1LA, United Kingdom
Renseignements Commerciaux
tel : 0 810 001 105
e-mail : [email protected]
Assistance Technique
PC : 0 0820 000 731
MAC : 0 0820 391 191
Assistance Technique
e-mail : [email protected]
fax : +33 (0)01 72 72 90 52
Site Web www.m-audio.fr
M-Audio Germany
Kuhallmand 34, D-74613 Ohringen, Germany
Technical Support
e-mail: [email protected]
tel: +49 (0)7941 - 9870030
fax: +49 (0)7941 98 70070
Sales
e-mail: [email protected]
tel: +49 (0)7941 98 7000
fax: +49 (0)7941 98 70070
Web www.m-audio.de
M-Audio Canada
1400 St-Jean Baptiste Ave. #150, Quebec City,
Quebec G2E 5B7, Canada
Technical Support
email: [email protected]
phone: (418) 872-0444
fax: (418) 872-0034
Sales
e-mail: infocanada@m-audio.com
phone: (866) 872-0444
fax: (418) 872-0034
Web www.m-audio.ca
071212_MTII_QSG_EN01
/