Page is loading ...

Installation Guide
and Users Manual
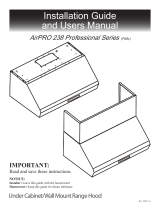
Island Mount Range Hood
IMPORTANT:
Read and save these instructions.
NOTICE:
Installer:
Leave this guide with the homeowner
Homeowner:
Keep this guide for future reference
Rev. 2016u.6a
Suitable for:


Important Safety Notice
Read all Instructions before Installing and operating this appliance
-
DO NOT
DO NOT -
pors.
-
sure to vent air outside. DO NOT
or garages.
-
den utilities.
vendor.
Page 1

Page 2
Important Safety Notice
Read all Instructions before Installing and operating this appliance
The manufacturer and/or distributor/reseller declines all responsibility in the event of failure to ob-
serve the instructions given here for installation, maintenance and suitable use of the product.
The manufacturer and/or distributor/reseller further declines all responsibility for injury due to neg-
ligence and the warranty of the unit automatically expires due to improper maintenance.
The manufacturer and/or distributor/reseller will not be held responsible for any damages to per-
sonal property or real estate or any bodily injuries whether caused directly or indirectly by the range
hood.
WARNING
-
-
what can happen if the instructions are not followed.

Tools needed:
Page 3
Measuring
Table of Contents
INSTALLATION
Tools needed....................................................3
Parts supplied...................................................4
Venting requirements.......................................5
Mount heights & clearance...........................5-6
Venting methods & ductless conversion..........7
Preparation......................................................9
Installation................................................10-12
Range hood operations............................13-19
USE AND CARE
Use and care information.............................21
MAINTENANCE
Cleaning...............................................22
WARRANTY
Disclaimer & contact information..................26

Concrete Sleeve Anchor
Page 4
Description
4 Pcs
Duct Set
1 Set
Inner Supporting Frame with Top Plate
1 Set
Outer Support Frame
4 Pcs
1 Set
24 Pcs
16 Pcs
4 Pcs
2 Pcs
Charcoal Filter
Support Frame Structure
Support Frame Structure
Flappers
Remote Control
Parts supplied:
Air diverter

Page 5
Range hood
101” at 31” hood mounting
Venting Requirements Height & Clearance
-
tic or other enclosed area.
caps.
aluminum vent is recommended.
DO NOT use plastic vent.
-
1.
-
2.
tertop/stove (recommend* 28” to 31”).
Distance between the countertop/stove
3.
4.
hood.
-
hood.
opening around the cap.
-

Page 6
IMPORTANT:
Please use
and caps.
-
-
It is important to install the hood at the proper mounting height. Hoods mounted too low could result in heat
Minimum Duct Size:
Round - 6” minimum
Duct Run Calculation:
50 ft
Vent piece deduction
9 ft
5 ft
7 ft
Side wall cap with damper
0 ft
Roof cap
0 ft
Duct Run Calcuation example:
23ft
23ft
used.
23ft
27ft
27ft
27ft
Calculating vent system length

Venting Methods
Page 7
-
Recirculating (Non-Vented) Kit
on Page 11.
Recirculating (Non-Vented) Kit
IMPORTANT:
Side wall cap
Ductless Conversion
within the home.

Electrical Requirements
IMPORTANT:
that the ground path is adequate.
sides of the line.
Do not ground to a gas pipe.
Do not have a fuse in the neutral or ground circuit.
-
-
-
CSA International
NOTE:
1.
2.
3.
4.
White
Charcoal Filter Installation

Page 9
WARNING
Severe Injury
Rotating fan can cause se
-
vere injury. Stay clear of
fan when motor is running.
WARNING
Severe Injury
Hood may have very shape edges. Please wear
protective gloves if it is necessary to remove
any parts for installing, cleaning or servicing.
1.
2.
Range Hood Operations
,
Page 13.
3.
Range Hood Operations
,
Page 13.
4.
parts listed on Page 4.
5.
1.
2.
3.
4.
Venting requirements
and
Electrical requirements
5.
Venting Methods
or roof openings.
6.
of electrical cord hanging from the ceiling. Do not restore power until wiring is completed.
7.
installed.
8.
Preparation
WARNING

Installations
:
-
1.
-
2.
-
ping Screw as shown in Figure 2.
Align the holes in top
3.
support plate with two
screws on the ceiling.
the top supporting
see Figure 3. Fasten
-
insert two more on
the last two holes
and fasten them..
CAUTION: MAKE
Ceiling
Top
Support
Plate
Figure 1A
Figure 1A
Figure 1B
Figure 1B
Wood Screws
Wood Screws
Top Support
Page 10
Installation

Page 11
-
4.
prevent them from sliding down as illustrated in Figure 4C.
5.
Figure 4A
Figure 4A
Figure 4C
Figure 4C
Figure 4B
Recirculating (Non-Vented) Kit:
Recirculating (Non-Vented) Kit:
Air Diverter
Support Frames
Upper
4mm
Duct Set
Aluminum
Duct
Installation (Continued)
WARNING
Excessive Weight
Require three or more person to move and
install this range hood. Spinal or other bodi
-
ly injuries could occur if it is not followed.

Due to excessive weight, two or more person is recommended for this step.
Due to excessive weight, two or more person is recommended for this step.
6.
Figure 6B
Aluminum
7.
16mm Round Phillips Head Screws as shown in Figure 7B.
Phillips Head Screws
Page 12
Page 12
Page 12
Recirculating (Non-Vented) Kit:
Recirculating (Non-Vented) Kit:
Air Divertor
Air Flow
Figure 7B
Installation (Continued)
WARNING
Excessive Weight
Require three or more person to move and
install this range hood. Spinal or other bodi
-
ly injuries could occur if it is not followed.

Range Hood Operations & Wiring Diagram
Press the Light Switch to power on the lights.
Press the Power Switch to turn off the power.
Press the Light Switch to power off the lights
NOTE:
Page 13

Page 14
-
-
Indicator will activate to indicate fan speed.
-
Immediate Power-off
Control
will
Range Hood Operations & Wiring Diagram (Continued)
Remote Control Sensor
Light Control

Page 15
The credit card size remote control controls the power of the Lights
Press the
Timer Indicator will activate to indicate fan speed.
Press the
Press the
pressing
shut off activated.
Immediate Power-off
and
func
-
-
ton will light up.
Press the
Remote Control Sensor
Light Control
Range Hood Operations & Wiring Diagram (Continued)

Page 16
Range Hood Operations & Wiring Diagram (Continued)
NOTE:

Page 17
This range hood is equipped with a cleaning reminder that will activate following 30 hours of use.
Reminder Indicator
Reminder Indicator
.
Press
-
Press
-
main the same the next time it is turned on.
Range Hood Operations & Wiring Diagram (Continued)
Power
Decrease Value
Light
Increase Value
Blower Speed Indicator
Cleaning Reminder Indicator

or
Decrease
Press
-
main the same the next time it is turned on.
Range Hood Operations & Wiring Diagram (Continued)
Power
Decrease Value
Light
Increase Value
Blower Speed Indicator
Cleaning Reminder Indicator
/