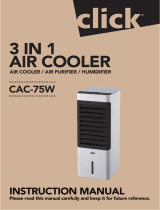
Honeywell CO301PC User manual

Type
User manual

Honeywell CO301PC is a portable evaporative air cooler that cools the air using water and a fan. It features a large water tank with a continuous water supply option, a remote control, and an adjustable swing function for directing the airflow. The cooler also has multiple speed settings and a low water alarm to prevent damage to the pump. It's ideal for personal cooling in homes, offices, and other indoor spaces.

Honeywell CO301PC is a portable evaporative air cooler that cools the air using water and a fan. It features a large water tank with a continuous water supply option, a remote control, and an adjustable swing function for directing the airflow. The cooler also has multiple speed settings and a low water alarm to prevent damage to the pump. It's ideal for personal cooling in homes, offices, and other indoor spaces.

EN
Portable Evaporative Air Cooler
User Manual
Read and save these instructions before use
FR
Refroidisseur d'air par évaporation portatif
Mode d'emploi
Lire ces instructions avant l'utilisation et les conserver
ES
Enfriadores de Aire Evaporativos Portátil
Manual de Uso
Lea y guarde estas instrucciones antes de usar
Model / Modèle / Modelo:
CO301PC
Scan Here/
Scanner ici/
Escanear Aquí:
www.honeywellaircoolers.com/products/CO301PC
www.jmatek.com
Customer Support:
Assistance Au Client:
Servicio de atencion a clientes:
USA/ EE.UU: 1-800-474-2147
CANADA/ CANADÁ
#
: 1-888-209-0999
#Canada Customer Support service
available for models sold in Canada only.
TIMER SWING
POWER SPEED COOL
PARTS DESCRIPTION
1)
2)
3)
4)
5)
6)
Touch Screen Control Panel
Louvers
Front Grill
Front Honeycomb Cooling Pad
Casters
Water Fill Door
USE & OPERATION
TOUCH SCREEN CONTROL PANEL
EN 1
7)
8)
9)
10)
11)
12)
Water Inlet Valve
Water Level Indicator
Beverage Can Holders
Top Storage Compartment
Rear Grill
Rear Honeycomb Cooling Pad
13)
14)
15)
16)
Power Cord Wrap
Overflow Hole
Drain Plug
Power Cord & Plug
WARNING -- READ AND SAVE THE AIR COOLER SAFETY & MAINTENANCE GUIDE AND USER
MANUAL BEFORE USING THIS PRODUCT. FAILURE TO FOLLOW THESE INSTRUCTIONS MAY
DAMAGE AND/ OR IMPAIR ITS OPERATION AND VOID THE WARRANTY. IN CASE THERE IS ANY
INCONSISTENCY OR CONFLICT BETWEEN THE ENGLISH VERSION AND ANY OTHER LANGUAGE
VERSION OF THE CONTENT OF THIS MATERIAL, THE ENGLISH VERSION SHALL PREVAIL.
NOTE: The Control Panel uses soft-touch control. Operate the air cooler by touching the buttons of the
Touch Screen Control Panel.
POWER
Touch the button to turn the unit on. The cooler will start automatically at high speed. After a few
seconds the speed will switch to low. To turn the unit off, press the power button for 2 seconds or
longer.
TIMER
Touch the TIMER button until the desired time duration setting is selected. When the set time has
passed, the unit will automatically turn off (unit remains in Standby mode until power cord is unplugged
from electrical socket). The TIMER function allows you to program the unit for up to 8 hours of use.
SWING
Touch the SWING button until the SWING indicator light is illuminated on the control panel. The louvers
will begin to move left to right automatically.
Vertical Air Flow - You can manually adjust the louvers to change vertical air flow.
FUNCTION BUTTONS
SPEED
Touch the SPEED button repeatedly to change the speed between High and Low. The display will show
the selected speed.
(9)
(10)
(11)
(12)
(6)
(7)
(13)
(14)
(8)
(15)
(1)
(2)
(4)
(5)
(3)
(16)
USE & OPERATION (CONTINUED)
FUNCTION BUTTONS (CONTINUED)
COOLER LOCATION
Make sure to position the air cooler correctly before you set up and start using the product. Please refer
to the COOLER LOCATION section of the separate Safety & Maintenance Guide.
Water Inlet Valve
Garden Hose
FILLING WITH WATER
REMOTE CONTROL
t
t
t
t
t
t
t
t
t
t
The remote control requires two new AAA dry cell batteries for replacement.
Open the battery compartment at the back of the remote control and insert two batteries inside. Care
must be taken to insert the batteries according to the correct polarity (+ / –) markings shown inside
the battery compartment.
Always point the remote control signal transmitter towards the unit when operating. Make sure that
the signal path is not obstructed.
Remove the batteries if the unit is not going to be used for an extended period of time.
Do not drop the remote control.
Do not mix different types of batteries such as alkaline, carbon-zinc, or rechargeable batteries.
Do not mix old and new batteries.
Do not recharge the battery.
Exhausted batteries are to be removed from the product and safely disposed of as per local regulations.
Do not dispose of batteries in fire. Batteries may explode or leak.
WARNING: Caution for ingestion of the small battery. Keep away from children and animals.
Note:
EN 2
COOL
Touch the COOL button until it is illuminated on the display screen. This activates evaporative cooling.
The water pump will operate and you will feel the cooler air after the Honeycomb Cooling Media is
completely wet. When COOL is not illuminated, the unit switches to a fan only mode, without
evaporative cooling.
+
SAFETY LOCK
To avoid accidentally touching and changing the set air cooler settings, you can touch both the
POWER + COOL buttons at the same time to lock the control panel. Touch both POWER + COOL at
the same time again to unlock the control panel buttons.
Power
Speed
Cool
Swing
Timer
: ON / OFF
: Low / High
: Controls cooling or fan option
: Controls the motion of the louvers
: Controls the Timer function for automatic off
It is ideal to use the Continuous Water Supply Connection to run the unit for long periods of time
without refilling the tank. This also helps prevent pump failure in case the cooler is running with
inadequate water in the tank.
CAUTION: Unplug the unit from the electrical power outlet before emptying or refilling the water tank.
Continuous Water Supply Connection:
For a continuous water supply, you will need a garden hose that is
connected to a mains water supply.
t
Locate the male connector at one end of the garden hose. Insert the
garden hose connector into the water inlet valve of the cooler. Screw
and tighten the water inlet valve onto the threaded part of the garden
hose connector, making sure the hose connector is secured to ensure
there will be no leaks. If there is a leakage, the hose and the water inlet
valve may not be connected properly. Try to disconnect, replace and
tighten the water inlet valve again.
CLEANING & DRAINING THE WATER TANK
USE & OPERATION (CONTINUED)
WARNING:
Before cleaning the unit, switch the unit OFF and disconnect from the power outlet.
FILLING WITH WATER (CONTINUED)
Water Level
IndicatorWater Fill Door
LOW WATER ALARM*
The unit is equipped with a low water sensor. In Cooling Mode, when water in the tank is below the
minimum level, you will hear a beeping sound and the will flash continuously. The unit will
automatically pause evaporative cooling.
*Applicable for models with Low Water Alarm feature only.
EN 3
t
t
t
When the connection is secured, turn ON the water supply and the water will flow into the water tank
of the cooler.
The cooler is now set so the water refills automatically when the water tank is empty, or when the
water reaches below a minimum level.
When the water tank is full of water, the water inlet valve will automatically stop the water supply from
overflowing the water tank.
WARNING: The maximum water inlet pressure is 0.5 MPa.
Manual Water Tank Refill:
Open the Water Fill Door located on the side of the unit.
The Water Level Indicator is located at the side of the unit. Refill the water
tank when water level is low. Do not fill water above the "Max." water
level mark to avoid water droplets collecting on the louvers. Check the
water level in the tank before running the COOL function. Make sure that
the water in the tank is above the minimum water level mark. Running the
unit in COOL mode with inadequate water may cause pump failure.
WARNING: Always ensure the water in the water tank is above the minimum (Min.) water level mark for
both Continuous & Manual Water Refill. Running the unit in Cool mode with inadequate water may
cause pump failure.
NOTE: The water capacity refers to the total volume of water that can be contained within the air cooler
water tank and water distribution system. The water capacity in the tank at the “Max.” indicator level
may be lower than the actual water capacity of the air cooler.
WARNING: Do not fill water tank with dirty water or salt water. This can damage the unit and
Honeycomb media.
To deactivate the alarm and continue using the unit as a fan (without evaporative cooling), switch the
unit OFF and then ON again. The Low Water Alarm will not activate in Fan only mode. The Low Water
Alarm will sound again if the COOL function is activated while the water tank is still empty.
Refill the water tank to deactivate the alarm in cooling mode. First switch OFF the unit and unplug from
the power outlet. Fill the water tank with water above the minimum water level mark. Plug in and switch
ON again.
Below are instructions on how to clean and maintain your air cooler. If the cooler will not be used for a
long period of time, please refer to the STORAGE & MAINTENANCE GUIDELINES located in the
separate Safety & Maintenance Guide.
Move the unit to a location where the water can be drained. Remove the cap from the Drain plug
located at the bottom of the unit. Allow the tank to empty.
Refill the water tank with clean water, up to the maximum level and drain it completely.
Use a damp cloth to remove the dirt and dust from the surface of the unit. Never use corrosive
elements or chemicals to clean this product.
When the product is not in use, store the unit in a dry place out of direct sunlight.
t
t
t
t
USE & OPERATION (CONTINUED)
CLEANING THE HONEYCOMB COOLING MEDIA
EN 4
Front/
Rear Grill
Front/ Rear
Grill Screws
Front/
Rear Grill
Honeycomb
Frame
Rear
Honeycomb
Pad
Honeycomb
Frame
Cover
Step 4:
Step 6:
Honeycomb
Pad
Screws
Rear
Honeycomb
Pad
Honeycomb
Frame
t
t
t
t
t
The appliance is supplied with two Honeycomb Cooling Media pads.
The Honeycomb Cooling Media are located inside the Front & Rear Grills. See Step 1 to Step 5 for
instructions on how to remove them from the unit for cleaning and maintenance.
Do not run the unit in COOL mode with stale water in the tank. You must empty the water tank and
refill with fresh water, especially if the tank has not been cleaned in a long time.
The cleaning frequency for the Honeycomb media depends on local air and water conditions. In areas
where the mineral content of water is high, mineral deposits may build up on the Honeycomb Cooling
Media and restrict air flow. Draining the water tank and refilling with fresh water at least once a week
will help reduce mineral deposits. If mineral deposits remain on the Honeycomb Cooling Media, the
media should be removed and washed under fresh water. The media should be cleaned every two
months or sooner, depending on your needs.
For best results allow the Honeycomb Cooling Media to dry after each use by turning off the cool
function 15 minutes before turning the unit off..
Step 1: Step 2:
Step 3:
Step 5:
WARNING: DO NOT operate the Air Cooler when the Front or Rear Grills are removed from the Air
Cooler, or if there is a loose-fitting Front or Rear Grill. Doing so can cause serious injury or dangerous
electrical shock.
1.
2.
3.
4.
5.
Removing the Honeycomb Cooling Media:
Remove the screws from the Front Grill of the Air Cooler.
Carefully pull out the Front Grill from the Air Cooler.
The Honeycomb Cooling Pad is secured on the Honeycomb Frame that is fixed in place by screws
on the Left and Right Side of the Honeycomb Frame. Remove these screws to release the
Honeycomb Frame Cover.
Pull out the Honeycomb Frame Cover and Honeycomb Cooling Pad. Replace with the new
Honeycomb Cooling Pad by put into the grooves of the Honeycomb Frame until it fits comfortably
and securely in place on the frame. Replace the Honeycomb Frame Cover rear back onto the
Honeycomb Frame by replacing the screws and tightening them in place. This secures the
Honeycomb Cooling Pad in place on the Honeycomb Frame.
Repeat steps 1 to 4 to remove the Honeycomb Cooling Pad on the Rear Grill.
Model / Modèle / Modelo CO301PC
TECHNICAL SPECIFICATIONS / CARACTÉRISTIQUES TECHNIQUES /
ESPECIFICACIONES TÉCNICAS
ELECTRICAL WIRING DIAGRAM / DIAGRAMME DU CIRCUIT ÉLECTRIQUE /
DIAGRAMA DE CIRCUITO ELÉCTRICO
Product Dimension / Dimensions de l’appareil /
Dimensiones del Producto
433 (W) x 570 (D) x 1131 (H) mm
17.0 (W) x 22.0 (D) x 44.5 (H) in
Net Weight / Poids net / Peso Neto 20.7 kg / 45.6 lbs
Voltage / Tension / Voltaje 110 - 120 V
Frequency / Fréquence / Frecuencia 60 Hz
Ampere / Ampère / Amperaje 2.2 A
Wattage / Puissance / Watts 250 W
Version: 110 - 120V, 60Hz
Cooling Media / Système de refroidissement /
Filtro de Enfriamiento
Honeycomb
For Low Water Alarm
SERVICE AND WARRANTY
EN
1-YEAR LIMITED WARRANTY
Read all the instructions before attempting to use this product.
This 1 year limited warranty applies to repair or replacement product found to be defective in material or
workmanship.
A.
B.
C.
D.
E.
F.
This warranty does not apply to any damage resulting from commercial, abusive, unreasonable
use or supplemental damage. Defects that are the result of normal wear and tear will not be
considered manufacturing defects under this warranty.
JMATEK NORTH AMERICA LLC IS NOT LIABLE FOR INCIDENTAL OR CONSEQUENTIAL
DAMAGES OF ANY NATURE. ANY IMPLIED WARRANTY OF MERCHANTABILITY OR FITNESS
FOR A PARTICULAR PURPOSE ON THIS PRODUCT IS LIMITED IN DURATION TO THE DURATION
OF THIS WARRANTY.
Some jurisdictions do not allow the exclusion or limitation of incidental or consequential damages or
limitations on how long an applied warranty lasts, so the above limitations or exclusions may not
apply to you. This warranty gives you specific legal rights, and you also may have other rights which
vary from jurisdiction to jurisdiction. This warranty applies only to the original purchaser of this
product from the original date of purchase.
At its option, JMATEK NORTH AMERICA LLC will repair or replace this product if it is found to be
defective in material or workmanship.
This warranty does not cover damage resulting from any unauthorized attempts to repair or
from any use not in accordance with the instruction manual.
This warranty applies only if the unit is purchased new from an authorized retailer and is
non-transferable from the original purchaser of the item.
This product is manufactured according to specifications of the country of sale. Any warranties
accompanied with this product is only valid in the country of purchase.
Please read the Instruction Manual carefully before setting up or using this product. If you
believe this product to be suffering from a manufacturing fault, or if you have inquiries about
this product, please contact our Customer Support:
CUSTOMER SUPPORT:
When contacting our Customer Support, please have the information below along with the proof of
purchase. All warranty requests must be accompanied by a proof of purchase, which is a copy of
the original receipt.
: .......................................................................................................................
: .......................................................................................................................
: .......................................................................................................................
Model
Date of purchase
Purchased from
USA
JMATEK NORTH AMERICA LLC
Mahwah, New Jersey 07495 USA
Phone: 1-800-474-2147
Web: www.jmatek.com
CANADA*
GORDON R. WILLIAMS CORP.
Mississauga, ON L5L0B3 CANADA
Phone: 1-888-209-0999
*Canada Customer Support service available for models sold in Canada only.
JMATEK North America LLC
Mahwah, New Jersey 07495 USA
Phone: 1-800-474-2147
Web: www.jmatek.com
© 2017 JMATEK Limited. All rights reserved.
The Honeywell Trademark is used under license from
Honeywell International Inc.
Honeywell International Inc. makes no representations
or warranties with respect to these products.
This product is manufactured by Airtek Int'l Corp. Ltd.
(subsidiary of JMATEK Ltd.)
EN
© 2017 JMATEK Limited. Tous droits réservés.
La marque déposée Honeywell est utilisée sous
licence de Honeywell International Inc.
Honeywell International Inc. n'offre aucune
recommandation ni de garantie au sujet de ce produit.
Ce produit est fabriqué par Airtek Int'l Corp. ltée
(une filiale de JMATEK ltée)
FR
© 2017 JMATEK Limited. Todos los derechos reservados.
La marca Honeywell es usada bajo licencia de
Honeywell International Inc.
Honeywell International Inc. no representa
ni garantiza este producto.
Este producto es fabricado por Airtek Int'l Corp. Ltd.
(subsidiaria de JMATEK Ltd.)
ES
Customer Support:
Assistance Au Client:
Servicio de atencion a clientes:
USA/ EE.UU: 1-800-474-2147
CANADA/ CANADÁ
#
: 1-888-209-0999
#Canada Customer Support service
available for models sold in Canada only.
  • Page 1 1
  • Page 2 2
  • Page 3 3
  • Page 4 4
  • Page 5 5
  • Page 6 6
  • Page 7 7
  • Page 8 8
  • Page 9 9
  • Page 10 10
  • Page 11 11
  • Page 12 12
  • Page 13 13
  • Page 14 14
  • Page 15 15
  • Page 16 16
  • Page 17 17
  • Page 18 18

Honeywell CO301PC User manual

Type
User manual

Honeywell CO301PC is a portable evaporative air cooler that cools the air using water and a fan. It features a large water tank with a continuous water supply option, a remote control, and an adjustable swing function for directing the airflow. The cooler also has multiple speed settings and a low water alarm to prevent damage to the pump. It's ideal for personal cooling in homes, offices, and other indoor spaces.

Ask a question and I''ll find the answer in the document

Finding information in a document is now easier with AI