Page is loading ...

©Copyright LOTRONIC 2017 CROSS-GOBOFX 1
2
2
-
-
i
i
n
n
-
-
1
1
R
R
G
G
B
B
A
A
L
L
E
E
D
D
L
L
I
I
G
G
H
H
T
T
E
E
F
F
F
F
E
E
C
C
T
T
W
W
I
I
T
T
H
H
2
2
0
0
G
G
O
O
B
B
O
O
S
S
+
+
S
S
T
T
R
R
O
O
B
B
E
E
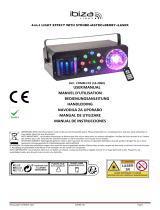
Ref.: CROSS-GOBOFX (16-2050)
USER
MANUAL
MANUEL D’UTILISATION
BEDIENUNGSANLEITUNG
HANDLEIDING
NAVODILA ZA UPORABO
MANUAL DE UTILIZARE
MANUAL DE INSTRUCCIONES
IMPORTANT NOTE: Electric products must not be put into household waste. Please bring them to a recycling centre. Ask your local authorities or
your dealer about the way to proceed.
NOTE IMPORTANTE : Les produits électriques ne doivent pas être mis au rebut avec les ordures ménagères. Veuillez les faire recycler là où il existe
des centres pour cela. Consultez les autorités locales ou votre revendeur sur la façon de les recycler.
WICHTIGER HINWEIS: Elektrogeräte gehören nicht in den Hausmüll. Sie müssen in speziellen Betrieben recycelt werden. Bringen Sie sie zu einer
speziellen Entsorgungsstelle für Elektrokleingeräte (Wertstoffhof)!
BELANGRIJK: De elektrische producten mogen niet naast het huisvuil geplaatst worden. Gelieve deze te laten recycleren daar waar er centra’s hiervoor voorzien
is. Raadpleeg de plaatselijke autoriteiten of uw verkoper ivm de manier van recycleren.
NOTA IMPORTANTE: Los productos eléctricos, no deben ser tirados a la basura doméstica, hágalos reciclar en un lugar destinado a ello. Pregunte a las
autoridades locales por el punto más cercano a su domicilio.

©Copyright LOTRONIC 2017 CROSS-GOBOFX 2
BEFORE YOU BEGIN
Contents of the carton:
• 1 x light effect
• 1 x mains lead
• 1 x remote control
• 1 x user manual
Unpacking Instructions
Immediately upon receiving a fixture, carefully unpack the carton, check the contents to ensure that all parts are
present and have been received in good condition. Notify the freight company immediately and retain packing
material for inspection if any parts appear to be damaged from shipping or the carton itself shows signs of
mishandling. Keep the carton and all packing materials. In the event that a fixture must be returned to the factory, it
is important that the fixture be returned in the original factory box and packing.
Safety Instructions
Please read these instructions carefully, they include important information about the installation, usage and
maintenance of this product.
• Please keep this User Guide for future reference. If you sell the unit to another user, be sure that they also receive
this instruction booklet.
• Always make sure that you are connecting to the proper voltage, and that the line voltage you are connecting to is
not higher than that stated on the decal or rear panel of the fixture.
• This product is intended for indoor use only!
It is essential that the device is earthed. A qualified person must carry out the electric connection.
• To prevent risk of fire or shock, do not expose fixture to rain or moisture. Make sure there are no flammable
materials close to the unit while operating.
• The unit must be installed in a location with adequate ventilation, at least 20in (50cm) from adjacent surfaces. Be
sure that no ventilation slots are blocked.
• Always disconnect from power source before servicing or replacing fuse and be sure to replace with same fuse size
and type.
• Secure fixture to fastening device using a safety chain. Never carry the fixture solely by its head. Use its carrying
handles.
• Maximum ambient temperature (Ta) is 104° F (40°C). Do not operate the fixture at temperatures higher than this.
• In the event of a serious operating problem, stop using the unit immediately. Never try to repair the unit by
yourself. Repairs carried out by unskilled people can lead to damage or malfunction. Please contact the nearest
authorized technical assistance center. Always use the same type of spare parts.
• Don’t connect the device to a dimmer pack.
• Make sure the power cord is never crimped or damaged.
• Never disconnect the power cord by pulling or tugging on the cord.
• Avoid direct eye exposure to the light source while it is on.
DISCONNECT DEVICE: Where the MAINS plug or an appliance coupler is used as the disconnect device, the
disconnect device shall remain readily operable.
Features
DMX controlled 2-in-1 light effect that will cover the dance floor with colorful gobos, combining sharp RGBA beams
with dazzling strobe effects. The speed and intensity of all lenses and strobe rows can be controlled individually.
• 4 / 28 DMX channels
• 16 auto programs
GB

©Copyright LOTRONIC 2017 CROSS-GOBOFX 3
• 4 lenses each containing 5 x 3W RGBA LEDs with 5 different gobos
• 12 x 1W white LEDs for the strobe effect, with speed and dimmer control
• Operating modes: Auto, sound controlled, DMX controlled or remote controlled
• In/out power socket for daisy-chaining of other units
• Remote control
Specifications
Power supply .................................................................................................. 100-240Vac 50/60Hz
Consumption ................................................................................................................. 100W max.
Fuse ................................................................................................................ 3A/250V Ø5 x 20mm
DMX channels ......................................................................................................... 4 / 28 channels
Light source ...................................................................... 20 x 3W RGBA LED + 12x 1W white LED
Beam angle ................................................................................................................................... 8°
Dimensions ....................................................................................................... 290 x 290 x 230mm
Weight ................................................................................................................................. 3.022kg
Fixture Linking
You will need a serial data link to run light shows of one or more fixtures using a DMX-512 controller or to run
synchronized shows on two or more fixtures set to a master/slave operating mode. The combined number of
channels required by all fixtures on a serial data link determines the number of fixtures that the data link can
support.
Important: Fixtures on a serial/data link must be daisy chained in one single line. Maximum recommended serial
data link distance: 100 meters (1640 ft.) Maximum recommended number of fixtures on a serial data link: 32 fixtures
CABLE CONNECTORS
Cabling must have a male XLR connector on one end and a female XLR connector on the other end.
DMX connector configuration
Termination reduces signal errors. To avoid signal transmission problems and interference, it is always advisable to
connect a DMX signal terminator.
CAUTION
Do not allow contact between the common and the fixture’s chassis ground. Grounding the common can cause a
ground loop, and your fixture may perform erratically. Test cables with an ohm meter to check correct polarity and
to make sure the pins are not grounded or shorted to the shield or each other.
Setting up a DMX Serial Data Link
1. Connect the (male) 3 pin connector side of the DMX cable to the output (female) 3 pin connector of the controller.
2. Connect the end of the cable coming from the controller which will have a (female) 3 pin connector to the input
connector of the next fixture consisting of a (male) 3 pin connector.
3. Then, proceed to connect from the output as stated above to the input of the following fixture and so on.
DMX address setting
Each fixture must have a specific starting address. When receiving signal transmission, every fixture will receive
channels control signals for its own starting address.
INPUT
COMMON
DMX +
DMX-
Resistance 120 ohm
1/ 4w between pin 2
(DMX-) and pin 3
(DMX+) of the last
fixture.

©Copyright LOTRONIC 2017 CROSS-GOBOFX 4
The user can set several fixtures to the same address or set up a separate address for every device.
If more than one fixture is set to the same address, all of them receive the same DMX channels signals. All connected
fixtures are jointly controlled; the controller can't control a device separately.
If every device is set to a different address, it will receive different DMX signals corresponding to its starting address.
This device has 4 or 28 channels, so the first device starting address is set 1, second is 5 or 29 (1+4/28), third is 9 or
57 (9 + 4 / 29 + 28) and so on.
MENU operation
This fixture has 4 buttons on the rear panel to access, edit and set all functions.
[MENU]: press MENU key to enter into the submenus. Press MENU again to leave the sub-menu. If no key is pressed
during 30 seconds, the unit will go back to MENU display automatically.
[Up]: press UP key to increase the displayed values. Keep pressed to increase the values quickly.
[Down]:press DOWN key to decrease the displayed values. Keep pressed to decrease the values quickly.
[ENTER]:in normal status, this button has no function. In edit mode, press ENTER to enter into the sub-menu.
Function setting
1) DMX address setting
1. Press <MENU>
2. Press <UP/DOWN> to choose, then pres <ENTER> to enter [Addr]
3. Press <Up/Down> to choose address 001~XXX
4. Press <ENTER> to confirm, or press "MENU" to exit
2) Channel Setting
1. Press <MENU>
2. Press <UP/DOWN> to choose [Chnd], press ENTER
3. Press UP/DOWN to choose the channel mode ‘4CH’ or ‘28CH’
4. Press ENTER to confirm, or press "MENU" to exit
3) Master-slave setting
1. Press <MENU> to enter EDIT interface
2. Press <UP/DOWN> to choose [SLnd], press ENTER
3. Press <UP/DOWN> to choose Mast/SL1/SL2, etc.
4. Press <Enter> to confirm, or press "MENU" to exit.
4) Sound mode setting
1. Press <MENU> to enter EDIT interface
2. Press <UP/DOWN> to choose [SoUn], press ENTER
3. Select So 0 ….. So16 for the different sound programs
Sound sensitivity Setting (before this setting, press MENU, select <SoUn> and save. You must be in Sound Mode
first, before you can select the sensitivity)
1. Press MENU
2. Press UP/DOWN to choose [Sens], press ENTER
3. Press <Up/Down>, <Enter> to adjust the sound sensitivity from Se99 to Se 0.
4. Press <Enter> to confirm, or press "MENU" to exit.
5) AUTO mode setting:
1. Press MENU.
2. Press UP/DOWN to choose [AUTO], press ENTER
3. Press<Up/Down> to select an automatic program from 0 to 16

©Copyright LOTRONIC 2017 CROSS-GOBOFX 5
4. Press enter to set the speed from SP0 to SP9
5. Press <Enter> to confirm, or press "MENU" to exit.
6) LED display setting: Choose OFF if you want the display to switch off after 30 seconds of non-use.
1. Press MENU.
2. Press UP/DOWN to choose [LED], press ENTER
3. Press<Up/Down> to choose ‘ON’ or ‘OFF’
4. Press <Enter> to confirm, or press "MENU" to exit.
7) Display reverse setting
1. Press MENU.
2 .Press UP/DOWN to choose [Disp], press ENTER
3. Press<Up/Down> to choose ‘ON’ or ‘OFF’
4. Press <Enter> to confirm, or press "MENU" to exit.
8) Test run
1. Press < ENTER>
2. Press < UP/DOWN> to select [Test], then press < ENTER> to do the whole test
3. Press <Enter> to confirm, or press "MENU" to exit.
9) Software Version
1. Press < ENTER>
2. Press < UP/DOWN> to select [Ver], then press < ENTER>to check the light’s version information
3. Press <Enter> to confirm, or press "MENU" to exit.
Remote Control
1. ON/OFF
2. Automatic mode
3. Music controlled modes
4. Strobe mode
5. Selection of one of the built-in programs
6. Setting of sensitivity and speed of the music controlled mode
7. Setting of sensitivity and speed of the strobe mode
Description of the Channels
4-Channel operation
28-Channel
Function
Value
CH1 CH1 Dimmer 000-255 0% - 100%
CH2 CH2 Strobe 000-255 Strobe (speed 0 – 100%)
CH3 Color Chase
000-007 no function
008-022 Chase 01
023-037 Chase 02
023-037 Chase 02
038-052 Chase 03
053-067 Chase 04
068-082 Chase 05
083-097 Chase 06
098-112 Chase 07
113-127 Chase 08
128-142 Chase 09

©Copyright LOTRONIC 2017 CROSS-GOBOFX 6
143-157 Chase 10
158-172 Chase 11
173-187 Chase 12
188-202 Chase 13
203-217 Chase 14
218-232 Chase 15
233-247 Chase 16
248-255 All Chase
CH4 Sound sensitivity / auto speed
000-127 Chase Auto Speed Slow to fast
128-255 Chase sound sensitivity low to high
CH3 Red 1 000-255 (0-100%)
CH4 Green 1 000-255 (0-100%)
CH5 Blue 1 000-255 (0-100%)
CH6 Amber 1 000-255 (0-100%)
CH7 Red 2 000-255 (0-100%)
CH8 Green 2 000-255 (0-100%)
CH9 Blue 2 000-255 (0-100%)
CH10 Amber 2 000-255 (0-100%)
CH11 Red 3 000-255 (0-100%)
CH12 Green 3 000-255 (0-100%)
CH13 Blue 3 000-255 (0-100%)
CH14 Amber 3 000-255 (0-100%)
CH15 Red 4 000-255 (0-100%)
CH16 Green 4 000-255 (0-100%)
CH17 Blue 4 000-255 (0-100%)
CH18 Amber 4 000-255 (0-100%)
CH19 Red 5 000-255 (0-100%)
CH20 Green 5 000-255 (0-100%)
CH21 Blue 5 000-255 (0-100%)
CH22 Amber 5 000-255 (0-100%)
CH23 White dimmer 000-255 (0-100%)
CH24 White Strobe
000-007 Open
008-255 Strobe (speed 0-100%)
CH25 S-White 1 000-255 (0-100%)
CH26 S-White 2 000-255 (0-100%)
CH27 S-White 3 000-255 (0-100%)
CH28 S-White 4 000-255 (0-100%)

©Copyright LOTRONIC 2017 CROSS-GOBOFX 17
Beschreibung der Kanäle
4-Kanal
Betrieb
28-
Kanalbetrieb
Funk
tion
Wert
CH1 CH1 Dimmer 000-255 0% - 100%
CH2
CH2
Stroboskop
000-255 Stroboskop (Geschwindigkeit 0 – 100%)
CH3 Programme
000-007 unbelegt
008-022 Chase 01
023-037 Chase 02
023-037 Chase 02
038-052 Chase 03
053-067 Chase 04
068-082 Chase 05
083-097 Chase 06
098-112 Chase 07
113-127 Chase 08
128-142 Chase 09
143-157 Chase 10
158-172 Chase 11
173-187 Chase 12
188-202 Chase 13
203-217 Chase 14
218-232 Chase 15
233-247 Chase 16
248-255 All Chase
CH4
Empfindlichkeit / Automatische
Geschwindigkeit
000-127 Chase Automatische Geschwindigkeit
von Langsam auf schnell
128-255 Chase Empfindlichkeit
von gering auf hoch
CH3 Rot 1 000-255 (0-100%)
CH4 Grün 1 000-255 (0-100%)
CH5 Blau 1 000-255 (0-100%)
CH6 Amber 1 000-255 (0-100%)
CH7 Rot 2 000-255 (0-100%)
CH8 Grün 2 000-255 (0-100%)
CH9 Blau 2 000-255 (0-100%)
CH10 Amber 2 000-255 (0-100%)
CH11 Rot 3 000-255 (0-100%)
CH12 Grün 3 000-255 (0-100%)
CH13 Blau 3 000-255 (0-100%)
CH14 Amber 3 000-255 (0-100%)
CH15 Rot 4 000-255 (0-100%)

©Copyright LOTRONIC 2017 CROSS-GOBOFX 22
1. Druk < ENTER>
2. D.m.v. < UP/DOWN> [Test] kiezen en ENTER drukken om de hele test door te voeren
3. Bevestig met <ENTER> of druk "MENU" om de functie te verlaten
9) Software Versie
1. Druk < ENTER>
2. D.m.v. < UP/DOWN> [Ver] kiezen en ENTER drukken
3. Bevestig met <ENTER> of druk "MENU" om de functie te verlaten
Afstandsbediening
1. AAN/UIT
2. Automatische werking
3. Geluidsbestuurde werking
4. Stroboscoop
5. Keuze van een ingebouwde programma
6. Instelling van gevoeligheid en snelheid in geluidsgestuurde modus
7. Instelling van gevoeligheid en snelheid van de stroboscoop
Omschrijving van de kanalen
4-kanaal
modus
28-kanaal
modus
Functie
Waarde
CH1 CH1 Dimmer 000-255 0% - 100%
CH2 CH2 Strobe 000-255 Strobe (snelheid 0 – 100%)
CH3 Programma’s
000-007 geen functie
008-022 Chase 01
023-037 Chase 02
023-037 Chase 02
038-052 Chase 03
053-067 Chase 04
068-082 Chase 05
083-097 Chase 06
098-112 Chase 07
113-127 Chase 08
128-142 Chase 09
143-157 Chase 10
158-172 Chase 11
173-187 Chase 12
188-202 Chase 13
203-217 Chase 14
218-232 Chase 15
233-247 Chase 16
248-255 All Chase
CH4
Geluidsgevoeligheid / Automatische
000-127 Chase Automatische snelheid

©Copyright LOTRONIC 2017 CROSS-GOBOFX 28
113-127 Chase 08
128-142 Chase 09
143-157 Chase 10
158-172 Chase 11
173-187 Chase 12
188-202 Chase 13
203-217 Chase 14
218-232 Chase 15
233-247 Chase 16
248-255 All Chase
CH4 Zvočna občutljivost / auto hitrost
000-127 Chase Auto hitrost počasi-hitro
128-255 Chase zvočna občutljivost nizka-visoka
CH3 Rdeča 1 000-255 (0-100%)
CH4 Zelena 1 000-255 (0-100%)
CH5 Modra 1 000-255 (0-100%)
CH6 Rjava 1 000-255 (0-100%)
CH7 Rdeča 2 000-255 (0-100%)
CH8 Zelena 2 000-255 (0-100%)
CH9 Modra 2 000-255 (0-100%)
CH10 Rjava 2 000-255 (0-100%)
CH11 Rdeča 3 000-255 (0-100%)
CH12 Zelena 3 000-255 (0-100%)
CH13 Modra 3 000-255 (0-100%)
CH14 Rjava 3 000-255 (0-100%)
CH15 Rdeča 4 000-255 (0-100%)
CH16 Zelena 4 000-255 (0-100%)
CH17 Modra 4 000-255 (0-100%)
CH18 Rjava 4 000-255 (0-100%)
CH19 Rdeča 5 000-255 (0-100%)
CH20 Zelena 5 000-255 (0-100%)
CH21 Modra 5 000-255 (0-100%)
CH22 Rjava 5 000-255 (0-100%)
CH23 Bela dimmer 000-255 (0-100%)
CH24 Bela Strobe
000-007 Open
008-255 Strobe (hitrost 0-100%)
CH25 S-bela 1 000-255 (0-100%)
CH26 S-bela 2 000-255 (0-100%)
CH27 S-bela 3 000-255 (0-100%)

©Copyright LOTRONIC 2017 CROSS-GOBOFX 33
Telecomanda
1. Pornit/Oprit
2. Mod automat
3. Moduri control muzică
4. Mod Strobe
5. Selectarea unuia dintre programele existente
6. Configurarea sensibilitații și a vitezei modului control muzică
7. Configurarea sensibilității și vitezei modului strobe
Descrierea canalelor
Funcționare
4-canale
28-
Canale
Funcție
Valoare
CH1 CH1 Regulator de intensitate 000-255 0% - 100%
CH2 CH2 Strobe 000-255 Strobe (viteză 0 – 100%)
CH3 Programe culori
000-007 nicio funcție
008-022 Chase 01
023-037 Chase 02
023-037 Chase 02
038-052 Chase 03
053-067 Chase 04
068-082 Chase 05
083-097 Chase 06
098-112 Chase 07
113-127 Chase 08
128-142 Chase 09
143-157 Chase 10
158-172 Chase 11
173-187 Chase 12
188-202 Chase 13
203-217 Chase 14
218-232 Chase 15
233-247 Chase 16
248-255 All Chase
CH4
Sensibilitate sunet / viteză
automată
000-127 Chase Viteză automată de la încet la rapid
128-255 Chase sensibilitatea sunetului de la mică al
mare
CH3 Roșu 1 000-255 (0-100%)
CH4 Verde 1 000-255 (0-100%)
CH5 Albastru 1 000-255 (0-100%)
CH6 Amber 1 000-255 (0-100%)
CH7 Roșu 2 000-255 (0-100%)
CH8 Verde 2 000-255 (0-100%)
/