Page is loading ...

2
©Copyright LOTRONIC 2016 DJLIGHT80LED
Unpacking Instructions
Immediately upon receiving a fixture, carefully unpack the carton, check the contents to ensure that all parts are
present and have been received in good condition. Notify the freight company immediately and retain packing
material for inspection if any parts appear to be damaged from shipping or the carton itself shows signs of
mishandling. Keep the carton and all packing materials. In the event that a fixture must be returned to the
factory, it is important that the fixture be returned in the original factory box and packing.
Safety Instructions
Please read these instructions carefully, they include important information about the installation, usage and
maintenance of this product.
• Please keep this User Guide for future reference. If you sell the unit to another user, be sure that he also
receives this instruction booklet.
• Always make sure that you are connecting to the proper voltage, and that the line voltage you are connecting
to is not higher than that stated on the decal or rear panel of the fixture.
• This product is intended for indoor use only!
• To prevent risk of fire or shock, do not expose fixture to rain or moisture. Make sure there are no flammable
materials close to the unit while operating.
• The unit must be installed in a location with adequate ventilation, at least 1m from adjacent surfaces. Be sure
that no ventilation slots are blocked.
• Always disconnect from power source before servicing or replacing fuse and be sure to replace with same fuse
size and type.
• Maximum ambient temperature (Ta) is 104° F (40°C). Do not operate the fixture at temperatures higher than
this.
• In the event of a serious operating problem, stop using the unit immediately. Never try to repair the unit by
yourself. Repairs carried out by unskilled people can lead to damage or malfunction. Please contact the nearest
authorized technical assistance center. Always use the same type of spare parts.
• Make sure the power cord is never crimped or damaged.
• Never disconnect the power cord by pulling or tugging on the cord.
• Avoid direct eye exposure to the light source while it is on.
• DISCONNECT DEVICE: Where the MAINS plug or an appliance coupler is used as the disconnect device, the
disconnect device shall remain readily operable.
• The light source contained in this luminaire shall only be replaced by the manufacturer or his service agent or a
similar qualified person.
Specifications
Voltage ................................................................................... 220-240V AC~ 50/60Hz
Consumption ....................................................................................................... 60W
LED lamp: ................................................................................... 12 x 1W (RGBW) x 4
DMX channels ........................................................................................................... 8
Control modes ..................................................... Auto, Master/Slave, DMX, Remote
Power cable ........................................................................................................... 4m
Packing Size...................................................................................... 89.5 x 19 x 39cm
GB

3
©Copyright LOTRONIC 2016 DJLIGHT80LED
Power supply, wire Connection
Use a dedicated plug to connect the LED light and power. Make sure the unit is connected to the appropriate
power supply.
Installation of the units
Before positioning the light, ensure the stability of the installation site. Drive the screw into the screw hole on
the stand. Make sure that the units can’t fall from the stand. The manufacturer cannot be held responsible for
damages due to bad installation of the units.
Warning
Carry the lights only by the handle.
Features
The control panel features 4 buttons and a 4-digit LED display.
Operation
1) When power is on, the digital LED display works with red dots.
When a DMX signal is present, the dot will be shiny.
2) DMX address code setting: Press “MENU” button. When the digital LED displays d001-d512, press “UP” or
“Down” to set the address code. The code ranges from 001-512.
3) IP code setting: Press “MENU”. When IP.01-IP.64 is displayed, press “UP” or “DOWN” to set the address code.
The code ranges from 001-512.
4) Internal program running:
There are 5 built-in programs. Press “MENU” to choose one of the built-in programs from A1-A5: A1 is static
color mode, A2 LED jump function, A3 LED rainbow function, A4 LED sound active function, and A5 LED
strobe function, A6 is Auto Run and A7 scrolling effect.
Button Specifications:
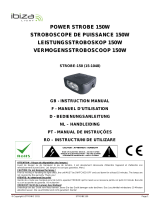
Connection of Signal Cable
You can use the 3-pin XLR cable to connect the OUT socket of the first light and the IN socket of the following
light. Connect all the lights as below:
A1
Solid Mode
←UP/DOWN→ 1-19
A2.
Jump Mode
←UP/DOWN→ 1-19
A3.
Rainbow mode
←UP/DOWN→ 1-19
A4.
Sound active mode
←UP/DOWN→ 1-19
A5.
Strobe Mode
←UP/DOWN→ 1-19
R.
Solid Red Color intensity
←UP/DOWN→ 0-255
G.
Solid Green Color intensity
←UP/DOWN→ 0-255
B.
Solid Blue Color intensity
←UP/DOWN→ 0-255
U.
Red+White Color Wash
←UP/DOWN→ 0-255
D.
DMX Mode
d.512
IP.
IP Mode
IP.64

4
©Copyright LOTRONIC 2016 DJLIGHT80LED
A DMX signal terminator is recommended on the last unit of the chain. DMX terminator is a XLR connector with
a 120Ω resistor between the pin 2 and pin 3 of the XLR connector
Remote Control:
A1: Effect 1 All bright
A2: Effect 2 Jump change
A3: Effect 3 Gradual change
A4: Sound activated
A5: Strobe
Color: Color adjustment
Speed: Speed adjustment
DMX: Selection of DMX channel
IP: Running effect
DMX Channels:
Channel
Value
Description
Reminder
CH 1
0-10
No function
Macro function
11-50
Macro A1
51-100
Macro A2
101-150
Macro A3
151-200
Macro A4
201-255
Macro A5
210-255
Red+Green+Blue
CH2
0-255
Macro color
CH3
0-255
Speed adjustable
CH4
0-255
Master dimming
CH5
0-255
Red dimming
CH6
0-255
Green dimming
CH7
0-255
Blue dimming
CH8
0-255
White dimming
Fixture Cleaning
The cleaning of internal and external optical lenses and/or mirrors must be carried out periodically to optimize
light output. Cleaning frequency depends on the environment in which the fixture operates: damp, smoky or
particularly dirty surrounding can cause greater accumulation of dirt on the unit’s optics.
• Clean with soft cloth using normal glass cleaning fluid.
• Always dry the parts carefully.

5
©Copyright LOTRONIC 2016 DJLIGHT80LED
• Clean the external optics at least every 20 days. Clean the internal optics at least every 30/60 days.
VII. Trouble-shooting
Problem
Solution
No display when power is on
1. Check if the power is correctly connected.
2. Check the outlet is powered
Light is out of control
1. Check if the DMX address code is correctly set.
2. Check if the DMX cable is correctly connected.
The light is off after working for a while
1. Check if the sensor is soldered on the LED PCB
2. Check if the temperature is too high or not.
3. Check if Power supply is damaged.
The beam is dark
1. Check if the temperature is too high and cause a fast fade.
2. Check if there are too much dust on the surface of light.
This marking indicates that this product should not be disposed with other household wastes
throughout the EU. To prevent possible harm to the environment or human health from uncontrolled
waste disposal, recycle it responsibly to promote the sustainable reuse of material resources. To
return your used device, please use the return and collection systems or contact the retailer where the
product was purchased. They can take this product for environmental safe recycling.
Déballage
Dès réception de l’appareil, ouvrez le carton et vérifiez que le contenu est complet et en bon état. Sinon,
prévenez immédiatement le transporteur et conservez l’emballage s’il montre des signes de mauvais
traitements. Conservez le carton et tous les matériaux d’emballage afin de pouvoir transporter l’appareil en
toute sécurité.
Consignes de sécurité
Lisez attentivement ce manuel qui contient des informations importantes sur l’installation, l’utilisation et
l’entretien de cet appareil.
• Conservez le manuel pour référence ultérieure. Si l’appareil change un jour de propriétaire, assurez-vous que
le nouvel utilisateur est en possession du manuel.
• Assurez-vous que la tension secteur convient à cet appareil et qu’elle ne dépasse pas la tension d’alimentation
indiqué sur la plaque signalétique de l’appareil.
• Uniquement pour utilisation à l’intérieur!
• Afin d’éviter tout risque d’incendie ou de choc électrique, ne pas exposer cet appareil à la pluie ou à
l’humidité. Assurez-vous qu’aucun objet inflammable ne se trouve à proximité de l’appareil pendant son
fonctionnement.
• Installez l’appareil à un endroit bien ventilé à une distance minimum de 1m de toute surface. Assurez-vous que
les fentes de ventilation ne sont pas bloquées.
• Débranchez l’appareil du secteur avant toute manipulation ou entretien. Lorsque vous remplacez le fusible,
utilisez uniquement un fusible qui présente exactement les mêmes caractéristiques que l’ancien.
• La température ambiante ne doit pas dépasser 40°C. Ne pas faire fonctionner l’appareil à des températures
supérieures.
F
/