Page is loading ...

1
2
3
1
3
• The current supplied to the glow plug/s is precisely regulated to ensure the optimum ignition
temperature and low power consumption, as well as a steady idle and smooth transition from
idle to full throttle. The power supplied to the glow plug/s increases gradually as the throttle
stick is pulled back further, which reduces glow plug failures and contributes to the smooth
transition from idle to full power. The unit also removes the need to carry a separate
1.2 to 2 volt supply and glow plug connector as it energizes the glow plug for starting
purposes. This has the added benefit that it is now unnecessary to drill holes in the cowling
of a scale model for glow plug access.
• The battery pack required to use with a single cylinder engine is 2.4volt (2 cells). Capacity
of the cells used in the battery should be considered for the model being flown. The typical
current drain from the battery is around 1.0Amp and may differ depending on the type of
glow plug used.
• When used with twin engines, or a twin cylinder engine, the glow plugs should be connected
in series as shown below. In this application the glow plug battery pack should be made up
of 3 cells (3.6Volt). Typical current drain in this usage is around 7-800mA.
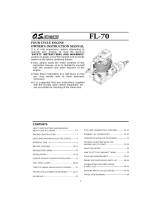
OPERATING INSTRUCTION
Prior to use, please read this manual thoroughly.
Keep this manual in a convenient place for quick and easy reference.
SAFETY APPROVAL
제품:
SMART GLOW PLUGS BOOSTER
국립전파 연구원의 전자파 적합등록을 획득하였습니다.
EG DECLARATION OF CONFORMITY
We hereby declare that the flowing product
Product:
SMART GLOW PLUGS BOOSTER
Confirms with the essential protective requirements as laid down in the
directive for harmonizing the statutory directives of the member states
concerning electro-magnetic interference
The applicant may issue a DECLARATION of CONFIRMITY and apply the
CE marking in accordance with European Union Rules
• KC Information
• A/S regulation
Only when the product is faulty after normal operation within the warranty period,
we will repair the product for free based on our regulations. The repair will be
paid for by the consumer when the damage is due to use in improper ways
or beyond the warranty period.
• ENVIRONMENTAL PROTECTION NOTES
This product must not be disposed of with other waste. Instead,
it is the user’
it over to a designated collection point for the recycling of waste
electrical and electronic equipment. The separate collection and
recycling of your waste equipment at the time of disposal will help
to conserve natural resources and ensure that it is recycled
in a manner that protects human health and the environment. For more
information about where you can drop off your waste equipment for recycling,
please contact your local city office, your household waste disposal service
or where you purchased the produce.
s responsibility to their waste equipment by handing
•
OPENHOBBY A/S CENTER
8F, 202 Dong, Chunui Techno-Park II, 18, 198 street, Bucheon-ro, Wonmi-Gu,
Bucheon-Shi, Gyungki-Do KOREA 420-857
Phone: 82-70-7863-3675 Fax: 82-70-7863-3670
Customer Service E-mail: service@openhobby.com
FEATURES
• Customer support
• I
nternet sales site
Please feel free to contact “www.openhobby.com” to get all information on
product features, specifications, running events and the newest product line up.
Please feel free to ask any question by e-mail or phone. We’ ve been trying to deal
with your question. We are open from nine to six, Monday to Friday in Korea. We may
respond to your question by e-mail as soon as possible when we are close.
CONNECTIONS
SPECIFICATION
• The servo lead from the Glow 2 unit should be connected to a “Y” lead which is also used for the
throttle servo and is connected to the throttle output of the receiver. Alternatively, if a programmable
transmitter is being used, the Glow 2 lead can be plugged into a spare receiver output and mixed with
the throttle channel (mixer set to 100%). This removes the need for the “Y” lead.
• The red LED acts as an adjustment aid and also doubles to confirm the correct operation of the system.
It illuminates while the Glow 2 unit provides power to the glow plug.
• The adjustment potentiometer is used to set the position where the Glow 2 unit begins to provide power
to the glow plug, (and the LED lights). The throttle stick should be set to the position where the glow plug
is required to light, and then the potentiometer should be adjusted so that the plug does indeed begin
to light. Pulling the throttle stick back further should result in the glow plug continuing to glow.
If the glow plug lights when the throttle is set to full, the throttle output needs to be reversed.
The LED can be positioned in the cockpit as part of the dashboard, or through the fuselage side.
• When used with an inline twin cylinder engine, a hotter rated glow plug should be used for the front
cylinder to keep the combustion temperature similar.
• Please note that as the glowplug is energised all the time that the throttle stick is in the low position,
the radio equipment in the model should be kept switched off until the model is ready to be started.
If this is not done, the battery in the model will run flat or the glowplug will burn out.
SMART GLOW PLUGS
BOOSTER
No. R8065
NOTICE: Take care when handling glow plugs, the element may be hot even
when the plug is not glowing.
Battery types
Weight included Leads
Dimension
Operates from RX Battery of 4~5 cells (4.8V ~ 6.0V)
Single cylinder engine 2.4V (2cell pack)
3.6V (3cell pack)
3.6V (3cell pack)
Twin cylinder engine
Twin engines
14g
0.49oz
38x25x4.5mm
1.50x0.98x0.18in
IDLE SETUP
OPENHOBBY A/S CENTER
/