Page is loading ...

OWNER’S MANUAL
C
M
Y
CM
MY
CY
CMY
K
Manual - FT600-550-LITE-450 v3 EN-US.pdf 1 21/11/2019 16:14:37


FT450 / FT550 / FT550LITE / FT600
3
1. Index
2. Presentation ...................................................................................... 6
3. Warranty terms .................................................................................. 7
4. Characteristics ................................................................................... 8
4.1 Harness connections A connector - FT450 / FT550 and LITE........... 10
4.2 Harness connections B-connector (FT550 / LITE Only) ................... 12
4.3 Harness connections A-connector (FT600) ....................................14
4.4 Harness connections B-connector (FT600) .................................... 16
4.5 Output table of FT .....................................................................17
4.6 PowerShift Connector (FT550 / LITE and FT600) ...........................18
4.7 Auxiliary outputs .........................................................................18
4.8 Internal MAP sensor .................................................................... 18
4.9 USB port ................................................................................... 18
4.10 FuelTech CAN network .............................................................. 18
4.11 Connector disassembly ............................................................. 19
5. First steps with FuelTech read before installation .................................... 19
6. Getting to know the ECU....................................................................20
6.1 Dashboard ................................................................................ 20
6.2 Main menu ................................................................................ 20
6.3 FTManager shortcuts .................................................................. 21
6.4 Warning sounds in FT550LITE...................................................... 22
6.5 Dashboard screen ...................................................................... 22
6.6 Diagnostic panel ......................................................................... 22
6.7 Test time based features .............................................................. 23
6.8 Compression test ....................................................................... 24
6.9 Internet Remote Tuning................................................................ 24
6.10 FTManager exclusive features .................................................... 24
6.11 FTManager - Datalogger ........................................................... 25
7. Engine settings ................................................................................. 27
7.1 Engine setup .............................................................................. 27
7.2 RPM signal ................................................................................ 29
7.3 Cam sync sensor........................................................................30
7.4 Ignition ...................................................................................... 31
7.5 Fuel injection ............................................................................. 32
7.6 Pedal/Throttle ............................................................................33
7.7 Idle actuators ............................................................................. 35
7.8 FuelTech base map .................................................................... 35
7.9 Fuel injectors deadtime................................................................36
7.10 Ignition Dwell ........................................................................... 36
7.11 Ignition energy ......................................................................... 36
7.12 Map options ............................................................................ 37
7.13 Advanced map options .............................................................. 37
8. Electrical installation .......................................................................... 38
9. Wiring PowerFT ECUs to harnesses from previous ECUs ........................40
9.1 Connector diagram - Harness FT250, FT300, FT350 to FT450 ....... 40
9.2 Connector diagram - Harness FT400 to FT550/LITE ....................... 41
9.3 Connector Diagram - Harness FT400 to FT550/LITE ...................... 41
9.4 A - Connector Diagram - Harness FT500 to FT550/LITE ................. 42
9.5 B - Connector Diagram - Harness FT500 to FT550/LITE ................. 42
9.6 A - Connector diagram - Harness FT500 to FT600 ......................... 43
9.7 B - Connector diagram - Harness FT500 to FT600 ......................... 43
10. Fuel injectors ................................................................................... 44
11. Ignition ............................................................................................ 44
12. Sensors and actuators ....................................................................... 47
12.1 Intake air temperature sensor ..................................................... 47
12.2 Engine temperature sensor ........................................................ 47
12.3 Fuel and oil pressure ................................................................. 47
12.4 Throttle position sensor (TPS) ..................................................... 47
12.5 Crank trigger/RPM sensor .......................................................... 48
12.6 Camshaft position sensor ........................................................... 50
12.7 O2 sensor ............................................................................... 50
12.8 Step motor – idle speed ............................................................ 50
13. Auxiliary outputs ............................................................................... 52
13.1 Cooling fan 1 and 2 .................................................................. 52
13.2 Idle valve ................................................................................. 52
13.3 Air conditioning ........................................................................52
13.4 Shift Alert ................................................................................52
13.5 Fuel pump ............................................................................... 52
13.6 Variable camshaft control/Powerglide gearbox ...............................52
13.7 Progressive nitrous control ......................................................... 53
13.8 Boost Control – N75 ................................................................ 53
13.9 BoostController ........................................................................ 54
14. Electronic throttle control ................................................................... 55
14.1 Electronic throttle control (FT600) ............................................... 55
14.2 Connection – throttle bodies and pedals ...................................... 55
14.3 Electronic throttle control (FT550 / LITE) ..................................... 56
14.4 Connection – throttle bodies and pedals ...................................... 56
15. Sensors and Calibration ..................................................................... 57
15.1 Ignition calibration ..................................................................... 57
15.2 TPS calibration ......................................................................... 57
15.3 Electronic throttle/pedal calibration ............................................. 57
15.4 Fuel/oil pressure sensors inputs .................................................. 58
15.5 Intake air and engine temperature sensors ................................... 58
15.6 O2 sensor inputs ...................................................................... 58
15.7 Speed inputs ........................................................................... 60
15.8 Driveshaft RPM ....................................................................... 60
15.9 Input shaft RPM ....................................................................... 61
15.10 MAP Sensor .......................................................................... 61
15.11 Gear detection ....................................................................... 61
15.12 Nitrous bottle pressure ............................................................ 62
15.13 Clutch position ....................................................................... 62
15.14 Clutch pressure ...................................................................... 62

FT450 / FT550 / FT550LITE / FT600
4
15.15 Ride Height ........................................................................... 63
15.16 Pitch Rate ............................................................................. 63
15.17 CAN communication ............................................................... 63
15.18 EGT ...................................................................................... 63
15.19 Wastegate Pressure ................................................................64
15.20 Internal accelerometer (FT550 /LITE and FT600) ....................... 64
15.21 Brake Pressure ...................................................................... 65
15.22 Front and rear shocks .............................................................65
15.23 Flex Fuel ............................................................................... 65
15.24 Back Pressure ....................................................................... 65
15.25 Oil pan pressure .................................................................... 66
15.26 Transmission pressure .............................................................66
15.27 Transmission temperature ........................................................66
15.28 Torque converter pressure ....................................................... 66
15.29 Intercooler temperature ........................................................... 66
15.30 Front and rear tires temperature ................................................66
15.31 Track temperature ...................................................................66
15.32 Engine Coolant pressure .......................................................... 66
15.33 Turning lights ........................................................................ 67
15.34 Low beam / High beam...........................................................67
15.35 Turbocharger RPM ..................................................................67
15.36 Fuel ow ............................................................................... 67
15.37 Flywheel RPM (Clutch basket) .................................................. 67
15.38 Automatic transmission range selector ....................................... 67
15.39 Paddle Shift ........................................................................... 68
15.40 Brake ................................................................................... 69
15.41 Multifunction button ................................................................ 69
15.42 Battery temperature ................................................................ 69
15.43 Compressed air pressure ......................................................... 69
16. Starting the engine for the rst time ..................................................... 70
16.1 First engine start ....................................................................... 70
16.2 Ignition calibration ..................................................................... 70
17. Fuel tables adjust..............................................................................71
17.1 Main fuel table ......................................................................... 71
17.2 Overall fuel trim ........................................................................ 71
17.3 RPM compensation .................................................................. 71
17.4 O2 Closed Loop....................................................................... 72
17.5 Idle speed by TPS table ............................................................. 73
17.6 Acceleration fuel enrichment and decay ....................................... 73
17.7 Engine temperature compensation .............................................. 74
17.8 Intake air temperature compensation ........................................... 74
17.9 Battery voltage compensation ..................................................... 74
17.10 MAP / TPS compensation ........................................................ 75
17.11 Prime pulse ........................................................................... 75
17.12 Engine start ........................................................................... 75
17.13 Post-start enrichment .............................................................. 75
17.14 Individual cylinder trim ............................................................. 76
17.15 Rotor compensation................................................................76
17.16 Gear based compensation ....................................................... 76
17.17 Gear shift fuel enrichment ........................................................ 76
17.18 Fuel injection phase angle table ................................................ 76
18. Ignition tables adjust..........................................................................77
18.1 Main ignition table .................................................................... 77
18.2 Overall ignition trim ................................................................... 77
18.3 MAP/TPS compensation ........................................................... 77
18.4 Engine temperature compensation .............................................. 78
18.5 Intake air temperature compensation ........................................... 78
18.6 Rotary timing split ..................................................................... 78
18.7 Individual cylinder trim ............................................................... 78
18.8 Rotor compensation..................................................................78
18.9 Timing limits ............................................................................ 79
18.10 Engine Start ........................................................................... 79
18.11 Gear compensation.................................................................79
18.12 Gear shift compensation .......................................................... 79
19. Other functions................................................................................. 80
19.1 Internal datalogger .................................................................... 80
19.2 Accelerometer and gyroscope (FT550 and FT600) ....................... 81
19.3 Idle speed control ..................................................................... 82
19.4 Deceleration cut-off .................................................................. 83
19.5 Revolution limiter ...................................................................... 84
19.6 Shift Light ................................................................................ 84
19.7 Thermatic Fan #1 ..................................................................... 84
19.8 Thermatic Fan #2 ..................................................................... 85
19.9 Air conditioning ........................................................................85
19.10 Fuel pump ............................................................................. 86
19.11 Cold start auxiliary .................................................................. 86
19.12 Camshaft control .................................................................... 86
19.13 Progressive nitrous control #1 and #2 ....................................... 87
19.14 Generic duty cycle output ........................................................ 88
19.15 Boost activated output #1 and #2 ............................................ 89
19.16 Tachometer output ..................................................................89
19.17 Wastegate boost pressure control #1 and #2 ............................. 89
19.18 Power shift (GearController FT550 / LITE and FT600) ..................93
19.19 Start Button ........................................................................... 95
19.20 RPM activated output .............................................................. 96
19.21 Pit limit ................................................................................. 96
19.22 Active traction control .............................................................. 96
19.23 Generic Outputs ..................................................................... 97
19.24 Flex Fuel ............................................................................... 98
19.25 Throttle blip / Heel and toe ....................................................... 99
19.26 Variable Camshaft (VVT)........................................................... 99
19.27 Automatic Transmission Control............................................... 102
19.28 Lockup Control .................................................................... 104
19.29 Push to pass (P2P) ............................................................... 105
19.30 Anti-lag / Pops & Bangs / Engine brake ................................... 105
19.31 Compressed air control ......................................................... 107
20. Drag race features .......................................................................... 108
20.1 Burnout mode ....................................................................... 108
20.2 3-step (boost spool) ............................................................... 108
20.3 2-step rev limiter .................................................................... 109
20.4 Linelock Brake Control ............................................................ 110
20.5 Timing table for rev launch ....................................................... 111

FT450 / FT550 / FT550LITE / FT600
5
20.6 Gear shift output ..................................................................... 111
20.7 Time based fuel enrichment .....................................................112
20.8 Pro-Nitrous ............................................................................ 114
20.9 Time based output ..................................................................116
20.10 Wheelie Control ....................................................................116
20.11 Davis Technologies ...............................................................117
20.12 Time based throttle opening .................................................. 117
20.13 Staging control ..................................................................... 118
20.14 Mechanical fuel injection controller .......................................... 118
20.15 Launch delay controls (delay box) ........................................... 119
21. Alert settings .................................................................................. 121
21.1 Safe mode RPM limiter ........................................................... 121
21.2 Alerts .................................................................................... 121
22. Favorites .......................................................................................123
23. Interface settings ............................................................................ 124
23.1 Day/night mode selection ........................................................ 124
23.2 LCD blacklight settings (FT600 only) ......................................... 124
23.3 LED conguration (FT600 only) ................................................ 124
23.4 Virtual LEDs conguration (FT450 and FT550) ........................... 125
23.5 Alert sound settings ................................................................ 125
23.6 Dashboard setup .................................................................... 125
23.7 Startup screen selection .......................................................... 126
23.8 Splash Screen ....................................................................... 126
23.9 Password Protection setup .......................................................126
23.10 Clear peaks ......................................................................... 127
23.11 Measurement units ............................................................... 127
23.12 Demonstration mode ............................................................ 127
23.13 Touchscreen calibration .........................................................127
23.14 Serial number and software version ......................................... 127
23.15 Odometer and Hourmeter ...................................................... 128
23.16 Practice Tree Game .............................................................. 128
24. File manager .................................................................................. 129
24.1 FuelTech base map generator ................................................. 129
24.2 Edit map le name .................................................................. 129
24.3 Copy map to another le ......................................................... 129
24.4 Erase le ............................................................................... 129
24.5 Selection by button ................................................................. 129
25. Rotary engines setup ...................................................................... 130
25.1 Crank angle sensor installation and alignment ............................. 130
25.2 Crank angle sensor wiring ........................................................ 130
25.3 ECU setup ............................................................................. 131
25.4 Ignition coils wiring.................................................................. 131
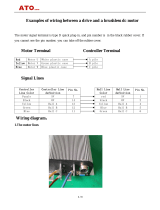
26. Electrical diagram - example FT600 .................................................. 132
27. FT450 and FT550 mounting kit ....................................................... 136
28. Bracket dimensions ........................................................................ 137
29. FTCAN 2.0 protocol ....................................................................... 139
29.1 Physical layer ......................................................................... 139
29.2 IDENTIFICATION ..................................................................... 139
29.3 DATA FIELD ........................................................................... 139
29.4 Attachments .......................................................................... 141
29.5Connector Pinout.....................................................................148

FT450 / FT550 / FT550LITE / FT600
6
Presentation
2. Presentation
Congratulations, You’re now part of the high performance world of
FuelTech!
The equipment that you just acquired is the same being used in
different vehicles all over the world, whether it be for a street car,
motorcycle, jet ski, boat, ATV or professional series drag race
combination...we have you covered!
From all of us at FuelTech, we wish you fun on your path and many
victories, because winning is in our DNA!
Inspired by our passion of victories, be it on the track or a personal
one like having a perfectly tuned car, and writing new chapters in our
history between automobilism and technology, FuelTech created the
PowerFT line of ECU’s, with it you will enjoy features developed to
extract the maximum performance and safety out of your project, street
or drag car, off road vehicle, motorcycle or any other application that
needs functionalities with ease of use and great results.
The PowerFT platform is capable of managing any type of Otto cycle
engine(with cylinders) or Wankel (with rotors). It has sequential, semi-
sequential and multipoint fuel injection as well as sequential, distributor
or wasted spark ignition, both with either simple (2D) or advanced (3D
tables), besides that , there are many other features made to improve
functionality on a variety of applications, allowing for better drivability
and comfort. All this versatility is also applied to the hardware, making
it possible to customize its inputs to use factory sensors and assigning
outputs to different roles, rendering it practically impossible not to suit
to your project.
The PowerFT ECU’s have no limitation in regards to features except
when special hardware is needed, like with the powershift, internal
accelerometer and drive by wire. The main integrated features of
all ECU’s are wastegate boost control (Boostcontroller), O2 closed
loop corrections, idle control by timing and actuators, nitrous control,
active traction control, as well as dedicated features to obtain the
best results in drag racing.
All the ECU’s feature a CAN bus to create a network with other
products, making the installation of upgrades even simpler and easier,
the USB port also allows a fast and robust communication with the
FTManager software.
Another great feature is the 256 channel datalogger, with a resolution
of up to 200hz for detailed analysis and ne adjustments that could
make all the difference to attain victory. Through FTDatalogger software
you can quickly and efciently visualize every logged channel and
easily make changes to the engine management as well as using
the diagnostic feature (also accessible on the ECU screen and
FTManager) to identify problems.
FuelTech is concerned with your engine safety and created an
extensive range of alerts and safe modes to help protect your engine
in dangerous and critical situations.
The FuelTech FT450 is the perfect choice for cost-effective builds.
Featuring a robust and waterproof plastic housing, an automotive 26
pin connector, 7 inputs and 10 outputs that are totally congurable.
Its 4.3” display, along with same dashboard as the FT600, makes the
heads up of information to the driver much more clearer while enabling
street cars to have an engine start button and virtual LEDs to use
with warning lights such as high beam, turn signals and much more.
The display also allows for complete access to all map adjustments,
so its possible to edit tables and other settings without the need of
a computer, the perfect integration between ECU and Dashboard.
The FT550 is ideal for projects that need more resources, it has
integrated powershift, internal accelerometer (G force sensor) and
gyroscope (inclination sensor), and drive by wire control.
Features a robust and waterproof plastic housing with 52 pins
automotive connectors, 2 CAN ports, 14 inputs and 24 outputs that
are totally congurable.
The FT600 is the most complete ECU and Dashboard available on
the market.
It features an waterproof aluminum case with superseal automotive
connectors with a total of 68 pins (21 inputs and 32 outputs), 2 CAN
ports, internal accelerometer and gyroscope as well as integrated
powershift feature. It also has 10 LEDS with RPM, activation and
colors congurable, 4 side LEDs that can be used for alerts and a
4.3” anti-glare display.

FT450 / FT550 / FT550LITE / FT600
7
3. Warranty terms
The use of this equipment implies the total accordance with the terms
described in this manual and exempts the manufacturer from any
responsibility regarding to product misuse
Read all the information in this manual before starting the product
installation.
Warranty terms
Before starting any electric installation, disconnect the battery.
The inobservance of any of the warnings or precautions described in
this manual might cause engine damage and lead to the invalidation
of this product warranty. The improper use of the product might cause
engine damage.
This product does not have a certication for the use on aircraft or
any ying devices, as it has not been designed for such use purpose.
In some countries where an annual inspection of vehicles is enforced,
no modication in the OEM ECU is permitted. Be informed about local
laws and regulations prior to the product installation.
Important warnings for proper installation of this product:
• Always cut the unused parts of cables off NEVER roll up the
excess.
• The black wire of the harness MUST be connected directly to the
battery’s negative terminal, as well as each one of the sensors’
ground wires.
• It is recommended to wire the black/white wire directly to the
battery negative terminal, making sure that the ECU is well
grounded. If the ECU wiring has not been made properly, it may
cause irreparable problems to the ECU.
NOTE
This product must be installed and tuned by
specialized auto shops and/or personnel with
experience on engine tuning.
Limited Warranty
This product warranty is limited to one year from the date of purchase
and covers only manufacturing defects upon presentation of purchase
invoice.
This ECU has a serial number that’s linked to the purchase invoice
and to the warranty. In case of product exchange, please contact
FuelTech tech support.
Damages caused by misuse of the unit are not covered by the
warranty. This analysis is done by FuelTech tech support team.
The violation of the warranty seal results in the
invalidation of the Product Warranty.
Manual version 1.9 – November/2020
ECU version – 4.5
FTManager version - 4.5
WARNING
- It is a good practice to save your maps on the
PC, as a security backup. In case of problems
with your ECU, this will be the guarantee that
your calibrations are saved. In some cases,
when the ECU is upgraded by the factory, its
memory may be erased also.
- It’s not possible to change the FT600’s
interface language.
IMPORTANT
The all black and black/white ground wires
must go SEPARATELY to the negative battery
terminal.
IMPORTANT
PowerFT ECU’s are water proof, however, some
specic instructions must be followed:
- Do not point pressure washers directly to the
ECU screen
- When removing wires from the ECU connector,
be sure to use Super seal connector hole plugs,
to completely seal the ECU (TE Connectivity PN
4-1437284-3)

FT450 / FT550 / FT550LITE / FT600
8
Characteristics
4. Characteristics
Specications
FT450
FT550 /
LITE
FT600
Otto cycle engine control 8 12 12
Wankel engines (rotary) 2 4 4
Sequential, semi sequential and multipoint fuel control YES
Distributor and crank trigger ignition control YES
Wasted spark and sequential ignition control YES
Electronic throttle body Control (Drive-By-Wire) NO YES YES
Idle speed control by PWM valve YES
Idle speed control by electronic throttle, stepper motor and ignition timing NO YES YES
Closed loop injection through oxygen sensor (wide band lambda sensor) YES
Real time programmable by the screen or PC through FTManager Software YES
Inputs
Differential input for RPM signal YES
Differential input for cam sync signal NO NO YES
Input channels totally congurable - digital and analogical 7 14 20
2 high sensibility inputs used preferably for gear shifter force sensor NO YES YES
Editable sensors reading scale NO YES YES
103psi internal MAP sensor (7 bar - absolute), 14.7psi of vacuum and 88psi of positive pressure (boost); YES
1 USB port for computer and FuelTech software connection; YES
CAN ports for FuelTech FTCAN 2.0 or FTCAN 1.0 communication with FuelTech WB-O2 Nano, FuelTech
EGT-8 CAN, Racepak IQ3, VNET, AiM, etc).
1 2 2
Outputs
Congurable outputs channels 10 24 32
Blue output
1
6 12 16
Gray output
2
4 8 8
Yellow output
3
0 4 8
Injection control
Sequential injection (Blue outputs) 6 12 16
Closed loop fuel control through O2 sensor (wide band sensor) YES
2 injector banks (staged injection banks A and B) YES
Main map to MAP or TPS to RPM YES
Main map 3D advanced until 32x32 points (completely adjustable map index and size) YES
Simplied 2D map with up to 1x32 cells per MAP or TPS and RPM compensation of up to 1x32 cells
(completely adjustable map index and size)
YES
Injection time resolution 0.001ms YES
Fuel enrichment and decay adjust YES
Individual cylinder trim setting by MAP or RPM YES
Starting engine map with the engine temperature YES
Ignition control
Sequential ignition with individual coil 5
4
8 8
Main map to MAP or TPS to RPM YES
Main map 3D advanced until 32x32 points (completely adjustable map index and size) YES
Simplied 2D map with up to 1x32 cells per MAP or TPS and RPM compensation of up to 1x32 cells
(completely adjustable map index and size)
YES
Ignition angle resolution 0.01° YES
Timing compensation (air temperature, engine and gear) YES

FT450 / FT550 / FT550LITE / FT600
9
Characteristics
Dashboard screen / On board computer
FT450
FT550 /
LITE
FT600
Screen dashboard which displays different sizes and styles to be used with any existing equipment or
sensor
YES
6
Upper tab with 10 LED lights, colored RGB and adjustable progressive shift light NO NO YES
4 RGB LED side lights which can be triggered by 3 different combined settings NO NO YES
4 Virtual LED YES YES
6
NO
Diagnosis dashboard with real-time information of all inputs outputs, CAN and Status Events YES
Internal datalogger
Multiple logs recording (channels) 256
Congurable sampling rate per channel 1, 5, 25, 50, 100 or 200Hz
Automatic activation by RPM, through the screen or by external button YES
Data storage for up to
5
2h50min
FTManager Datalogger Software for viewing and comparing logs YES
Drag race features
Burnout mode, 2-step, 3-step; Timing table for rev launch; 2-step by wheel speed or pressure/position
of clutch; Time based RPM limiter by timing retard or ignition cut; Time based wheel speed or driveshaft
RPM control with timing retard or ignition cut; Time-based ignition timing compensation; Pro-Nitrous setting
for up to 6 stages, with activation control, fuel enrichment and ignition timing maps; Gear shift output;
Time based output; Staging control; Wheelie control;
YES
Other features
Integrated GearController: ignition cut for clutchless gear shifting using a strain gage sensor on the shifter; NO YES YES
Integrated BoostController: wastegate valve pressure control; Idle speed control by timing, step motor,
PWM valve or electronic throttle body; Deceleration fuel cut-off; Control of up to two cooling fans by
coolant temperature; Air conditioning control; Fuel pump control – with 6s prime; VTEC control; Progressive
nitrous control with fuel enrichment and timing retard; Automatic transmission control; Lockup control;
Launch delay control (Delay Box);
YES
Protection and Alerts
RPM limiter by fuel or ignition cut; Shift light
6
with sound and dashboard alert and/or external shift light;
Congurable safe mode options;
YES
General characteristics
Display brightness adjusts; Night and day mode selection by external switch and through the menu;
Audible and visual alert, including external shift light control; 5 memory positions to save different adjusts
and maps; User and tuner protection passwords; PC communication through USB cable and channel
customization via FTManager Software;
YES
6
Working temperature: -4 F until 158 F
Maximum power supply 20V
ECU Dimensions
- ECU: width (in) 5.75 5.75 5.86
Height (in) 3.62 3.62 3.7
Depth (in) 2.13 2.13 2.42
- Box: width (in) 12.2
Height (in) 8.86
Depth (in) 3.34
Weight
- ECU (oz) 10 11 21
- Box with wire harness (oz) 92 134 117
1 - Recommended for high impedance injectors without the need of an external driver (up to 4
injectors per output)
2 - Recommended for ignition (open collector outputs with 5v power supply)
3 - Recommended for driving stepper motors, electronic throttle, ignition and 12v loads
4 - Use blue output number 6 as a 5th ignition output on FT450
5 - Data recording time depends on the sample rate and the number of channels that are being
recorded.
6 - FT550LITE not support.

FT450 / FT550 / FT550LITE / FT600
10
Pin Wire Color Function Information
1 Blue #1 Blue output #1
These outputs are usually used for injector control. When needed, they can be
congured as auxiliary outputs
1 2 3
.
2 Blue #2 Blue output #2
3 Blue #3 Blue output #3
4 Blue #4 Blue output #4
5 Blue #5 Blue output #5
6 Blue #6 Blue output #6
7 Black/white Power ground input
Directly wired to the battery negative terminal with no seams. Do not tap any
other grounds to this wire, it must run clean straight to the battery negative terminal.
8 Gray #1 Gray output #1
These outputs are usually used for ignition control.
When needed, they can be set up as injector outputs or auxiliary outputs
1 4
.
9 Gray #2 Gray output #2
10 Gray #3 Gray output #3
11 Gray #4 Gray output #4
12 Black Battery negative input
Connected directly to the battery negative with no seams. Do not connect
this wire to the chassis, engine block or head.
13 Red 12V input from relay Connected to the pin 87 of the Main Relay
14 Green/Red 5V outputs for sensors 5V voltage output for TPS, electronic throttle and pedal sensors
15 Yellow/Blue CAN A (-) CAN A (-)
16 White/Red CAN A (+) CAN A (+)
17
Shielded Cable
(white)
CAM sync signal input Connected to the cam sync sensor (hall or magnetic)
18
Black Shielded
Cable (White)
Magnetic RPM sensor
reference
Connected to the negative wire of the magnetic sensor. When OEM ECU is
reading the sensor in parallel, split this wire with OEM sensor negative - Do not
connect when using hall effect sensor.
19
Black Shielded
Cable (Red)
RPM signal input
Connected to the crank trigger sensor (hall or magnetic) or to the distributor.
To VR sensors, use the shield wire the sensor shield. To Hall sensor, use the
shield as negative
20 White #1 Input #1
Sensors input
21 White #2 Input #2
22 White #3 Input #3
23 White #4 Input #4
24 White #5 Input #5
25 White #6 Input #6
26 White #7 Input #7
4.1 Harness connections A connector - FT450 / FT550 and LITE
Characteristics
1 - Outputs that can be used as “Tach output”: Blue #3, blue #6, gray #4 (FT450)
2 - The blue output #6 can be used as the fth ignition output (FT450)
3 - In order to avoid backfeeding when using the blue outputs or gray output #4 to power relays or actuators, make sure the switched 12V that powers them is the same that powers the ECU.
4 - When using as an injector output a Peak and Hold driver must be used

FT450 / FT550 / FT550LITE / FT600
11
A-connector diagram - FT450 / FT550 and LITE
Blue - Output #1
Blue - Output #2
Blue - Output #3
Blue - Output #4
Blue - Output #6
Blue - Output #5
Power Ground
Gray - Output #1
5V Sensors
White - Input #1
Gray - Output #2
Gray - Output #3
Gray - Output #4
Battery negative
Red 12V input
from relay
CAN A (-) LOW
CAN A (+) HI
CAM input signal
RPM reference Input
RPM signal Input
White - Input #2
White - Input #3
White - Input #4
White - Input #5
White - Input #6
White - Input #7
1
3
4
5
7
2
6
10
12
13
8
9
11
14
16
17
15 18 19
20
22
25
26
21
23
24
Characteristics

FT450 / FT550 / FT550LITE / FT600
12
Pin Wire Color Function Information
1 Black/White Power ground inputs Directly wired to the battery negative terminal with no seams. Do not tap any
other grounds to this wire, it must run clean straight to the battery negative
terminal.
2 Black/White Power ground inputs
3 Yellow/Blue CAN B (-) CAN B (-)
4 White/Red CAN B (+) CAN B (+)
5 White #8 Input #8
Sensors input6 White #9 Input #9
7 White #10 Input #10
8 Blue #7 Blue output #7
These outputs are usually used for injector control. When needed, they can be
congured as auxiliary outputs.
9 Blue #8 Blue output #8
10 Gray #5 Gray output #5
These outputs are usually used for ignition control.
When needed, they can be set up as injector outputs or auxiliary outputs.
11 Gray #6 Gray output #6
12 White #11 Input #11
Sensors input
13 White #12 Input #12
14 Blue #9 Blue output #9
These outputs are usually used for injector control. When needed, they can be
congured as auxiliary outputs.
15 Blue #10 Blue output #10
16 Gray #7 Gray output #7 These outputs are usually used for ignition control.
When needed, they can be set up as injector outputs or auxiliary outputs
2
.
By standard, Gray output #8 is used as a tachometer output
1
. (FT550)
17 Gray #8 Gray output #8
18 White #13 Input #13 Sensors input or Power Shift Input - Blue wire Strain gage sensor (positive)
19 White #14 Input #14 Sensors input or Power Shift Input - Orange wire Strain gage sensor (negative)
20 Blue #11 Blue output #11
These outputs are usually used for injector control. When needed, they can be
congured as auxiliary outputs.
21 Blue #12 Blue output #12
22 Yellow #1 Yellow output #1
Electronic throttle and step motor outputs. Also used as injection or auxiliary
outputs (cooling fan, fuel pump, etc.)
23 Yellow #2 Yellow output #2
24 Yellow #3 Yellow output #º3
25 Yellow #4 Yellow output #4
26 Green/Black Ground for sensors Connected the sensors ground
4.2 Harness connections B-connector (FT550 / LITE Only)
1 - In order to avoid backfeeding when using the blue outputs or gray output #4 to power relays or actuators, make sure the switched 12V that powers them is the same that powers the ECU.
2 - When using as an injector output a Peak and Hold driver must be used
Characteristics

FT450 / FT550 / FT550LITE / FT600
13
Power ground
Power ground
CAN B (-) LOW
CAN B (+) HI
White - Input #9
White - Input #8
White - Input #10
Blue - Output #7
Blue - Output #9
Blue - Output #11
Blue - Output #8
Gray - Output#5 Gray - Output#6
White - Input #11
White - Input #12
Blue - Output #10
Gray - Output#7
Gray - Output#8
White - Input #13
White - Input #14
Blue - Output #12
Yellow - Output #1
Yellow - Output #2
Yellow - Output #3
Yellow - Output #4
Sensors ground
1
3
4
5
7
2
6
10
12
13
8
9
11
14
16
17
15 18 19
20
22
25
26
21
23
24
B-connector diagram - FT550 / LITE
Characteristics

FT450 / FT550 / FT550LITE / FT600
14
Pin Wire Color Function Information
1 Blue#1 Blue output #1
These outputs are usually used for injector control. When needed,
they can be congured as auxiliary outputs.
2 Blue#2 Blue output #2
3 Blue#3 Blue output #3
4 Blue#4 Blue output #4
5 Blue#5 Blue output #5
6 Blue#6 Blue output #6
7 Blue#7 Blue output #7
8 Blue#8 Blue output #8
9 Blue#9 Blue output #9
10 Blue#10 Blue output #10
11 Blue#11 Blue output #11
12 Blue#12 Blue output #12
13 Blue#13 Blue output #13
14 Blue#14 Blue output #14
15 Blue#15 Blue output #15
16 Blue#16 Blue output #16
17 Black/White Power ground input
Directly wired to the battery negative terminal with no seams. Do not
tap any other grounds to this wire, it must run clean straight to the
battery negative terminal.
18 Gray#1 Gray output#1
These outputs are usually used for ignition control.
When needed, they can be set up as injector outputs or auxiliary
outputs.
By standard, Gray output #8 is used as a tachometer output
1
.
19 Gray#2 Gray output#2
20 Gray#3 Gray output#3
21 Gray#4 Gray output#4
22 Gray#5 Gray output#5
23 Gray#6 Gray output#6
24 Gray#7 Gray output#7
25 Gray#8 Gray output#8
26 Yellow#1 Yellow output#1
Electronic throttle and step motor outputs. Also used as injection or
auxiliary outputs (cooling fan, fuel pump, etc.)
27 Yellow#2 Yellow output#2
28 Yellow#3 Yellow output#3
29 Yellow#4 Yellow output#4
30 Yellow#5 Yellow output#5
31 Yellow#6 Yellow output#6
32 Yellow#7 Yellow output#7
33 Yellow#8 Yellow output#8
34 Red 12V input from relay Connected to the pin 87 of the Main Relay.
4.3 Harness connections A-connector (FT600)
Characteristics
1 - The switched 12v on loads like relays and solenoids, must be the same as the ECU when being triggered by the gray output 8, to avoid backfeeding that will keep the ECU powered on (FT600)

FT450 / FT550 / FT550LITE / FT600
15
A-connector diagram
Blue output#1
Blue output#10
Blue output#2
Blue outupt#11
Blue output#3
Blue output#12
Blue output#4
Blue output#13
Blue output#6
Blue output#14
Blue output#15
Blue output#7
Blue output#16
Blue output#8
Black/white -
Blue output#9
Yellow output#1
Gray output#1
Yellow output#2
Gray output#2
Yellow output#3
Gray Output#3
Yellow output#4
Gray output#4
Gray output#5
Gray output#6
Yellow output#6
Yellow output#7
Gray output#7
Yellow output#8
Gray output#8
Red - 12V
input from relay
Power Ground
Yellow output#5
Blue output#5
12
3
4
5
6789
10
11 12
13
14
15 16
17
18 19 20
21 22
23 24 25
26
27
28
29
30 31 32 33 34
Characteristics

FT450 / FT550 / FT550LITE / FT600
16
Pin Wire Color Function Information
1 Red RPM signal input
Connected to the crank trigger sensor (hall or magnetic) or to the distributor.
To VR sensors, use the shield wire the sensor shield. To Hall sensor, use the
shield as negative
2 White
Magnetic RPM sensor
reference
Connected to the negative wire of the magnetic sensor. When OEM ECU is
reading the sensor in parallel, split this wire with OEM sensor negative - Do not
connect when using hall effect sensor.
3 Red Cam sync signal input Connected to the cam sync sensor (hall or magnetic)
4 White Cam sync reference input
Connected to the cam sync sensor (hall or magnetic)
- Use the shield as negative to the sensor
5 White#1 White input#1 Default: O2 sensor input
6 White#2 White input#2 Default: two-step input
7 White#3 White input#3 Default: Air conditioning button
8 White#4 White input#4 Default: Oil pressure
9 White#5 White input#5 Default: Coolant temperature
10 Black Battery negative input
Connected directly to the battery negative with no seams. Do not connect
this wire to the chassis, engine block or head.
11 Yellow/Blue CAN A LOW
CAN A
12 White/Red CAN A HIGH
13 White#6 White input#6 Default: fuel pressure
14 White#7 White input#7 Default: Air temperature
15 White#8 White input#8 Default: pedal#2 signal input
16 White#9 White input#9 Default: pedal#1 signal input
17 White#10 White input#10 Default: MAP signal output, electronic throttle 1B input signal
18 Black/White
Power ground inputs
Directly wired to the battery negative terminal with no seams. Do not tap any
other grounds to this wire, it must run clean straight to the battery negative
terminal.
19 Black/White
20 White/Red CAN B HIGH CAN B HIGH
21 White#11 White input#11 Default: TPS sensor
22 White#12 White input#12
Sensors input
23 White#13 White input#13
24 White#14 White input#14
25 White#15 White input#15
26 Red 12V input from relay Connected to the pin 87 of the Main Relay
27 Green/Red 5V outputs for sensors 5V voltage output for TPS, electronic throttle and pedal sensors
28 Yellow/Blue CAN B LOW CAN B LOW
29 Green/Black Ground for sensors Connected the sensors ground
30 White#16 White input#16
Sensors input31 White#17 White input#17
32 White#18 White input#18
33 White#19 White input#19 Power Shift Input - Blue wire Strain gage sensor (positive signal)
34 White#20 White input#20 Power Shift Input - Orange wire Strain gage sensor (negative signal)
4.4 Harness connections B-connector (FT600)
Characteristics
NOTE
When using the GearController function connect the
White wire from the shifter to ground for sensors
Green/Black (pin #29).
IMPORTANT
Fuel only: When using this option, the RPM
signal input cannot be connected to a coil
high voltage signal because the input has no
protection and will damage the trigger input on
the ecu. Please use a tach output, another rpm
source or an ignition coil to tach adapter module
to avoid damage to the unit.

FT450 / FT550 / FT550LITE / FT600
17
GND
White magnetic RPM-
Yellow/Blue - CAN_A_LOW
Red- sync signal inputCAM
White/Red - CAN_A_HIGH
White sync- sensor referenceCAM
White input#6
White input#1
White input#2
White input#8
White input#3
White input#9
White input#4
White input#10
White input#5
Red - 12V input from relay
Green/Red -
Black/White - Power Ground
Yellow/Blue CAN_B_LOW
Red/white CAN_B_HIGH
Green/Black - Ground for sensors
White input#11
White input#16
White input#12
White input#13
White input#17
White input#18
White input#14
White input#19
White input#15
White input#20
Black Shielded Cable
Gray Shielded Cable
White input#7
Red RPM signal input
sensor reference
5V output sensorsfor
12
3
4
5
6789
10
11 12
13
14
15 16
17
18 19 20
21 22
23 24 25
26
27
28
29
30 31 32 33 34
DO NOT USE AS GROUND
FOR HALL EFFECT SENSORS
DO NOT USE AS GROUND
FOR HALL EFFECT SENSORS
Black/White - Power Ground
4.5 Output table of FT
Wire
color
Output type
Nominal current
for negative
activation (0V) for
each output
Nominal
current for
positive
activation for
each output
Application Notes
Blue
Open collector
(Lo side)
5A* ***
Can’t activate by
positive
Fuel injectors, relays,
solenoid valves
Triggers loads always by negative
Gray
Open collector
with current
source in 5V
(Lo side)
1A* *** 30mA in 5V
Inductive ignition control,
fuel injectors, relays,
solenoid valves
Triggers loads always by negative
Yellow
PUSH-PULL or
HALF BRIDGE
5A* *** 5A** in 12V
Electronic throttle, step
motor, MSD/M&W and
other ignitions activated
by 12V
When used to control relays, valves or
any other load by negative, there is a
risk of 12V return to the ECU. This will
keep the ECU always powered on.
In this case, an external diode
or a relay with built-in diode is
required for protection.
Green/
Red
5V output - 250mA in 5V 5V output sensors
Supplies 5v for sensors such as TPS,
driveshaft, PS150, PS300 and etc...
B-connector diagram
Characteristics
* Total max current combined with all outputs triggering loads by negative: (30A - FT550 / LITE and FT600) (10A - FT450) continuous
** Total max current combined with all outputs triggering loads by positive: (20A - FT600) (10A - FT450) continuous
*** Outputs can be automatically disabled for safety when currents above 20% of the rated current are detected
NOTE
Blue outputs cannot control ignition because they do
not have a pullup resistor.

FT450 / FT550 / FT550LITE / FT600
18
4.7 Auxiliary outputs
Outputs can be set up in many different ways, they have different
capacities according to the function. Bellow is some important
information about them:
Blue outputs: by default, used as injector outputs. Each one of
them can control up to:
Impedance higher than 10 Ohms: 24 injectors for the FT550 and
FT600/ 8 injectors for FT450 (amongst all blue outputs)
Impedance between 7 and 10 Ohms: 16 injectors for the FT550
and FT600/ 6 injectors for FT450 (amongst all blue outputs)
The use of a Peak and Hold driver is mandatory when the number
of injectors is higher than the maximum quoted above or when using
low impedance injectors (impedance below 7 Ohms).
During the Engine Setup conguration, blue outputs will be selected
automatically.
When more than 16 injector outputs are needed, the ECU will use
Gray outputs or Yellow output. In this case, the use of a Peak and
Hold driver is mandatory on Gray and Yellow outputs (for saturated
and low impedance injectors).
Blue outputs not used to control fuel injectors may be used as auxiliary
outputs (controlling fuel pump, cooling fan, etc.). In this case, the use
of a relay is mandatory.
Gray outputs: by default, used as ignition outputs. According to
the engine setup, they can be set up as injectors or auxiliary outputs.
During the Engine Setup conguration, ignition outputs will be selected
automatically from Gray #1 to Gray #8 and from Yellow #1 to Yellow
#4 (FT550) or Yellow #8 (FT600).
Gray outputs not used for ignition control can be set up as injectors
outputs (the use of a Peak and Hold driver is mandatory) or as auxiliary
outputs (the use of a relay is mandatory).
Yellow outputs (FT550/LITE and FT600 only): by default, they’re
used as electronic throttle control (Yellow #1 and #2) or stepper motor
control (Yellow #1 to #4).
The yellow outputs that will not be used for electronic throttle control
can be used as auxiliary outputs or for injectors. When using injectors
for the integrated BoostController, the output can be connected directly
to the injector, but when using injectors for fuel, the use of a Peak and
Hold driver is mandatory for both high and low impedance injectors.
This is because this output may present minimal differences in the
injection time when controlling fuel injectors without Peak and Hold.
Tach output: There are some pre-dened outputs for this function,
but in case the output for that is already assigned to something, use
one of the following:
FT450: Gray 4 (Default) or Blue 3 or Blue 6
FT550/LITE/FT600: Gray 8 (Default) or any of the yellow outputs
4.8 Internal MAP sensor
This ECU is equipped with an internal MAP sensor. Use a 6mm
pneumatic hose (4mm internal diameter) to connect the sensor
to the intake manifold. Pneumatic hoses are exible, durable and
highly resistant. Usually found in black or blue colors.
Silicon hoses are not recommended because they can be easily bent,
blocking vacuum/boost readings on the ECU MAP sensor.
Use a hose exclusively for FT MAP sensor, avoiding splitting it with
valves, gauges, etc. Connect it to any spot between the throttle and
the engine head. Its length must be as short as possible to avoid
lags and errors on the sensor readings. When using individual throttle
bodies, it is a good idea to connect all intake runners into a single point
and then connect to the FT MAP sensor; otherwise, MAP readings
may be erratic or inaccurate.
4.9 USB port
The USB cable is used to update the ECU rmware version, setup
maps and adjusts trough a computer and FTManager software and
download data recorded by the internal datalogger.
4.10 FuelTech CAN network
FuelTech CAN port is a 4 way connector placed on the wiring
harness of the ECU and is responsible for ECUs communication with
other FT modules (as KnockMeter and GearController) and Racepak
dashboards. A FuelTech CAN-CAN cable is used to establish a
connection between them.
Characteristics
4.6 PowerShift Connector (FT550 / LITE and
FT600)
The FT600 wiring harness comes with the gear strain gauge sensor
connector. In case the vehicle isn’t equipped with a gear strain gauge,
this connector can be removed and it’s white inputs can be used for
other functions.
FuelTech unit connected to CAN network (WB-O2 NANO,
Alcohol O2, EGT8, WB-O2 SLIM)
4
3
12
3
4
5
6789
10
11 12
13
14
15 16
17
18 19 20
21 22
23 24 25
26
27
28
29
30 31 32 33 34
White Red/- CAN_A
Yellow Blue/- CAN_A
4
3
WBO
2
NANO
4
3
Terminator
Connector B - FT600
WARNING
For the correct operation of the CAN Network,
its mandatory to use the CAN resistor as shown
in the following image.

FT450 / FT550 / FT550LITE / FT600
19
5. First steps with FuelTech read before
installation
This chapter is a step-by-step guide that must be followed to start FT
basic setup before electric installation, as the function of each wire
may vary according to engine setup (number of cylinders, injectors
control mode, ignition coils and auxiliary outputs).
1. Connect the ash drive in the PC USB port and install the
FTManager software. Remember to check if the software and
the ECU are in the latest version at www.fueltech.net.
2. Connect FT to the computer using the USB cable included on
the package. The ECU will be powered up;
3. With the ECU in hands go through chapter 6, that introduces all
basic information about menu navigation and operation;
4. Chapter 7 guides the user through all the menus where data
regarding the engine must be setup (crank trigger signal, injectors
and ignition control modes, etc.);
First steps with FT600
5. The last step before the electric installation is to check harness
connections. Go to the “Engine Setting” menu then click the
last option “Wiring harness diagram”. Check and write down the
connections and use it as guide to know how functions were
allocated to the pins.
6. Chapters 8 to 14 guide through details related to the electrical
installation of injectors, coils, 12V inputs, grounds, sensors,
etc. Chapter 25 shows full wiring diagrams as example for your
installation;
7. Chapter 15 gathers information on sensors settings for
temperature, pressure, RPM, speed, etc.
8. With the electric installation nished, proceed to chapter 15.14
and check all the information needed for the rst start of the
engine, ignition calibration, sensors checking, etc.
9. Lastly, chapters 17 to 24 show detailed descriptions about all
functions of the ECU. It is very important and informative to read
these sections, as they also outline every function and operation
that the FT can perform.
4.11 Connector disassembly
The connectors are built in a way that it’s terminals can be easily taken
out of the housing.
To do so follow these instructions:
a - Remove the connector from the ECU
b - Push down the white lock (1)
c - Pull the wire (2) out of the connector
d - On the other side of the connector, push down the 2 small white
locks (3)
1
2
3

FT450 / FT550 / FT550LITE / FT600
20
Getting to know the ECU
6.2 Main menu
Navigation through touchscreen is intuitive, because the ECU display
makes the access to information very easy, eliminating physical
buttons. So, all changes on maps, setups and functions are done
by light touches on the screen.
To enter menus, press the screen twice, just like a double click. This
is a feature that prevents the user from entering the wrong menu when
managing the ECU inside the car.
4 - Dashboard: Shows real time engine information (RPM,
Temperature, pressure, timing, injection time, etc.)
5 - Fuel Tables Adjust: Main fuel map, overall fuel trim, RPM
compensation, TPS idle fuel table accel fuel enrich and
decay, engine and intake temp, compensation battery voltage,
compensation, post start enrich, etc
6 - Ignition Tables Adjust: Main ignition map, overall ignition
trim, MAP / TPS compensation, air and engine temperature
compensations , individual cylinder trim, timing split, etc
7 - Alert Settings: Access to shift alert settings, safe mode RPM
limiter, alerts by fuel and oil pressure, TPS, etc
8 - Engine Settings: Engine basics info as ignition mode, RPM
signal, pedal/throttle settings, idle actuator, injectors deadtime,
ignition dwell, wiring harness diagram
6. Getting to know the ECU
6.1 Dashboard
The ECU has a whole new dashboard, completely redesigned and
customizable to improve visualization in any kind of vehicle.
1- Top LED bar (shift lights only FT600): congurable shift light
by gear
2- Side LEDs (alerts only FT600): many different options of
activation and alerts
3- Dashboard: fully customizable and redesigned with new gauges
(3x2 size), besides a G meter
1
22
3
9 - Interface Settings: LCD backlight and alert sounds, dashboard
congs, measurement units, touchscreen calibration serial
number and version
10 - File Manager: Used to generate FuelTech Base Map, copy,
delete and manager map les
11 - Sensors and Calibration: Setup and calibrate sensors,
electronic throttle, O2 sensor, etc
12 - Other Functions: Internal datalogger, RPM limiter, fuel cut-off,
thermatic fans, progressive nitrous, boost control idle speed, etc.
13 - Drag Race Features: Burnout mode 3-step, 2-step, spool
assist table, Gear shift output, time based enrichment and timing
Pro-Nitrous
14 - Favorites: Shortcuts to the most used menus and functions.
15 - Diagnostic Panel: Check inputs and outputs status and all
information of what the ECU is reading and doing is real time
Main Menu
Fuel
Tables Adjust
Ignition
Tables Adjust
Engine
Settings
Dashboard
4 5 6 7 8 9
101112131415
You can navigate through all menus with FTManager (available in the
ash drive) and mini USB cable. The software initial screen is shown
below:
16 - Quick access
17 - Function table
18 - Help
19 - Function or map graph
20 - Real time dashboard
When entering a map or setting up a function, there are some buttons
on the screen that act as described below:
21 - Red area shows the point selected for editing
22 - Yellow area is shown only when the engine is running and shows
the actual condition of MAP, temperature, TPS, etc
16
17
20
18
19
NOTE
For more info check chapter 23.11.
/