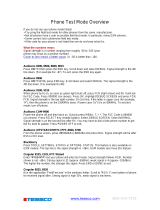
Page is loading ...

Headset Jack
Note: Remove back
cover and battery to
insert or remove SIM
card
Left Display key –
Perform functions
identified by left
display prompt
Volume keys
Send key –
Send and answer calls
Voicemail Access key
End key – End calls /
Power On/Off
Earpiece
Display
Menu key
Right Display key –
Perform functions
identified by right
display prompt
4-Way Navigation –
Scroll through menus
and lists
<+> key
Microphone
Special Instructions for your
MOTOROLA V551
Please read your oneRoam™ Service User Guide first,
and then refer to this insert as required.

MOTOROLA V551
General Instructions
Powering On Your Phone
Press and hold <>to turn the phone on and off.
Answering Calls
To answer an incoming call, flip open your phone.
The <+> Sign
The <+> sign is obtained by pressing and holding <0> on
your MOTOROLA V551 phone. This symbol is required
when dialing internationally, and in a few other instances
referred to in your oneRoam Service User Guide.
Voicemail Access
Press and hold <1> to access your voicemail.
To Change Band Frequency
Use 900/1800 for most of Europe, Asia and Africa. Use 1900 for
North America, most of South America and the Caribbean.
1. Press <Menu>.
2. Scroll down to Settings, press <Select>.
3. Scroll to Network, press <Select>.
4. Scroll to Network Setup, press <Select>.
5. Press <Change> to change to 900/1800 or 1900, press
<Select> when highlighted.
6. Press <Done> to complete the change.
Text Messaging Instructions
You can send and receive text messages on your
MOTOROLA V551 phone. Please review the oneRoam
Service User Guide for general instructions, detailed
examples and information on your Text Messaging address.

MOTOROLA V551
Receiving Text Messages
1. Press <Menu> and scroll to Messages, press
<Select>.
2. Scroll to Message Index, press <Select>.
3. Select new message and press <Select>.
4. Scroll to read through your message.
5. Use arrows and/or follow prompts to view, delete, and
save messages.
Sending Text Messages to another cellular phone
1. Press <Menu>, scroll to Messages, press <Select>.
2. Scroll to Create Message, press <Select>.
3. Scroll to New Short Msg and press <Select>.
4. Type your message using the keypad. Press <OK>,
followed by <Done> when message is complete.
5. Scroll to One Time Entry and press <Select>.
6. Enter the phone number your are sending a message to
and press <OK>.
7. Press <Send>.
Sending Text Messages to an email address
Note: Sending Text Messages to an email address is not available
with all services. Refer to your oneRoam Service User Guide to
confirm if this is available with the service you are using.
1. Follow steps 1-3 as noted in the previous section.
When prompted for the phone number, enter the 3-digit
number specified in your oneRoam Service User
Guide, press <OK> when finished. Press <Send>.
2. Begin with the target email address. Be sure to leave a
space between the email address and the start of your
message. When finished press <OK>.
3. Scroll to One Time Entry and press <Select>.
Example: [email protected] <space> Having a great trip!

MOTOROLA V551
Note: To insert '@' symbol, press <1> and scroll to the right. Press
<Select> when the '@' symbol is highlited.
Troubleshooting Details
Use this section in combination with the oneRoam Service User
Guide provided if you are having trouble using your phone.
To change your Network Selection
1. Press <Menu>, scroll to Settings, press <Select>.
2. Scroll to Network, press <Select>.
3. Scroll to Available Networks, press <Search>.
4. Scroll through available networks and select a network
that you are not currently on, press <View>.
5. Select Registr. to complete the change.
6. Place a test call.
Tip: When placing a test call, call Roadpost and avoid airtime
charges. Dial +1.905.272.5665 – always a free call from your
Roadpost phone.
/