Panasonic TXL47ET60B Quick start guide
- Category
- LCD TVs
- Type
- Quick start guide
This manual is also suitable for
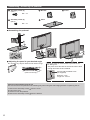
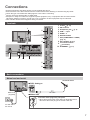
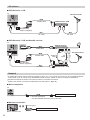
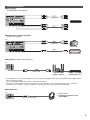
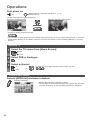
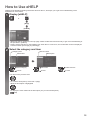
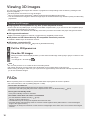
Panasonic TXL47ET60B is a high-definition LCD television with a range of features for enjoying TV shows, movies, and other media. It has a large 47-inch screen with LED backlighting for excellent picture quality and vibrant colors. The TV also supports 3D viewing with compatible content and glasses, allowing you to enjoy immersive entertainment in your own home. Additionally, it has built-in wireless LAN connectivity, enabling you to access streaming services, browse the internet, and mirror content from compatible devices.
Panasonic TXL47ET60B is a high-definition LCD television with a range of features for enjoying TV shows, movies, and other media. It has a large 47-inch screen with LED backlighting for excellent picture quality and vibrant colors. The TV also supports 3D viewing with compatible content and glasses, allowing you to enjoy immersive entertainment in your own home. Additionally, it has built-in wireless LAN connectivity, enabling you to access streaming services, browse the internet, and mirror content from compatible devices.


-
 1
1
-
 2
2
-
 3
3
-
 4
4
-
 5
5
-
 6
6
-
 7
7
-
 8
8
-
 9
9
-
 10
10
-
 11
11
-
 12
12
-
 13
13
-
 14
14
-
 15
15
-
 16
16
-
 17
17
-
 18
18
-
 19
19
-
 20
20


Panasonic TXL47ET60B Quick start guide
- Category
- LCD TVs
- Type
- Quick start guide
- This manual is also suitable for
Panasonic TXL47ET60B is a high-definition LCD television with a range of features for enjoying TV shows, movies, and other media. It has a large 47-inch screen with LED backlighting for excellent picture quality and vibrant colors. The TV also supports 3D viewing with compatible content and glasses, allowing you to enjoy immersive entertainment in your own home. Additionally, it has built-in wireless LAN connectivity, enabling you to access streaming services, browse the internet, and mirror content from compatible devices.
Ask a question and I''ll find the answer in the document
Finding information in a document is now easier with AI
Related papers
-
Panasonic TXL42FT60B Quick start guide
-
Panasonic TXP60ZT65B Quick start guide
-
-
Panasonic TXL50E6Y Quick start guide
-
-
-
-
Panasonic TXL42ET50E Operating instructions
-
Panasonic TX47AS650B Operating instructions
-