Page is loading ...


2

3
Contents
Installation…………………………………………..…..Page 5
Electrical and I/O……………………………………......Page 8
Operating Principle………………………………..........Page 11
Specifications………………...……………………..…..Page 12
Operation……………………………………………….Page 14
Menu Screens... ……………………………..................Page 15
Installation Tips and Troubleshooting……………….…Page 19
Factory Service Information……………………………Page 22
Connector Index ……………………………………….Page 23

4
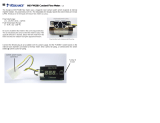
1.0 Introduction.
1.1 This manual covers the following Omega instruments.
1.1.1 Omega FLR2000 series Flow Meters.
1.1.2 Omega FLV2000 series Flow Controllers.
NOTE: It is important that you read this manual before
installing or operating any of the instruments. Some sections
apply to all of the listed instruments and will be marked
accordingly. There are sections which apply only to the series
you have purchased and these are also marked accordingly.
1.2 Unpacking Your Instrument.
1.2.1 Inspect Carton for Visible Damage.
Your instrument was packed to withstand normal
shipping. If there is any visible damage to the carton,
you should contact the shipping company immediately.
1.2.2 Unpack Your Instrument.
Open the container carefully and inspect for concealed
shipping damage. If there is damage, this should be
reported to the shipping company and a copy sent to your
Omega representative.
Please verify that all items on the Packing List are in the
box. Any shortages should be reported immediately.
1.2.3 Returning Instrument for Repair.
Direct all warranty and repair requests/inquiries to the
OMEGA Customer Service Department. BEFORE
RETURNING ANY PRODUCT(S) TO OMEGA,
PURCHASER MUST OBTAIN AN AUTHORIZED
RETURN (AR) NUMBER FROM OMEGA’S
CUSTOMER SERVICE DEPARTMENT (IN ORDER
TO AVOID PROCESSING DELAYS). The assigned AR
number should be marked on the outside of the return
package and on any correspondence. The purchaser is
responsible for shipping charges, freight, insurance and

5
proper packaging to prevent breakage in transit. In the
event that instruments returned for repair are found to be
free from warranted defects, then Omega may, at its
discretion, charge a fee to the customer for service. The
customer shall be notified before repairs are made as to
the warranty status of the needed repair. All shipping
charges shall be paid by the customer.
All instruments returned for servicing must have a signed
certification attached which states that returned
instruments have been purged and neutralized of any
hazardous materials including but not limited to
corrosive, radioactive, toxic or infectious. This
certification form is available from Omega customer
service.
2.0 Installation.
2.1 Primary Fluid Connections.
Omega FLR2000 series Flow Meters and Omega FLV2000
series Flow Controllers are manufactured with a 1/2” NPT
internal thread on both the inlet and outlet ports. Omega kit
model FLR2000-MC is available for installation of these
instruments utilizing standard O.D. tubing sizes of 1/4”, 3/8”
and 1/2”. The kit material is black polypropylene.
Inspect all parts of the system including pipe, tubing and
fittings for dust or other contaminants before assembly. Omega
FLR2000 series Flow Meters and Omega FLV2000 series Flow
Controllers are tested with water and then closed with a plastic
plug before shipping. Upon removal of the plugs, water may
drip from the flow body. You should remove the plugs only in
a location which will not be damaged by a small amount of
water, and the location should also be free of dust or other
contaminants which could enter the chamber.
If Teflon tape is used as a thread sealant for the NPT
connections, you must not allow pieces of the tape to fall into
the flow body as this could clog the orifice. Liquid or paste
thread sealants are not recommended. Thread sealants are not
to be used on the tube fittings. When removing fittings which

6
have been sealed with Teflon tape, you must clean both the
internal and external threads to prevent pieces of tape from
falling into the flow body.
THE DIRECTION OF FLUID FLOW IS LEFT TO RIGHT
WHEN FACING THE METER.
2.2 Omega Accessory FLR2000-MC Fitting Installation.
If the fittings supplied in Omega Accessory FLR2000-MC are
used, the tubing should be inserted as follows.
2.2.1 Loosen the nut sufficiently so that the O-ring is not
compressed.
2.2.2 Using tubing of the O.D. size for which the fitting is
designed, cut the tubing with a square end and inspect to
see that there are no sharp edges that could damage the
O-ring in the fitting.
2.2.3 Insert the tubing carefully, moving the tubing in a slow
circular motion until it passes through the stainless steel
grab ring, the washer and the O-ring, and “bottoms” in
the fitting. You should not have to use excessive force to
insert the tubing. If the tubing does not go in easily then
you should unscrew the nut completely and visually
inspect to verify that the O-ring has not been pushed into
the fitting well. You can push the tube through the O-
ring and into the fitting with the nut out of the way,
however you should be careful to not push the grab ring
farther up the tube than it will be when the nut is
tightened as the grab ring cannot be moved in a
tightening direction on the tube without damaging the
grab ring and/or the tube.
2.2.4 Once the tubing has “bottomed” in the fitting, you should
hand tighten the nut, forcing the grab ring to grip the
tubing surface and compressing the O-ring. The nut
should come close to the body of the fitting but does not
have to contact the body.
2.3 Checking For Leaks.

7
The entire system should be checked for leaks using a fluid
which is not hazardous and using a system pressure that is
within the stated limits of the instruments. *See Maximum
Operating Pressure in section 5.12.
2.4 Mounting.
2.4.1 Locating the Meter.
Omega FLR2000 series Flow Meters and Omega
FLV2000 series Flow Controllers are not attitude
sensitive; however, it is recommended that they be
installed with the flow body in a horizontal position. The
display and membrane switches are designed for use in
the horizontal.
THE DIRECTION OF FLUID FLOW IS LEFT TO RIGHT
WHEN FACING THE METER.
2.4.2 Opening the Box.
It is necessary to open the box in order to access the
mounting holes in the back panel of the box. In order to
remove the front cover, first remove the
power/communication I/O 18 pin plug (this plug can be
removed by rotating the locking ring counterclockwise to
a stop and then gently pulling down on the plug). The
front cover with all the electronic components and
circuitry can then be removed by loosening the four
plastic screws on the front corners of the enclosure (they
have a retainer feature and can be left in the front cover
after loosening about 1/2"), separating the cover from the
back of the box about 4” (enough to turn the front cover
90° to the side) and then disconnecting the sensor cable
connector (the middle connector on the bottom left side
of the circuit board which is attached to a cable running
through the bottom back of the box). The connector
which is removed has a center latch release which must
be depressed before pulling the connector from the
mating end. You can then put the front of the box with
the electronics to one side while mounting the back of the
box to the mounting surface. Please use caution while the
box is open to insure that no liquids or dirt are allowed to

8
contact the interior components of the box as this may
cause premature meter failure.
2.4.3 Attaching the Box.
The box may be attached by inserting a fastener in either
the four holes in the corners of the box (if this is used,
then you must be careful to not damage the threads
toward the upper end of the holes which are used to
attach the front of the box to the back of the box), or you
may use the four holes in the back of the box (if these are
used, there are four plastic covers to place over the screw
heads). The box must be attached securely with the
proper size and style of fasteners for the surface on which
it is to be mounted.
2.4.4 Reinstalling the Front of the Box.
Once the back of the box has been mounted and the
plumbing has been attached, the front of the box can then
be reattached in the reverse manner. To insert the 18 pin
connector (or 7 pin connector), it will be necessary to
pull the lock ring toward the body of the plug to the open
position and rotate the locking ring so that the rib on the
lock ring lines up with the rib on the inside of the plug
body. Then align the locator rib on the plug with the
mating slot on the socket and insert the plug. When the
plug is fully inserted then push the locking ring toward
the panel socket and rotate clockwise until it stops.
3.0 Electrical and I/O
3.1 Power Supply
The standard power supply furnished with all Omega FLR2000
series Flow Meters and Omega FLV2000 series Flow
Controllers consists of an ungrounded wall adapter which plugs
into a 120VAC, 60 Hz standard receptacle and delivers 15 VDC
with maximum 500 mA current to the instrument through pins
1 & 2 of an 18 pin circular watertight industrial I/O connector
which plugs into a mating 18 pin socket on the bottom right
side of the front portion of the enclosure. If it is necessary to
remove the front cover for service, first remove the
power/communication I/O 18 pin plug (this plug can be
removed by rotating the locking ring counterclockwise and then
gently pulling down on the plug). The front cover with all the

9
electronic components and circuitry can then be removed by
loosening the four plastic screws on the front corners of the
enclosure (they have a retainer feature and can be left in the
front cover after loosening about 1/2”), separating the cover
from the back of the box about 4” (enough to turn the front
cover 90° to the side) and then disconnecting the sensor cable
connector (the middle connector on the bottom left side of the
circuit board which is attached to a cable running through the
bottom back of the box).
3.2 18 Pin Circular Connector.
In addition to providing the power input to the unit, the 18 pin
watertight connector is used to access other I/O functions as
follows (see pin indexing illustration # 1). Any pins not
referenced here are not used or spare:
3.2.1 Power Supply.
Pin 1 is DC power input (+).
Pin 2 is DC power ground (-).
3.2.2 Chassis Grounding.
The unit can be grounded by attaching the green wire
(#7) to a permanent earth ground connection.
3.2.3 Relay Output.
Pin 4 is used for a normally open relay contact.
Pin 6 is used for a normally closed relay contact.
Pin 5 is the common for the relay outputs.
3.2.4 Analog Input.
Pin 8 (red lead marked #8) is used for analog in and
must be 0 to 5 VDC.
Pin 9 (blue lead marked #9) is the ground pin for analog
in.
3.2.5 Analog Output #1.
Pin 11 (orange lead marked # 11) is used for analog out
(+) signals and this can be 0 to 5 VDC or 4 to 20
mA. This option must be selected when placing an
order. If 4 to 20 mA is not specified, then it will be
set at 0 to 5 VDC.

10
Pin 12 (violet lead marked # 12) is analog out (-) or
ground.
3.2.6 Analog Output # 2.
Pin 14 (yellow lead marked # 14) is used for analog out
(+) signals and this can be 0 to 5 VDC or 4 to 20
mA. This option must be selected when placing an
order. If 4 to 20 mA is not specified, then it will be
set at 0 to 5 VDC.
Pin 15 (brown lead marked # 15) is analog out (-) or
ground.
Analog Out #2 is used for the control output on
Controller models.
3.2.7 Digital Input.
Pin 17 will accept 0 to 5 VDC digital inputs and is TTL-
CMOS compatible.
Pin 18 is the digital ground.
3.3 7 Pin Circular Connector.
This connector is used for RS232 serial communication as
follows (see pin indexing illustration #1). Any pins not
referenced here are not used or spare:
3.3.1 Serial Communication.
Pin 2 is used to transmit data from the unit to a remote
computer.
Pin 3 is used to receive data from a remote computer.
Pin 5 is a ground pin.
3.3.2 Factory Use only.
Pin 4 is for use by the factory only. Any use by the
purchaser will void the warranty.
3.4 Accessory Cables.
3.4.1 Standard Cable.
The only accessory cable supplied with Omega FLR2000
series Flow Meters and Omega FLV2000 series Flow
Controllers is an ungrounded wall adapter which plugs
into a 120VAC, 60 Hz standard receptacle and delivers
15 VDC with maximum 500 mA current to the

11
instrument through pins 1 & 2 of the 18 pin circular
watertight industrial I/O connector which plugs into a
mating 18 pin socket on the bottom right side of the front
portion of the enclosure.
3.4.1.1Meter.
The cable supplied with the meter has additional
flying leads for analog output and chassis ground.
The yellow lead (#14) is for analog output (+) and
the brown lead (#15) is for analog output (-). The
green lead (#7) is a chassis ground.
3.4.1.2Controller.
The cable supplied with the controller has
additional flying leads for 1 analog input, 2 analog
outputs, and chassis ground. Analog input has a
red lead (#8) for analog in (+) and a blue lead (#9)
is for analog in (-). Analog output #1 has an
orange lead (#11) for analog out (+) and a violet
lead (#12) for analog out (-). Analog output #2 has
a yellow lead (#14) for analog out (+) and a brown
lead (#15) for analog out (-). The green lead (#7) is
a chassis ground.
3.4.2 Custom Cables.
Custom cables to access all of the available inputs and
outputs can be purchased separately. You may order
these at the time the original order is placed or at any
time afterwards. Please call the factory for pricing.
4.0 Operating Principle.
Omega FLR2000 series Flow Meters and Omega FLV2000 series
Flow Controllers are based on the measurement of a pressure drop
across a restriction. From this measured pressure drop, the volumetric
flow rate is determined. Because the flow does not behave in a purely
inviscid manner, a simple loss coefficient can be experimentally
determined and applied. The volumetric flow rate is related to the
measured pressure drop as found in Equation 1.

12
−
∆
=
1
2
2
2
1
1
A
A
P
KAQ
ρ
(Equation 1)
Where:
K
= experimentally determined loss coefficient
P
∆
= measured pressure drop across restriction
ρ
= density of fluid or gas
1
A = cross-sectional area upstream of restriction
2
A = cross-sectional area downstream of restriction
5.0 Specifications – Omega FLR2000 series Flow Meters and Omega
FLV2000 series Flow Controllers.
5.1 Flow Range: .03 to 475GPH
5.2 Flow Medium: The Omega FLR2000 series Flow Meters
and Omega FLV2000 series Flow Controllers are designed for
liquids.
5.3 Flow Units: Cubic centimeters per minute (CCM) is
default. Select GPM, GPH or LPM options from menu.
Contact factory for customized units.
5.4 Calibration: Performed at standard conditions (25°C and
14.7 psia).
5.5 Accuracy: ± 1% Full Scale.
5.6 Repeatability: ± 0.5% Full Scale.
5.7 Linearity: ± 0.25%
5.8 Temperature Coefficient: .05%/degree C
5.9 Temperature Range: 0 to 70 degrees C

13
5.10 Turndown Ratio: 50:1
5.11 Response Time (typical): 50 milliseconds
5.12 Maximum Pressure: 250 PSIG
5.13 Relative Humidity Range (ambient): 0 to 100%
5.14 Attitude Sensitivity: None. Unit is designed to be installed
with the flow body in a horizontal position for operation of
membrane switches.
5.15 Input Signals: 1 Digital input – TTL/CMOS compatible
and 1 analog input – 0-5 VDC equals maximum flow setting.
5.16 Output Signals: 2 Analog 4-20 mA (standard) outputs or 0-5
VDC (optional) outputs (one output drives valve on
Controllers), 1 RS232 serial port (19200 baud rate – full duplex
operation on separate 7 pin connector), and 1 relay output
(SPDT 1 amp).
5.17 Supply Current: 0.25 Amp with back lighting on meters and
.45 amp with back lighting on controllers.
5.18 Supply Voltage: 15.0 VDC maximum @ 300 mA maximum
current on meters and 500 mA maximum current on controllers.
5.19 Supply Voltage – 4-20 mA output models: Loop powered –
no supply necessary.
5.20 Power Consumption: less than 3.5 watts on meters and 6
watts on controllers.
5.21 Indicating Display: 4 line x 20 character LCD – back lighted
5.22 Human Interface: Membrane Touch Switch with menu
driven screens with audible beep standard.
5.23 Connector Electrical: Serial connector is 7 pin circular
watertight Female, I/O connector is 18 pin circular watertight
female.

14
5.24 Connector Mechanical: 1/2” NPT standard, 3/4"
optional w/high flow model.
5.25 Wetted Materials (Standard): PVC
5.26 Wetted Materials (Optional): CPVC, 316 L Stainless,
Teflon, Kel-F, Alloy.
5.27 Dimensions: 7.125” wide x 10.25” tall x 4.875” deep
5.28 Pressure Drop (Typical Full Scale): 20-60 psi
5.29 Totalizer: Totalizes flow over specified time with reset.
5.30 Relay Output Standard: .5 Amp, Single Pole, Double
Throw.
5.31 Aggressive, Corrosive, Abrasive Medias: Call factory for
availability.
6.0 Operation
6.1 Keypad Functions
These functions are the same on Omega FLR2000 series Flow
Meters and Omega FLV2000 series Flow Controllers.
6.1.1 Up Arrow Key – Multi-function.
Use the Up Arrow Key to page through screens from
forward to backward. Use the Up Arrow Key to change
the ten’s value of a setpoint on the setpoint screen
(Controller models only) after selecting either up or
down with the Scroll Key.
6.1.2 Down Arrow Key – Multi-function.
Use the Down Arrow Key to page through screens from
backward to forward. Use the Down Arrow Key to
change the one’s value of a setpoint on the setpoint
screen (Controller models only) after selecting either up
or down with the Scroll Key.

15
6.1.3 Scroll Key – Multi-function.
Use the Scroll Key to select a function on a user
selectable screen. Use the Scroll Key to select Up or
Down while changing setpoints on controller units (the
Scroll Key must be depressed and held with the asterisk
indicating Up or Down, while using the Arrow Key to
change the value).
6.1.4 Enter Key.
Use the Enter Key to store function changes made by the
Scroll Key or setpoint changes (Controller models only)
made by the Scroll Key and Arrow Keys.
Note: When the Enter Key is pressed on a user selectable
screen, an exclamation point will appear on the upper
right hand corner of the display to indicate that the
selected value has been accepted and stored.
6.2 Screens and Screen Actions – Omega FLR2000 series Flow
Meters and Omega FLV2000 series Flow Controllers.
(This section lists screens and screen actions for Omega
FLR2000 series Flow Meters and Omega FLV2000 series Flow
Controllers. Screens which are only active on controller
models are so marked.)
6.2.0 Boot-up Screen.
The boot-up screen will only display on start-up.
Information available on the boot-up needed for
obtaining service is also available on the service screen.
6.2.1 Flow Rate Screen.
This screen displays the flow rate in real time and in the
flow units which were selected (see Flow Units Screen
6.2.6). This is the default screen and the system will
default to this screen from others (except the Flow
Totalizer Screen – see 6.2.4, the Reset Totalizer Screen –
see 6.2.5, the Alarm Message Screen – see 6.2.10, and

16
the Service Screen – see 6.2.12) if no action is taken on a
screen for 10 seconds. When this screen is selected, the
RS232 serial port will stream the actual flow rate at a
baud rate of 19200. The flow rate transmission data is
transmitted approximately every .5 seconds and the unit
is the same as the unit selected on the Flow Units screen.
6.2.2 Setpoint Change Screen. (Only active in controller
model.)
This screen allows the user to change the flow set point
using the local keypad, analog input or serial input (see
Select Input Screen 6.2.7). Use the scroll key to select up
or down. While holding the scroll key depressed on the
desired direction (asterisk must be showing in the proper
box), use the arrow keys to change the setpoint. The left
arrow key changes the 10’s digit and the right arrow key
changes the 1’s digit. After reaching the desired setpoint,
you must release the scroll key and then press the enter
key to retain that setpoint in the memory. An
exclamation point will show in the upper right hand
corner of the screen to indicate that the entry was
recorded.
6.2.3 Orifice Screen.
This screen displays the identification of the orifice that
is installed in the flow body.
6.2.4 Flow Totalizer Screen.
This screen displays the accumulated flow in the selected
units over time in real time (does not default).
6.2.5 Reset Totalizer Screen.
This screen allows the user to reset the totalized flow to
zero on the Flow Totalizer Screen. Use the scroll key to
select reset (by putting an asterisk inside the brackets)
and then push the enter key to complete the reset
operation (an exclamation point will appear in the upper
right corner when the reset has been entered into the
memory). Because this meter is a real-time flow
indicator, the flow totalizer will not be zero when you

17
return to that screen if there is flow. This screen does not
default.
6.2.6 Select Flow Units Screen.
This screen allows the user to select the flow units which
will be displayed on the Flow Screen. There are 4 units
available as standard. Cubic centimeters per minute
(CCM) is default. Select GPM, GPH or LPM options
from menu. Contact factory for customized units Use the
scroll key to select the desired flow unit then use the
enter key to retain the selection in memory. Other flow
units are available.
6.2.7 Select Input Screen. (Only active in controller models.)
This screen allows the user to change the flow set point
input mode by selecting analog input, serial input (com1)
or local keypad. Use the scroll key to select the desired
input and then use the enter key to retain the selection in
memory. If the serial input (com1) is selected and there
is an operating computer wired to the system, then the
keypad setpoint function will automatically be locked
out. If this function is selected without an operating
computer wired to the system, then the unit will default
to local (keypad) input after 10 seconds. This screen
function only controls input to the set point. All other
screens can be viewed when Com1 is selected. Analog
input power is set at the factory for either 0-5VDC or 4-
20 mA and cannot be changed in the field.
6.2.8 System Alarm Screen.
This screen allows the user to select failures which will
send alarm notification. Over differential pressure,
external alarm and no/low flow are standard. Use the
scroll key to select the alarm feature desired (a double
arrow will point to the feature selected). If an asterisk
appears within the brackets and you want to select that
feature, then press the enter key to retain the selection in
memory (the asterisk will then remain in the display).
Scroll to the second and third features and repeat. After
all feature selections have been determined, use the arrow
keys to move to an adjacent screen and then back to
verify your selection. Without pressing the scroll key to

18
activate the pointer, the asterisks will show the features
which are currently in memory. Deselect by using the
scroll key to point to the feature desired. If the feature
was previously selected, then the asterisk will disappear
if you point to that feature. Press the enter key and the
deselection will be retained in memory. You should
always verify your selection by moving to an adjacent
screen and returning. After selecting alarms to be used,
the alarm relay must still be enabled (see also Alarm
Relay Enable Screen 6.2.9). Anyone or all three alarm
features can be selected or deselected at any time. Once
an alarm has occurred, the user must deselect the feature
in order to reset the alarm. If the cause of the alarm has
not been repaired, and the alarm feature is selected again,
then the alarm will reactivate after 10 seconds. If an
alarm occurs, a message will appear on the Alarm
Message screen and the flow rate screen until the alarm is
cleared.
6.2.9 Alarm Relay Enable Screen.
This screen allows the user to enable or disable the
internal relay to send an alarm message to the Alarm
Message Screen or energize the Alarm Beeper or both.
Use the scroll key to select the alarm notification method
desired (a double arrow will point to the feature
selected). If an asterisk appears within the brackets and
you want to select that feature, then press the enter key to
retain the selection in memory (the asterisk will then
remain in the display). Scroll to the second feature and
repeat. After all feature selections have been determined,
use the arrow keys to move to an adjacent screen and
then back to verify your selection. Without pressing the
scroll key to activate the pointer, the asterisks will show
the features which are currently in memory. Deselect by
using the scroll key to point to the feature desired. If the
feature was previously selected, then the asterisk will
disappear if you point to that feature. Press the enter key
and the deselection will be retained in memory. You

19
should always verify your selection by moving to an
adjacent screen and returning. Enabling the Alarm Relay
will activate the alarms that have been selected on the
System Alarm Screen (6.2.8).
6.2.10 Alarm Message Screen
When alarms are activated, this screen will appear as the
default screen until alarm condition is corrected (Alarm
Message Screen can be deactivated by disabling alarm
relay – 6.2.9). Keypad will allow viewing of other
screens, but will default to Alarm Message Screen after 10
seconds of inactivity.
6.2.11 Analog Output Screen.
This screen identifies the analog output of the instrument
as 4-20 mA or 0-5 VDC, which was preset at the factory
by customer’s order.
6.2.12 Service Screen.
This screen contains the Software Version Number,
Model Number, Serial Number, and customer service
phone number. This screen will not default to the Flow
Screen. You must manually move to another screen to
activate the screen default.
7.0 Installation Tips and Troubleshooting.
7.1 Alarm Functions.
7.1.1 Over Differential Pressure Alarm.
When the flow exceeds the high-high limits of the
controller or meter, and the function has been selected,
the alarm screen will indicate an over pressure alarm.
The unit remains in an alarm condition until the flow is
reduced to a safe level and the alarm is cleared. In an
alarm condition you may move to the System Alarm
Screen (6.2.8) and deselect the alarm or you may move to
the Alarm Relay Enable Screen (6.2.9) and disable the
alarm relay, however if the alarm condition is not
removed, then the alarm will reactivate if the alarm and
relay are selected again. The notification of an active

20
alarm will also appear on the Flow Rate Screen (6.2.1)
until it is cleared.
7.1.2 Low Flow/No Flow Alarm.
When the flow rate drops below the minimum flow
capacity of the meter or controller, or to zero, the unit
will indicate a low flow/no flow alarm condition. In a
start-up situation, the flow must first move above the
minimum flow rate after boot-up after which time the
low flow/no flow alarm will be active if it has been
selected and the alarm relay has been enabled. The unit
remains in an alarm condition until the flow has been
restored and the alarm is cleared. In an alarm condition
you may move to the System Alarm Screen (6.2.8) and
deselect the alarm or you may move to the Alarm Relay
Enable Screen (6.2.9) and disable the alarm relay,
however if the alarm condition is not removed, then the
alarm will reactivate if the alarm or relay are selected
again. The notification of an active alarm will also
appear on the Flow Rate Screen (6.2.1) until it is cleared.
7.1.3 External Alarm.
You may activate the alarm from an external source by
using the digital input to send a dry closure or a TTL
signal to the alarm relay. If the digital input is grounded,
the Meter or Controller will, after a 10 second delay,
indicate on the alarm screen that there is an External
Alarm. The alarm indication will remain until the digital
low input is removed or the grounded input is allowed to
go to the high or open state and the alarm is cleared by
deselecting the function. In an alarm condition you may
move to the System Alarm Screen (6.2.8) and deselect
the alarm or you may move to the Alarm Relay Enable
Screen (6.2.9) and disable the alarm relay, however if the
alarm condition is not removed, then the alarm will
reactivate if the alarm or relay are selected again. The
notification of an active alarm will also appear on the
Flow Rate Screen (6.2.1) until it is cleared.
7.2 Filtering.
/