Lexmark 22L0214 - C 770dtn Color Laser Printer Reference guide

Category
Multifunctionals
Type
Reference guide

This manual is also suitable for

Lexmark™ C78x
Quick Reference
Loading paper and
specialty media
Loading 500-sheet trays
1 Remove the tray and place it on a flat, level
surface.
2 Squeeze the front guide lever and slide the
guide to the front of the tray.
3 Squeeze the side guide lever and slide the
guide to the correct position for the size paper
you are loading. Icons along the back of the tray
indicate paper sizes.
4 Flex the sheets back and forth to loosen them,
and then fan them. Do not fold or crease the
paper. Straighten the edges of the stack on a
level surface.
5 Place the paper in the tray as shown, print side
down.Do not load bent or wrinkled paper.
6 Squeeze the front guide lever and slide the
guide until it firmly touches the stack of paper.
7 Reinstall the tray.
8 Make sure the tray is pushed completely into
the printer.
Loading the 2000-sheet tray
1 Pull open the tray.
2 Squeeze the side guide lever, lift the guide, and
place it into the appropriate slot for the size
paper you are loading.
3 Squeeze the two front guide levers and slide the
guide to the correct position for the size paper
you are loading.
4 Slide the bottom support toward the front of the
tray until it touches the front guide.
5 Flex the sheets back and forth to loosen them,
and then fan them.
Do not fold or crease the paper. Straighten the
edges of the stack on a level surface.
6 Place the paper against the back left corner of
the tray, print side down.
Maximum stack height
indicator
LT.LG
LT.LG
EX
EX
A4
A4
B5
B5
A5
A5
Do not load bent or wrinkled print media.
7 Close the tray.
Make sure the tray is pushed completely into
the printer. Do not exceed the maximum stack
height. Overfilling the tray may cause paper
jams.
Loading the multipurpose feeder
1 Open the multipurpose feeder.
2 Squeeze the paper guide lever and slide the
guide all the way toward the front of the printer.
3 Flex the specialty media back and forth to
loosen the stack, and then fan the stack. Do not
fold or crease the media. Straighten the edges
of the stack on a level surface.
4 Arrange the stack of paper or specialty media
correctly for the size, type, and print method you
are using.
5 Place the paper or specialty media, print side
up, along the left side of the multipurpose
feeder, and then push it in as far as it will easily
go.
Do not force the media.
Note: Do not exceed the maximum stack
height. Overfilling the feeder may
cause jams.
6 Squeeze the paper guide lever and slide the
guide until it lightly touches the side of the stack.
7 If you are loading a different type of media than
was previously loaded in the tray, change the
Paper Type setting for that tray on the operator
panel.
Setting the paper type and paper
size
1 Press on the operator panel.
2 Press until you see Paper Menu.
3 Press .
4 Press until you see Paper Size/
Type.
5 Press .
6 Press until you see MP Feeder Size/
Type.
7 Press .
8 Press until the appears next to the
media size you loaded.
9 Press .
10 Press until you see MP Feeder Size/
Type.
11 Press .
12 Press until appears next to the media
type you loaded.
13 Press .
Printing
Printing a document
1 Open the file you want to print.
2 From the File menu, select Print.
3 Verify that the correct printer is selected in the
dialog box.
4 Modify the printer settings as appropriate (such
as the pages you want to print or the number of
copies).
Note: Click Properties or Setup to adjust
printer settings not available from
the first screen, and click OK.
5 Click OK or Print to send the job to the selected
printer.
Printing confidential and other
held jobs
1 With a document open, click File Print.
2 Click Properties, Preferences, Options, or
Setup.
3 Click Other Options, and then click Print and
Hold.
4 Select your job type (Confidential, Reserve,
Repeat, or Verify), and then assign a user
name. For a confidential job, also enter a four-
digit PIN.
5 Click OK or Print, and then go to the printer to
release the job.
6 Press until Held jobs appears, and then
press .
7 Press until Confidential jobs
appears, and then press .
8 Press until the appears next to your user
name, and then press .
9 Enter your PIN.
10 Press until appears next to the job you
want to print, and then press .
After your job prints, it is deleted from printer
memory.
Printing from a USB flash memory
device
A USB Direct interface is located on the operator
panel so you can insert a USB flash memory device
and print PDF documents and supported graphic
files. Printing a document from a USB flash memory
device is similar to printing a held job.
Note: Supported graphic types are .gif,
.jpeg, .jpg, .bmp, .png, .tiff, .tif, .pcx,
and .dcx.
For information regarding tested and approved USB flash
memory devices, see the Lexmark Web site at
www.lexmark.com.
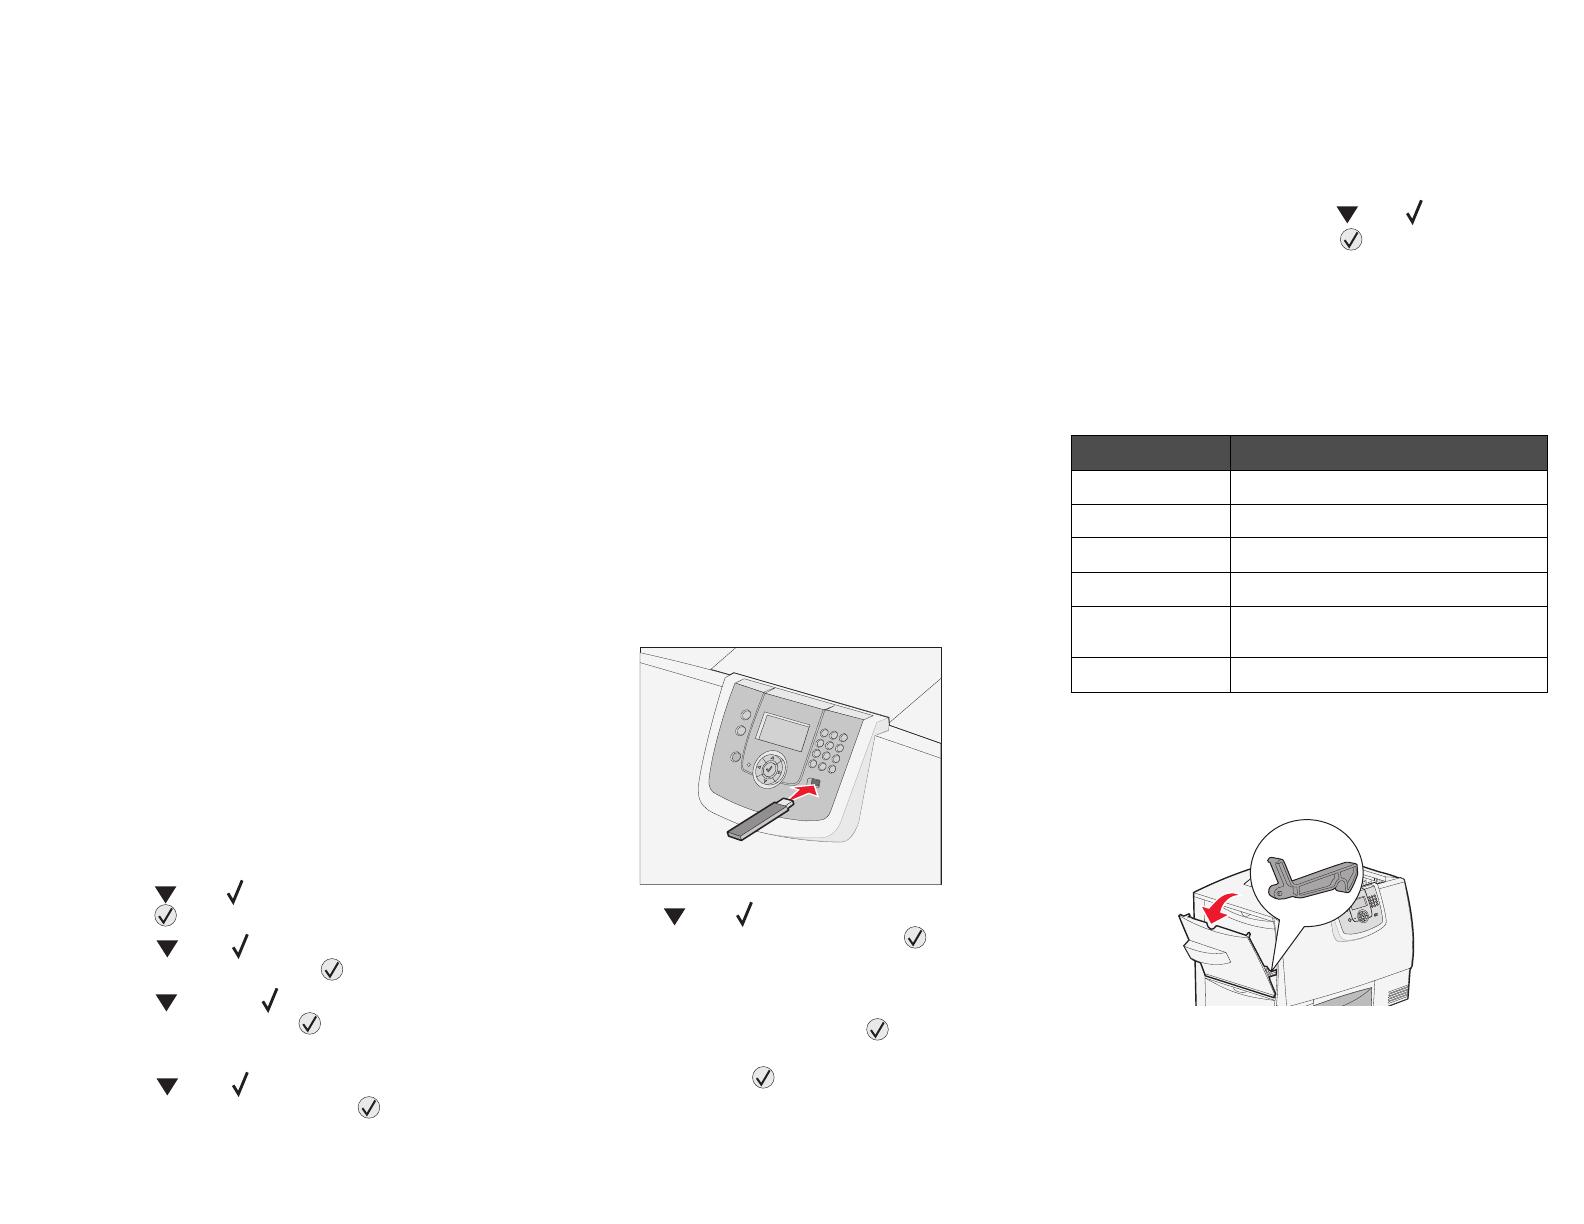
1 Make sure the printer is on and Ready or Busy
appears.
2 Insert a USB flash memory device into the USB
Direct interface.
3 Press until appears next to the document
you want to print, and then press .
A screen asking the number of copies to be
printed will appear.
4 To print only one copy, press , or manually
input the number of copies with the number
pad, then press .
Note: Do not remove the USB flash
memory device from the USB Direct
interface until the document has
finished printing.
Canceling a print job
If the job you want to cancel is printing, and Busy
appears on the display, press until Cancel a
job appears, and then press . The message
Cancel Pending appears until the job is canceled.
Clearing jams
Understanding jam messages
Area A
1 Release the levers on each side of the
multipurpose feeder to lay it flat.
Message What to do
200 Paper Jam Clear Area B and Area T1.
201 Paper Jam Clear Area D, Area K, and Area L.
202 Paper Jam Clear Area K and Area L.
230 Paper Jam Clear Area E and Area J.
24<x> Paper
Jam
Clear Area B, Area C, and Area
T<x>.
250 Paper Jam Clear Area A and Area D.
2 Press the pick assembly release lever, and
remove all media and jams.
3 Return the feeder to its working position, and
reload your paper.
Area B
1 Open the left access door until it clicks into
place.
2 Remove all visible paper. Remove any torn
paper from the printer.
3 Close the door.
4 Open Tray 1, and make sure the entire paper
stack is pushed all the way down into the tray.
Area C
1 Open the 500-sheet drawer access door. Hold
the door down while removing jams.
2 Make sure the entire paper stack is loaded
correctly, and then close the door.
Area D
1 Open the front access door.
2 Hold down the front access door. Remove jams
in the rollers under the image transfer unit.
Area T1
1 Open tray 1.
2 Remove any jams.
3 Make sure the paper is pushed all the way down
into the tray, and then close tray 1.
Area E
1 Pull the duplex tray E completely out. Remove
any paper caught in the rollers or inside the
printer.
2 Reinstall the duplex mechanism in the printer.
Area T<x>
1 Carefully open trays 2 through 4 (all 500-sheet
trays), and then remove jams.
2 Make sure the paper is pushed all the way down
into the tray, and then close trays 2 through 4.
Area J
1 Remove the duplex tray J.
2 Remove any jams, and then reinstall the tray.
Area K
1 Open the lower right access door.
2 Remove any jams, and then close the door.
Area L
1 Open the upper right access door.
2 Remove jams from the rollers, and then close
the door.
1 / 1

Lexmark 22L0214 - C 770dtn Color Laser Printer Reference guide

Category
Multifunctionals
Type
Reference guide
This manual is also suitable for

Ask a question and I''ll find the answer in the document

Finding information in a document is now easier with AI

Ask the document