Page is loading ...

TD250.0119
US PATENT : 9884222
Scan this QR code with your
Portable Device to link to
additional product information.
www.bodycraft.com/TD250-qr.html

Purchaser’s Reference Information:
IT IS IMPERATIVE THAT YOU FILL IN
THE FOLLOW ING
INFORMATION AND
REFER TO IT SHOULD THE NEED
FOR SERVICE ARISE.
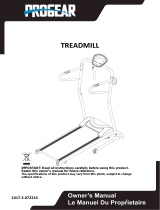
Product Name: TD250 TDESK Treadmill
Serial Number: T D 2 5 _ _ _ _ _ _ _ _ _ _
Proof of purchase must be supplied to validate warranty and the product must have been
registered with BODYCRAFT via online at www.bodycraft.com or by calling 800-990-5556 or
740-965-2442 M-F 9 a.m. - 5 p.m. EST.
CONGRATULATIONS! And thank you for selecting the BODYCRAFT TD250
Treadmill Desk! Your choice reflects a wise investment in you and your family’s
health and wellness. We hope you use it for many healthy years!
For your safety and benefit, please read this entire manual.
Please keep the manual in a convenient place for quick reference when needed.
BODYCRAFT offers a complete array of high quality fitness equipment. Please refer to our web site at
www.bodycraft.com to view more ways to enhance your lifestyle.
Your BODYCRAFT TD250 has all the quality and design elements to make your workout extremely
efficient and comfortable. Your new Treadmill is a serious cardio fitness machine that will keep you
motivated, challenged and within reach of your fitness goals. The BODYCRAFT TD250 will provide an
efficient cardiovascular workout that will help improve energy levels and your quality of life.
Cardiovascular training is vital for all ages and the BODYCRAFT TD250 will provide an effective workout,
producing results that will encourage you to reach your fitness goals and maintain the body you have
always wanted. Spending 15 to 30 minutes a day, three times a week is all you need to start seeing the
benefits of a regular exercise program.
As a premium exercise equipment manufacturer, we are committed to your complete satisfaction. If you
have questions, suggestions or find missing or damaged parts, we guarantee your complete satisfaction
through our authorized dealer network or by contacting us directly. Please call your local dealer or
BODYCRAFT.
Phone: 800-990-5556 9 am - 5 pm EST Email: [email protected]
BODYCRAFT (a division of Recreation Supply, Inc.)
7699 Green Meadows Dr.
Lewis Center, OH 43035

PRODUCT SAFETY
. . . . . . . . . . . . . . . . . . . . . . . . . . . . . . . . . . . . . . . . . . . .
ELECTRICAL GROUNDING INSTRUCTIONS
CAUTION: BEFORE AND AFTER RUNNING ON THE TREADMILL
RUNNING DECK LUBRICATION
ASSEMBLY PARTS LIST
ASSEMBLY INSTRUCTIONS
MOVING & LEVELING
HOW TO ADJUST FORE / AFT POSITION OF DESKTOP
HOW TO ADJUST HEIGHT OF DESKTOP
TREADMILL OPERATION
CONSOLE OPERATION
MASTER POWER SWITCH LOCATION
PROFILE FOR PROGRAMS
MASTER CONSOLE FUNCTION DESCRIPTION
MASTER CONSOLE BUTTON OPERATION
LOWER BUTTON INTERFACE OPERATION
LOWER BUTTON INTERFACE FUNCTION DESCRIPTION
LOWER BUTTON INTERFACE BUTTON OPERATION
WARNING / CAUTION
ERROR MESSAGE & TROUBLE SHOOTING
HOW TO USE ASA SYSTEM
HOW TO FOLD UP FOR STORAGE
HOW TO FOLD DOWN FOR EXERCISE
WARNING
ALIGNING THE RUNNING BELT
ADJUSTING THE RUNNING BELT TENSION
CLEANING AND INSPECTING THE RUNNING BELT
CLEANING
INSPECT FASTENERS AND WIRING
STORAGE
HOW TO WORK OUT SAFELY AND EFFICIENTLY
EXPLODED DRAWING
PARTS LIST
HOW TO MAINTAIN YOUR MOTORIZED TREADMILL
PRODUCT WARRANTY
. . . . . . . . . . . . . . . . . . . . . . . . . .
. . . . . . . . . .
. . . . . . . . . . . . . . . . . . . . . . . . . . . . . . . . . . .
. . . . . . . . . . . . . .. . . . . . . . . . . . . . . . . . . . . . . . . . .
. . . . . . . . . . .. . . . . . . . . . . . . . . . . . . . . . . . . . .
. . . . . . . . . . . . . . . . . . . . . . . . . . . . . . . . . . . . . . . . . .
. . . . . . . . . . . . . . . .
. . . . . . . . . . . . . . . . . . . . . . . . . . . .
. . . . . . . . . . . . . . . . . . . . . . . . . . . . . . . . . . . . . . . .
. . . . . . . . . . . . . . . . . . . . . . . . . . . . . . . . . . . . . . . . .
. . . . . . . . . . . . . . . . . . . . . . . . . . . . . .
. . . . . . . . . . . . . . . . . . . . . . . . . . . . . . . . . . . . . .
. . . . . . . . . . . . . . . . . . . . . . .
. . . . . . . . . . . . . . . . . . . . . . . . . .
. . . . . . . . . . . . . . . . . . . . . . . . . .
. . . . . . . . . . . . . . . .
. . . . . . . . . . . . . . . . . . . .
. . . . . . . . . . . . . . . . . . . . . . . . . . . . . . . . . . . . . . . . . .
. . . . . . . . . . . . . . . . . . . . . . . . . .
. . . . . . . . . . . . . . . . . . . . . . . . . . . . . . . . . . . . . .
. . . . . . . . . . . . . . . . . . . . . . . . . . . . . . . . .
. . . . . . . . . . . . . . . . . . . . . . . . . . . . .
. . . . . . . . . . . . . . . . . . . . . . . . . . . . . . . . . . . . . . . . . . . . . . . . . . .
. . . . . . . . . . . . . . . . . . . . . . . . . . . . . . . . . . .
. . . . . . . . . . . . . . . . . . . . . . . . . .
. . . . . . . . . . . . . . . . . . . .
. . . . . . . . . . . . . . . . . . . . . . . . . . . . . . . . . . . . . . . . . . . . . . . . . . .
. . . . . . . . . . . . . . . . . . . . . . . . . . . . . .
. . . . . . . . . . . . . . . . . . . . . . . . . . . . . . . . . . . . . . . . . . . . . . . . . . .
. . . . . . . . . . . . . . . . . . . . .
. . . . . . . . . . . . . . . . . . . . . . . . . . . . . . . . . . . . . . . . . .
. . . . . . . . . . . . . . . . . . . . . . . . . . . . . . . . . . . . . . . . . . . . . . . . .
. . . . . . . . . . . . . . . . . .
. . . . . . . . . . . . . . . . . . . . . . . . . . . . . . . . . . . . . . . . . .
P. 1
P. 2
P. 3
P. 3-4
P. 5
P. 6-7
P. 8
P. 8
P. 8
P. 9-10
P. 10-12
P. 12
P. 13-15
P. 16
P. 16-17
P. 17
P. 18
P. 18
P. 19
P. 19
P. 19
P. 20
P. 20
P. 20
P. 21
P. 21
P. 21
P. 22
P. 22
P. 22
P. 22
P. 23
P. 24
P. 25
P. 26
TABLE OF CONTENTS
We at Bodycraft believe in the continued improvement processes and reserve the right to make changes at
any time without notice that may or may not effect color, parts and materials.

1. Wear the safety tether at all times while using the treadmill. Stand on the side rails before the treadmill
starts.
2. Before beginning any exercise program, it is important to consult with your physician. It is especially
important if you have a history of heart disease, high blood pressure, diabetes, chronic respiratory diseases,
elevated cholesterol, or if you smoke cigarettes or experience any other chronic diseases or physical
complaints.
3. If over the age of 35, overweight or pregnant, consult with your physician before beginning a exercise
program.
4. If you experience dizziness, nausea, chest pains or other abnormal symptoms during exercise, stop the
exercise session immediately. Consult your physician before continuing.
5. Drink fluids if you exercise for twenty or more minutes on the treadmill.
6. Always follow the console instructions for proper operation. Read the entire owners manual.
7. This treadmill should never be left unattended when plugged in. Unplug from outlet when not in use, and
before servicing or moving the unit.
8. Close supervision is necessary when using this treadmill around children, pets, or disabled persons. Keep
children & pets away from the tr
eadmill. Hands and feet may get caught in the moving parts which could result
in serious injury.
9. Never operate your treadmill if it has a damaged cord or plug, or if it is not working properly. Contact your
authorized BODYCRAFT fitness dealer for service and repair.
10. Keep the power cord away from heated surfaces.
11. Never insert any objects into openings. Keep hands and feet away from all moving parts.
12. Use the handrails when getting on and off your treadmill.
13. Check the power requirement for your unit to see if it matches your local power outlet.
14. Do not operate the heart rate monitor transmitter together with an electrical heart pacemaker. The
transmitter may cause electrical disturbances.
15. Inspect this treadmill prior to exercising to ensure it is working properly. Check that all components are
secure.
16. This treadmill is intended for indoor use. Do not place the unit outdoors.
17. Place your treadmill on a solid, level surface when it is in use. Adjust the levelers if needed.
18. Do not dismount the treadmill until it has come to a complete stop.
19. Make sure the running belt is at a complete stop before exiting the machine.
20. Do not operate if oxygen equipment or if aerosol (spray) products are being used in the area.
21. Keep the treadmill away from walls to allow proper ventilation. Air should be able to circulate freely around
the unit. Keep all air openings free of dirt and dust.
Continued on next page
P
RODUCT
S
AFETY
WARNING: To reduce the risk of injury, basic precautions should always be
followed, including the following Safety Instructions:
1

2
GROUNDING INSTRUCTIONS
This product must be grounded. If it should malfunction or breakdown, grounding provides a path of least
resistance for the electric current and will reduce the risk of electric shock. The treadmill is equipped with a
grounded power cord. All 3 prongs must be plugged into an appropriate outlet that is properly installed and
grounded in accordance with all local codes and ordinances.
POWER REQUIREMENTS
It is recommended that your treadmill be plugged into a dedicated 120 volt 20 amp circuit with a ground.
The treadmill must be connected to a grounded receptacle having the same configuration as the plug.
Improper connection of the grounding conductor can result in risk of electric shock. Check with a qualified
electrician or serviceman if you are in doubt as to whether the treadmill is properly grounded. Do not modify
the plug provided with this product- if it will not fit the outlet, have a proper outlet installed by a qualified
electrician. A power strip should never be used and extensions cords should be avoided, but we realize that
in some cases an extension cord is needed. In this case, Appliance Grade extension cords are available at
most if not all hardware stores. Buy only the minimum length required. Avoid anything longer than 6 feet,
and find one made with 14 gauge wire (3-wire is required). DO NOT use a 2-prong adapter with your treadmill.
To reduce the risk of electric shock, always unplug the treadmill from the electrical outlet immediately after
use and before cleaning.
SAFETY KEY CLIP & TETHER
Your treadmill will not start unless the safety key is placed on the proper location of the treadmill console.
Attach the safety key clip properly onto your clothes before operating treadmill. In case of an emergency,
pull the safety key off the treadmill, it will shut down the power to the console and stop the treadmill
immediately. Replace the safety key and the treadmill will return to idle mode. Contact your dealer for a
safety key replacement if you do not have one.
Retain this Owner’s Manual for future reference
22. To ensure proper functioning of your treadmill, do not install attachments or accessories not
provided or recommended by BODYCRAFT.
23. Place treadmill in an area that will meet minimum clearance requirements: Front/Sides:1ft / 30cm,
Back 6 ft./ 225 cm.
24. Always wear proper clothing and shoes when exercising on the treadmill.
25. Do not stand on the tread belt while performing auto-calibration or service.
26. Never walk or jog or run backwards on the treadmill.
27. Hi gher speed and higher incline is not for everyone. It is designed for occasional use of a skilled
runner and may exceed many users’ capabilities. Stop right away if you feel any discomfort.
28. Use this treadmill only for its intended use as described in this manual. User weight is not to
exceed 300 pounds / 135 kilograms.
29. Do not remove the treadmill covers or other components. Only an authorized BODYCRAFT
Fitness dealer should perform service.

CAUTION:
BEFORE AND AFTER RUNNING ON THE TREADMILL
Before Running:
1. Read this manual in its entirety to familiarize yourself with the computer and other
important features.
2. Before starting the treadmill, always stand on side rails (not on the running belt) as
shown below.
3. The safety key must be in place on the computer console, and the safety clip must be
securely attached to an article of your clothing.
4. Start the treadmill and allow it to reach at speed of at least 1.0 mph, and hold onto the
handrail before you start to walk or run on the running belt.
After Running:
1. If you hear unusual noises from the treadmill, please discontinue use and contact your
Bodycraft Dealer for necessary maintenance.
2. Please refer below to the RUNNING DECK LUBRICATION section for necessary
periodical maintenance that will insure long-term and functional operation.
PLEASE NOTE: IF PERIODICAL MAINTENANCE IS NOT PERFORMED, YOU MAY
VOID THE WARRANTY.
RUNNING DECK LUBRICATION
Why lubricate?
Your treadmill comes pre lubricated from our factory. As the lubrication dissipates, the
friction between the running belt and the deck will rise and place undue stress on the drive
motor, drive belt and electronic motor control board, which, over time, will result in catastrophic failure
of these important and expensive components. To purchase Lubrication, email
[email protected]m or go to www.bodycraft.com.
When to lubricate?
We use a high-efficiency, low-friction Running Deck/Belt combination on this machine. The
deck is pre-lubricated and subsequent lubrication should be performed every 100 miles (160
KM), or every 3 months of operation, whichever comes first. Keeping the deck lubricated at the
recommended intervals ensures the longest life possible for your treadmill.
3

RUNNING DECK LUBRICATION
What to lubricate?
Use only our approved lubricants for the deck of your treadmill. Your treadmill includes silicone lube.
More can be purchased from www.bodycraft.com or 1-800-990-5556.
How to lubricate?
Refer to the above drawing. Start by wiping the surface of the deck between the running belt side rail
covers with a clean lint free cloth to remove any dirt on both sides. 1. Starting at about 12” from the
motor cover, lift the running belt as high as possible and apply silicone lube to both sides. It is
important to apply the lubricant starting about 1/2” in from the edge of the running belt extending to
the middle of the deck. Repeat the above procedures to areas 2 and 3 in 12” increments as shown
above.
Once the silicone is applied, you should walk, not run, at a speed not more than 1.5 MPH (2.5 KPH)
for at least 5 minutes to ensure even distribution of the lubricant. To improve distribution of the
lubricant, it is a good idea to spend about a minute in different locations of the belt:
Spend 1 minute each walking towards the LEFT SIDE, RIGHT SIDE, FRONT and REAR of the belt
being careful to not leave the edge of the belt. It’s ok to stay within your comfort zone on the belt.
Spend the last minute walking normally.
Note:
1. IF the belt is under side rail cover, use a screwdriver or butter knife to lift the running belt
(be careful to not scratch the deck) to allow lubrication.
2. IF belt is not centered, please refer to Aligning The Running Belt before lubrication.
3. IF you notice a increase in static electricity during your workout, apply silicone to the
running deck to help resolve it.
4
2
1
3
12”
12”
12”
App ly across
the underside of
the running belt
Lift belt as
high as possible

Assembly Parts List
Dimensions Overview
70.4" (1790mm)
33.7" (855mm)
1.
A.
B.
C.
D.
TREADMILL
KNOB & WASHERS
PIN
TOOLS
POWER CABLE
. . . . . . . . . . . . . . . . . . . . . . . . . . . . . . . .
. . . . . . . . . . . . . . . . . . . . . . . . . . . .
. . . . . . . . . . . . . . . . . . . . . . . . . . . . . . . . . . . . . .
. . . . . . . . . . . . . . . . . . . . . . . . . . . . . . . . . . .
. . . . . . . . . . . . . . . . . . . . . . . . . . . . . .
1
4 + 4
1
1 + 1 + 1
1
5

ASSEMBLY INSTRUCTIONS
Step 1.
Start by lifting the front upright post into
position as shown.
Step 2. SECURING THE LEFT AND RIGHT PLATE FRAMES
Refer to Figures 1 and 2. While holding the up the upright post, lower the left and right Plate
Frames (7 & 8) into position. In order to easily install the Knob and Washer into the Plate
Frame (8), push the Upright Post forward slightly until the Plate Frame sits flat with the Bottom
Frame. Refer to Fig 3 (incorrect) and Fig 4 (correct). Fully tighten the the knobs with washers.
IMPORTANT It is imperative that 2 people be present for the safe
assembly of your treadmill. Use extreme caution and be careful to
not pinch your fingers during assembly.
6
Incorrect Correct
PLATE FRAME (8) BOTTOM FRAME (2)
PLATE FRAME (7)
Fig. 2
3
1
PLATE FRAME (8)
PLATE FRAME (7)
2
BOTTOM FRAME (2)
Fig. 1
Plate Frames (7 & 8) and Bottom Frame
(2) do not sit flat
Plate Frames (7 & 8) and Bottom Frame
(2) are even (flat).

Wrong
Position
Correct
Position
1 2 3
Step 3.
Please follow these 3 steps to secure the
air shock to the underside of the frame.
Before starting, please make sure the air
shock is in correct position as shown below.
3 Steps to attach Air Shock:
1. Fold the frame up, and lift up the air
shock.
2. Slightly fold down the frame to attach
U-bracket on the frame to the head of
air shock.
3. Insert Pin (B) into the hole of U-bracket
and into the air shock as shown.
Step 5.
Use Knob (A) to secure both handlebars
to the top of front post.
Step 4.
Fold the handlebar and desktop down.
7
ASSEMBLY INSTRUCTIONS

8
MOVING & LEVELING
HOW TO ADJUST FORE / AFT POSITION OF DESKTOP
Fore/Aft
Adjustment Knob
There are 2 SwitchPro Knobs located at the lower
front of the Main Frame. These are used for both
leveling and for lowering the front transport wheels
allowing you to easily move the machine within your
room.
1. For Transport: Remove the power cord from the
treadmill. Turn both knobs Clockwise (The treadmill
can be in the folded or unfolded position).
2. For Leveling: Turn each Knob counter-clockwise
until the machine is level and does not rock during
use.
There are 3 Fore/Aft Positions for Desktop.
Follow these steps for proper adjustment.
Step 1: Loosen the Fore/Aft adjustment knob
located under the right side of the console by
turning it counter-clockwise one full turn.
Step 2: Pull down on the knob and slide the top
forward or back. For work desk mode the ideal
position is in most closest position to the user.
Step 3: Release the knob then position the desktop
to one of the 3 desired positions until the pin locks
into place.
Step 4: To secure, turn the knob clockwise to
tighten.
HOW TO ADJUST HEIGHT OF DESKTOP
There are 8 vertical height settings.
Step 1: Completely loosen both of the spring knobs
located on the inside of the left and right upright
post by turning them counter-clockwise until
desktop can be moved up and down.
Step 2: Raise and lower the desktop to the desired
height.
Step 3: Tighten both Spring Knobs Clockwise.
Step 4: Raise or lower the desktop to engage the
spring knob pin into the adjustment holes on the
upright posts.

9
Desktop slides forward and back.
(See how to adjust fore/aft position)
Lower Display Button Interface
TREADMILL OPERATION
WORK DESK MODE
Master Console
TREADMILL MODE
When the Master Console is flipped down, it
becomes a work desktop. Use the Lower
Display/Button Interface to operate your treadmill
for walking only. For your safety, during Work
Desk mode, the maximum speed is 4.0 mph (6
kph) and the incline is disabled).
For your convenience, the Desktop can be
moved forward and back for ideal placement for
working.
Flip up the Master Console for standard treadmill
operation. This allows for incline operation
speeds up to 10 mph (16 kph).
For your convenience, the Desktop can be
moved forward and back for ideal placement for
walking or running.
Incline
Up/Down
Keys
Speed
Up/Down
Keys
Reset
Key
Enter
Key
Stop
Key
Start
Key
Numeric Keypad &
Quick Speed and Incline Keys
Comprehensive Feedback &
Dot Matrix Display area
Magnetic Safety
Key holder
Reset • Mode • Stop • Start • Slow • Fast
Keys
Comprehensive
Feedback Data
USB
Charging Port

TREADMILL OPERATION
CAUTION
Before beginning a workout session, make sure the safety key is properly placed onto
the computer console and the safety clip is securely attached to an article of your
clothing. Always start the treadmill while standing on the side rails instead of the
running belt. Allow the treadmill to reach a speed of at least 1.0 MPH (1.5 KPH) before
walking on the running belt. Before operating, read this page first for a clear
understanding of the treadmill computer console and other important features.
10
BASIC INFORMATION
1. When the safety key is removed, the LCD will not display data.
2. When safety key is in place, by default, the treadmill will be in MANUAL mode. All functions are
ready for manual operation.
CONSOLE OPERATION
MASTER CONSOLE OPERATION (TREADMILL MODE) 0.5 ~ 10 MPH
NOTE: The lower button interface buttons and display will not function when the master
console is flipped up for Treadmill Mode.
QUICKSTART (manual OPERATION)
t the running belt.startobuttonARTSTthePress
Time, distance, step and calories will count up from 0.
The first segment in the Speed Dot Matrix will flash and a zero will be displayed in the Incline Dot
Matrix. This is a lap counter, for every 0.25mile (400m) you run, the Lap Counter will advance by 1.
You can adjust both the INCLINE and SPEED.
For P1 ~ P12 Preset Programs
Step 1.Press the SPEED or INCLINE up and down keys to select one of the 12 preset programs.
Step 2.Press ENTER, then select levels 1 ~ 3 using the SPEED or INCLINE keys.
Step 3.Press ENTER, the default setting time of 30:00 minutes will begin flashing, use the SPEED or
INCLINE keys to set desired workout time from 10:00 ~ 99:00 minutes.
Step 4.Press ENTER, and then press START to begin your workout.
For H1, H2, H3 Heart Rate Control Program*
Step 1.Press the SPEED or INCLINE up and down keys to choose between H1, H2 or H3.
Step 2.Press ENTER, the default age of 30 will begin flashing. Adjust using the SPEED or INCLINE
up or down keys. The preset maximum heart rate will be displayed in pulse window.
Step 3.Press ENTER, and then use the SPEED or INCLINE keys to choose Level 1 ~ 3 for
target heart rate you prefer.
Step 4.Press ENTER, the default time of 30:00 minutes will flash. Use the SPEED or INCLINE to set
the desired workout time from 10:00 ~ 99:00 minutes.
Step 5.Press ENTER, and then press START to begin your workout.
*
The user must wear an optional heart rate transmitter or hold both hands on the pulse plates
located on the handlebars in order to use the Heart Rate Control (HRC) programs. The treadmill
will make adjustments to keep you within your target heart rate zone.

How the HRC Programs function
:
HRC 1 (SPEED ADJUSTMENT) PROGRAM OPERATION
1. Once your HRC workout has begun, you must either hold onto both of the contact heart rate plates
or wear an optional Heart Rate Belt. It can take up to 30 seconds for your heart rate appear. Once
the computer detects the user's pulse it will begin program operation.
2. If computer cannot detect the user's pulse within 30 seconds, the treadmill will stop and a symbol
on the Pulse display will flash 3 times. After 3 minutes the machine will enter standby mode.
3. If the user's heart rate is higher than the preset maximum, the speed will decrease in increments
of 0.2 until the speed reaches the target heart rate. If your heart rate continues to exceed the
preset maximum, you should stop your workout immediately and consult your physician.
4. If your heart rate exceeds the target by more than 20 beats per minute for more than 20
seconds, the machine will stop. After 3 minutes, the machine will enter the standby mode.
If your heart rate is below the preset maximum, the speed will increase in increments of 0.2 mph (.02
kph) until the speed reaches the maximum. If your heart rate is still lower than preset maximum heart
beat, the machine will continue to run at the highest speed.
HRC 2 (INCLINE ADJUSTMENT) PROGRAM OPERATION
This functions the same as HRC 1, but the instead of speed, it uses the Incline in 1% increments.
HRC 3 (SPEED AND INCLINE ADJUSTMENT) PROGRAM OPERATION
This functions the same as HRC 1 but:
1. If the Heart Rate is below the preset maximum, first, speed will increase in 0.2 mph increments. After
the highest speed is achieved, the incline will then adjust in 1% increments.
2. Heart Rate is higher than preset maximum, first, speed will decrease in 0.2 mph increments. After it
reaches the lowest speed, the incline will adjust in 1% increments.
CHOOSING HRC LEVEL. Maximum heart rate calculation (Default Age Setting: 30)
Level 1: (220 – age) x 60%
Level 2: (220 – age) x 75%
Level 3: (220 – age) x 85%
For User Program (U1, U2)
Step 1. Press the SPEED or INCLINE keys to choose either U1 or U2.
Step 2. Press and hold the ENTER key until you hear a "beep". 0 should appear in the incline window,
and a 0.5 (0.8 for KPH) will appear in the speed window. The first row of dots will flash in
both Dot Matrix windows.
Step 3. Press SPEED or INCLINE keys to set desired starting speed and incline.
Step 4. Press ENTER to confirm the first program segment, you will now see that the second row of
dots are flashing in both Dot Matrix windows.
Step 5. Repeat Step 3 and 4 for the remaining program segments There are 12 total segments.
Step 6. Press ENTER to confirm all 12 ranges are set. The default time setting of 30:00 will flash.
Step 7. Press SPEED or INCLINE keys or use the NUMERIC KEYPAD 0 ~ 9 to set desired time.
Step 8. Press ENTER to confirm then press START to begion program.
11

To completely shut down power to the treadmill,
turn off master power switch. After turning the
main power off, you may also unplug the machine
from the outlet.
MASTER POWER SWITC H LOCATION
12
U1 & U2 Function.
U1 (User 1) and U2 (User 2) allow you to create a customer speed and incline profile. Once you have completed
entering a USER profile, Follow these steps:
Step 1. Press SPEED or INCLINE keys to choose between U1 or U2.
Step 2. Press ENTER, the default time setting 30:00 minutes will flash, Using the SPEED or INCLINE keys to set
your desired workout time from 10:00 ~ 99:00 minutes.
Step 3. Press ENTER and then press START to begin the program.
For Target Goal Programs (Time, Distance, Calories)
Press ENTER to choose one of three for countdown goals.
For the Target Time Program
Step 1. Press ENTER to select target time. The default time setting of 30:00 Minutes will flash. Use the SPEED
or INCLINE keys to set the desired workout time from 10:00 ~ 99:00 minutes.
Step 2. Press ENTER and then press START to begin your workout.
For the Target Distance Program
Step 1. Press ENTER to select target distance. The default setting of 1.0 will flash. Use the SPEED or INCLINE
keys to set the desired workout distance from 1 ~ 20 miles (or kilometers).
Step 2. Press ENTER and then press START to begin your workout.
For the Target Calories Program
Step 1. Press ENTER to select target calories. The default setting of 10.0 will flash. Use the SPEED or INCLINE
keys to set the desired calorie goal from 10 ~ 990 KCAL.
Step 2. Press ENTER and then press START to begin your workout.
Power
Cord
Circuit
Breaker

P 1 ~ P 4 PROGRAM FOR SPEED
PROFILES FOR PROGRAMS
Level 2 is based on Level 1, but each interval increases speed 2.0mph.
Level 3 is based on Level 2, but each interval increases speed 2.0mph.
INCLINE DOT MATRIX SPEED DOT MATRIX
INCLINE DOT MATRIX SPEED DOT MATRIX
P2
INCLINE DOT MATRIX SPEED DOT MATRIX
P1
INCLINE DOT MATRIX SPEED DOT MATRIX
P3
P4
13

P 5 ~ P 8 PROGR AM FOR INCLINE
Level 2 is based on Level 1, but each interval increases 1% incline and remains same speed.
Level 3 is based on Level 2, but each interval increases 1% incline and remains same speed.
INCLINE DOT MATRIX SPEED DOT MATRIX
INCLINE DOT MATRIX SPEED DOT MATRIX
P6
INCLINE DOT MATRIX SPEED DOT MATRIX
P5
INCLINE DOT MATRIX SPEED DOT MATRIX
P7
P8
14

P9 ~ P12 PROGRAM FOR SPEED & INCLINE
Level 2 is based on Level 1, but each interval increases 1% incline and speed 2 mph.
Level 3 is based on Level 2, but each interval increases 1% incline and speed 2 mph.
SPEED DOT MATRIX
SPEED DOT MATRIX
P11
SPEED DOT MATRIX
P9
SPEED DOT MATRIX
P10
P12
INCLINE DOT MATRIX
INCLINE DOT MATRIX
INCLINE DOT MATRIX
INCLINE DOT MATRIX
15

MASTER CONSOLE FUNCTION DESCRIPTION
1. INCLINE: 0 ~ 12%. 8 x 12 Dot Matrix will display a circle of running and incline data.
2. TIME: 00: 00 ~ 99.59. Default setting: 30 minutes. Trees will flash in running.
3. SPEED: 0.5 ~ 10 mph, 8 x 12 Dot Matrix will show lap for .25mile/400m and speed
data.
4. PULSE: 40 ~ 200 BPM. 5 kHz Polar® compatible receiver is built in.
5. PROGRAMS: 0 - 01 ~ 12 – H1 – H2 - H3 – U1 – U2
6. CALORIES: 10 ~ 990 KCAL, default setting: 10
7. STEP: 0 ~ 9999
8. AGE: 10 ~ 99, default setting: 30 years old
9. DISTANCE: 1 ~ 12.5 Mile, default setting: 1 MILE
10. LEVEL: L1 ~ L3
STEP COUNTING FUNCTION
1. This machine offers a “step” function that will accumulate total steps to
incorporate user's own count goal. (May not work with lighter weight users)
2. Step count will begin 20 seconds after the user steps on the machine and walks about 20 ~
30 steps. Step count will may not be 100% accurate.
3. The Step count may not function or be accurate for those who walk lightly. Users over
100lbs (45.5kgs) that walk at speeds of around 1.2 ~ 4.0 mph (2 ~ 6 kph) will get higher
accuracy around 97%. Steps must also be solid and stable.
MASTER CONSOLE KEYPAD OPERATION
16
1. SPEED UP AND DOWN KEYS:
a. Used to choose a program & level (Manual, P1 ~ P12, H1 ~ H3, U1 ~ U2, L1 ~ L3)
b. To increase or decrease speed
c. To adjust numeric input data
2. ENTER KEY: Push to confirm data entry.
3. START KEY: To begin your workout.
5
55
0
10
50
0
2
6
4
8
10
14 12
16
0
30
15
20
25
35
40
45
12
INCLINE
2
4
6
8
10
5
55
0
10
50
0
2
6
4
8
10
14 12
16
0
30
15
20
25
35
40
45
12
INCLINE
2
4
6
8
10

Once the master console is flipped down, insert the safety key, The Time on lower button interface
display will light up for operation.
1. Press START button to begin exercise, Time flashes in Scan mode and will display TIME,
SPEED, DISTANCE, CALORIES, PULSE, and STEP in sequence.
2. During Scan mode, when adjusting speed, the display will jump to SPEED, after 5 seconds, it will
resume scan mode.
3. During scan mode, when the user wears Heart Rate Belt Transmitter, the display will jump and stay
on PULSE to display heart rate. You may press the MODE key to jump to STEP. Pres
s mode
again to resume the Scan Function. Time will Flash to indicate scan is on. When the user removes
the Heart Rate Belt, it will resume to SCAN from STEP, then TIME, SPEED, DISTANCE,
CALORIES, and PULSE in sequence.
4. In scan mode, whenever user holds both hands on the pulse plates to detect pulse rate, it will jump
and stay on PULSE. And after user lets go from contact pulse plates, the display will jump to STEP
to resume scan function. Or, just press MODE to jump to STEP.
5. To focus on specific display functions, use the MODE button to choose.
LOWER BUTTON INTERFACE OPERATION (0.5 ~ 4.0 MPH)
17
4. NUMERIC KEYPAD WITH INCLINE AND SPEED KEYS:
1). For quick speed adjustment, select a number then press the SPEED button. Ex: Press 5
then press SPEED, speed is adjusted to 5.0 mph.
2). For quick incline adjustment, select a number then press the INCLINE button. Ex: Press 5
then press INCLINE, incline is adjusted to 5%.
3). For quick selection of program, press a number then press ENTER. Ex: MANUAL: Press 0
then press ENTER
P1: Press 1 then press ENTER
P12: Press 1 & 2 then press ENTER
H1 (P13): Press 1 & 3, then press ENTER
H3 (P15): Press 1 & 5, then press ENTER
U1 (P16): Press 1 & 6, then press ENTER
U2 (P17): Press 1 & 7, then press ENTER
5. RESET KEY
1). While in Stop mode, press the RESET button to resume from standby mode.
2). During selecting a program, press RESET button to return to standby mode.
3). During data entry, press RESET button to return to default setting.
6. STOP KEY
1).Press STOP button to pause, incline will descend to 0%. Press START Ke
y to resume,
machine runs from originally set incline, speed from 0.5mph (0.8 kph).
2). 20 minutes after pause mode, whole system will reset.
7. INCLINE UP AND DOWN KEYS
1). To choose program & level (Manual, P1 ~ P12, H1 ~ H3, U1 ~ U2, L1 ~ L3). 2). To
increase or decrease incline.3). To do adjustment of set data.
/