Page is loading ...

Register your
new device on
MyBosch now and
get free benefits:
bosch-home.com/
welcome
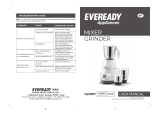
MGM88...IN
Mixer Grinder
[en] Instruction manual Mixer Grinder
Register your
new device on
MyBosch now and
get free benefits:
bosch-home.com/
welcome
MGM88...IN
Mixer Grinder
[en] Instruction manual Mixer Grinder
2
en
Motor coupler
Speed
selector knob
Rubber feet
Big jar Medium jar Chutney jar
Main unit PoundingBlade
Active flow breaker
Spatula / Tool for fitting
and removing blades
Blender jar with
MaxxJuice extractor
(only for MGM8842.IN)
MaxxJuice extractor
(fruit filter) only for
MGM8842.IN
Overview
Note:
Fitting jar: Place the jar on the top socket of the main unit, ensuring that the
locks fit properly in the jar locking grooves of the top socket.
Jar Lid: Ensure that the lid gasket is properly fitted. Place the lid on top of the
jar, gently press down and lock the lid onto the jar using the lid lock
clamps. Hold the lid gently while operating.
Speed control: Turn the speed selector knob clockwise for speed 1, 2 or 3, as
desired.
Pulse: Turn the speed selector knob anti-clockwise for a few seconds and
release for momentary operation. Pulse is especially useful for
applications such as grinding chutneys, crushing ice, etc.
Overview
3
en
Blender jar
Blender jar lid
Blender jar lid stopper
Blender jar blade
Medium jar
Medium jar lid
Medium jar lid stopper
Dry grinding blade
PoundingBlade
Big jar
Big jar lid
Big jar lid stopper
Wet grinding blade
Chutney jar
Chutney jar blade
Chutney jar lid
Chutney jar lid stopper
Big jar Medium jar
or
Chutney jar Blender jar (only for MGM8842.IN)
Overview
4
en Safety and important instructions
Safety and important instructions
Read and follow the instruction manual carefully and keep for later reference! Enclose
these instructions when you give this appliance to someone else. If the instructions for
correct use of the appliance are not observed, the manufacturer’s liability for any resulting
damage will be excluded.
1. This mixer grinder is strictly for household use and not applicable for non-domestic and/
or commercial use.
2. Please only use official Bosch parts and accessories with the Mixer Grinder. Never use
these parts and accessories with any other appliances.
3. Check if the voltage indicated on the base of the mixer grinder corresponds to the local
electrical mains voltage before you connect the appliance.
4. This appliance can be used by persons with reduced physical, sensory or mental
capabilities or lack of experience and/or knowledge if they have been given supervision
or instruction concerning use of the appliance in a safe manner and if they understand
the hazards involved.
5. Keep children away from the appliance and connecting cable and do not allow them
to use the appliance. Do not let children play with the appliance. Cleaning and user
maintenance must not be performed by children.
6. Do not use the mixer grinder if the power cord and/or appliance are damaged. Only our
customer service may repair the appliance, e.g. by replacing a damaged power cord, in
order to avoid hazards.
7. Do not use the mixer grinder on a wet surface.
8. Keep the mixer grinder away from hot gas burners, electric hot plates or similar appliances.
9. The power cord must not come into contact with hot parts or be pulled across sharp edges.
10. Always ensure that speed selector knob is in the OFF position and the appliance
unplugged before you remove or attach jars or accessories.
11. Blades should be fitted properly before running the mixer grinder.
12. Do not operate the mixer grinder without locking the dome or lid in place or with an empty jar.
13. Always unplug the mixer grinder before reaching into the jar with your fingers or any
other object (such as a spatula).
14. Do not open the lid or dome when the mixer grinder is running.
15. Do not add solid ingredients when the mixer grinder is running.
16. Do not grind hot ingredients or sugar in the mixer grinder.
17. Do not overload the mixer grinder.
18. Do not leave the main unit unattended while in operation.
19. Always unplug the mixer grinder after use, or whenever the appliance is unsupervised
or in the event of an error.
20. If the appliance/motor is getting too hot and you can feel hot air coming out of the side
vent or bottom, switch off the mixer grinder and restart after 10 minutes.
21. Recommended time for grinding dry ingredients is up to 120 seconds. If you need finer
powder please wait for 2 minutes and grind again. Warning – Risk of burns: Jars may
heat up due to friction so never touch the metal part with bare hands immediately after
grinding & always use the handle provided for moving the jar.
22. Do not run the mixer grinder for more than 5 minutes continuously. Wait for 2 minutes if
you need to use it for longer.
23. Switch off the appliance if the motor stalls or smoke emanates from the appliance. If
this continues, call the Bosch service center.
24. Never immerse the main unit in water or any other liquid. Do not rinse or wash in a
dishwasher.
5
en Safety and important instructions
Congratulations on the purchase of
your new Bosch TrueMixx Pro Mixer
Grinder. In doing so, you have opted
for a modern, high-quality domestic
appliance. You can find further
information about our products on our
web page.
Know your mixer grinder
Voltage and frequency 230 V AC, 50 Hz
Class of motor insulation winding wire F class
Rating 30 minutes rating
5 min ON and 2 min OFF (Maximum 6 ON cycles)
Material of body ABS
Material of jars Stainless steel
Blade assembly Stainless steel
Speed control 3 speed with pulse
Main cord PVC flexible 3-core cord
Country of origin India
Jar capacity
Jar Size Rated Capacity
Dry Wet Liquidise
Big jar 1.5 litre - 0.75 litre 1.0 litre
Medium jar 1.0 litre 0.5 litre - -
Chutney jar 0.4 litre 0.2 litre 0.2 litre -
Blender jar 1.5 litre - - 1.0 litre
Minimum capacity for all the above jars is at least up to blade level.
Contents
Overview.....................................................2
Safety and important instructions ...............4
Know your mixer grinder.............................5
Jar capacity ................................................5
Using the product .......................................6
Safety systems ...........................................6
Operating your mixer grinder ...................... 7
Cleaning ....................................................8
Troubleshooting .......................................... 8
Blade changing procedure .........................9
Blade selection .........................................10
Dry grinding applications with
PoundingBlade ......................................... 11
Disposal .................................................... 13
25. Handle the blades carefully, wash them under running water and do not rub with your
hands.
26. It is normal for the mixer grinder to become a little discoloured, especially when used
with ingredients like turmeric. To avoid this, make sure that the ingredients do not come
into contact with the mixer grinder body.
27. Do not drop the main unit or jars.
28. Do not use the jars as storage containers.
6
en Using the product
3. How to fit/remove active flow breaker
Your Bosch TrueMixx Style Mixer
Grinder has an active flow breaker
which improves the quality of your wet
grinding applications. To fit the active
flow breaker, insert the active flow
breaker in the groove on the inside
surface of the big jar and slide it in
until it fits properly. To remove it, gently
press in the opposite direction till it
disengages. Slide it out thereafter.
remove
fit
fit
4. How to use MaxxJuice extractor
(only for MGM8842.IN)
For mixing smoothies use the blender
jar with the blender jar blade. Put the
MaxxJuice extractor in the blender jar as
shown and press it gently down.
Safety systems
The Bosch TrueMixx Pro Mixer Grinder
is fitted with an overload protector (OFF)
mechanism to prevent the motor burning
out due to overloading. In case of excess
loading with ingredients in the jar, very thick
paste or low voltage conditions, your Bosch
mixer grinder automatically switches off and
the red knob on the bottom of the mixer
grinder will spring out.
Using the product
1. How to fit/remove blades
(big jar, medium jar, blender jar)
Hold the coupler on the underside of
the jar and with the spatula, tighten by
rotating in an anti-clockwise direction
to fit and clockwise to remove until the
blade is securely locked/removed.
remove
fit
Note: If the coupler and/or some other
parts are removed during removing
the blade, please refer to X “Blade
changing procedure” see page 9.
2. How to fit jar to main unit
Carefully insert the jar on top of the
main unit. Ensure that the lock of the jar
fits into the slot of the main unit. Rotate
the jar clockwise until it locks and use
the handle to lock.
7
en Operating your mixer grinder
If this happens, switch off your mixer
grinder and remove the excess ingredients.
Add sufficient water if dealing with thick
paste and wait for 2-3 minutes. Press the
red reset button and start the mixer grinder
again.
Operating your mixer
grinder
Before using for the first time /
using after a long time
Before using the mixer grinder for the
first time or using it after a long time,
thoroughly clean all the parts that come
into contact with food ingredients.
Rotate the motor shaft by hand via the
motor coupler, on top of the main unit.
The motor shaft should rotate freely.
Check that the speed selector is in the
OFF position.
Place the main unit on a smooth, stable
and clean surface.
W Caution!
Never place plastic, paper or cloth under
the mixer grinder as it may block the
ventilation holes.
Connect the main plug to the wall
socket. Switch on the main supply
and turn the speed selector knob to
the required position and speed. After
operation, turn the speed selector knob
to the OFF position and check. Repeat
until the desired results are obtained.
You may observe some minor oil
spillage in the Jars and Jar sockets
during first two to three operations. This
is normal. Thoroughly clean the minor
oil spillages with water and wipe dry with
soft cloth.
Preparation of ingredients
Important!
Cool down any hot ingredients before
putting in the jar.
Cut large ingredients into small pieces
approx. 2 cm in size before mixing/
grinding.
Regular use and operation
For blending/liquidising/puréeing use
‘Pulse’ on the speed selector knob. This
will activate Pulse until you release the
button. Use position 1-3 for continuous
operation.
1 = Lowest operating speed
3 = Highest operating speed
Hold down the jar lid gently while your
mixer grinder is in operation.
After switching off the mixer grinder, wait
until the blade stops rotating completely
and only then remove the lid or insert
the spatula.
P
u
l
s
e
0/off
1
2
3
Before removing the jar from the main
unit, ensure that the power supply is
disconnected.
Avoid using your hand to fill or clean
jars. It is safer and more hygienic to use
the spatula.
Avoid storing food in the jar.
BSH Household Appliances
Manufacturing Pvt. Ltd.
Arena House, 2nd Floor Main Building,
Plot No.103, Road No.12,
MIDC, Andheri East
Mumbai 400093
Toll Free 1 - 800 - 266 - 1880 *
www.bosch-home.com/in
* Mon-Sat: 8.00am to 8.00pm
(excluding public holidays)
8001203294
(010125)

8
en Cleaning
Cleaning
W Risk of electric shock!
Never immerse the main unit in water or
any other liquid or pour any liquid over it.
Never hold under running water and do not
clean in the dishwasher.
To keep your Bosch mixer grinder sparkling
clean, just follow these steps.
1. First remove the mains plug from the
electrical socket.
2. Clean the main unit using a damp/wet
cloth. Do not use abrasive cleaning
agents.
3. Hold the jar under running water for a
minute after each use to remove the
residue.
4. Please remove active flow breaker while
cleaning the jar. For instructions how to
remove it, please refer to X “How to fit/
remove active flow breaker” see page 6.
5. Remove the jars after each use and
wash in soapy water. Then rinse with
clean water.
6. Dry the parts thoroughly with a clean
soft cloth.
7. Always keep/store the jars upside down.
8. We recommend you clean your Bosch
mixer grinder immediately after use for
easier removal of residue.
9. Do not immerse the main unit in water
or any other liquid or pour liquid over it.
10. Regularly clean the jars and gaskets
after each use for proper hygiene and
performance of the Mixer Grinder.
11. After every use of the Mixer Grinder,
pour small amounts of hot water into
the jars to remove the leftover or sticky
substances.
Troubleshooting
Trouble Reason Check
Mixer grinder does not
switch on
No power supply. Check mains supply.
Overloading with
ingredients.
Remove some ingredients, process
smaller quantities.
Overload protection
mechanism is activated.
Press the red reset button on the
bottom of the mixer grinder.
Other than above
mentioned.
Call Bosch service centre.
Time taken for mixing/
blending is very long
Loose blade or wrong
blade selection.
Check blade and choose blade as
per grinding requirements. Tighten
properly with spatula/spanner.
Overloading of mixer. Remove some ingredients, process
smaller quantities.
Unit overheating External heat source. Check and remove any heat
source, if nearby.
Uneven surface that
blocks air vents.
Place the mixer on a level surface.
Overloading with
ingredients.
Remove some of the ingredients
and add in small quantities.
The coupler and/or some
other parts are removed
during removing the blade.
This is normal and may
happen during changing
the blade.
X “Blade changing procedure” see
page 9.
9
en Blade changing procedure
Blade changing procedure
Parts
Blade (a)
Axis (b)
Coupler (i)
Fibre washer (f)
Fibre washer (g)
Metal washer (h)
Fibre washer (c)
Metal washer (d)
Fibre washer (e)
Removing the blade
1. Hold the coupler on the underside of the
jar and using spatula rotate the blade
nut in a clockwise direction.
remove
2. If the coupler is removed (the blade
sticks together with the axis), washers
will come off when you take blade
assembly out of the jar.
W Small parts – be careful not to lose or
forget them.
3. Take the blade assembly out of the jar.
4. Hold the blade assembly with cloth.
Using spatula untighten the blade nut
(turn in a clockwise direction).
remove
10
en Blade selection
Fitting the blade
Do this in reverse order as described
in Chapter “Removing the blade” (see
page 9).
5. Put selected blade onto the axis and
tighten the blade nut with the spatula
(rotate in anti-clockwise direction).
a
b
6. Put fibre washer, metal washer and
another fibre washer onto the axis. Put
the assembly into the jar.
b
c
e
a
d
7. Put 2 x fibre washer and metal washer
onto the axis from the underside and
tighten the coupler by rotating it in an
anti-clockwise direction.
i
h
g
f
8. Check that all parts are properly
connected before use.
fit
Blade selection
Your Bosch TrueMixx Pro Mixer Grinder comes with a special PoundingBlade. Use this
blade to prepare dry grinding applications for a perfect authentic taste.
Blade Jar Application
PoundingBlade
Medium Sambhar masala, garam masala, rasam
powder, puliyodharai masala, idli podi
Dry grinding blade
Medium Turmeric, coriander seeds, black
pepper, cumin, red chilli powder,
almonds, rice powder
Wet grinding blade
Big Idli batter, dosa batter, tomato purée
Chutney blade
Chutney Ginger garlic paste, coconut chutney,
coriander chutney
Blender jar blade
(only for MGM8842.IN)
Blender Chickoo milk shake, banana milk shake,
soya milk, pomegranate juice, water
melon juice, orange/sweet lime juice etc.
11
en Dry grinding applications with PoundingBlade
Dry grinding applications
with PoundingBlade
Use the PoundingBlade fitted with the
medium jar for the following recipes:
Sambhar masala
Ingredients
– Bengal gram (chana dal) – 4 tbsp (72 g)
– Black gram (urad dal) – 2 tbsp (36 g)
– Coriander seeds – 4 tbsp (27 g)
– Cumin seeds (jeera) – 2 tsp (9 g)
– Fenugreek seeds (methi) – 1 tsp (5 g)
– Dry coconut – 8 tbsp (38 g)
– Dry red chillies – 10-15 (10 g)
– Spring curry leaf – 3 leaves
Dry-roast the above ingredients in a
pre-heated pan on a low/medium heat
until there is enough aroma from the
ingredients.
After roasting, allow the ingredients to
cool to room temperature.
Pour the roasted ingredients into
the medium jar fitted with the
PoundingBlade and grind as per the
table below.
Speed Time
Pulse 5 times (for about 1 second
each pulse)
1 10 seconds
2 10 seconds
3 5 seconds
Remarks Stop and scoop off if
ingredients stick to wall of jar
Puliyodharai masala
Ingredients
– Sesame seeds – 4 tsp (16 g)
– Bengal gram (chana dal) – 4 tbsp (72 g)
– Urad dal – 2 tbsp (36 g)
– Dried red chillies – 8-10
– Black pepper – 2 tsp (9 g)
– Coriander seeds – 4 tsp (10 g)
–
Dry-roast the sesame seeds, chana dal
and urad dal in a pre-heated pan on a
low/medium heat until there is enough
aroma from the ingredients. Then
add black pepper, dried red chillies,
coriander seeds and fenugreek, one by
one, in this order and roast the entire
mixture for a bit longer.
After roasting, allow the ingredients to
cool to room temperature.
Pour the roasted ingredients into
the medium jar fitted with the
PoundingBlade and grind as per the
table below.
Speed Time
Pulse 10 times (for about 1 second
each pulse)
1 5 seconds
2 -
3 -
Remarks Stop and scoop off if
ingredients stick to wall of jar
12
en Dry grinding applications with PoundingBlade
Rasam powder
Ingredients
– Coriander seeds – 2 cups (50 g)
– Tur dal – ²/ cup (50 g)
– Dried red chillies – 6-8
– Black pepper – ½ cup (30 g)
– Cumin seeds (jeera) – 3 tsp (15 g)
Dry-roast the coriander seeds and
tur dal in a pre-heated pan on a low/
medium heat until the mixture of
ingredients turns brown/slightly dark.
Then add black pepper, dried red chillies
and cumin, one by one, in this order and
roast the entire mixture for a bit longer.
After roasting, allow the ingredients to
cool to room temperature.
Pour the roasted ingredients into
the medium jar fitted with the
PoundingBlade and grind as per the
table below.
Speed Time
Pulse -
1 10 seconds
2 15 seconds
3 -
Remarks Stop and scoop off if
ingredients stick to wall of jar
Idli podi
Ingredients
– Sesame seeds – ½ tsp (2 g)
– Bengal gram (chana dal) – ½ cup
(100 g)
– Urad dal – ½ cup (100 g)
– Dry red chillies – 4-5 nos
– Peeled garlic cloves – 5 nos
– Spring curry leaf – 1 nos
– Asafoetida – 1 pinch
– Salt as per taste
Dry-roast the above ingredients in a
pre-heated pan on a low/medium heat
until there is enough aroma from the
ingredients.
After roasting, allow the ingredients to
cool to room temperature.
Pour the roasted ingredients into
the medium jar fitted with the
PoundingBlade and grind as per the
table below.
Speed Time
Pulse 10 times (for about 1 second
each pulse)
1 15 seconds
2 -
3 -
Remarks Stop and scoop off if
ingredients stick to wall of jar
13
en Disposal
Garam masala
Ingredients
– Cloves – 16 (9 g)
– Cumin seeds (shahi jeera) – 1 tbsp
(27 g)
– Bay leaf – 4-5 (3 g)
– Green cardamom – 1 tsp (5 g)
– Black cardamom – ½ tsp (5 g)
– Star anise – 2 tbsp (6 g)
– Mace 8 (3 g)
– Cinnamon – 15-16 leaves (9 g)
– Black pepper – 7 g
– Lichen (pathar ka phool) – 2 g
Dry-roast the above ingredients in a
pre-heated pan on a low/medium heat
until there is enough aroma from the
ingredients. Add cumin seeds (shahi
jeera) and bay leaves at the end.
After roasting, allow the ingredients to
cool to room temperature.
Pour the roasted ingredients into
the Medium Jar fitted with the
PoundingBlade and grind as per the
table below.
Speed Time
Pulse 10 times (for about 1 second
each pulse)
1 15 seconds
2 -
3 -
Remarks Stop and scoop off if
ingredients stick to wall of jar
Dane ki chutney
Ingredients
– Peanuts roasted – 120 g
– Red chilli powder – 6 g
– Salt to taste – 3 g
– Cumin seeds – 4 g
– Coriander seed – 5 g
– Oil – 2.5 ml
– Asafoetida powder – 2 pinch (0.5 g)
Dry-roast the above ingredients in a
pre-heated pan on a low/medium heat
until there is enough aroma from the
ingredients.
After roasting, allow the ingredients to
cool to room temperature.
Pour all the roasted ingredients (except
the peanuts) into the medium jar fitted
with the PoundingBlade and grind as
per the table below.
Speed Time
Pulse 3-4 times
Stop Scoop and mix
Then add the roasted peanuts to the
mixture and grind again as per following
table.
Speed Time
Pulse 4 times, or as required
Stop Scoop and mix
Note: The timings in all the above recipes
are indicative to obtain the desired level of
fineness/coarseness close to the traditional
grinding method. However, you may adjust
the timings as per your requirements.
Disposal
J
Save the environ ment - dispose your
e-waste in an environ
mentally friendly
manner by contacting designated
e-waste collection centers.
Please check our website
https://www.bosch-home.in/
for more details.
Changes reserved.
1. This product is warrantied by the company
(warranty) to be free from defects in materials
and workmanship for a period of 2 years from
the date of purchase (warranty period)
2. This product is covered under warranty
against any manufacturing defect or
workmanship for a period of TWO YEARS
from the date of purchase. Should a defect
develop during the warranty period, Bosch
undertakes to repair the appliance FREE
OF CHARGE through any of the authorised
service centres.
3. Warranty and service:
For any information, grievances or queries
please contact our customer care helpline:
1 - 800 - 266 - 1880, or write to us at
[email protected]. The company
will register your service request and retain
a computer record of your service request.
To make a warranty claim, you must provide
proof of purchase.
4. CLAIM:
a. The claim must be made within the
warranty period.
b. Bosch will repair or replace any defective
parts and correct any problems resulting
from poor workmanship free of charge.
c. Service to the product shall be carried out
at your home or the store, whereby the
customer has to take the product to the
store where the product was purchased
at the purchaser’s risk, responsibility and
cost.
d. While the company will make every effort
to carry out the necessary repairs at the
earliest opportunity, the company is under
no obligation to do so within a stipulated
time period. Claims, if any, to this warranty
shall in no case exceed the purchase
price of the product.
e. In case of repairs or replacement of any
part(s) of the product, this warranty will
thereafter continue and remain in force
only for the unexpired period of the
warranty.
f. Replacement of parts would be purely at
the discretion of the company alone. If the
entire product is being replaced (subject
to the sole discretion of the company), the
same model will be replaced, and in the
event such model has been discontinued,
it shall be replaced with the model of
equivalent price at the time of purchase.
g. Replacement criteria from warranty
terms do not stand if “no problem found”
type diagnosis is made and perceived
intermittent errors that cannot be
reproduced are noticed.
h. The authorised technician concerned will
advise whether to effect repair on site or
at the authorised service centre.
i. This warranty will be terminated
automatically after a period of 24 months
from the date of purchase even if the
product was not in use for any time during
the warranty period for any reason.
5. This warranty shall be rendered null and void if:
a. The product is physically damaged
b. The product is modified, maintained or
repaired by a party not authorised by
Bosch.
c. The product is installed, maintained
and operated in ways other than as
recommended by Bosch.
d. The product is used for commercial
purposes.
e. The product is faulty or damaged due to
electrical faults external to the product.
f. Malfunctions or damage resulting from
insects, natural calamities, fire and/or
accidents.
g. The model number, serial number or
warranty stickers have been removed or
tampered with.
h. In case any spare part or any other part
is used in the functioning of the appliance
which does not comply with the safety
parameters approved by Bosch.
6. Warranty limitations
a. The warranty is not transferable from one
user/customer to another.
b. The Bosch warranty does not entail a
warranty of functionality or any obligation
to repair or replace a defective product
if that defect is a result of physical
breakage, improper installation or
connections, electrical faults external
to the product, misuse or unauthorised
modification of the product.
IMPORTANT NOTE:
This product is designed for sale and use in
India only. The applicability of conditions as
provided for claiming Warranty, are valid for use
in India not outside of India.
WARRANTY
WARRANTY CARD
Customer Service
Regardless of the nature of your concern, you can always
be sure of personal attention from the Bosch Customer
Service: on the internet and on the phone.
www.bosch-home.com/in
1 - 800 - 266 - 1880 (toll-free)
E-mail: ser[email protected]
Customer’s Name
Address
City Pin State
Telephone Mobile
E-mail Model/E-Nr
Serial No.
Date of Purchase Date of Expiry
Dealer’s Name
Dealer’s Signature and Stamp Customer’s Signature
Note: Warranty will start from the date of purchase.
/