Page is loading ...

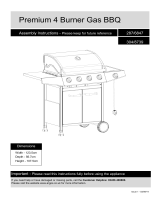
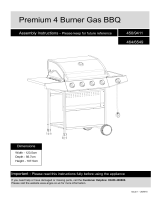
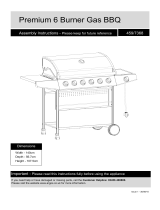
Buffalo 3
!
GG201821B
3 BURNER
GAS BBQ
READ THE
OPERATING
INSTRUCTIONS
BEFORE USING THE
APPLIANCE.
FOR OUTDOOR USE
ONLY.
OUTDOOR USE ONLY!
EN
INSTRUCTION AND USER MANUAL

Innehållsförteckning
Buffalo 3
Warnings ........................................................................................3
Technical data..................................................................................4
Gas category ...................................................................................4
Exploded drawing.............................................................................5
Parts list ...........................................................................................6
Hardware ........................................................................................7
Assembly instructions ......................................................................8
Gas leak test .................................................................................16
Connecting gas ..............................................................................17
Before using the grill ......................................................................18
Grilling tips...................................................................................... 19
Lighting instructions .......................................................................20
Warnings .......................................................................................21
Maintenance................................................................................... 22
Troubleshooting .............................................................................23
Consumer Contact .........................................................................24
Contents
2

WARNINGS
!
!
Failure to follow the instructions provided can imply a risk of
serious injury to personnel and xed installations.
!
Some grill parts can be sharp, we recommend wearing gloves when
assembling and lifting. Sharp edges can cause injury.
!
The grill is intended for outdoor use only in well-ventilated areas.
Never grill in enclosed spaces or under a roof, due to the danger of the
lack of oxygen.
!
Accessible parts of the grill become very hot during use.
Keep children and others who need supervision at a safe distance.
!
Do not move the grill while in use or connected to the gas bottle.
Shut off the gas on the regulator after use and disconnect from the gas
bottle.
!
Modication of the grill can cause danger and will invalidate
the warranty.
!
Never keep the gas bottle under the grill when in use. Gas leaks can
cause serious damage. Place the gas bottle by the side of the grill during
use.
!
Do not place the grill cover or other ammable material in the
compartment under the grill when it is in use or hot.
!
Do not use lava stones, charcoal or briquettes.
!
Clean the grill regularly and thoroughly.
3

Innehållsförteckning
H: 116 cm
L: 133.5 cm
Buffalo 3
Total effect: 10.5 kW (main burner: 10.5 kW)
Gas consumption: 764 g/h (main bur
Hose and regulator (not included):
Must be approved according to
EN standard.
Gas bottle (not included): Use standard bottle
approved for use in the Nordic Region, 10/11 kg
recommended. Even though butane and propane
gas can be used, we recommend propane for
use in the Nordic Region. Approved hoses and
regulators are available from most outlets selling
gas equipment.
NB!
Gas hoses used for this product must not
exceed 120 cm in length.
Technical Data
Gas information
2531-19
This product is produced according to EUROPEAN GAS APPLIANCE
STANDARD EN498 AND EN484 and is CE certied.
DESTINATION OF
COUNTRIES
VALVE SIZE GAS TYPE GAS CATEGORY
BE,FR,IT,LU,LV,
IE, GB, GR, PT, ES,
CY, CZ, LT, SK, CH,
SI
Grill burner:
0.91 mm
Butane (28~30) mbar
Propane 37 mbar
I3+(28-30/37)
LU,NL,DK,FI,SE,
CY,CZ,EE LT,LV,
MT,SK,SI,BG,IS,
NO, TR, HR,
RO, IT, HU
Grill burner:
0.91 mm
G30(butane),G31(propa-
ne) and mixture of these,
LPG 28~30 mbar
I3B/P(30)
PL
Grill burner:
0.87 mm
G30(butane),
G31(propane)
and mixture of these,
LPG 37mbar
I3B/P(37)
AT, CH, DE, SK
Grill burner:
0.80mm
G30 (butane),
G31(propane)
and mixture of these,
LPG 50mbar
I3B/P(50)
4

2
3
4
5
6
7
11
9
10
14
12
15
16
11
13
1
17
18
8
19
20
21
Exploded Drawing
5

Innehållsförteckning
Buffalo 3
Parts List
Code Part QTY
01 Bottom panel 1
02 Left leg assembly 2
03 Right leg assembly 2
04 Front panel 2
05 Right bracket for drip tray 1
06 Left bracket for drip tray 1
07 Wheel axle 1
08 Wheel 2
09 Firebox and hood 1
10 Left side table 1
11 Right side table 1
12 Knob bezel 3
13 Knob 3
14 Flame tamer 3
15
Cooking grate 2
16
Warming rack 1
17
Drip tray 1
18 Grease cup 2
19
Matchstick holder assy 1
20
Thermometer 1
21 Ignition button 1
When ordering spare parts, please use the code from parts list found here.
6

Hardware
C
D
A
B
1 pcs
M6 screw
16 pcs
M6x12 screw
16 pcs
Lock washer
10 pcs
M4x8 screw
9 pcs
M6x16 screw
9 pcs
M6 Lock washer
1 pcs
Small spanner
1 pcs
Axle washer
The following screws and nuts are
supplied with the grill and must be tted.
7

Innehållsförteckning
Buffalo 3
1
2
1
3
Assembly
1
Attach the four legs to bottom panel
Using M6x12 screws and M6 lock washers secure left leg assembly (part 2) to bottom panel (part 1) and right leg
assembly (part 3) with corresponding screws. Assemble 2 additional legs in same manner (see illustration).
M6 x12 screw, 8 pcs.
M6 lock washer, 8 pcs.
B
TOOLS FOR ASSEMBLING
0102030405060708090 100 110 120 130 140 150
0123456
Philips/cross-point screwdriver (not included)
Small spanner (included)
WARNING!
Exercise caution when using electric tools –
their strength can damage the screws.
Please follow these instructions step by step.
We recommend two people to assemble the
grill to avoid heavy lifting.
8

4
Assembly
2
Install the front panel
Insert the corresponding M6x12 screws with M6 lock washers into the pre drilled holes of the left and
right legs located at the front of the cart. Do not tighten screws. Line up the slots in the front panel (part 4)
to the screws. Slide the front panel into place. Tighten the screws.
M6 x12 screw, 8 pcs.
M6 lock washer, 8 pcs.
B
9

Innehållsförteckning
Buffalo 3
7
8
6
5
C
Assembly
3
Install the Wheel
Insert the axle (part 7)
into the wheel (part 8).
Insert the axel into the pre drilled
hole located on the right front
leg of the cart (see illustration).
The axel will then insert into
coordinating hole in the cart leg
at the back of the cart. Insert the
additional wheel on the axel on
the back side of the cart. Insert
the axel washer on the axel and
secure with the M6 lock nut.
Tighten with the included spanner.
4
Install left and right drip tray brackets
Lock the left bracket for drip tray (part 6) and right bracket for drip
tray (part 5) into the mounting hole at left and right leg assembly
with corresponding M4x8 screws.
M4 x 8 screw,
4 pcs
M6 lock washer, 1 pcs.
Axle washer, 1 pcs.
Small wrench, 1 pcs (included)
A
C
10

9
13
a
M6 x 16 screw, 8 pcs
M6 lock washer, 8 cs
Assembly
5
Install the rebox and hood
assembly
Place the knob (part 13) on the valve stem (see
illustration). Set the rebox and hood assembly (part 9)
on top of the cart panel. Secure the rebox and hood
assembly with M6x16 screws and M6 washers at the
top of each leg of the cart (see illustration).
WARNING!
Two persons should
perform this step, due
to heavy lifting.
!
11

Innehållsförteckning
10
11
Buffalo 3
6
Install the left side
table
Line up the holes in the left
side table (part 10) with the
pre-installed screws on left side
of the rebox and hood assembly.
Slide left side table into place over
the screws. Tighten the pre-installed
screws to secure the side table.
7
Install the right side
table
Line up the holes in the right side
burner table (part 11) with the pre-installed
screws on right side of rebox and hood as-
sembly. Slide right side table into place over
the screws. Tighten the pre-installed screws
to secure the side table.
Assembly
12

14
15
12
Install ame
tamers
Place the 4 ame
tamers (part 14) over each
burner inside the rebox.
Vented end of ame tamer is
placed toward the back of the
rebox (see illustration).
13
Install the cooking grate
Place the cast iron cooking grate (part 15) into the rebox.
Assembly
13

Innehållsförteckning
16
17
18
14
Install the warming rack
Insert warming rack (part 16) making sure that the tabs on the warming rack t into
the pre- drilled holes in the rebox (see illustration).
15
Install the drip tray and grease cup
Insert the drip tray (part 18) into the drip tray brackets from the back of the grill.
Insert the grease cup (part 17) into the brackets on drip tray (see illustration).
Buffalo 3
Assembly
14

M6 x16 skruv, 1 st.
M6 låsbricka, 1 st.
16
Install matchstick
holder assy. and
ignitor battery
Install M6X16 screw and M6 lock washer
at the 2/3 position of back left leg of cart.
Do not tighten screw. Hang the single loop
end of matchstick holder (part 19) onto the
screw. You may also hang the top loop on
the other end of the matchstick holder over
the same screw (see illustration below).
This is a safety feature for use when
lighting with a standard match. Please use
with caution.
Locate ignitor button on front panel of
grill. Unscrew the ignitor button. Place
an AA battery inside the ignitor negative
end rst. Make sure the spring is located
inside the rubber boot of the ignitor button.
Screw ignitor button back into place (see
illustration).
Note: AA battery is not provided by
manufacturer.
ALL JOINTS AND CONNECTIONS MUST NOW BE
LEAK TESTED BEFORE USING THE GRILL.
Assembly
M6 x16 screw, 1 pcs.
M6 lock washer, 1 pcs.
D
18
15

Innehållsförteckning
Buffalo 3
Leak Testing
ALL JOINTS AND CONNECTIONS MUST NOW BE
LEAK TESTED BEFORE USING THE GRILL.
Leak test annually, and whenever the gas bottle is removed or replaced.
Always perform a leak test in a well-ventilated area.
!
8
If there are still gas leaks after repeated attempts, contact your dealer.
7
IF BUBBLES APPEAR, SWITCH OFF THE GAS SUPPLY AND REPAIR THE
PROBLEM. PERFORM A NEW LEAK TEST. DO NOT USE THE GRILL BEFORE YOU
ARE SURE THAT THERE ARE NO LEAKS.
6
Open the gas tap on the regulator and carefully check for bubbles
appearing anywherethe liquid has been applied.
1
Make a mixed solution
(½ water and ½ liquid detergent / soap).
2
Ensure that there are no naked ames,
heat sources and cigarettes in the vicinity
when performing a leak test.
3
Check that all controls on the grill are in
the ”OFF” position.
4
Set the regulator to the ”OFF” position and connect it
to the gas bottle.
5
Apply the liquid to all joints and connections on the gas bottle,
regulator, the entire hose and all valves on the grill.
!
WARNING!
NEVER USE AN OPEN
FLAME TO PERFORM
A GAS LEAK TEST
16

Connecting Gas
ALWAYS perform a gas leak test before using the grill.
Connect the gas hose to the gas
rail inlet on the left hand side of the
barbecue. Do not overtighten.
Do not use any sealing tape, paste
or liquid on the connection.
Connect the regulator to the gas
bottle according to your regulator
and bottle dealer’s instructions.
Gas hoses used for this product
must not exceed 120 cm in length
Conrm all barbecue control knobs
are in the OFF position.
We recommend propane gas for use
in the Nordic Region, but butane can
also be used.Butane is not suitable
for low temperatures.
Fit the regulator and the hose.
Follow the assembly instructions
supplied with the regulator set.
Check the gas hose regularly
for cracks and decay. Never
use a damaged gas hose.
Check that the movable
plastic collar on the regulator
is intact and that it has not
been damaged by hot grill
parts.
Check that the gas bottle
stands on a rm, at surface
and is lower than the
connector.
Use an approved gas
bottle that ts the regulator
supplied. Bottles of 10/11 kg
or above are recommended.
I3B/P(30): G30(Butane), G31(propane)
and mixture of these, LPG 28-30 mbar
The following gas types can be used
Hose
Gas bottle
Regulator
WARNING
!
Never store the gas bottle
under the grill when in use. If the
gas bottle is being stored under the
grill when not in use, disconnect
the regulator.
!
Never move the grill while
it is in use, or connected
to the gas bottle.
17

Innehållsförteckning
Buffalo 3
Before using the grill
Ensure that the grill is placed
at least 150cm in all directions
from house walls, trees, plants and
other flammable materials or liquids
when in use.
Do not place the grill under a
roof or overhang.
Ensure the grill is placed where
there is plenty of ventilation.
Do not grill below normal
ground level.
Always lock the wheels,
whenever using the grill.
LOCATION
FINAL CHECK
Check that all control knobs
work normally.
Check that the gas hose is free
of cracks and damage (it should
always be done before using the
grill).
Check that the gas bottle and
hose do not come into contact
with hot objects.
18

Grilling tips
A CLEAN GRILL WORKS BETTER, causes less
smoke and prevents fat catching re. Burn off the grill
after use by opening the lid and burning all the burners
at full power for 10 minutes. Allow the grill to cool, and
then brush off ash from ame tamers and grates.
BRUSH THE GRATES WITH AN OIL that tolerate
high temperatures. This prevents food from burning
onto the grates.
PREHEAT THE GRILL for around 10 minutes at full
power before placing food on the grates. This gives a
better result, and cuts grilling time.
DO NOT GRILL FROZEN FOOD. The cold will
extend grilling time and give a poorer result.
DIVIDE THE GRILL INTO HOT AND COLD
ZONES. When the food is half-ready, move it to the
coldzone to nish grilling. This gives a better result
and cooks the food through without it being burnt.
ASSESS COOKING TIME FOR EACH PRODUCT
to be grilled and put them on the grill in the order
which will mean they are ready at the same time.
BRUSH THE FOOD REGULARLY WHILE
GRILLING with oil or other marinade. It makes the
food stays juicy for longer.
DO NOT OPEN THE LID IF NOT NECESSARY.
When the lid is opened, a lot of the heat escapes.
WARNING!
THIS GRILL IS NOT DESIGNED TO BE USED WITH
MORE THAN 50% OF THE COOKING AREA AS
A SOLID PLATE — THIS INCLUDES BAKING DISHES.
FULL COVERAGE WILL CAUSE EXCESSIVE
BUILD-UP OF HEAT AND DAMAGE THE BARBECUE.
THIS IS NOT COVERED BY WARRANTY.
19

Innehållsförteckning
Buffalo 3
TURNING OFF THE GRILL
Switch off the gas supply at the bottle,
then turn all control valves to the
“Off” position.
Wait until the barbecue is sufciently cool
before closing the hood.
Lighting instructions
MANUEL IGNITION
If the grill will not light using the
ignitor button, use the following
procedure for manual lighting.
Use a long match or lighter.
1. Always keep lid open during
lighting.
3. Place a match between the
coils on the end of the lighting
rod, light the match and insert it
into the hole of rebox to ignite.
4. Push and turn the knob to
“MAX” position, and make sure
the burner lights and stays
lighted.
5.Repeat 3~4 to light other
burners.
NEVER DOUSE THE
GRILL WITH WATER
WHEN THE SURFACES
ARE HOT.
IF THE GRILL WILL NOT LIGHT USING
NORMAL OR MANUAL LIGHTING,
REFER TO THE TIPS SECTION IN THE
TROUBLESHOOTING MANUAL, OR
CONTACT YOUR DEALER.
!
Flames should be blue
and stable. If the ames are
large and yellow, aring or
’broken’, check the
troubleshooting manual.
NB! Make sure to insert an AA-battery (not included)
in the ignitor.
1
ALWAYS KEEP LID OPEN WHEN LIGTHING THE
GRILL
2
Check that all controls are in the ”OFF” position.
3
Open the gas supply valve on the regulator.
4
Push and hold the ignitor button, at the same
time push and turn any control knob slowly
to ”MAX” position. Press the ignitor button until
the grill is lit. If the burner do not to light within
5 seconds, shut down the gas supply and wait 5
minutes, then, repeat the procedure.
5
If the burner will not ignite after repeatedly
attempts, use a match and do a manual ignition.
6
When the rst burner is lit, ignite the next
burner. Ignite one burner at a time in the same
way as step 4. Make sure one burner is lit before
igniting another.
7
Always preheat the grill on max temperature for
10 minutes (lid must be closed) before placing
food on the cooking grid.
20
/