Page is loading ...


1 | OVERVIEW
Innite Jets tracks the dynamics of your playing, samples individual notes and chords, and then
reinterprets them as new sounds using two independent channels of sampling and innite
sustain. It oers 4 separate sampling eects in one (Blur, Synth, Glitch, and Swell).
Although these eects share a common control system, they allow for the creation of a diverse
range of dierent sounds: lush ambient textures that seamlessly fade from one chord to the
next, droning sustain, glitching granular loops, ltered synthesizer sounds, violin-like fuzz and
swell eects, drones, distorted delay and vibrato, and much more.
The pedal uses two channels of sampling (A & B), that can be triggered by your playing
automatically. Notes can attack, sustain, and decay on top of each other. This allows for unique
harmony, drone, and textural eects.
Each channel of sampling can also be triggered manually by the A & B footswitches, allowing two
separate notes or chords to be held and sustained independent of each other. Footswitches
can be set up in Momentary, Latching, or Toggle modes.
The Dry control can be used to blend in your original signal and allows you to play on top of any
sustained notes or chords.
Dimension controls a distinct set of parameters for each preset voice. Dimension can also be
controlled by the internal LFO, the envelope generator, or by recording knob movements.
Innite Jets features a digitally-controlled-analog Drive, Tone, and Dry section. The movements
of the Drive knob can be recorded and played back to add unique textural eects to your
sound. Innite Jets can save Drive, Tone, and Dry settings as part of a User Preset.
The pedal features two save slots for custom User Presets. Recorded knob movements, LFO
settings, and all other pedal parameters can be saved and recalled later.
FEATURES
• Two independent channels of sampling, allowing for innite sustain of two dierent notes or chords at a time
• Samplers can be triggered automatically by note attack or in manual mode via footswitch
• 4 separate eect styles (Blur, Synth, Glitch, and Swell)
• 10 preset variations
• 2 User Save slots
• Envelope Shape control, for changing the attack and decay characteristics of sampled notes
• Dimension control, for manipulating parameters unique to each eect style
• Record and Save Knob Movements
• Internal LFO and Envelope Generators for control of Dimension and sampling channel volume
• Digitally-Controlled-Analog Drive, Tone, and Dry Mix controls
• Analog Dry Path
• Expression Pedal Input, mappable to many controls
• True Bypass Switching (electromechanical relay)

2 | CALIBRATION
In order for Innite Jets to accurately track the dynamics of your playing, it’s necessary to
calibrate the pedal to each new instrument that you will be using. It only takes a few seconds
and can be done mid set or even mid song.
Simultaneously hold the Bypass and B footswitches for two seconds. You will see the lights ash
to acknowledge that you have entered calibration mode. You can then release the footswitches.
Play a few notes/chords, and the pedal will adjust itself to your playing. It will ash the same
short animation when it has nished calibrating. These settings will be retained between power
cycles, so it is only necessary to perform these steps when switching instruments.
If you wish to lower the sensitivity of the pedal, simply strike the notes harder when in calibration
mode. The pedal will look for notes of similar volume before taking a sample. Conversely, if you
would like to make the pedal more sensitive to your playing, simply play softly when calibrating.

3 | GETTING STARTED
To get started with Innite Jets, begin by calibrating the pedal as described in the previous
section.
For a starting point, set the controls to the following:
Set the Trigger Mode switch to Mono. Mono Trigger mode means that Innite Jets will alternate
between Sampler channels A & B each time it detects that you have played a new note. This
means only one sampled note will sound at a time.
Hit a few notes or chords on your instrument. Each new note attack will trigger either Sampler
channel A or B. Use the Envelope Shape knob to change the contour of the notes being played
back. Use the Envelope Time control to vary how long each note will sustain.
Set the Trigger Mode switch to Poly. In this mode, Innite Jets will still alternate between
Sampler channels A & B, but both channels can sustain at the same time. Experiment with
dierent combinations of Envelope Shape and Envelope Time values to get a feel for the types
of sounds you can create in this mode. Shorter envelope times in this mode will provide a small
amount of overlap between notes, while longer envelope times will allow the notes to sustain on
top of each other.
Now set the Trigger Mode switch to Manual. Each channel of sampling can be used
independently via the A & B footswitches. Play a note and step on the A footswitch to capture
it. This note or chord will sustain until you tap the footswitch again. Play a dierent note and
tap the B footswitch to capture it. Turn the Dry control up to 50% (equal parts dry and eected
signal) to hear your instrument’s original signal mixed in. Spend some time using the Manual
mode to bring combinations of sustained notes in and out. Try changing the Envelope Shape
and Envelope Time controls to hear the dramatic eects that can be created by fading
sustained notes in and out. These switches are set to Toggle operation (press once to turn
on, press again to turn o) by default, but they can also be set to Latching or Momentary
operation (see Section 8). When you’ve nished, switch Trigger Mode back to Mono.
Dimension controls a dierent set of parameters for each Voice preset. It can be controlled by
physically turning the Dimension knob, by recording and looping the movement of this knob,
or by the internal LFO (Low Frequency Oscillator).
For Blur presets, Dimension controls a combination of delay time, feedback and ltering. You
may notice a pitch bend eect as the delay time changes when turning the knob. Manipulating
this control very slightly can create subtle chorus or tape warble eects, while wide sweeps of
the control will create more drastic pitch bends and delay eects. Once you nd a range that
you like, you can record and loop this knob movement.
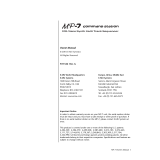
Square Wave
25%
0%
0%
0%
Blur / 0
Env Shape
Env Time
Drive
Dry
Dimension
Voice

3 | GETTING STARTED CONTINUED
To record the movement of the Dimension control, hold down the Bypass (center) footswitch
and twist the Dimension knob. When you release the Bypass footswitch, Innite Jets will begin
to play back and loop this movement. As you record, you’ll see the MOD indicator light turn
red. When you have nished recording, you will see this light reproduce the motion you just
recorded. To stop playback and return the Dimension control to its normal function, simply
move it again. This technique works across all of the dierent Voice presets, and can be used to
create a wide variety of new eects of your own.
Try switching the Voice control to Synth A. You’ll hear your playing reinterpreted as a
synthesizer sound. In this mode, Dimension controls the cuto frequency of a lowpass lter.
Instead of recording knob movements, this time try controlling Dimension with the internal
LFO. The LFO functions of each control are indicated in red text below their primary functions.
Hold the A footswitch to adjust these parameters. Try turning up the LFO Depth by holding
down the A footswitch and turning the Dimension control. When LFO Depth is set to 0,
the LFO is o. As you turn up the depth, you’ll start to hear the LFO acting on the Dimension
control. To change the speed of the LFO, hold down the A footswitch while turning the LFO
Frequency control. To change the waveform of the LFO, hold down A and change the Shape
control. To turn the LFO o, turn the LFO Depth back down to 0.
You’ll notice two additional function markers at the furthest end of the Envelope Time control:
Innite will sustain any incoming note until you play another, and Repeat Waveform that
repeats the current Envelope Shape waveform. When using Repeat Waveform, the distance
between one wave shape and the next on the Envelope Shape control sets the rate.
Use the Drive control to add overdrive. Like the Dimension control, the movements of the
Drive control can be recorded and looped. This can be used to create tremolo eects or add
interesting textures to the sounds you create. Innite Jets also contains secondary control
functions for adjusting Tone, Master Volume, and Gain Mode (see Secondary Control Functions,
Section 8).
Try switching the Voice control to Glitch A. In this mode, Dimension controls the playback
length of the looping sample fragments the pedal captures. Automating this control with a
recorded knob movement or the internal LFO can add complex textural elements to your
playing as loops fade in and out. Put the pedal into Poly Trigger Mode, and loops can cascade
on top of each other for even more complexity and musical interest.
Glitch B, Swell A, and Swell B have slight dierences in their control schemes that are detailed
in their respective sections below.
Once you’ve found a sound you like you can save these settings for later recall. Hold down both
the A & B footswitches until the indicator lights begin to blink, turn the Voice knob to either User
A or User B, and hold down the A & B footswitches again to save the preset.
Innite Jets is designed to foster experimentation, creativity, and a nearly limitless level of
customization. It is our hope that this getting started guide will serve as a jumping o point for
your own explorations.

4 | INPUTS & OUTPUTS
9V POWER INPUT
The pedal accepts a standard 9v, center-negative, 2.1mm DC barrel connector power supply. For
best results, use a transformer isolated “wall-wart” power supply, or a pedalboard power supply
with multiple isolated outputs. Using a switching power supply or daisy-chain from another
pedal can add extra unwanted noise. For best results, we recommend a power supply than can provide a
minimum of 200mA.
EXPRESSION PEDAL INPUT
An external Expression Pedal can be used to control the
Envelope Time, Envelope Shape, Drive, Dry, or Dimension controls.
If an Expression pedal is plugged in to the 1/4” “EXP” jack while the
pedal is powered on, the Indicator Lights will ash blue. While the lights are ashing, move the
control to which you’d like to assign the Expression Pedal.
This Expression Pedal assignment will persist after cycling power; to skip this step on
subsequent uses of the pedal, plug in the Expression Pedal before powering on the pedal. Or
to keep the same assignment, don’t touch any controls while the Indicator Lights ash after
plugging it in.
AUDIO INPUT / OUTPUT
9 volt
2.1 mm barrel connector, center negative
200 mA minimum
Tip: 0-5v input
Ring: 5v output
Sleeve: 0v output
Recommended pot resistance: >10 kOh
Input impedance: >300 kOhm
Output impedance: ~1.2 kOhm
Recommended minimum input impedance of next device: 20kOhm (instrument level input)

5 | INDICATOR LIGHTS
Sampler Channel A : Indicates the output volume of Sampler Channel A, which can be triggered
automatically by your playing or manually via the A footswitch.
Input Signal Indicator : Indicates the volume of your instrument’s signal. This light will also display the
automation applied to the Drive control if knob movements have been recorded.
Sampler Channel B : Indicates the output volume of Sampler Channel B, which can be triggered by
either your playing or the B footswitch.
Mod : Displays either the value of the Dimension control or the value of any modulation sources
controlling Dimension (LFO, recorded knob movements, or the internal envelope generator)
Bypass : Indicates whether the eect is engaged; a turquoise light indicates the eect is on, while a red
light indicates the eect is bypassed. The light will turn blue when recording knob movements.

6 | VOICE PRESETS
BLUR
These presets “freeze” your note or chord, but remove the original attack and decay
characteristics, allowing the sample to be reshaped into a new sound. The Blur presets are
useful for creating hazy, atmospheric textures, pads underneath lead playing, and many other
unique sounds.
When using Blur presets, the Dimension knob controls a combination of delay time, ltering,
and feedback that drastically changes the perceived “size” and “space” of the sound. Automating
the Dimension knob with either the internal LFO or recorded knob movements can create
anging, chorus, or vibrato eects. At more extreme settings, changing the Dimension
control will create a pitch bend while the control is in motion-- capturing and playing back this
movement can be used to great creative eect.
The -1 and +1 Blur presets mix in a pitch shifted signal that is either one octave below or above
the original signal. The +1/-1 preset mixes in both an octave up and octave down pitch shifted
signal and also adds a longer delay time to the Dimension control for the creation of massive
sounding atmospherics.
All of this adds up to an expressive toolkit for the creation of subtle atmospheric textures,
sustain eects, warbly cassette sounds, pitch bending reverbs, and an endlessly tweakable array
of combinations in between.
SYNTH
These presets sample your playing and convert it into one of two dierent synth sounds. When
using the Synth A and B presets, Dimension controls the low pass lter’s cuto frequency. The
lter can be automated with recorded knob movements or controlled by the internal LFO or
envelope.
Synth A transforms your playing into a hard edged digital synthesizer sound, while Synth B
transforms your signal into an airy, gently chorused synthesizer sound reminiscent of 1980s
synth pads.
The combination of these synth sounds with the built in Drive control, as well as the low pass
lter (accessible via Dimension control), can create a wide variety of synth tones. They can be
useful as both lead sounds and “pad” accompaniment underneath your playing when mixed
with the Dry signal.

6 | VOICE PRESETS CONTINUED
GLITCH
These presets chop the incoming signal into looping fragments and reassemble them in two
distinct ways: Glitch A creates short loops out of incoming notes or chords and allows the user
to choose one of four sample playback lengths. Glitch B adds a random element by storing
notes or chords in separate chunks of audio and playing them back at random (or controlled)
intervals. In both cases, these presets allow the user to manipulate the incoming audio in real
time, re-organizing your sound into dierent stuttering patterns on the y.
Despite the name “Glitch,” these two presets are not limited to abrupt, scratched CD type
eects. Using the sine or sawtooth envelope shapes in Poly trigger mode, for example, can
create complex, swirling textures around the original signal. Shorter envelope times can create
interesting delay eects. Automating changes in the Dimension control can add an enormous
amount of complexity to the sound by varying the playback length of the recorded fragments of
sound in real time.
Glitch A captures short sample fragments from the incoming signal. Each time a new note or
chord is captured, the pedal will begin playing back a short looped section of audio. Dimension
selects one of four sample lengths to play back when in this mode. Recording and playing
back the movement of the Dimension control in this mode can yield interesting rhythmic and
textural eects as recorded samples change between short and long sample lengths.
Glitch B samples each incoming note or chord separately as a short loop and stores it in one
of six memory blocks, selected at random. In this mode, Envelope Time controls how often
the pedal will record and loop a sample; at 0% it will very infrequently record and play back a
sample, and at ∞ it will trigger and play back a sample with every new incoming note or chord.
While in Glitch B mode, Dimension can be used to scroll back through the 6 notes stored
in the pedal’s memory, organizing the sound into brand new combinations of small looped
segments of audio. Automating this control allows for real time reordering of audio into new
patterns— while the control is automated it sweeps through the dierent sample blocks of pre
recorded audio and plays them back. Any new notes played while the control is automated
will overwrite the existing material in the sample blocks. In this way the pattern can continually
evolve as notes are added and subtracted.
When using the Glitch B preset, the Dry control functions slightly dierently. When Dry is set
to 0% in this mode, the output mix will fully switch between the eected signal and the original
instrument signal when the sampler is turned on or o. This allows the looping fragments
captured by the pedal to occasionally “interrupt” the dry signal for a more striking eect. Turning
the Dry control above 15% will return the Dry control to normal operation, allowing the original
signal to pass through regardless of whether the pedal is sampling.
Because Glitch B works slightly dierently than the other presets, there is no dierence
between Mono and Poly trigger modes when using this preset.
This preset is intended to inject some chaos, unpredictability, and excitement into a piece of
music. The loops that the preset creates are ephemeral and cannot be saved; as you create
them you are hearing it for both the rst and last time.

6 | VOICE PRESETS CONTINUED
SWELL
Swell presets A & B allow for the use of Innite Jets’ dynamics processing to add dramatic
volume eects to your playing. Create volume swells or use Repeat Waveform to create
tremolo eects. The eected signal is then fed into a delay (controlled by Dimension) which
can be modulated by LFO, envelope, or recorded knob movement. Automating this control
can create a wide range of sounds from subtle tape warble, chorus, or vibrato to extreme
pitch shifting feedback sounds.
Swell A uses the dynamics of your playing to trigger a volume envelope selectable by the
Envelope Shape control.
Swell B adds waveshaping to the signal, allowing for violin-like sustained fuzz eects and over
the top distorted lead tones.
Because the Swell presets do not capture and sample your playing, Mono, Poly, and Manual
trigger modes work slightly dierently for this eect. In Poly mode, Innite Jets will play the
through the entire selected Envelope Shape each time a note is triggered for more dramatic
volume efects. In Mono mode, it will apply only the attack portion of the selected Envelope
Shape for a slightly more subtle eect and to allow for faster playing.
Unlike the other preset voices, Swell A and Swell B are always set to Momentary operation
when using Manual trigger mode. When the footswitch is depressed, signal is allowed to
pass into the delay that comes at the end of the signal path. When the footswitch is released,
signal is no longer allowed to pass to the delay. This allows for some very interesting creative
uses for the Swell presets. Consider this example: turning the Dry control to 50% allows
the signal to pass unchanged. However, when Footswitch A or B is depressed, signal will
pass into the delay and thus the note will jump out from the mix, suddenly occupying a very
dierent space. Releasing the footswitch allows this delayed note to trail o naturally and
clearly over the top of whatever the user plays afterwards.

7 | CONTROLS
TRIGGER MODE SWITCH
The Trigger Mode switch oers three dierent ways to control Innite Jets’ samplers: Mono,
Poly, and Manual. In Mono and Poly modes the samplers are triggered by your playing.
Manual trigger mode is controlled by the A and B footswitches.
In Mono trigger mode, sampling is controlled by your playing, but only one note or chord
sustains. Each successive note or chord cancels out the previous note. Because only one
channel sustains at a time, this mode can be helpful for playing faster or with more clarity than
the Poly trigger mode.
In Poly trigger mode, Innite Jets will still alternate between Sampler channels A & B, and both
channels sustain at the same time. In this mode it is possible to create very unusual harmonies
and textural eects. Shorter envelope times provide a small amount of overlap between
notes, while longer envelope times allow the notes to sustain on top of each other. It can take
some experimentation to become accustomed to playing this way, as Poly mode can create
harmonies and stacks of notes not easily achieved by normal playing. With a little practice,
however, this mode can unlock some truly inspiring and unusual sounds.

7 | CONTROLS CONTINUED
ENVELOPE SHAPE AND ENVELOPE TIME
Envelope Shape selects the type of waveform used to shape the
output volume of each sampler channel. The user can choose from
one of six waveforms. This control works in tandem with the Envelope
Time control, which determines the duration of the waveform once the
envelope has been triggered.
Similarly, when using the Random waveform, the area assigned to the
Random waveform on the Envelope Shape control can also be used to
set how often the pedal chooses a new random value. Envelope Time
controls the overall duration of the waveform.
You’ll notice two additional function markers at the furthest end of the
Envelope Time control: Innite, which will sustain any incoming note
until you play another, and Repeat Waveform that loops the current
Envelope Shape waveform.
When using Repeat Waveform, the distance between one wave shape
and the next on the Envelope Shape control sets the rate at which
the waveform repeats. When the pedal is in Poly trigger mode, the
repeating waveforms for sampler channels A & B are oset by 50% to
create an alternating pattern between the two voices. When the pedal
is in Mono trigger mode, the repeating waveforms are in sync between
the two channels.
When using the Glitch B preset voice, Envelope Time does not control
the duration of the waveform. Rather, Envelope Time determines how
often the pedal will record and loop a new sample; when set to 0% it
will very infrequently record and play back a sample, while at Innite or
Repeat Waveform it will trigger and play back a sample with every new
incoming note or chord.
GLITCH B

7 | CONTROLS CONTINUED
VOICE
Voice allows you to choose between one of four sampling eect styles, comprising ten individual
presets and two User save locations. For more on this see Section 6, Voice Presets.
DIMENSION
Dimension controls a dierent distinct set of parameters for each preset voice. Dimension
can also be controlled by the internal LFO, the envelope generator, or by recording knob
movements to create a wide variety of sounds. For more about using the LFO and envelope
generator to control Dimension, (see Section 8, Secondary Control Functions).
The value of the Dimension control or the value of any modulation sources controlling
Dimension (LFO, recorded knob movements, or the internal envelope generator) is displayed on
the MOD indicator light.
When using Blur or Swell presets, Dimension controls a combination of delay time, ltering,
and feedback that drastically changes the perceived “size” and “space” of the sound. Automating
the Dimension knob with either the internal LFO or recorded knob movements can create
anging, chorus, or vibrato eects. At more extreme settings, changing the Dimension control
will create a pitch bend while the control is in motion-- capturing and playing back this
movement can be used to great creative eect.
Parameter
Space / Feedback
Lowpass Filter Cuto
Sample Playback Length
Sample Selector
Space / Feedback
Preset Voice
Blur
Synth
Glitch A
Glitch B
Swell

7 | CONTROLS CONTINUED
When using the Synth A and B presets, Dimension controls the low pass lter’s cuto frequency.
The lter can be automated with recorded knob movements or controlled by the internal LFO or
envelope.
Glitch A captures short sample fragments from the incoming signal. Each time a new note or
chord is captured, the pedal will begin playing back a short looped section of audio. Dimension
selects one of four sample lengths to play back when in this mode. Recording and playing
back the movement of the Dimension control in this mode can yield interesting rhythmic and
textural eects as recorded samples change between short and long sample lengths.
While in Glitch B mode, the Dimension control can be used to scroll back through the 6 notes
stored in the pedal’s memory, organizing the sound into brand new combinations of small
looped segments of audio. Automating this control allows for real time reordering of audio into
new patterns— while the control is automated it sweeps through the dierent sample blocks of
pre recorded audio and plays them back. Any new notes played while the control is automated
will overwrite the existing material in the sample blocks. In this way the pattern can continually
evolve as notes are added and subtracted.
DRIVE
Drive controls the amount of overdrive applied. Innite Jets uses a digitally-controlled, analog
overdrive stage at the output. This means that although it is an analog overdrive, the control’s
value can be saved as part of a User preset, or automated by recording knob movements.
The pedal automatically compensates for the amount of gain introduced by the Drive control
by reducing the output volume proportionally; although the Drive control provides more than
10x gain it will remain at a consistent output level. This feature can be disabled by selecting a
dierent gain mode at startup, and the user can also manually control the digitally controlled
analog Master Volume and Tone controls for extended customization (see Secondary Controls).
DRY
Dry controls the balance between the original instrument signal and the eected signal. It
makes use of a digitally-controlled, analog circuit that allows you to save the settings of the
analog dry path as part of a User preset. Turning the knob clockwise adds an increasing amount
of your original instrument signal to the output. At 50%, both signals will be equal. Above 75%, it
also begins to reduce the level of the eected signal, shifting the balance toward the dry signal.
When using the Glitch B preset, the Dry control functions slightly dierently. When Dry is set
to 0% in this mode, the output mix will fully switch between the eected signal and the original
instrument signal when the sampler is turned on or o. This allows the looping fragments
captured by the pedal to occasionally “interrupt” the dry signal for a more striking eect. Turning
the Dry control above 15% will return the Dry control to normal operation, allowing the original
signal to pass through regardless of whether the pedal is sampling.
The Dry control can also be used to manually adjust the analog Master Volume control
(see Secondary Controls).

7 | CONTROLS CONTINUED
FOOTSWITCHES
■ BYPASS FOOTSWITCH / RECORD KNOB MOVEMENTS
Tapping the center Bypass Footswitch toggles Innite Jets’ true-bypass relay switching.
Holding the Bypass Footswitch will allow the Dimension or Drive controls’ movements to be
recorded and looped. For more on this, see Knob Recording.
Holding down the Bypass Footswitch while starting up the pedal allows the user to change the
pedal’s gain mode. For more on this see Secondary Control Functions.
■ FOOTSWITCH A / LFO ADJUST
When the pedal is in Manual trigger mode, the A footswitch can be used to sustain individual
notes, or fade new notes or chords in or out. By default the footswitches are set to Toggle on/
o, but they can also be set to Momentary and Latching operation.
See Secondary Control Functions.
Holding Footswitch A will allow the user to adjust the controls of the internal LFO, as well as
access the secondary functions of the digitally-controlled, analog output section.
For more on this see Secondary Control Functions.
Holding down Footswitch A while starting up the pedal allows the user to change the brightness
of the indicator lights. For more on this see Secondary Control Functions.
■ FOOTSWITCH B
When the pedal is in Manual trigger mode, Footswitch B can be used to sustain individual
notes, or fade new notes or chords in or out. By default the footswitches are set to Toggle on/
o, but they can also be set to Momentary and Latching operation.
For more on this, see Secondary Control Fuctions.
Holding Footswitch B while adjusting the Trigger Mode switch allows the user to switch
between Toggle, Momentary, and Latching modes.

8 | SECONDARY CONTROL FUNCTIONS
INTERNAL LFO (LOW-FREQUENCY OSCILLATOR)
The internal LFO provides a continuously sweeping control signal that can be used to modulate
the Dimension control. You can choose between one of six waveforms for this control signal
and can set the rate at which it sweeps. The LFO allows you to add great complexity to the
preset sounds by constantly shifting the Dimension control in a predictable way.
The LFO’s parameters may be manipulated by holding Footswitch A (LFO Adjust) and turning
the Dimension, Envelope Shape, or Envelope Time controls. The secondary functions are
denoted in red text below each each control. All LFO parameters can be saved as part of a User
preset.
■ LFO DEPTH
LFO Depth controls the amount of modulation applied to the Dimension control from the LFO.
At an LFO Depth of 0%, the LFO is “o” and Dimension is controlled solely by the knob itself.
To increase LFO Depth, hold Footswitch A while turning the Dimension control. As the depth
increases, the MOD indicator light will change from its normal turquoise color to a new color,
determined by the waveshape of the LFO.
After setting the LFO Depth, release Footswitch A. While the LFO is engaged, the Dimension
control knob can then be used to set the oset for the LFO. For instance, if the LFO Depth is set
to 20%, and then the Dimension knob is moved to 50%, the output of the Dimension control
will swing between 40% and 60%. The depth parameter dictates how far the Dimension control
will swing in either direction from its current position.

8 | SECONDARY CONTROL FUNCTIONS CONTINUED
■ LFO FREQ
LFO Frequency controls the rate of the low frequency oscillator’s sweep. To change the LFO
Frequency, hold Footswitch A and turn the Envelope Time control. The current value of the
Envelope Time knob will be retained and will not change until the user moves it again after
releasing the footswitch.
■ LFO SHAPE
LFO Shape allows the user to choose from one of six waveforms for the internal low-frequency
oscillator. To change the LFO Shape, hold Footswitch A and turn the Envelope Shape control.
The value of the Envelope Shape knob will be retained and will not change until the user moves
it again after releasing the footswitch.
■ LFO MODE / ENVELOPE GENERATOR
Innite Jets also allows an internal Envelope Generator to be used to modify the Dimension
control instead of the LFO. The Envelope Generator controls the Dimension control in the
same manner as the LFO, but instead of providing a continuous sweep it only plays once each
time a new note is triggered.
To switch between LFO and Envelope Generator, hold Footswitch A and ip the Trigger
Mode toggle switch left for LFO operation or right for Envelope Generator operation.

8 | SECONDARY CONTROL FUNCTIONS CONTINUED
MANUAL TRIGGER FOOTSWITCH MODES
When using the Manual trigger modes, the A and B footswitches trigger capture of new notes
or chords. By default they are set to Toggle operation (push once to turn on, push again to turn
o). Alternatively, they can be set to Momentary or Latching operation.
■ MOMENTARY
In Momentary operation, the A and B footswitches trigger the capture of a new note when
pressed. The note will continue to sustain while the footswitch is depressed, and then decay
when the footswitch is released. The combination of Envelope Time and Envelope Shape will
determine how long this decay takes after the footswitch is released. When set to Momentary
operation, many interesting creative results can be achieved by setting a long Envelope Time
and varying the choice of A or B footswitches when capturing notes so that occasionally both
channels may sustain or decay on top of each other.
Unlike the other preset voices, Swell A and Swell B are always set to Momentary operation
when using Manual trigger mode. When the footswitch is depressed, signal is allowed to pass
into the delay that comes at the end of the signal path. When the footswitch is released, signal
is no longer allowed to pass to the delay. This allows for some very interesting creative uses for
the Swell presets.
Consider this example case: turning the Dry control to 50% allows the signal to pass
unchanged. However, when Footswitch A or B is depressed, signal will pass into the delay and
thus the note will jump out from the mix, suddenly occupying a very dierent space. Releasing
the footswitch allows this delayed note to trail o naturally and clearly over the top of whatever
the user plays afterwards.
■ LATCHING
In Latching operation, pressing the A or B footswitch samples a note or chord and sustains
it; pressing the switch again will clear the previous note and sample another note or chord.
Double-tap the footswitch in quick succession to clear the note.
■ TOGGLE
In Toggle operation, pressing the A or B footswitch samples a note of chord and sustains
it. Pressing a footswitch again will clear the note. The Envelope Shape and Envelope Time
controls determine the amount of time it takes for a note to decay once it has been cleared.

8 | SECONDARY CONTROL FUNCTIONS CONTINUED
CHANGING FOOTSWITCH MODES
To switch between Momentary, Latching, and Toggle operation, hold Footswitch B while
changing the Trigger Mode switch. Flip the switch left to Poly for Toggle operation (yellow
lights), to the middle Mono setting for Latch operation (red lights), or to the right Manual
setting for Momentary operation (blue lights). The animated patterns of the indicator lights are
intended to indicate what each mode does so that they may be more easily dierentiated later.
Release Footswitch B to resume normal operation. If you have changed the Trigger Mode
switch, it may be necessary to ip back to Manual in order to resume manual footswitch
triggering. This setting is saved in memory and will persist after cycling power.

8 | SECONDARY CONTROL FUNCTIONS CONTINUED
TONE / MASTER VOLUME
In addition to the Drive control, Innite Jets features a digitally-controlled-analog Tone and
Master Volume section.
Tone controls the amount of high frequency rollo at the output. To adjust the Tone, hold
Footswitch A and turn the Drive control. Turning the knob clockwise allows more high
frequencies to pass through, fully clockwise representing no high frequency rollo (much like a
guitar’s tone knob). Any changes made to the Tone setting will be stored when saving presets
and can be recalled later. The current value of the Drive knob will be retained and will not
change until the user moves it again after releasing the footswitch.
By default, the pedal automatically compensates for the amount of gain introduced by the
Drive control by reducing the output volume proportionally, but for further customization
it is possible manually set the output volume. Master Volume can be adjusted by holding
Footswitch A and turning the Dry control.
This automatic gain compensation can be disabled, so that Master Volume is always set by
holding Footswitch A and changing Dry. To do this, change the Gain Mode at startup as
described above.
/