Page is loading ...

Date Issued: 06/20/16 IS-45590-CB
We’re here to help 866-558-5706
Hrs: M-F 9am to 5pm EST
CAUTION – RISK OF SHOCK –
Disconnect Power at the main circuit breaker panel or main fuse
box before starting and during the installation.
INSTRUCTIONS
For Assembling and Installing Fixtures in Canada
Pour L’assemblage et L’installation Au Canada
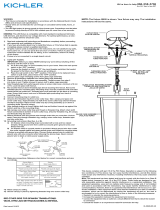
1) Attach mounting strap to outlet box with supplied screws.
NOTE: The mounting strap must be mounted with the 90°
bend with hole facing downward.
2) Make wire connections. Reference chart below for correct
connections and wire accordingly.
3) Raise fixture to wall slightly tilting forward to align locating
pin in bottom of canopy to hole in bottom of mounting strap.
Once locating pin is in hole of mounting strap, carefully tilt
fixture towards wall. Be careful not to pinch wires between
wall and canopy of fixture.
4) Thread mounting screws thru hole (top) in canopy into
mounting strap. Tighten mounting screws to secure fixture
to wall.
5) Raise glass to fixture carefully passing hole in glass over
socket. Thread glass retaining ring onto socket. Tighten to
secure. DO NOT over tighten.
6) Insert recommended bulb(s). (Not supplied)
Connect Black or
Red Supply Wire to:
Connect
White Supply Wire to:
Black White
*Parallel cord (round & smooth) *Parallel cord (square & ridged)
Clear, Brown, Gold or Black
without tracer
Clear, Brown, Gold or Black
with tracer
Insulated wire (other than green)
with copper conductor
Insulated wire (other than green)
with silver conductor
*Note: When parallel wires (SPT I & SPT II)
are used. The neutral wire is square shaped
or ridged and the other wire will be round in
shape or smooth (see illus.)
Neutral Wire
MOUNTING
SCREW(S)
CANOPY
SOCKET
GLASS
GLASS
RETAINING RING
OUTLET
BOX
WIRE
CONNECTOR(S)
STRAP
MOUNTING SCREW(S)
MOUNTING STRAP
NOTE: MUST BE
POSITIONED WITH
90° BEND WITH
HOLE AT THE BOTTOM
EXAMPLE
LOCATING TAB
/


