Page is loading ...

Secure. Anytime. Anywhere.
TM
Kanguru Mobile Workspace v100
Windows To Go USB3.0 Flash Drive
User Manual
Copyright 2018, All Rights Reserved Model no: KWTG100

2
NOTICES AND INFORMATION
Please be aware of the following points before using your Kanguru Mobile Workspace v100
Copyright © 2018 Kanguru Solutions. All rights reserved.
Windows 7
TM
, Windows 8
TM
, Windows 10
TM
and Windows To Go
TM
are registered trademarks of Microsoft
Inc. All other brands or product names are trademarks of their respective companies or organizations.
Kanguru Solutions will not be held responsible for any illegal use of this product nor any losses incurred
while using this product. The user is solely responsible for the copyright laws, and is fully responsible
for any illegal actions taken.
Customer Service
To obtain service or technical support for your system, please contact Kanguru Solutions Technical
Support Department at 508-376-4245, or visit www.Kanguru.com for web support.
Legal notice
In no event shall Kanguru Solutions’ liability exceed the price paid for the product from direct, indirect,
special, incidental, or consequential software, or its documentation. Kanguru Solutions offers no refunds
for its products. Kanguru Solutions makes no warranty or representation, expressed, implied, or statutory,
with respect to its products or the contents or use of this documentation and all accompanying software,
and specifically disclaims its quality, performance, merchantability, or fitness for any particular purpose.
Kanguru Solutions reserves the right to revise or update its products, software, or documentation without
obligation to notify any individual or entity.
Export Law Compliance
Regardless of any disclosure made to Kanguru Solutions pertaining to the ultimate destination of the
specific Kanguru product, you warrant that you will not export, directly or indirectly, any Kanguru
product without first obtaining the approval of Kanguru Solutions and the appropriate export license from
the Department of Commerce or other agency of the United States Government. Kanguru Solutions has
a wide range of products and each product family has different license requirements relative to exports.
Defragmenting Flash Memory Warning
Do not attempt to defragment your Kanguru Mobile Workspace v100 Flash Drive. Flash memory does
not need to be defragmented and does not gain any performance by doing so. Defragmenting your flash
drive can actually degrade the flash memory which may reduce the drive’s total capacity and lifespan.
Notices and Information

3
Table of Contents
Table of Contents
1. Introduction .....................................................................................................4
1.1 Package Contents ........................................................................................4
1.2 Technical Specifications .............................................................................5
2. What is Windows To Go? ...............................................................................6
3. Creating a Windows To Go Workspace .......................................................7
3.1 Minimum Requirements .............................................................................7
3.2 Preparation for Windows To Go .................................................................7
3.3 Creating a Windows To Go Workspace Using the Setup Wizard ...............8
3.4 Creating a Windows To Go Workspace Using Command Line .................11
3.5 Creating a Windows To Go Workspace Using Powershell.........................13
4. Booting Your Windows To Go Workspace ....................................................14
4.1 Enable Windows To Go Startup options .....................................................14
4.2 Configuring the BIOS Settings for use with Windows To Go ...................15
5. Activating Windows on Windows to Go Drives ...........................................16
6. Tips for Using Windows To Go .....................................................................17
7. FAQs .................................................................................................................18
7.1 Windows to Go Provisioning Methods .......................................................18
7.2 Windows to Go on Domain ........................................................................18
7.3 Windows to Go CPU Architecture .............................................................18
7.4 Windows Store ............................................................................................19
7.5 Activating Windows to Go Drives ..............................................................19
8. Warranty Information ....................................................................................20
9. Tech Support ...................................................................................................20

4
Introduction
1. Introduction
The Kanguru Mobile Workspace v100 is a high-quality USB3.0 flash drive that has been certified by
Microsoft for use with Windows To Go (WTG).
Windows To Go certified hardware has been optimized for:
• High random read/write speeds and support for thousands of random I/O operations per second
• Booting and running on hardware certified for use with 32-bit and 64-bit versions of Windows 8,
Windows 8.1 and Windows 10
• Low I/O Latency
• Durability
Note: Windows To Go is not supported by Windows RT
Kanguru Mobile Workspace v100 Features
• SSD-level performance
• Accelerated application performance
• Quick boot time
• Enterprise level provisioning
Note: This user guide only covers creating a Windows To Go workspace on your Kanguru Mobile
Workspace v100 drive. For information about using Windows, please refer to the user documentation
published by Microsoft:
• Windows 8/8.1 - http://www.microsoft.com/en-us/download/confirmation.aspx?id=39055
• Windows 10 - https://www.microsoft.com/en-us/itpro/windows-10/end-user-readiness
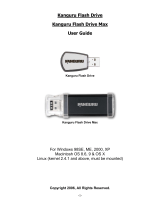
1.1 Package Contents
Please check the contents of the package you received. If any of the parts listed below are missing, please
contact Kanguru Solutions (508-376-4245) and you will be shipped replacement parts immediately.
• Kanguru Mobile Workspace v100 WTG Drive
• Quick Start Guide

5
1.2 Technical Specifications
Model Number KWTG100
Interface USB 3.0 (USB 2.0 and 1.1 compatible)
OS Compatibility Windows 8, Windows 8.1, Windows 10
Data Retention 10 years or more
Operating Temp 0°C – 70°C
Humidity Range 20% - 90%
Power (Idle) 110 mA
Power (Suspend) 1.2 mA
Power (Read) 340 mA
Power (Write) 330 mA
Weight 12 g
Dimensions 7.4 cm x 2 cm x .9 cm

6
2. What is Windows To Go?
Windows To Go is an Enterprise feature in Windows 8, Windows 8.1 and Windows 10 that allows you to
create and run a fully functional instance of Windows off of a USB flash drive from any PC that meets
the Windows 8 or later certification requirements, regardless of the operating system already installed
on the host PC. When a host machine is booted from a Windows To Go drive, the user experience is the
same as using a standard Windows OS. Windows To Go is not supported by Windows RT
Windows To Go supports important Windows security and management features, including Group
Policy, BitLocker, BranchCache, App-V, UE-V and Direct Access. This provides users with a safe and
convenient solution for working from different machines and locations. Windows To Go can use the
same system image that enterprises use for their desktops and laptops and can be managed the same
way. For example, a Kanguru Mobile Workstation device configured with a Virtual Private Network can
provide a trusted environment for secure, remote access into an enterprise network.
Note: For more information regarding features available with Windows To Go, please visit the Microsoft
website at: https://docs.microsoft.com/en-us/windows/deployment/planning/windows-to-go-overview
Differences Between Windows To Go and Typical Windows Installations
• Internal disks are offline. To ensure data isn’t accidentally disclosed, internal hard disks on the
host computer are offline by default when booted into a Windows To Go workspace. Similarly if
a Windows To Go drive is connected to a computer with a running OS, the Windows To Go drive
will not be displayed in Windows Explorer.
Note: If the Windows to Go drive is being provisioned using PowerShell or the Command Prompt
and not the Setup Wizard, then you can choose to change this functionality.
• Trusted Platform Module (TPM) isn’t used. Enabling BitLocker on a Windows To Go workspace
can prevent data loss in the event the drive is lost. When using BitLocker Drive Encryption, a pre-
operating system boot password will be used for security rather than the TPM since the TPM is tied
to a specific computer and a Windows To Go drives will likely move between multiple computers.
• Hibernate is disabled by default. To ensure that the Windows To Go workspace is able to move
between computers easily, hibernation is disabled by default. Hibernation can be re-enabled by
configuring the Group Policy settings.
• Windows Recovery Environment isn’t available. In the rare case that you need to recover your
Windows To Go drive, you should re-image it with a fresh image of Windows.
• Refreshing or resetting a Windows To Go workspace is not supported. Resetting to the
manufacturer’s standard for the computer doesn’t apply when running a Windows To Go workspace.
• Store is disabled by default on Windows. Apps licensed through the store are linked to hardware
for licensing. Since Windows To Go is designed to roam to different host PCs access to the store is
disabled. Windows settings have been updated to allow you to access the Windows Store.
Note: If you are running Windows and have purchased apps from the Microsoft Store, you can
simply log into your Microsoft account and download the application to your Windows to Go
device without having to purchase them again.

7
3. Creating a Windows To Go Workspace
There are multiple ways to create a Windows To Go Workspace. The three methods officially supported
by Microsoft are:
• Running the built-in Windows To Go setup wizard from a Windows Enterprise host
• Manually programming through Command Line from a Windows host
• Manually programming through PowerShell commands from a Windows host
For more tips on deploying Windows To Go, please visit Microsoft’s website:
https://docs.microsoft.com/en-us/windows/deployment/deploy-windows-to-go
3.1 Minimum Requirements
The following requirements MUST be met in order to create a Windows To Go workspace:
• PC host capable of booting from a USB device
• PC host running 32-bit or 64-bit version of Windows 8/8.1 or Windows 10 Enterprise
• PC host with available USB port (USB2.0 supported, USB3.0 recommended)
• PC host with 1Ghz or faster processor
• PC host with 2GB or greater of RAM
• PC host with DirectX 9 graphics device with WDDM 1.2 or greater driver
• Windows 8 Enterprise ISO or DVD
Other Considerations
• If the host PC is 32-bit with legacy BIOS, then it will only support booting from a 32-bit Windows
To Go USB flash drive.
• If the host PC is 64-bit with legacy BIOS, then it will support booting from 32-bit and 64-bit
Windows To Go USB flash drive.
• If the host PC is 32-bit with UEFI BIOS, then it will only support booting from a 32-bit Windows
To Go USB flash drive.
• If the host PC is 64-bit with UEFI BIOS, then it will only support booting from a 64-bit Windows
To Go USB flash drive.
• Windows To Go cannot be provisioned by a computer running on an ARM processor.
• Windows To Go is not supported by Windows RT
3.2 Preparation for Windows To Go
Enterprise corporations install Windows on a large group of computers either by using configuration
management software (such as System Center Configuration Manager), or by using standard Windows
deployment tools such as DiskPart, ImageX, and the Deployment Image Servicing and Management
(DISM) tool. These same tools can be used to create Windows To Go golden images, just as you would
if you were planning for provisioning a new class of mobile PCs.
Important! Make sure you use the versions of the deployment tools provided for the version of Windows
you are deploying. Using versions of the deployment tools released for Windows 7 or earlier to provision
a Windows To Go drive is not supported.

8
3.3 Creating a Windows To Go Workspace Using the Setup Wizard
Windows Enterprise has a built in Setup Wizard for provisioning Windows to Go devices. This is the
recommended method for provisioning your Windows to Go drives.
1. Connect the Kanguru Mobile Workspace v100 to a PC running Windows 8.1 Enterprise or Windows
10 Enterprise via a USB port. Connecting through a USB3.0 port is highly recommended.
2. Insert your Windows installation DVD, or mount your Windows installation ISO file. This is so you
can use the ‘Sources\install.wim’ file from the DVD or mounted ISO file to create the Windows
To Go workspace.
Note: The .wim can be customized and configured using DISM. Refer to Microsoft’s DISM if a
.wim file does not exist.
3. Open a Windows search (keyboard shortcut Win + S) and search for ‘Windows To Go”. Click on
the Windows To Go application.
4. The Windows To Go setup wizard appears. Select the ‘Kanguru Mobile Workspace v100 Device’
and then click on Next.

9
5. Select the Windows install.wim file from step 2 and then click on Next.
Note: If for any reason Windows didn’t find the .wim file, then click on the Add search location
button to manually select the DVD or mounted ISO from step 2.
6. Enable or disable BitLocker encryption depending on whether you would like to use a BitLocker
password on your Windows To Go workspace. Note: A BitLocker password encrypts your Windows
To Go USB flash drive. You’ll need to enter the password every time you boot from your Windows
To Go USB flash drive. This is different from the password you use to sign in to your regular
Windows OS.
a. Do Not Use BitLocker - Leave the “Use BitLocker with my Windows To Go workspace” box
unchecked. Click on Skip. IMPORTANT! If you are planning to use a USB-Duplicator to
create multiple Windows To Go drives, DO NOT enable BitLocker prior to duplication. Drives
protected with BitLocker should not be duplicated as they will use the same encryption key.
b. Use BitLocker - Check the Use BitLocker with my Windows To Go workspace box, type a
password you want for BitLocker, and click on Next. By default, BitLocker passwords must be
at least 8 characters long.

10
7. Click on Create. Your Windows To Go workspace will now start being created on the USB flash
drive. This may take several minutes to finish. Warning! Creating the Windows To Go workspace
will also format the drive. Back up any critical data saved on the drive before proceeding. Do not
remove the drive while the Windows To Go workspace is being created.
8. When finished, select which boot option you would like to use:
○ Yes : This PC (host) will always try to boot from any bootable USB flash drives connected
during bootup. If you connect the Windows To Go USB flash drive to another host PC, then you
will have to manually configure the computer to boot from a USB flash drive.
○ No : In order to boot from your Windows To Go USB flash drive, you will have to manually
choose to boot from a USB flash drive from the boot menu or set your BIOS or UEFI to have
the USB flash drive listed first in the boot drive priority list.
9. To finish setting up Windows To Go click on Save and restart.
10. When you have booted from the Windows To Go USB flash drive for the first time, check the I
accept the license terms box, and click on Next.
11. When finished, make sure that you have internet access. Sometimes you may need to setup the
wireless or ethernet network from the host PC for your Windows To Go workspace before you have
internet access.

11
3.4 Creating a Windows To Go Workspace Using Command Line
There is no WTG Setup Wizard for non-Enterprise editions of Windows, but a Windows To Go workspace
can be manually created using these operating systems. Windows 8 and Windows 10 already have all the
tools needed by default.
For this example, it will be assumed that Windows 10 Enterprise install media is mounted on drive E:
and that the Kanguru Mobile Workspace v100 device has been inserted into the host.
1. Start the appropriate command prompt for use in subsequent steps. In Windows, start a normal
command prompt as an administrator.
2. Run the commands below in an elevated command console to create two new partitions on the
USB drive using DiskPart. Substitute the correct drive number for the ‘##’ marks present in the
‘select disk’ command. The first (boot) partition created will be formatted FAT32 so that the drive
is bootable on legacy BIOS and UEFI hosts. The first partition on the disk will be assigned the Y:
drive letter, while the second will be assigned the Z: drive letter.
C:\> diskpart
DISKPART> list disk
DISKPART> select disk ##
DISKPART> clean
DISKPART> create partition primary size=350
DISKPART> create partition primary
DISKPART> select partition 1
DISKPART> format fs=fat32 quick
DISKPART> attributes volume set nodefaultdriveletter
DISKPART> assign letter=y
DISKPART> active
DISKPART> select partition 2
DISKPART> format fs=ntfs quick
DISKPART> attributes volume set nodefaultdriveletter
DISKPART> assign letter=z
ISKPART> exit
C:\>
3. Create a new folder called “wim” in the C: by typing in:
○ Cd\
○ Md wim
4. Copy Install.wim from your Windows 10 image to the wim folder that was created in C:\. Type in
○ Copy e:\sources\install.wim c:\wim

12
5. Apply the Windows 10 installation image to the second partition by typing in
○ imagex /apply c:\wim\install.wim 1 Z:
6. After it’s completed create the bootable partition by typing in:
○ z:\windows\system32\bcdboot z:\windows /f all /s Y:, Enter
7. Unassign the drive letters for the USB device. The sequence of commands are shown below.
Substitute the correct drive number for the ‘##’ marks presented in the ‘select disk’ command
output.
C:\> diskpart
DISKPART> list disk
DISKPART> select disk ##
DISKPART> select partition 1
DISKPART> remove letter=y dismount
DISKPART> select partition 2
DISKPART> remove letter=z dismount
DISKPART> exit
C:\>
8. Safely stop and remove the USB drive.
9. Insert the USB drive into a host machine and boot the host. It may be necessary to change the boot
options to allow the machine to boot from the USB drive.

13
3.5 Creating a Windows To Go Workspace Using Powershell
There is no Windows To Go Setup Wizard for non-Enterprise editions of Windows, but a Windows
To Go workspace can be manually created using these operating systems. For detailed instructions
on provisioning a Windows to Go drive using Powershell, please refer to the following instructions
published on Microsoft’s website:
http://social.technet.microsoft.com/wiki/contents/articles/6991.windows-to-go-step-by-step.aspx

14
4. Booting Your Windows To Go Workspace
Now that your workspace is ready, you have two primary options for booting: either use the new Windows
8 startup options or manually configure your computer’s BIOS.
Important! Users who will be roaming for the majority of the time while using the WTG device need
to ensure that they also periodically boot the drive on the enterprise network itself. This will prevent
any potential danger of Active Directory objects from being deleted. Administrators should notify their
WTG users of the period interval in which they will need to run the drive on the enterprise’s network.
4.1 Enable Windows To Go Startup options
To enable the Windows To Go Startup options:
1. Search for Windows To Go Startup Options
○ Using Windows 8.1, press Win+W
○ Using Windows 10, press Win and use the search function
2. Search for “Windows To Go startup options”
3. Press Enter
4. When you see the Windows To Go Startup Options dialogue box, select Yes.
5. Click Save Changes

15
4.2 Configuring the BIOS Settings for use with Windows To Go
If the host computer is running Windows 8.1 or Windows 10, then there is a setting called Windows To
Go Startup Options that configures the computer to boot from USB. However, if you only want to boot
from USB one-time only or are using a host computer running Windows 7 you will need to configure the
BIOS settings manually to enable the computer to boot from the Windows To Go drive. The method that
you use to configure the BIOS setting may differ based on the computer manufacturer.
Warning! Modifying the BIOS incorrectly can cause harm to your machine. If at any point you think
you have made an incorrect modification, exit the BIOS without saving your changes and begin again or
select an option to restore the BIOS to the default settings.
Note: If you have a computer with Windows 8 or Windows 10 installed, use the Launcher tool to set
your computer to boot from your USB drive instead of following these instructions. If you have a host
computer with Windows 7 installed, suspend BitLocker before changing the BIOS settings to boot from
USB and then resume BitLocker protection.
You can access the BIOS settings for your computer before the operating system starts by pressing a
hotkey prior to bootup.
1. Shut off the computer.
2. Insert your Windows To Go drive into a USB 2.0 or USB 3.0 port on the computer (do not use a
USB hub).
3. Start the computer and be ready to press the correct hotkey for your computer. Press it one to three
seconds after pressing the power button, before the Windows loading screen appears.
Note: Many of the timings for the hotkeys to access the BIOS are hard to hit. It may help to press
the hotkey multiple times to increase your chance of success.
a. For one-time use of Windows To Go, press the hotkey to access the Boot Menu and select your
USB drive.
○ This will boot directly into Windows To Go only for this boot sequence. The first use of a
Windows To Go drive on a specific computer may cause an automatic reboot; if so, repeat
this step. Some computers will not support this method and will require that you change the
boot order in the BIOS.
b. For repeated use of Windows To Go, press the hotkey to access the BIOS.
1. Once in the BIOS, navigate to the option that controls the boot order (this may be under
“Boot” or “System Configuration” or “Storage”).
2. There should be a list for “Boot Priority.” Place your USB drive at the top of this list (USB
drive may be listed under either a “USB” title or under its manufacturer’s title). If the option
is unavailable, continue on to the next step.
3. Check for USB boot support.
4. Some systems have USB boot disabled by default. You should be able to enable this from
the current “Boot” tab.
5. Some systems have “boot grouping” and you must disassociate the USB drive to allow USB
boot. You can modify this from HDD/Hard Drive Properties.

16
5. Activating Windows on Windows to Go Drives
Windows To Go requires volume activation; either using the Key Management Service (KMS) server
in your organization or using Active Directory based volume activation. Activation of a Windows to Go
drive should NOT be done using a Multiple Activation Key (MAK) or volume licensing.
When activated using KMS, a Windows To Go workspace does not need to be reactivated every time
you roam. KMS activates Windows on a local network, eliminating the need for individual computers
to connect to Microsoft. To remain activated, KMS client computers must renew their activation by
connecting to the KMS host on periodic basis. This typically occurs as soon as the user has access to the
corporate network, either through a direct connection on-premises or a through remote connection using
DirectAccess or a virtual private network connection.
Once activated, the machine will not need to be activated again until the activation validity interval has
passed. In a KMS configuration the activation validity interval is 180 days.

17
6. Tips for Using Windows To Go
This user guide covers creating a Windows To Go workspace on your Kanguru Mobile Workspace v100
drive. Here are some basic tips for using your Windows To Go device:
• Don’t insert the Windows To Go drive into a running computer. Always shut down your host
machine before connecting and booting into the Windows To Go USB drive.
• If available, connect your Windows To Go device through a USB3.0 port.
• For best performance, do not boot the Windows To Go drive from a USB hub. Always insert the
Windows To Go drive directly into a port on the computer.
• Users who will be roaming for the majority of the time while using the WTG device need to ensure
that they also periodically run the drive on the enterprise network itself. This will prevent any
potential danger of their AD objects from being deleted. Administrators should notify their WTG
users of the period interval in which they will need to run the drive on the enterprise’s network.
• When booting from USB when Windows 8 is running on the host PC:
From the start menu, search for “Windows to Go startup options” and select “Yes, to boot from
Windows To Go when it is present.” If your computer supports it, you can also try to use the one-
time boot menu hotkey (often F12) to select USB USB boot on a per-boot basis.
• When booting from USB when Windows 7 is running on the host PC:
Go into the firmware/BIOS setup utility (this differs depending on the manufacturer but is usually
done with one of the function keys, F1, F2 or F12). Once you’ve entered firmware setup, check
that ‘boot from USB’ is enabled, and then change the boot order to ‘boot from USB drives’ first.
As with Windows 8, if your computer supports it you can try to use the one-time boot menu (often
F12) to select USB boot on a per-boot basis.
• It is recommended to disable the first sign-in animation to avoid not seeing it every time you
connect this Windows To Go USB flash drive to a different PC.
• Do not install non-Microsoft core USB drivers on Windows To Go.
• There is no difference in Store behavior between a standard Windows installation and a Windows
To Go installation for Windows To Go images that are running Windows 8.1. Store apps can roam
between multiple PC’s on a Windows To Go drive.
• The Windows Store is disabled on Windows To Go images running Windows 8.0. In Windows
8.0, apps licensed through the store are linked to hardware for licensing. Since Windows To Go is
designed to roam to different host PCs, access to the store is disabled when running Windows 8.0.
You can enable the store if your Windows 8-based Windows To Go workspaces won’t be roaming
to multiple PC hosts.
• Do not pull the thumb drive from a running machine. If it does get pulled out accidentally, reinsert
the drive into the same USB port within 60 seconds to resume where you left off. Otherwise you
will have to start your session over.
• Always shut down Windows and wait for shutdown to complete before removing the Windows To
Go USB flash drive.

18
7. FAQs
7.1 Windows to Go Provisioning Methods
Windows To Go can be provisioned three ways. Windows 8/8.1 Enterprise and Windows 10 Enterprise
come pre-installed with a provisioning tool. The way the tool provisions the drives is differently than
how you would do it if you were using PowerShell commands or through the command prompt using
disk part.
Q) Can I provision a Windows to Go drive while not on an Enterprise edition of Windows?
A) Yes. However, you will need to do it using PowerShell.
Q) What’s the difference between the PowerShell version and the Windows Enterprise tool?
A) The Windows Enterprise tool has the capability to hide drive contents. The Enterprise tool also
removes the drive letters, making it hidden from the host machine if plugged in normally running the
host’s OS. Using PowerShell commands, you will still be able to see both drives and its contents.
7.2 Windows to Go on Domain
Users who will be roaming for the majority of the time while using the WTG device need to ensure
that they also periodically run the drive on the enterprise network itself. This will prevent any potential
danger of their Active Directory objects from being deleted. Administrators should notify their WTG
users of the period interval in which they will need to run the drive on the enterprise’s network.
Q) I am trying to use my WTG drive at headquarters using my domain login, but it won’t let me.
A) It is possible that your device has not been connected to a host machine that is connected to the
domain in a very long time. Depending on network policies, the Active Directory objects could have
been deleted that pertain to your device. You should contact your help desk or administrator and inform
them of the situation.
7.3 Windows to Go CPU Architecture
A WTG device can only be provisioned on a machine with processor architecture that is compatible
with the image architecture. In addition, WTG provisioned drives will only boot properly if it the host
machine’s architecture is compatible with the WTG provisioned architecture. Refer to section 3.1
Minimum Requirements on page 7 that indicates compatible architectures.
Q) Can I provision Windows to Go drives on an ARM processor?
A) No, ARM processors are not supported by Windows to Go.

19
7.4 Windows Store
For Windows To Go images that are running Windows 8.1 or Windows 10, there is no difference in Store
behavior between a standard Windows installation and a Windows To Go installation. Store apps can
roam between multiple PC’s on a Windows To Go drive.
For a Windows To Go image running Windows 8, the Windows Store is disabled by default. In Windows
8, apps licensed through the store are linked to hardware for licensing. Since Windows To Go is designed
to roam to different host PCs access to the store is disabled when running Windows 8. You can enable
the store if your Windows 8-based Windows To Go workspaces won’t be roaming to multiple PC hosts.
Q) Why is my device’s Windows to Go Store empty?
A) It is possible that your device may be running a Windows 8.0 image and you are using your WTG
device on a different host machine. You will need to update your drive to Windows 8.1 if possible. If not,
you should contact your administrator to provision your device with a Windows 8.1 image.
Q) I installed apps on my primary machine not running Windows to Go using my Microsoft account.
Will they show up in my WTG drive?
A) The apps will not appear on your WTG drive. However, if it was a purchased app then you can
simply log into your Microsoft account and re-download the app onto your WTG drive without having
to purchase again.
7.5 Activating Windows to Go Drives
Activation for a Windows to Go drive is recommended by using the KMS (Key Management Service)
instead of the MAK (Multiple Activation Key) or volume licensing.
Q) Every time I plug my drive into a different host, it asks me to enter a license key.
A) The reason for this is most likely because the activation key that is being entered is an MAK key. In
order to prevent wasting licenses, KMS has to be used.
Q) I used KMS but it is saying my activation is invalid.
A) KMS activation usually lasts 180 days before it has to re-validate itself. This can be done by running
the WTG drive on a host machine that is within the KMS network.
Q) I am planning to use KMS, but the host machines I will be roaming on will not have access to the
network that the KMS is on.
A) When Windows is activated through KMS, it typically holds activation for 180 days before needing
to re-validate itself.

20
8. Warranty Information
This product carries a 3-year warranty from the date of purchase. Kanguru Solutions is not responsible
for any damages incurred in the shipping process. Any claims for loss or damage must be made to the
carrier directly. Claims for shipping errors should be reported to Kanguru Solutions within three (3)
working days or receipt of merchandise.
9. Tech Support
If you experience any problems using your Kanguru Mobile Workspace v100 or have any technical
questions regarding any of our products, please call our technical support department. Our tech support
is free and available Monday thru Friday, 9am to 5pm EST.
Call 1-508-376-4245 or
Visit our website at www.Kanguru.com
/