Page is loading ...

DIGITAL
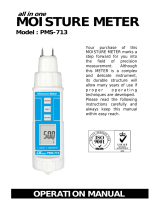
MOISTURE METER
USER’S MANUAL
TS06
Please read this manual carefully and thoroughly before using this product.

TABLE OF CONTENTS
Introduction. . . . . . . . . . . . . . . . . . . . . . . . . . . . . . . 2 –3
Key Features . . . . . . . . . . . . . . . . . . . . . . . . . . . . . . . . . 3
What’s in the Package . . . . . . . . . . . . . . . . . . . . . . . . . 3
Product Overview . . . . . . . . . . . . . . . . . . . . . . . . . . 4 –5
Setup Instructions. . . . . . . . . . . . . . . . . . . . . . . . . . . . . 5
Operating Instructions . . . . . . . . . . . . . . . . . . . . . . 6 –7
Checking Calibration. . . . . . . . . . . . . . . . . . . . . . . . . . . 8
Specifications . . . . . . . . . . . . . . . . . . . . . . . . . . . . . . . . 9
Operating, Maintenance & Safety Tips. . . . . . . . . 9 – 10
Warranty Information . . . . . . . . . . . . . . . . . . . . . 10 – 11
Return for Repair Policy . . . . . . . . . . . . . . . . . . . . . . . 11
FCC Statement. . . . . . . . . . . . . . . . . . . . . . . . . . . 11 – 12
Manual del Usuario . . . . . . . . . . . . . . . . . . . . . . . 13 - 28
INTRODUCTION
Thank you for purchasing General Tools & Instruments’
(General’s) TS06 Digital Moisture Meter. Please read this
user’s manual carefully and thoroughly before using the
instrument.
The TS06 can be used as a standalone moisture meter, or
with General’s free ToolSmart
™
app running on your mobile
phone. When used in concert with an iPhone
®
or Android
™
smartphone, the meter can stream—via Bluetooth
®
— to the
phone all measurements it makes. The phone initiates the
data transfer using the ToolSmart
™
app, which can be
downloaded from the iTunes
®
App Store or Google Play Store.
The measurements can then be used to tag photos taken by
2

the phone’s camera. For example, the app can attach
moisture percentages to icons of different surfaces in a
rendering of a room as a way to compare their readiness for
finishing.
iPhone
®
and iTunes
®
are trademarks of Apple Inc., registered in the U.S. and other
countries.
Android
™
is a trademark of Google Inc.
The Bluetooth
®
word mark and logos are registered trademarks owned by Bluetooth
SIG, Inc. and any use of such marks by General Tools & Instruments is under license.
KEY FEATURES
• Incorporates separate moisture-resistance curves for
wood and building materials
• 99.9 count backlit high-contrast reverse-type (black on
white) LCD w/0.3 in. high digits
• Audible high moisture alert
• Squeezing trigger holds displayed readings
• Replaceable stainless steel test pins
• Pin cap doubles as calibration checker
• 3-minute Auto Power Off
• 1 year limited warranty
WHAT’S IN THE PACKAgE
The TS06 comes in a display box along with a “9V” battery and
an extra set of test pins.
3

PRODUCT OVERVIEW
Fig. 1 above shows all controls, indicators and physical
components of the TS06. Fig. 2 on the next page shows all
possible indications on the LCD.
A. Protective pin cap with calibrating resistor inside
B. Test pins with black rubber sleeves (sleeves not shown)
C. LCD
D. button. Press briefly to power meter on; press and
hold for >2 seconds to power meter off.
E. button. Press and hold to transmit moisture level
measurements to your smartphone via Bluetooth.
Press and hold again to silence transmission.
4
Fig. 1. The
controls,
indicators
and physical
structures
of the TS06
A
B
C
F
G
J
D
E
H

F. MODE button. Press briefly to toggle between wood and
building materials measurement modes. Press and hold
to disable high moisture level alarm.
G. Measurement hold trigger. Squeeze to freeze displayed
reading. Squeeze again to release display.
H. Battery compartment
Fig. 2. All possible
indications on the
TS06 display
A. Low battery indicator
B. Moisture level reading
C. Wood measurement mode indicator
D. Indicates reading is being held
E. Building materials measurement mode indicator
F. Bluetooth enabled indicator
SETUP INSTRUCTIONS
INSTALL BATTERY
Snap the battery compartment (Fig. 1, Callout H) open and
plug the included "9V" battery into the wired socket inside.
The terminals of the battery and the socket mate in only one
way, with the smaller male terminal plugging into the larger
female terminal. Close the compartment by snapping its
cover shut.
5

OPERATINg INSTRUCTIONS
To measure a moisture level:
1. Remove the protective pin cap.
2. Remove the black rubber protective sleeve from each test
pin.
3. Press the button to power the meter on. The meter will
sound one beep and the LCD will temporarily illuminate
with a backlight and the following readout:
_ _ . _%
4. If you are measuring the moisture content of wood, skip
ahead to Step 5. To measure the moisture content of a
building material, briefly press the MODE button. This will
change the display to the following:
__ __ . __
%
5. Carefully press the test pins into the material whose
moisture level you wish to measure. The level will be
displayed as a percentage if it is within the measurement
range for the selected material:
For wood, the measurement range of the TS06 is 5 to
50%WME (Wood Moisture Equivalent). A moisture level
lower than 5% will produce the following readout: _ _ _%.
A level higher than 50% will produce a readout of
_ _ _
%
and sound the high moisture level audible alarm. The alarm
will sound for any wood moisture reading above 15.9%.
To silence the alarm, press and hold the MODE button.
For building materials, the measurement range of the
TS06 is 1.5 to 33%WME (Wood Moisture Equivalent). A
moisture level lower than 1.5% will produce the following
readout: _ _ _%. A level higher than 33% will produce a
readout of
_ _ _
% and sound the high moisture level
audible alarm. The alarm will sound for any building
6
WO
O
D
BLDG

material with a moisture reading above 19.9%. To silence the
alarm, press and hold the MODE button.
If silenced, the high moisture level alarm will automatically
be re-enabled after the TS06 is powered off and powered
on again. To re-enable the alarm without powering off the
meter, press and hold the MODE button.
To hold any reading (“freeze” the display), squeeze the
trigger (Fig. 1, Callout G). This will cause the word HOLD to
appear in the upper right corner of the LCD. To resume
measuring, squeeze the trigger again to make HOLD
disappear. This feature allows you to make a measurement in
a dark place or around a corner, hold the reading, and display
it within 3 minutes later where the lighting is better.
Measurements can be held for up to 3 minutes—the duration
of the meter’s Auto Power Off trigger.
To power off the meter, press the button and hold it for
more than 2 seconds.
To use the TS06 with your phone, begin by downloading
the ToolSmart
™
app from the iTunes Store or Google Play
Store and installing it. Then, pair the meter and your phone by
activating Bluetooth on your phone and pressing the
button (Fig. 1, Callout E) on the meter.
Pressing the button on the TS06 will cause the icon to
blink on the LCD for 30 seconds while the meter searches for
a device to pair with. If no Bluetooth device is detected within
30 seconds, Bluetooth transmission will cease and the
meter's internal Bluetooth circuitry will power down to save
battery power.
A tutorial on the app explains how to save moisture level
measurements to your phone and overlay them on photos of
your project taken by the phone’s camera.
7

CHECKINg CALIBRATION
You can verify the accuracy of the TS06’s readings by
manually checking its calibration at any time. To do so:
1. Remove the protective pin cap and note the small circuit
board attached to the inside of its rear wall. The rear wall also
has two small holes (left photo below) that provide access to
terminals on the circuit board. The circuit board contains a
resistor whose fixed value can be used to simulate a precise
moisture level and therefore check the calibration of the
meter.
2. Power on the meter, remove the black rubber protective
sleeves from the test pins, and push the pins into the
calibration holes (right photo below). If the meter is properly
calibrated, the displayed reading will be between 17.3%
and 19.3% in Wood Measurement mode. If you do not
obtain a reading within this range and your meter is still
under warranty, call General’s Customer Service
Department at 212-431-6100 to arrange to return the
meter for service or replacement.
8

SPECIFICATIONS
Measurement Range 5 to 50% for wood; 1.5 to 33% for
building materials
Measuring Accuracy ±2%
Test Pin Length 9mm (0.35 in.)
Operating Temperature -4º to 140ºF (-20º to 60ºC)
@ <85%RH
Current Consumption <50mA
Auto Power Off Trigger 3 minutes of inactivity
Backlight Characteristics 20 seconds at full brightness
after last button press; switches to
half-brightness after 20 seconds
Low Battery Icon Trigger <5.5V
Dimensions 7.01 x 2.76 x 1.65 in.
(178 x 70 x 42mm)
Weight (without battery) 4.1 oz. (115g)
Power Source “9V” battery (included)
OPERATINg, MAINTENANCE &
SAFETY TIPS
• Measurements of wood moisture level are skewed by two
variables: ambient humidity and the density of the wood
species. The best way to compensate for the effect of these
variables is to develop your own moisture level curves,
based on your experience working with different species of
wood on a day-to-day basis in your neighborhood.
For example, the humidity level affects the dryness of
interior wood considered “acceptable” for finishing. In the
steamy Deep South, where 60% relative humidity is the
norm, fine carpenters have learned how to work with wood
9

with 11% moisture content. But in bone-dry Nevada, Utah,
and Arizona, where 30% humidity is common, the same
piece of wood would have to have less than 6% moisture to
be considered “ready for finishing”.
• To locate the source of a leak behind wood, plaster, drywall
or a ceiling, make measurements at different locations. The
leak is where the meter displays the highest reading.
• Never use force to drive the test pins into a hard surface.
• Do not operate the TS06 in the presence of flammable or
explosive gases.
• Be careful not to stab yourself with the extremely sharp test
pins.
• Replace the protective pin cap and black rubber protection
sleeves after making measurements 1) for safety reasons
and 2) to avoid bending or dulling the pins.
• After subjecting the meter to a large change in ambient
temperature, wait at least 30 minutes before making
measurements to guarantee the accuracy of readings.
• Remove the battery when storing the unit or when you do
not expect to use it for an extended period of time (months
rather than weeks).
WARRANTY INFORMATION
In the U.S, General warrants its instruments and accessories,
and digital tools against defects in material or workmanship for
one year from the date of purchase unless otherwise stated on
the packaging, manual, and/or marketing materials. General
also warrants its non-digital tools products against defects in
material or workmanship on a limited lifetime term. The
company will replace or repair the defective unit, at its option,
subject to verification of the defect.
10

This warranty does not apply to defects resulting from abuse,
neglect, accident, unauthorized repair, alteration, or
unreasonable use of the product.
Any implied warranties arising from the sale of a General
product, including but not limited to implied warranties of
merchantability and fitness for a particular purpose, are limited
to the above. General shall not be liable for loss of use of the
product or other incidental or consequential damages,
expenses, or economic loss, or for any claim of such damage,
expenses, or economic loss.
State laws vary. The above limitations or exclusions may not
apply to you.
RETURN FOR REPAIR POLICY
Every effort has been made to provide you with a reliable
product of superior quality. However, in the event your
instrument requires repair, please contact our Customer Service
to obtain an RGA (Return Goods Authorization) number before
forwarding the unit via prepaid freight to the attention of our
Service Center at this address:
General Tools & Instruments
75 Seaview Drive Secaucus, NJ 07094 212-431-6100
Remember to include a copy of your proof of purchase, your
return address, and your phone number and/or e-mail address.
FCC STATEMENT
This device complies with part 15 of the FCC Rules. Operation is
subject to the following two conditions: (1) This device may not
cause harmful interference, and (2) This device must accept any
interference received, including interference that may cause
undesired operation.
11

This equipment has been tested and found to comply with the
limits for a Class B digital device, pursuant to part 15 of the FCC
Rules. These limits are designed to provide reasonable
protection against harmful interference in a residential
installation. This equipment generates, uses and can radiate
radio frequency energy and, if not installed and used in
accordance with the instructions, may cause harmful
interference to radio communications.
However, there is no guarantee that interference will not occur
in a particular installation. If this equipment does cause harmful
interference to radio or television reception, which can be
determined by turning the equipment off and on, the user is
encouraged to try to correct the interference by one or more of
the following measures:
• Reorient or relocate the receiving antenna.
• Increase the separation between the equipment and receiver.
• Connect the equipment to a different circuit than the one the
receiver is connected to.
• Consult your supplier or an experienced radio/TV technician
for help.
General Tools & Instruments
GeneralToolsNYC
GENERAL TOOLS & INSTRUMENTS
75 Seaview Drive Secaucus, NJ 07094
PHONE (212) 431-6100 FAX (212) 431-6499 TOLL FREE (800) 697-8665
e-mail: [email protected] www.generaltools.com
TS06 User’s Manual
Specifications subject to change without notice
©2016 GENERAL TOOLS & INSTRUMENTS
NOTICE - WE ARE NOT RESPONSIBLE FOR TYPOGRAPHICAL ERRORS.
MAN# TS06
07/08/16
12

28
GENERAL TOOLS & INSTRUMENTS
75 Seaview Drive
Secaucus, NJ 07094
TELÉFONO (212) 431-6100
FAX (212) 431-6499
SIN CARGO (800) 697-8665
Correo electrónico: [email protected]
www.generaltools.com
Manual del usuario TS06
Especificaciones sujetas a modificaciones sin previo aviso.
©2016 GENERAL TOOLS & INSTRUMENTS
ADVERTENCIA - NO NOS RESPONSABILIZAMOS
POR ERRORES TIPOGRÁFICOS.
MAN# TS05
08/07/16
General Tools & Instruments
GeneralToolsNYC
/