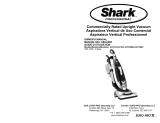
Shark NV370 User manual

Category
Vacuum cleaners
Type
User manual

This manual is also suitable for

NV370
OWNER’S GUIDE
MANUEL DU PROPRIÉTAIRE
GUÍA DEL USUARIO
WWW.SHARKCLEAN.COM
TOLL FREE: 1-800-798-7398
2
WARNING:
To reduce the risk
of electric shock or injury, do not use
outdoors or on wet surfaces.
WARNING:
TO REDUCE THE RISK OF FIRE, ELECTRIC
SHOCK OR INJURY:
GENERAL ELECTRICAL SAFETY:
1. Unplug from electrical outlet when not in use and
before servicing.
2. DO NOT use vacuum with a damaged cord
or plug. If appliance is not working as it
should, has been dropped, damaged, left outdoors,
or dropped into water, return it to EURO-PRO
Operating LLC for examination, repair, or
adjustment.
3. DO NOT pull or carry vacuum by the cord.
4. DO NOT unplug by pulling on cord; to unplug, grasp
the plug, not the cord.
5. DO NOT handle plug or appliance with
wet hands.
6. DO NOT run the vacuum over the power cord.
7. DO NOT use the cord as a handle.
8. DO NOT close a door on the cord.
9. DO NOT pull cord around sharp corners. The use of
an extension cord is not recommended.
10. DO NOT leave appliance when plugged in.
11. Keep cord away from heated surfaces.
12. Turn off all controls before plugging or unplugging
vacuum cleaner.
13. Always turn off this appliance before connecting or
disconnecting motorized nozzle.
14. Store your appliance with the power cord secured
around the two cord holders-as
shown in the storage instructions.
IMPORTANT SAFETY INSTRUCTIONS
For Household Use Only
WHEN USING AN ELECTRICAL APPLIANCE,
BASIC SAFETY PRECAUTIONS SHOULD
ALWAYS BE OBSERVED, INCLUDING THE
FOLLOWING:
READ ALL INSTRUCTIONS BEFORE USING YOUR
SHARK
®
NAVIGATOR
LIFT-AWAY
®
PRO.
POLARIZED PLUG:
To reduce the risk of electric shock, this appliance has
a polarized plug (one blade is wider than the other).
As a safety feature, this plug will fit into a polarized
outlet only one way. If the plug does not fit fully into the
outlet, reverse the plug. If it still does not fit, contact a
qualified electrician. DO NOT force into outlet or try
to modify to fit.
3www.sharkclean.com
English
HOSE ATTACHMENTS:
1. DO NOT use if air flow is restricted; if the air paths,
the hose, or the accessories become blocked, turn
the vacuum cleaner off. Remove all obstructions
before you turn on the
unit again.
2. Keep the end of the hose and accessory openings
away from face and body.
3. Keep cleaning tools and hose suction openings away
from hair, face, fingers, uncovered feet,
or loose clothing.
4. Only use manufacturer’s recommended
attachments.
GENERAL USE:
1. Use only as described in this manual.
2. DO NOT put any objects into openings. DO NOT use
with any opening blocked; keep free of dust, lint,
hair, and anything that may reduce air flow.
3. Keep your work area well lit.
4. Keep the vacuum moving over the carpet surface at
all times to avoid damaging the carpet fibers.
5. DO NOT place vacuum on unstable surfaces such as
chairs or tables.
6. DO NOT allow young children to operate the vacuum
or use as a toy. Close attention is necessary when
used by or near children.
7. DO NOT use vacuum cleaner if it has been dropped,
damaged, left outdoors, or submerged in water.
Return to EURO-PRO Operating LLC for examination,
repair, or adjustment.
8. DO NOT use without dust cup and/or filters
in place.
DUST CUP/FILTERS/ACCESSORIES:
Before turning on the vacuum:
1. Make sure that all filters are thoroughly dry after
routine cleaning.
2. Make sure that dust cup and all filters are in place
after routine maintenance.
3. Make sure accessories are free of blockages.
4. Only use filters and accessories provided by EURO-
PRO Operating LLC. [Failure to do so will void the
warranty.]
GENERAL CLEANING:
1. DO NOT pick up large-sized objects.
2. DO NOT pick up hard or sharp objects such as
glass, nails, screws or coins that could damage the
vacuum cleaner.
3. DO NOT pick up smoking or burning objects such as
hot coals, cigarette butts, or matches.
4. DO NOT pick up flammable or combustible materials
such as lighter fluid, gasoline, or kerosene or use
vacuum in areas where they may be present.
5. DO NOT pick up toxic solutions such as chlorine
bleach, ammonia, or drain cleaner.
6. DO NOT use in an enclosed space where vapors
are present from paint, paint thinner, moth-proofing
substances, flammable dust or other explosive or
toxic materials.
7. DO NOT vacuum up any liquids.
8. DO NOT immerse vacuum cleaner in water or other
liquids.
9. DO NOT use outdoors or on wet surfaces; use only
on dry surfaces.
10. Use extra care when cleaning on stairs.
SAVE THESE
INSTRUCTIONS
4
NURO SANS FRAIS: 1-800-798-7398
AVERTISSEMENT :
Pour
réduire le risque délectrocution,
n’utilisez pas l’appareil à l’extérieur ou
sur des surfaces mouillées.
AVERTISSEMENT :
POUR RÉDUIRE LE RISQUE D’INCENDIE,
D’ÉLECTROCUTION ET DE BLESSURES :
DIRECTIVES DECURITÉ ÉLECTRIQUE
GÉNÉRALES :
1. Débranchez l’appareil s’il n’est pas utilisé ou avant
d’effectuer des réparations.
2. N’utilisez PAS l’aspirateur si sa fiche ou son cordon
sont endommagés. Si l’appareil ne fonctionne pas
comme il se doit, a été échappé, endommagé, laissé à
l’extérieur ou échappé dans l’eau, veuillez le retourner
à EURO-PRO Operating LLC pour une vérification, pour
un ajustement ou pour une réparation.
3. NE déplacez PAS l’appareil en tirant sur son cordon
d’alimentation.
4. NE débranchez PAS l’appareil en tirant sur le cordon
d’alimentation; pour le débrancher, agrippez la fiche
et non le cordon.
5. NE manipulez PAS la fiche ou l’appareil avec des
mains humides.
6. NE passez PAS l’aspirateur sur le cordon
d’alimentation.
7. N’utilisez PAS le cordon comme une poignée.
8. NE fermez PAS une porte sur le cordon.
9. NE tirez PAS le cordon en le faisant passer sur des
rebords coupants. Nous déconseillons l’utilisation
d’une rallonge électrique.
10. NE laissez PAS l’appareil branché sans surveillance.
11. Tenez le cordon loin des surfaces chaudes.
12. Éteignez toutes les commandes avant de brancher
ou de débrancher l’aspirateur.
13. Veuillez toujours mettre cet appareil hors tension
avant de brancher ou de débrancher l’accessoire
motorisé.
14. Lors du rangement de l’appareil, enroulez
fermement le cordon d’alimentation autour des
deux supports à cordon – comme illustré dans les
instructions de rangement.
MESURES DE SÉCURITÉ IMPORTANTES
Pour usage domestique seulement
LORSQUE VOUS UTILISEZ UN APPAREIL ÉLECTRIQUE,
DES MESURES DE SÉCURITÉ ÉLÉMENTAIRES
DEVRAIENT TOUJOURS ÊTRE RESPECTÉES, Y
COMPRIS LES MESURESSUIVANTES :
LISEZ TOUTES LES CONSIGNES AVANT
D’UTILISER VOTRE NAVIGATOR
MC
LIFT-AWAY
MD
PRO DE SHARK
MD
.
FICHE POLARISÉE :
Afin de réduire les risques d’électrocution, cet appareil a
été muni d’une fiche polarisée (une lame est plus large
que l’autre). Par sécurité, cette fiche ne s’insère que
dans un seul sens dans une prise polarisée. Si la fiche
ne s’insère pas complètement dans la prise de courant,
inversez-la. Si elle ne s’adapte toujours pas, contactez un
électricien qualifié. NE forcez PAS et ne modifiez pas
la fiche pour la brancher dans une prise murale.
5www.sharkclean.com
Français
ACCESSOIRES POUR TUYAU SOUPLE :
1. N’utilisez PAS l’appareil si le débit d’air est
restreint; si les conduits d’air, le tuyau souple ou
les accessoires sont obstrués, éteignez l’aspirateur.
Retirez toutes les obstructions avant de remettre
l’appareil en marche.
2. Gardez l’extrémité du tuyau souple et les orifices
d’aspiration des accessoires éloignés de votre
visage et de votre corps.
3. Gardez les accessoires de nettoyage et les orifices
d’aspiration éloignés de vos cheveux, de votre
visage, de vos doigts, de vos pieds nus et de
vêtements amples.
4. N’utilisez que les accessoires recommandés par le
fabricant.
UTILISATION GÉNÉRALE :
1. Utiliser l’appareil seulement de la façon décrite dans
ce guide.
2. N’insérez PAS d’objets dans les ouvertures.
N’utilisez PAS l’appareil si des ouvertures sont
obstruées; assurez-vous que les ouvertures sont
libres de poussière, peluches, cheveux et d’objets
pouvant réduire le débit d’air.
3. Assurez-vous que votre espace de travail est bien
éclairé.
4. Laspirateur doit toujours être en mouvement sur le
tapis afin d’éviter d’endommager les fibres.
5. NE placez PAS l’aspirateur sur des surfaces
instables telles que des chaises et des tables.
6. NE permettez PAS aux jeunes enfants d’utiliser
l’appareil ou de s’en servir comme jouet. Une
surveillance étroite est nécessaire lorsque l’appareil
est utilisé par un enfant ou à proximité d’un enfant.
7. N’utilisez PAS l’aspirateur s’il a été échappé,
endommagé, utilisé à l’extérieur ou immergé dans
l’eau. Retournez l’appareil à EURO-PRO Operating
LLC pour vérification, réparation ou réglage.
8. N’utilisez PAS l’appareil si la coupelle à poussière et
(ou) les filtres ne sont pas en place.
COUPELLE À POUSSIÈRE / FILTRES /
ACCESSOIRES :
Avant de mettre l’aspirateur en marche :
1. Assurez-vous que les filtres sont complètement secs
après le nettoyage de routine.
2. Après avoir effectué l’entretien de routine, assurez-
vous que la coupelle à poussière et tous les filtres
sont bien en place.
3. Assurez-vous que les accessoires sont libres de
toute obstruction.
4. Utilisez seulement les filtres et accessoires fournis
par EURO-PRO Operating LLC. [À défaut de quoi, la
garantie sera annulée.]
NETTOYAGE GÉNÉRAL :
1. NE ramassez PAS de gros objets.
2. N’aspirez PAS des objets durs ou pointus comme du
verre, des clous, des vis ou de la monnaie, lesquels
pourraient endommager l’aspirateur.
3. N’aspirez PAS d’objets chauds, fumants ou brûlants
comme des cendres chaudes, bouts de cigarettes
ou allumettes.
4. N’aspirez PAS de liquides inflammables ou
combustibles tels que de l’essence à briquets, du
carburant, du kérosène; n’utilisez pas l’aspirateur
dans des endroits où ces produits peuvent
êtreprésents.
5. N’utilisez PAS l’aspirateur pour aspirer des solutions
toxiques telles que de l’eau de javel, de l’ammoniac
ou du nettoyeur à drains.
6. N’utilisez PAS l’appareil dans des endroits clos où il y
a des vapeurs provenant de la peinture, des diluants
à peinture, des substances antimites, de la poussière
inflammable ou tout autre matériel explosif ou toxique.
7. N’aspirez AUCUN liquide.
8. N’immergez PAS l’appareil dans l’eau ou dans un
autre liquide.
9. N’utilisez PAS l’appareil à l’extérieur ou sur des
surfaces mouillées; utilisez l’appareil uniquement sur
des surfaces sèches.
10. Soyez particulièrement prudent en nettoyant
lesescaliers.
VEUILLEZ CONSERVER
CES DIRECTIVES
6
SIN CARGO: 1-800-798-7398
ADVERTENCIA:
To reduce the
risk of electric shock or injury, do not
use outdoors or on wet surfaces.
ADVERTENCIA:
PARA REDUCIR EL RIESGO DE INCENDIO,
DESCARGA ELÉCTRICA O DAÑOS PERSONALES:
SEGURIDAD ELÉCTRICA GENERAL:
1. Desenchúfela del tomacorriente cuando no la utilice
y antes de limpiarla.
2. NO use la aspiradora si el cable o el enchufe están
dañados. Si el artefacto no funciona como debe, ha
sufrido caídas, daños, se ha dejado en el exterior o
caído en el agua, retórnelo a EURO-PRO Operating
LLC para que sea examinado, reparado o ajustado.
3. NO jale o transporte la aspiradora por el cable.
4. NO la desenchufe tirando del cable; para
desenchufarla, sostenga el enchufe, no el cable.
5. NO toque el enchufe o el artefacto con las manos
húmedas.
6. NO pase la aspiradora sobre el cable de
alimentación.
7. NO use el cable como una manija.
8. NO apriete el cable al cerrar una puerta.
9. NO jale del cable alrededor de bordes afilados. No
se recomienda el uso de un cable de extensión.
10. NO deje el artefacto desatendido cuando esté
enchufado.
11. Mantenga el cable alejado de superficies calientes.
12. Apague todos los controles antes de enchufar o
desenchufar la aspiradora.
13. Apague siempre este artefacto antes de conectar o
desconectar el cabezal motorizado.
14. Guarde su artefacto con el cable de alimentación
enrollado en los dos soportes como se muestra en
las instrucciones de almacenamiento.
AL USAR APARATOS ELÉCTRICOS, SIEMPRE DEBE
SEGUIR PRECAUCIONES BÁSICAS DE SEGURIDAD,
INCLUYENDO LAS SIGUIENTES:
LEA TODAS LAS INSTRUCCIONES ANTES DE USAR
SU ASPIRADORA SHARK
®
NAVIGATOR
MR
LIFT-
AWAY
®
PRO.
ENCHUFE POLARIZADO:
Para reducir el riesgo de una descarga eléctrica, este
artefacto posee un enchufe polarizado (una pata es
más ancha que la otra). Como medida de seguridad,
este cable entrará únicamente en un tomacorriente
polarizado. Si el enchufe no entra completamente en
el tomacorriente, inviértalo. Si aún no entra, llame a
un electricista calificado. NO lo fuerce dentro del
tomacorriente ni trate de modificarlo para que
calce.
INSTRUCCIONES IMPORTANTES DE SEGURIDAD
Para uso doméstico solamente
7www.sharkclean.com
Español
ACCESORIOS PARA LA MANGUERA:
1. NO los use si el flujo de aire está restringido; si las
aberturas de circulación de aire, la manguera o los
accesorios se tapan, apague la aspiradora. Saque
todas las obstrucciones antes de volver a encender
la unidad.
2. Mantenga el extremo de la manguera y las aberturas
de los accesorios alejados de la cara y del cuerpo.
3 Mantenga las herramientas de limpieza y las
aberturas de succión de la manguera alejados del
cabello, la cara, los dedos, los pies o ropa suelta.
4. Use únicamente los accesorios recomendados por el
fabricante.
USO GENERAL:
1. Utilícela solamente como se indica en este manual.
2. NO introduzca ningún objeto en las ranuras. NO
la use con ninguna abertura tapada; manténgalas
libres de polvo, pelusa, pelos y cualquier otra cosa
que pudiera reducir el flujo de aire.
3. Mantenga el área de trabajo bien iluminada.
4. Mantenga la aspiradora en movimiento sobre la
supercie de la alfombra todo el tiempo para evitar
dañar las fibras de la alfombra.
5. NO coloque la aspiradora sobre supercies
inestables como sillas o mesas.
6. NO permita que los niños pequeños usen la
aspiradora o que se utilice como un juguete. Debe
tener mucho cuidado al ser utilizada por o cerca de
niños.
7. NO utilice la aspiradora si se ha caído, dañado,
dejado en el exterior o sumergido en agua.
Retórnela a EURO-PRO Operating LLC para que sea
examinada, reparada o ajustada.
8. NO la utilice sin el recipiente de la tierra y/o los
filtros instalados en su lugar.
RECIPIENTE PARA LA TIERRA/FILTROS/
ACCESORIOS:
Antes de encender la aspiradora:
1. Verifique que todos los filtros estén completamente
secos luego de limpiarlos.
2. Verifique que el recipiente para la tierra y todos
los filtros estén en su lugar luego de realizar el
mantenimiento de rutina.
3. Verifique que los accesorios no estén tapados.
4. Use únicamente filtros y accesorios proporcionados
por EURO-PRO Operating LLC. [El no hacerlo
invalidará la garantía].
LIMPIEZA GENERAL:
1. NO aspire objetos muy grandes.
2. NO aspire objetos duros o filosos como vidrios,
clavos, tornillos, monedas, los que podrían dañar la
aspiradora.
3. NO aspire objetos con fuego o humeantes tales como
carn caliente, colillas de cigarrillos o fósforos.
4. NO aspire materiales inflamables o combustibles
como líquido para encendedor o queroseno, ni
use la aspiradora en áreas en las cuales puedan
estarpresentes.
5. NO la use para aspirar soluciones tóxicas tales como
lavandina, amoníaco o destapa cañerías.
6. NO la use en lugares cerrados y con vapores de
pintura, diluyente de pintura, substancias antipolilla,
polvo inflamable u otros materiales explosivos o tóxicos.
7. NO aspire ningún líquido.
8. NO sumerja la aspiradora en agua o ningún otro
líquido.
9. NO la use en el exterior o en superficies mojadas;
úsela únicamente en superficies secas.
10. Tenga especial cuidado al limpiar escaleras.
CONSERVE ESTAS
INSTRUCCIONES
TOLL FREE: 1-800-798-7398
8
This manual covers
modelnumber:
NV370 31
TECHNICAL SPECIFICATIONS
Voltage: 120V., 60Hz
Watts: 1200W
Amps: 10A
Getting Started 10
Mode 1: Upright Vac 12
Mode 2: Portable Lift-Away
®
14
Above-Floor Cleaning 15
Dust-Away
Hard Floor Attachment Use & Care 16
Storage and Maintenance 17
Maintenance 17
Emptying the Dust Cup 18
Cleaning the Pre-Motor Filters 18
Cleaning the Post-Motor HEPA Filter 19
Cleaning the Power Brush 19
Cleaning the Motorized Floor Brush 20
Checking for Blockages 20
Ordering Parts 21
Troubleshooting Guide 22
Warranty 23
Ce manuel couvre le numérode
modèle:
NV370 31
SPÉCIFICATIONS TECHNIQUES
Voltage: 120V., 60Hz.
Watts: 1200 watts
Ampères: 10 ampères
Este manual cubre el
modelos:
NV370 31
ESPECIFICACIONES TÉCNICAS
Voltage: 120V., 60Hz
Vatio: 1200W
Amperio: 10A
Contents
Thank you for
purchasing
the Shark
®
Navigator
Lift-Away
®
Pro
9www.sharkclean.com
Table des matières
Merci d’avoir
fait l’achat de
l’aspirateur
Navigator
MC
Lift-Away
MD
Pro de Shark
La mise en marche 24
Mode 1: aspirateur vertical 26
Mode 2 : aspirateur portatif Lift-Away
MD
28
Nettoyage sur surface élevée 29
Utilisation et entretien de l’accessoire Dust-Away
MC
pour revêtements de sol durs 30
Rangement et entretien 31
Entretien 31
Vidange de la coupelle à poussière 32
Nettoyage des filtres avant-moteur 32
Nettoyage du filtre HEPA après-moteur 33
Nettoyage de la brosse motorisée 33
Nettoyage de la brosse à planchers motorisée 34
Détection des obstructions 34
Commande de pièces 35
Guide de dépannage 36
Garantie 37
Índice
Gracias
por haber
comprado la
aspiradora
Shark
®
Navigator
MR
Lift-Away
®
Pro
Introducción 38
Modo 1: Aspiradora vertical 40
Modo 2: Portátil Lift-Away
®
42
Limpieza por encima del piso 43
Uso y cuidado del accesorio Dust-Away
MR
para pisos lisos 44
Almacenamiento y mantenimiento 45
Mantenimiento 45
Vaciando el recipiente para la tierra 46
Limpieza de los filtros del motor 46
Limpieza del filtro HEPA de salida 47
Limpieza del cepillo giratorio 47
Limpieza del cepillo eléctrico para pisos 48
Verificación de obstrucciones 48
Ordenando partes 49
Guía de diagnóstico de problemas 50
Garantía 51
TOLL FREE: 1-800-798-7398
10
FIRST THING’S FIRST, YOU NEED TO KNOW
WHAT’S IN THE BOX YOU JUST OPENED:
a Handle with Stretch Hose
b Accessory Holder
c Extension Wand
d Portable Lift-Away
®
e Motorized Floor Brush*
f Crevice Tool
g Dusting Brush
h Pet Power Brush
i Dust-Away
Hard Floor Attachment
j Dusting Pad
*NOTE: Motorized floor brush may differ from what is
shown in the illustration above.
h
i
f
g
ACCESSORIES:
DUST-AWAY
HARD FLOOR ATTACHMENT
Specialized hard floor attachment vacuums up large
particles, then re-usable micro-fiber pad traps extra
fine dirt and dust for a superior bare floor clean.
(Fig. 1) Use only in Portable Lift-Away
®
mode.
CREVICE TOOL
Reach deep into narrow spaces and clean between
cushions, under radiators and baseboards and in
hard to reach crevices and corners. (Fig. 2)
DUSTING BRUSH
Dust shelves, lamp shades, window blinds, books,
furniture and other upholstered household items.
(Fig. 3)
ACCESSORY HOLDER
Designed to hold the crevice tool and dusting brush.
For quick access to tools when vacuuming and
cleaning around the house. (Fig. 4)
PET POWER BRUSH
This unique tool was engineered for fast and easy
removal of pet hair and ground in dirt from carpeted
stairs and upholstery. (Fig. 5)
Fig. 1
Fig. 4
Fig. 5
Fig. 2
Fig. 3
a
e
c
d
b
Getting Started
j
11www.sharkclean.com
English
Your new Shark
®
Navigator
Lift-Away
®
Pro vacuum cleaner can easily be configured into different
cleaning modes to meet all your cleaning needs: upright vacuum and portable Lift-Away
®
- both with
constant suction power.
MODES:
1 UPRIGHT VAC
Upright vacuuming - floors and carpets. (Fig. 6)
Fig. 6
Fig. 7
2 PORTABLE LIFT-AWAY
®
Take the Lift-Away
®
with you around the house to
clean hard to reach places. (Fig. 7)
TOLL FREE: 1-800-798-7398
12
b
c
Upper Cord
Storage Wrap
To reduce the risk of electric shock, unplug the unit before assembling, adding or removing attachments or
converting modes.
WARNING: The On/Off switch is on the top of the Lift-Away
®
canister. Always ensure the power is OFF
(“O” position) before plugging and unplugging.
TO ASSEMBLE:
1 Place the floor nozzle on a level surface.
2 Align the tube of the floor nozzle with the tube on
the Lift-Away
®
canister and lower until you hear the
two pieces click into place. (Fig. 8)
When attaching the motorized floor brush, ensure
that the latching mechanism is fully locked in place
to ensure electrical connection has been made.
3 Attach the end of the extension wand to the tube on
the back of the Lift-Away
®
canister until it clicks into
place. (Fig. 9)
4 Slide the accessory holder (a) positioned opposite
the upper cord wrap, over the extension wand. Align
the tab with the groove and push down. (Fig. 10)
5 Push the handle (b) onto the top of the extension
wand until you hear it click into place. (Fig. 10)
6 Insert the end of the stretch hose (c) into the
connector on the back of the Lift-Away
®
canister.
(Fig. 10)
7 Store the dusting brush (d) and the crevice tool (e)
on the mounts of the accessory holder.
(Fig. 10)
Fig. 8 Fig. 9
Fig. 10
a
d
e
Mode 1: Upright Vac
13www.sharkclean.com
English
TO USE:
1 Rotate the cord release to quickly release the power
cord.
2 Secure the power cord in the cord hook.
= Brush Roll ON
= Bare Floor
= OFF
3 Press the On/Off switch (a) to the “I” position to
vacuum bare floors (straight suction only) or to the
“II” position to engage the motorized floor brush (for
vacuuming carpets and rugs). (Fig. 11)
IMPORTANT: The motorized brush indicator light
(b) will illuminate green when motorized floor brush
is on, or red if there is a blockage or jam. (Fig. 11)
This feature is designed to protect your Lifetime
Belt that powers your motorized floor brush. See
Checking for Blockages on page 20.
4 Gently press the floor nozzle down with your foot
while you grasp the handle and tilt it back towards
you. (Fig. 12)
NOTE: The rotating brush on the motorized floor
brush will not spin unless the nozzle is flat against
the floor and the handle is tilted back.
5 Due to the huge suction power of this vacuum,
it may become necessary at times to adjust the
suction release (c) on the handle. (Fig. 10) If the
vacuum seems difcult to push or pull or if it is
lifting up area rugs, adjust the suction release
by rotating the collar 90° counterclockwise to
open the valve. Rotate the collar clockwise to
close the valve when you need high suction and
for vacuuming floors.
6 Empty dust cup after vacuuming and periodically
during use when it appears full. (See “Maintenance”
section for instructions.)
7 When you are finished vacuuming, turn the
vacuum off.
Fig. 12
Fig. 11
b
Suction
Release Collar
a
Release suction
for easier push &
pull on high pile
carpets and
area rugs.
c
TOLL FREE: 1-800-798-7398
14
a
You can carry your vacuum cleaner
in both modes by the carry handle
located on top of the dust cup.
Fig. 15
Fig. 14
Fig. 13
Mode 2: Portable Lift-Away
®
b
a
PORTABLE LIFT-AWAY
®
1 Separate the portable Lift-Away
®
canister from the
floor nozzle by pressing the red release button (a)
on the side of the canister. Gently hold the nozzle to
the floor with your foot and pull the canister up.
(Fig. 13)
2 Press the handle release button (a) and pull the
handle up or press the extension wand release
button (b) and pull the extension wand up.
(Fig. 14)
3 Attach desired accessory onto the end of either the
extension wand or the handle.
4 Press the On/Off switch to the “I” position to turn
the vacuum on for above-floor cleaning and hold
the handle in one hand while you carry the portable
Lift-Away
®
around the house with the other hand.
(Fig. 15 )
15www.sharkclean.com
English
Release suction when
dusting delicate
objects, furniture or
draperies.
Fig. 16
Suction
Release Collar
a
Above-Floor Cleaning
CLEAN ABOVE THE FLOOR IN UPRIGHT VAC
OR PORTABLE LIFT-AWAY
®
MODE
1 Press the handle release button and pull the handle
up or press the extension wand release button and
pull the extension wand up.
2 Attach desired accessory onto the end of either the
extension wand or the handle. (Fig. 16)
3 Your vacuum has tremendous suction power.
Adjust the amount of suction with the suction
release on the handle. Open the valve (a) by
rotating the collar 90˚ counterclockwise for
low suction when doing light jobs such as
drapes or fine surfaces. Close the valve (a)
by rotating the collar clockwise 90˚ for high
suction and when using the hand held power
brush. (Fig. 16-a)
4 Press the On/Off switch to the “I” position to turn
the vacuum on for above-floor cleaning.
IMPORTANT: Ensure vacuum is in upright position.
Do not use position “II” when cleaning above the
floor in the upright vac mode as this will engage
the motorized floor brush. The rotating brush may
damage your floor if run for a prolonged period of
time in one area.
TOLL FREE: 1-800-798-7398
16
Fig. 18
Dust-Away
Hard Floor Attachment - Use and Care
ATTACH PAD
Slip two of the tabs between the suction nozzle and
the Dust-Away
base and attach them to the front
fasteners on the base. Then pull the other two tabs
tightly around to the back fasteners on the base. For
best results, ensure that the pad is flat against the
bottom surface and secured tightly. (Fig. 17)
CLEAN THE FLOOR
1 Press the extension wand release button and pull the
extension wand up. (Refer to page 14, Fig. 14-b)
2 Attach Dust-Away
hard floor attachment onto the
end of the extension wand. (Fig. 18)
3 Press the On/Off switch to the “I” position to
turn the suction motor on and begin cleaning
all hard surfaces.
IMPORTANT: Do not use to clean damp floors or
wet/sticky messes.
CARE FOR PADS
1 Wash the pads separately with warm water
either in the washing machine or by hand
using liquid detergent.
2 Do not use bleach or fabric softeners as they may
damage or leave a coating that will reduce the
cleaning performance of the pads.
3 Tumble dry low or line dry to extend the life of the
micro-fiber fabric.
REPLACE PADS
1 For best floor cleaning results, we recommend
replacing your micro-fiber pads every 3-4 months
following normal use.
2 You can find and purchase replacement micro-fiber
dusting pads and accessories
at www.sharkclean.com
TO REPLACE THE MOTORIZED FLOOR BRUSH
FOR UPRIGHT CLEANING
1 Press the red release at the bottom of
the extension wand and remove the
hard floor attachment.
2 Replace the canister back onto the motorized floor
brush and re-insert the handle with extension wand
back into the top of the vacuum body until you hear
these click into place.
When attaching the motorized floor brush, ensure
that the locking mechanism is fully locked in place to
ensure electrical connection has been made.
Fig. 17
IMPORTANT: Use only in
Portable Lift-Away
®
mode.
17www.sharkclean.com
English
Fig. 19
Quick
Cord Release
Lower Cord
Storage Clip
Storage and Maintenance
STORE YOUR VACUUM SAFELY
1 Convert your vacuum back to upright vac mode.
2 Rotate the upper quick cord release to its upright
position and coil the power cord loosely around the
two clips. Clip the plug onto the cord to secure.
(Fig. 19)
3 Store the dusting brush and the crevice tool on the
mounts on the accessory holder.
4 Store your vacuum cleaner safely in a cool dry area
where it will not be a hazard, will not get damaged
and
will not cause damage to anyone or anything.
NOTE: Empty dust cup after cleaning and prior
to storing. (See “Maintenance” section for
instructions.)
To reduce the risk of electric shock, unplug the unit
before performing any cleaning, maintenance, or
troubleshooting checks.
Reassemble all parts securely before operating
vacuum.
DO NOT operate the vacuum without the pre-motor
filters and dust cup in place.
DO NOT operate the vacuum with WET filters.
IMPORTANT: Make sure all filters are completely
dry before inserting back into vacuum.
WARNING: Never insert sharp objects into any
opening to clear an obstruction.
IMPORTANT: Damages caused while clearing or
attempting to clear blockages are not covered under
your product’s limited warranty.
TOLL FREE: 1-800-798-7398
18
Fig. 20
Fig. 21
COMPONENT
MAINTENANCE SCHEDULE
Rinse and air dry every 3 months under normal use.
Empty each time you vacuum.
Pre-Motor Foam Filter
Dust Cup
Rinse and air dry every 3 months under normal use.
Pre-Motor Felt Filter
Clean once every 2 years or as needed.
Post-Motor HEPA Filter
1
2
3
4
CLEANING THE PRE-MOTOR FILTERS
1 Remove the dust cup.
2 Pull the 2 filters out from the top of the motor base.
(Fig. 23)
3 Rinse the filters thoroughly in lukewarm water until
the water runs clear.
DO NOT put the filter in the washing machine or
dishwasher.
NOTE: The material in the filter will discolor over
time. This is NORMAL and will not affect the
performance of the filter.
4 Squeeze out excess water and let air-dry for at least
24 hours before replacing. Do not use a hair dryer or
other heating methods to dry.
5 Place the felt filter in first, then the foam filter.
6 Replace the dust cup.
EMPTYING THE DUST CUP
The dust cup needs to be emptied each time you vacuum
and periodically during cleaning, when the dust cup
appears full.
1 Undo the latches on the sides of the dust cup by
lifting them up and outwards to remove the dust cup
from the motor base. (Fig. 20)
2 Hold the dust cup over a trash receptacle and press
the bottom door release button. (Fig. 21) Tap gently
to empty contents. Press the door shut again until it
clicks.
3 If needed, turn the dust cup upside down over the
trash receptacle and press the top door release
button. (Fig. 22) Tap gently to remove contents.
Use a dry cloth or paper towel to remove debris
stuck to the screen filter inside the dust cup. Press
the door shut again until it clicks.
4 Replace the dust cup on top of the motor base. Hook
the two latches onto the tabs on the sides of the
dust cup and push down to lock.
Screen
Filter
Fig. 22
Fig. 23
Pre-Motor
Foam Filter
Felt Filter
Post Motor
HEPA Filter
IMPORTANT: Loss of Suction
may occur if foam filters are not
cleaned every 3 months. Rinse and
allow to air dry completely. Also, tap
loose dirt off filter between washes
as needed. Foam filters may appear
dirty after use - this is normal.
Maintenance
19www.sharkclean.com
English
Fig. 25
Fig. 24
Fig. 26
CLEANING THE POST-MOTOR HEPA FILTER
1 Remove the filter cover from the front of the vacuum
by pulling up on the tab and pulling the cover away
from the vacuum. (Fig. 24)
2 Take out the HEPA filter by pulling it straight out.
3 Turn the filter over so that the dirty side is on the
bottom and vigorously tap it clean against a garbage
can to remove any dust. (Fig. 25)
4 Wash the filter under the tap using lukewarm water
with the dirty side face down until the water runs
clear. (Fig. 26)
DO NOT put the filter in the washing machine or
dishwasher.
NOTE: The material in the filter will discolor over
time. This is NORMAL and will not affect the
performance of the filter.
5 Allow the filter to air dry for 24 hours. Do not use a
hair dryer or other heating methods to dry.
6 Once the HEPA filter is dry, replace it back into the
vacuum.
7 Replace the cover by inserting the two tabs into the
holes at the top and then swinging the cover down
until it clicks into place.
Fig. 28
Fig. 27
CLEANING THE POWER BRUSH
1 Slide the locking latch (a) forward and gently tilt
brush housing upward to open. (Fig. 27)
IMPORTANT: DO NOT force; it will not open all the
way.
2 Carefully remove any blockage or debris.
3 Turn the power brush over to inspect the rotating
brush and cut away any build-up of hair or string
wrapped around the rotating bristle brush with
scissors. (Fig. 28)
4 Push the housing back down and slide the locking
latch backward to lock.
Maintenance - cont’d
TOLL FREE: 1-800-798-7398
20
Make sure you are working in a well
lit area and use a flashlight to help
search for blockages.
CLEANING THE MOTORIZED FLOOR BRUSH
When your motorized floor brush needs cleaning or locks
onto an object, it automatically shuts down to prevent
damage to your lifetime belt. The indicator light will
illuminate red warning you to turn off the vacuum and
clear blockage immediately. The light will reset itself
once blockage has been cleared and power has been
cycled on/off or vacuum has been locked in the upright
position.
1 Detach the motorized floor brush from the portable
Lift-Away
®
canister.
2 Inspect the opening underneath and the rotating
brush. If a build-up of debris is present, remove it.
Carefully cut anything wound around the rotating
brush with scissors. Avoid damaging or cutting the
bristles. (Fig. 29)
CHECKING FOR BLOCKAGES
Blockages may cause your vacuum to overheat and shut
down. To prevent this from happening, check potential
blockage areas after heavy use or if you detect a loss of
suction or poor cleaning performance.
1 Dust Cup
Dust cup may be full. Empty dust cup.
2 Pre-Motor & Post-Motor Filters
• Pre-motorltersrequirewashingevery3months
for optimum performance.
The post-motor HEPA filter needs to be washed
every 2 years.
• Ensurethatalltheltersareclean.
3 Accessories
• Checkintakeopenings:
- Extension Wand
- Dusting Brush
- Crevice Tool
- Turbo Brush
Rotating
Brush
Fig. 29
Fig. 32
Fig. 31
Maintenance - cont’d
Fig. 30
  • Page 1 1
  • Page 2 2
  • Page 3 3
  • Page 4 4
  • Page 5 5
  • Page 6 6
  • Page 7 7
  • Page 8 8
  • Page 9 9
  • Page 10 10
  • Page 11 11
  • Page 12 12
  • Page 13 13
  • Page 14 14
  • Page 15 15
  • Page 16 16
  • Page 17 17
  • Page 18 18
  • Page 19 19
  • Page 20 20
  • Page 21 21
  • Page 22 22
  • Page 23 23
  • Page 24 24
  • Page 25 25
  • Page 26 26
  • Page 27 27
  • Page 28 28
  • Page 29 29
  • Page 30 30
  • Page 31 31
  • Page 32 32
  • Page 33 33
  • Page 34 34
  • Page 35 35
  • Page 36 36
  • Page 37 37
  • Page 38 38
  • Page 39 39
  • Page 40 40
  • Page 41 41
  • Page 42 42
  • Page 43 43
  • Page 44 44
  • Page 45 45
  • Page 46 46
  • Page 47 47
  • Page 48 48
  • Page 49 49
  • Page 50 50
  • Page 51 51
  • Page 52 52

Shark NV370 User manual

Category
Vacuum cleaners
Type
User manual
This manual is also suitable for

Ask a question and I''ll find the answer in the document

Finding information in a document is now easier with AI

in other languages