Page is loading ...

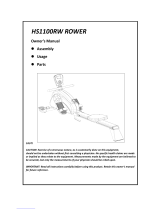
Owner’s Manual
Model No.
16807638000US
CRW800
- Assembly
- Operation
- Adjustments
- Parts
- Warranty
CAUTION:
Read and
understand this
manual before
operating unit
Retain For Future Reference

CUSTOMER SERVICE 1-888-707-1880 Dyaco Canada Inc. ©2016
Email: customerservice@dyaco.ca
2
TABLE OF
CONTENTS
Safety Precautions ……………………………………………………………………………... 4
Important Safety Instructions………………………………………………………………….. 6
Important Electrical Instructions………………………………………………………………. 7
Important Operation Instructions………………………………………………………………. 8
Assembly Instructions………………………………………………………………………….. 9
Operation of Your Rower ………………………………….………………………………….. 14
Operating Instruction……………………………………………………………………………. 17
Folding/Unfolding Procedures…………………………………………………………………. 23
Heart Rate Programs…………………………………………………………………………… 24
Using a Heart Rate Transmitter……………………………………………….……….……... 26
Wireless Handle Coding Steps ……………………………………………………….……...... 27
Parts List and Diagram .......................…………….……………………………………..…… 28
General Maintenance……….…………………………………………………………………. 33
Training Guidelines ……………….……………………………………………………………. 33
Stretching ……………………………………………………..………………………………… 37
Manufacture’s Limited Warranty……………………………………………………………... 39

CUSTOMER SERVICE 1-888-707-1880 Dyaco Canada Inc. ©2016
Email: customerservice@dyaco.ca
3
Thank you for your purchase of this quality Rower from Dyaco Canada Inc. Your new
Rower was manufactured by one of the leading fitness manufacturers in the world and is
backed by one of the most comprehensive warranties available. Through your dealer,
Dyaco Canada Inc. will do all we can to make your ownership experience as pleasant as
possible for many years to come. The local dealership where you purchased this Rower
is your administrator for all warranty and service needs. Their responsibility is to provide
you with the technical knowledge and service personnel to make your experience more
informed and any difficulties easier to remedy.
Please take a moment at this time to record the name of the dealer, their telephone
number, and the date of purchase below to make any future, needed contact easy. We
appreciate your support and we will always remember that you are the reason that we
are in business. Please complete and mail your registration card today and enjoy your
new Rower.
Name of Dealer______________________________________
Telephone Number of Dealer___________________________
Purchase Date_______________________________________
RECORD YOUR SERIAL NUMBER
Please record the Serial Number of this fitness product in the space provided below.
Serial Number_______________________________________
REGISTER YOUR PURCHASE
The self-addressed product registration card must be completed in full and returned to
Dyaco Canada Inc.
CONGRATULATIONS ON YOUR
NEW ROWER
Product Re
g
istration

CUSTOMER SERVICE 1-888-707-1880 Dyaco Canada Inc. ©2016
Email: customerservice@dyaco.ca
4
SAFETY
PRECAUTIONS
IMPORTANT SAFETY INFORMATION
THIS UNIT IS INTENDED FOR HOUSEHOLD USE ONLY
READ ALL INSTRUCTIONS BEFORE USING THIS ROWER
CAUTION: Before starting any exercise program, it is recommended that you consult your physician.
WARNING: Connect this unit to a properly grounded outlet only.
DANGER: To reduce the risk of electric shock, always unplug the Rower from the electrical outlet
immediately after using and before cleaning.
Thank you for purchasing our product. Even though we go to great efforts to ensure the quality of
each product we produce, occasional errors and/or omissions do occur. In any event should you
find this product to have either a defective or a missing part please contact us for a replacement.
This product has been designed for home use only. Product liability and guarantee conditions will
not be applicable to products being subjected to professional use or products being used in a gym
center.
This exercise equipment was designed and built for optimum safety. However, certain precautions
apply whenever you operate a piece of exercise equipment. Be sure to read the entire manual
before assembly and operation of this machine. Also, please note the following safety precautions:
1. Read the OWNER’S OPERATING MANUAL and all accompanying literature and follow it
carefully before using your Rower.
2. It is the responsibility of the owner to ensure that all users of the Rower exerciser are
adequately informed of all precautions.
3. If dizziness, nausea, chest pains, or any other abnormal symptoms are experienced while
using this equipment, STOP the workout at once. CONSULT A PHYSICIAN IMMEDIATELY.
4. The Rower exerciser is intended for in-home use only. Do not use the Rower exerciser in a
commercial, rental, or institutional setting.
5. Inspect your exercise equipment prior to exercising to ensure that all nuts and bolts are fully
tightened before each use.
6. The Rower must be regularly checked for signs of wear and damage. Any part found
defective, the part must be replaced with new spare part from the manufacturer.
7. Fitness equipment must always be installed on a flat surface, do not place the unit on a loose
rug or uneven surface. It is recommended to use an equipment mat to prevent the unit from
moving while it is being used, which could possibly scratch or damage the surface of your
floor. Keep the Rower exerciser indoors, away from moisture and dust.
8. No changes must be made which might compromise the safety of the equipment.
9. It is recommended to have a minimum of 1’ safe clearance around the exercise equipment
while in use.
10. Keep children and pets away from this equipment at all times while exercising.
11. Warm up 5 to 10 minutes before each workout and cool down 5 to 10 minutes afterward.
This allows your heart rate to gradually increase and decrease and will help prevent you from
straining muscles.
12. Never hold your breath while exercising. Breathing should remain at a normal rate in
conjunction with the level of exercise being performed
13. Always wear suitable clothing and footwear while exercising. Do not wear loose fitting
clothing that could become entangled with the moving parts of your Rower.
14. Keep your back straight when using the Rower exerciser; do not arch your back.
15. Always unplug the power cord immediately after use and before cleaning the Rower
exerciser.

CUSTOMER SERVICE 1-888-707-1880 Dyaco Canada Inc. ©2016
Email: customerservice@dyaco.ca
5
16. If decals on the Rower exerciser are missing or illegible, please call our customer service
department toll free at 1-888-707-1880 and order a replacement decal.
17. Care must be taken when lifting or moving the equipment, so as not to injure your back.
Always use proper lifting techniques
18. User weight should not exceed 450 lbs.
WARNING: Before beginning any exercise program consult your physician. This is especially
important for individuals over the age of 35 or persons with pre-existing health
problems. Read all instructions before using any fitness equipment. We assume no
responsibility form personal injury or property damage sustained by or through the
use of this product.
SAVE THESE INSTRUCTIONS

CUSTOMER SERVICE 1-888-707-1880 Dyaco Canada Inc. ©2016
Email: customerservice@dyaco.ca
6
IMPORTANT
SAFETY INSTRUCTIONS
WARNING - Read all instructions before using this appliance.
DANGER - To reduce the risk of electric shock disconnect your rower from the electrical
outlet prior to cleaning and/or service work.
WARNING - To reduce the risk of burns, fire, electric shock, or injury to persons, install
the rower on a flat level surface with access to a 110-volt, 15-amp grounded outlet with only
the rower plugged into the circuit.
DO NOT USE AN EXTENSION CORD UNLESS IT IS A 14 AWG OR BETTER, WITH
ONLY ONE OUTLET ON THE END: DO NOT ATTEMPT TO DISABLE THE GROUNDED
PLUG BY USING IMPROPER ADAPTERS, OR IN ANY WAY MODIFY THE CORD SET.
A serious shock or fire hazard may result along with computer malfunctions. See Grounding Instructions, page 7
Do not operate the rower on deeply padded, plush or shag carpet. Damage to both carpet
and the rower may result.
Keep children away from the rower. There are obvious pinch points and other caution areas
that can cause harm.
Keep hands away from all moving parts.
Never operate the rower if it has a damaged cord or plug. If the rower is not working
properly, call your dealer.
Keep the cord away from heated surfaces.
Do not operate where aerosol spray products are being used or where oxygen is being
administered. Sparks from the motor may ignite a highly gaseous environment.
Never drop or insert any object into any openings.
Do not use outdoors.
To disconnect, turn all controls to the off position, then remove the plug from the outlet.
Do not attempt to use your rower for any purpose other than for the purpose it is
intended.
Use of a chest strap transmitter (sold separately) is an accurate method of heart rate
analysis. Various factors, including the user’s movement, may affect the accuracy of heart
rate readings.
Wear proper shoes. High heels, dress shoes, sandals or bare feet are not suitable for use
on your rower. Quality athletic shoes are recommended to avoid leg fatigue.
This appliance is not intended for use by persons with reduced physical, sensory or mental
capabilities, or lack of experience and knowledge, unless they have been given supervision
or instruction concerning use of the appliance by a person responsible for their safety.
Keep children under the age of 13 away from this machine.

CUSTOMER SERVICE 1-888-707-1880 Dyaco Canada Inc. ©2016
Email: customerservice@dyaco.ca
7
IMPORTANT
ELECTRICAL INSTRUCTIONS
WARNING
NEVER remove any cover without first disconnecting AC power. If voltage varies by ten percent
(10%) or more, the performance of your Rower may be affected. Such conditions are not covered
under your warranty. If you suspect the voltage is low, contact your local power company or a
licensed electrician for proper testing.
NEVER expose this Rower to rain or moisture. This product is NOT designed for use outdoors,
near a pool or spa, or in any other high humidity environment. The operating temperature
specification is 40 to 120 degrees Fahrenheit, and humidity is 95% non-condensing (no water
drops forming on surfaces).
Circuit Breakers: Some circuit breakers used in homes are not rated for high inrush currents that
can occur when a Rower is first turned on or even during use. If your Rower is tripping the house
circuit breaker (even though it is the proper current rating) but the circuit breaker on the Rower
itself does not trip, you will need to replace the home breaker with a high inrush type. This is not a
warranty defect. This is a condition we as a manufacture have no ability to control. This part is
available through most electrical supply stores. Examples: Grainger part # 1D237, or available
online at www.squared.com part #QO120HM.The electrical outlet used should have a dedicated
15 amp circuit breaker.
Grounding Instructions
This product must be grounded. If the Rower should malfunction or breakdown, grounding
provides a path of least resistance for electric current, reducing the risk of electric shock. This
product is equipped with a cord having an equipment- grounding plug. The plug must be plugged
into an appropriate outlet that is properly installed and grounded in accordance with all local
codes and ordinances.
DANGER - Improper connection of the equipment- grounding conductor can result in a risk of
electric shock. Check with a qualified electrician or serviceman if you are in doubt as to whether
the product is properly grounded. Do not modify the plug provided with the product if it will not fit
the outlet; have a proper outlet installed by a qualified electrician.
This product is for use on a nominal 110 volt dedicated circuit, and has a grounding plug that
looks like the plug illustrated below. A temporary adapter that looks like the adapter illustrated
below may be used to connect this plug to a 2-pole receptacle as shown below if a properly
grounded outlet is not available. The temporary adapter should be used only until a properly
grounded outlet, (shown below) can be installed by a qualified electrician. The green colored rigid
ear-lug, or the like, extending from the adapter, must be connected to a permanent ground such
as a properly grounded outlet box cover. Whenever the adapter is used, it must be held in place
by a metal screw.

CUSTOMER SERVICE 1-888-707-1880 Dyaco Canada Inc. ©2016
Email: customerservice@dyaco.ca
8
IMPORTANT
OPERATION INSTRUCTIONS
NEVER operate this Rower without reading and completely understanding the results of any
operational change you request from the computer.
Understand that changes in resistance do not occur immediately. Set your desired resistance
level on the computer console and release the adjustment key. The computer will obey the
command gradually.
Use caution while participating in other activities while pedaling on your Rower; such as
watching television, reading, etc.
These distractions may cause you to lose balance which may result in serious injury.
Do not use excessive pressure on console control keys. They are precision set to function
properly with little finger pressure.

CUSTOMER SERVICE 1-888-707-1880 Dyaco Canada Inc. ©2016
Email: customerservice@dyaco.ca
9
ASSEMBLY
INSTRUCTIONS
PRE-ASSEMBLY
1. Using a razor knife (Box Cutter), cut the banding straps that wrap around the carton. Reach
under the bottom edge of the carton and pull it away from the cardboard underneath,
separating the staples that join the two together. Lift the box over the unit and unpack.
2. Carefully remove all parts from carton and inspect for any damage or missing parts. If
damaged parts are found, or parts are missing, contact your dealer immediately.
3. Locate the hardware package. The hardware is separated into four steps. Remove the tools
first. Remove the hardware for each step as needed to avoid confusion. The numbers in the
instructions that are in parenthesis (#) are the item number from the assembly drawing for
reference.
ASSEMBLY TOOLS
#127. Combination M5 Allen Wrench
& Phillips Head Screw Driver
(1 pc)
#126. L Allen Wrench
(1 pc)
#128. 13/14m/m Wrench
(1 pc)

CUSTOMER SERVICE 1-888-707-1880 Dyaco Canada Inc. ©2016
Email: customerservice@dyaco.ca
10
STEP 1
1. Gather HARDWARE FOR STEP 1.
2. Use the WRENCH (128) to tighten 4 HEX HEAD BOLTS (120) together with 4 SPRING
WASHERS (121) and 4 FLAT WASHERS (109) to secure the MAIN FRAME (1) and FRONT
STABILIZER (2) together.
HARDWARE
#109. 3/8" × 19 × 1.5T
Flat Washer
(4 pcs)
#121. 10 × 2T
Spring Washer
(4 pcs)
#120. 3/8" × 3/4"
Hex Head Bolt
(4 pcs)

CUSTOMER SERVICE 1-888-707-1880 Dyaco Canada Inc. ©2016
Email: customerservice@dyaco.ca
11
STEP 2
1. Gather HARDWARE FOR STEP 2.
2. Use ALLEN WRENCH (126) to remove 2 BUTTON HEAD SOCKET BOLTS (89) on
ALUMINUM TRACK (51), then attach SEAT STOP COVER (65) to REAR STABILIZER (3)
and install at rear end of the ALUMINUM TRACK (51). Use ALLEN WRENCH (126) to tighten
4
BUTTON HEAD SOCKET BOLTS (129) and 2 BUTTON HEAD SOCKET BOLTS (89) onto
the Aluminum Track (51).
HARDWARE
#129. M6 × 10m/m
Button Head Socket Bolt
(4pcs)

CUSTOMER SERVICE 1-888-707-1880 Dyaco Canada Inc. ©2016
Email: customerservice@dyaco.ca
12
STEP 3
1. Gather HARDWARE FOR STEP 3.
2. Attach the other end of the ALUMINUM TRACK (51) to FOLDING END ASSEMBLY (6) and
use COMBINATION WRENCH (127) to tighten the 5 BUTTON HEAD SOCKET BOLTS (123)
together with 4 FLAT WASHERS (122).
HARDWARE
#122. 5/16" × 18 × 1.5T
Flat Washer
(4 pcs)
#123. M8 × 12m/m
Button Head Socket Bolt
(5pcs)

CUSTOMER SERVICE 1-888-707-1880 Dyaco Canada Inc. ©2016
Email: customerservice@dyaco.ca
13
STEP 4
1. Gather HARDWARE FOR STEP 4.
2. Install left and right PEDALS (4, 5) on the MAIN FRAME (1) with 6 BUTTON HEAD SOCKET
BOLTS (123) and 6 FLAT WASHERS (122) by using COMBINATION WRENCH (127) to
tighten. Use again COMBINATION WRENCH (127) to install CONNECTING COVER (63) on
ALUMINUM TRACK (51) with 3 PHILLIPS HEAD SCREWS (85). Install SEAT (49) and SEAT
ATTACHING BOARD (16) with 4 PHILLIPS HEAD SCREWS (124) together with 4 SPRING
WASHERS (125) by using COMBINATION WRENCH (127).
HARDWARE
#85. M5 × 10m/m
Phillips Head Screw
(3pcs)
#123. M8 × 12m/m
Button Head Socket Bolt
(6pcs)
#124. M6 × 15m/m
Phillips Head Screw
(4pcs)
#122. 5/16" × 18 × 1.5T
Flat Washer
(6 pcs)
#125. 1/4"
Spring Washer
(4 pcs)

CUSTOMER SERVICE 1-888-707-1880 Dyaco Canada Inc. ©2016
Email: customerservice@dyaco.ca
14
OPERATION OF
YOUR ROWER
GETTING FAMILIAR WITH THE CONTROL PANEL
POWER
When pressing any key button wakes up the console which has been turned off, the console
LCD will turn on with full display and beeps for 2 seconds then enters idle mode. When there
is speed signal input with the speed sensor detected, it directly enters Manual workout mode.
Power off: While in use, if no buttons are activated or there is no activity with the rower, the
monitor will turn off automatically after 1 minute.
WINDOW FUNCTIONS
Stroke/min
s/m value shows the equivalent strokes per
min
ute
.
Time
It shows the time.
Range of time: 00:00~99:59(minute: second)
The time is accumulated for each workout mode.
When time is set to count down, it shows the time remaining.
Distance
The distance range is 0~9999 and switches to the format of 1X.XX when the value is over
9999.
The distance will be accumulated for each workout mode.
When the distance is set to count down, it shows the remaining distance.
Large Blue-LED
Matrix Window
Ten innovative
programs offer a
variety of work-outs
Built-in Heart
Rate Receiver
Easy-Touch
Control Keys

CUSTOMER SERVICE 1-888-707-1880 Dyaco Canada Inc. ©2016
Email: customerservice@dyaco.ca
15
Heart Rate
The heart rate range is 40~220 bpm
When the heart rate signal is detected, the small dot at lower right corner of the heart rate
window will be blinking together with heart rate value showing.
When there is no heart rate signal detected, the heart rate window shows nothing.
Calories
The calorie window shows the value of calorie dissipated.
The calorie range is 0~999.
Watts
The Watts window shows Watt value for each stroke.
The Watt range is 0~2000
When the numbers over 999 to four digits, the display would use point to show digit in
thousands. E.g. 1000 shows 1.00, 1009 shows 1.01, 1240 shows 1.24, 1250 shows 1.25,
2000 shows 2.00, etc.
Level
The level window shows the current resistance level.
The level range is 1~16
Level 1 and 2 would light the first dot, level 3 and 4 would light the second dot, etc.
500M/Time
Only workout modes of Manual, Distance, Time and Calorie are with this display function.
For Manual workout mode as an example: When the console starts, Matrix in the middle of
LCD will show the wave pattern then switch to 500M/TIME 00:00 across center display
after 5 seconds then switch again back to the wave pattern after another 5 seconds and
continue to repeat the cycle. This is the function of SCAN.
The console goes directly into SCAN mode after start. If MODE button is pressed, it shows
the wave pattern. Pressing the MODE button again, it displays 500M/TIME and repeat
again by pressing “MODE” button it goes back with “SCAN” function (recyclable).
KEY BUTTON FUNCTION
Any valid key button pressed will generate a beep sound.
When in power off mode, pressing any key button turns on the console.
Mode Key
Under idle mode, pressing MODE key each time switches the workout mode with the
following sequence:
MANUAL » DISTANCE » TIME » CALORIES » 20/10 INTERVAL » 10/20 INTERVAL »
CUSTOM INTERVAL » Fat Burn » Cardio » Strength » Game
The default workout mode after turning on the unit is Manual mode.
To choose the target workout mode, when the matrix window shows the desired workout
pattern and parameter window value to be set will be blinking each second.
Up Key
Under the setting mode of the target workout, the parameter is will be counted up.
The value increases one increment when “UP” key is pressed once.

CUSTOMER SERVICE 1-888-707-1880 Dyaco Canada Inc. ©2016
Email: customerservice@dyaco.ca
16
Down Key
Under the setting mode of the target workout, the parameter is will be counted down.
The value decreases one increment when DOWN key is pressed once.
Start/Stop Key
Under idle mode, pressing Start/Stop key button enters Manual workout mode.
To confirm the value the window is showing when setting the parameter under each target
workout mode and to start the workout mode.
Press to end the current workout mode and all message windows stop counting.
Reset Key
Pressing this key button under stopping mode, the image switches to the idle mode.
The reset key button is valid only in stopping mode.
Under any mode, pressing this key button for 3 seconds turns on the console again.

CUSTOMER SERVICE 1-888-707-1880 Dyaco Canada Inc. ©2016
Email: customerservice@dyaco.ca
17
OPERATING INSTRUCTION
The screen shows full display and the buzzer beeps for two seconds after turning on.
Pressing Start button goes directly to Manual workout mode or pressing MODE button to
switch and select a workout mode with the workout sequence shown as below:
MANUAL » DISTANCE » TIME » CALORIES » 20/10 INTERVAL » 10/20 INTERVAL »
CUSTOM INTERVAL » Fat Burn » Cardio » Strength » Game
The program name will scroll from left to right to tell the user what it is.
Manual Mode
To choose MANUAL mode (Fig. 1-1)
Pressing Start/Stop button begins the workout mode or pulling the paddle under the idle
mode enters directly into Manual workout mode.
The image at the center of LCD will scan every 5 seconds to show the stroke speed with
wave pattern (Fig. 1-2) and 500M/TIME (Fig. 1-3) or pressing MODE button to cancel
scanning with wave pattern only. Pressing MODE again switches the image to show
500M/TIME.
Pressing UP or DOWN button adjusts the resistance level which is shown at bottom right
corner of LEVEL window.
Manual Distance Time Calories
20/10 Interval 10/20 Interval Custom Interval Fat Burn
Cardio Strength Game
Fig 1-2
Fig 1-3
Fig 1-1

CUSTOMER SERVICE 1-888-707-1880 Dyaco Canada Inc. ©2016
Email: customerservice@dyaco.ca
18
Target Distance
To choose target distance count-down Distance workout mode (Fig. 2-1)
Use UP/DOWN buttons to adjust and set the workout distance. The default distance is 100M
with increments of 50M up or down. Press Start/Stop button to confirm the setting and start
the workout mode.
The image at the center of LCD will scan every 5 seconds to show the stroke speed with
wave pattern (Fig. 2-2) and 500M/TIME (Fig. 2-3) or pressing MODE button to cancel
scanning with wave pattern only. Pressing MODE again switches the image to show
500M/TIME.
Distance window counts down from target distance setting value and shows the remaining
distance of the workout.
Under the workout mode, pressing UP or DOWN key button adjusts the resistance level.
When the distance has counted down to 0, the workout completes and the buzzer sounds
with a long beep. If paddling continues, the distance count-down repeats.
Target Time
To choose target time count-down Time workout mode (Fig. 3-1)
Use UP/DOWN buttons to adjust and set the workout time. The default distance is 1:00 with
1-minute increment of up or down (99:00 maximum). Press Start/Stop button to confirm the
setting and start the workout mode.
The image at the center of LCD will scan every 5 seconds to show the stroke speed with
wave pattern (Fig. 3-2) and 500M/TIME (Fig. 3-3) or pressing MODE button to cancel
scanning with wave pattern only. Pressing MODE again switches the image to show
500M/TIME.
Under the workout mode, pressing UP or DOWN key button adjusts the resistance level.
Time window counts down from the setting time value and shows the remaining time of the
workout. When time has counted down to 0:00, the workout completes and the buzzer
sounds with a long beep. If paddling continues, the time count-down repeats.
Fig 2-1 Fig 2-2 Fig 2-3
Fig 3-1 Fig 3-2 Fig 3-3

CUSTOMER SERVICE 1-888-707-1880 Dyaco Canada Inc. ©2016
Email: customerservice@dyaco.ca
19
Target Calorie
To choose target calorie count-down Calories workout mode (Fig. 4-1)
Use UP/DOWN buttons to adjust and set the target calorie. The default value is 100 with
increments of 10 up or down. Press Start/Stop button to confirm the setting and start the
workout mode.
The image at the center of LCD will scan every 5 seconds to show the stroke speed with
wave pattern (Fig. 4-2) and 500M/TIME (Fig. 4-3) or pressing MODE button to cancel
scanning with wave pattern only. Pressing MODE again switches the image to show
500M/TIME.
Calorie window counts down from the setting target calorie value and shows the remaining
calorie of the workout.
Under the workout mode, pressing UP or DOWN key button adjusts the resistance level.
When calorie has counted down to 0, the workout completes and the buzzer sounds with a
long beep. If paddling continues, the time count-down repeats.
20/10 Interval
To choose 20/10 INTERVAL workout mode (Fig. 5-1)
The image at the center of LCD: 20 seconds (Exercise)/10 seconds (Rest)
Pressing Start/Stop button starts the workout mode.
The image at the center of LCD shows time count-down of current workout and wave
(Fig. 5-2) or rest time count-down and mark (Fig. 5-3).
Under the workout mode, pressing UP or DOWN key button adjusts the resistance level.
There are 10 Exercise/Rest cycles for each workout time.
When workout completes, the buzzer sounds with a long beep. If paddling continues, the
time count-down repeats.
Fig 4-1
Fig 4-2
Fig 4-3
Fig 5-1 Fig 5-2 Fig 5-3

CUSTOMER SERVICE 1-888-707-1880 Dyaco Canada Inc. ©2016
Email: customerservice@dyaco.ca
20
10/20 Interval
To choose 10/20 INTERVAL workout mode (Fig. 6-1)
The image at the center of LCD: 10 seconds (Exercise)/20 seconds (Rest)
Pressing Start/Stop button starts the workout mode.
The image at the center of LCD shows time count-down of current workout and wave
(Fig. 6-2) or rest time count-down and mark (Fig. 6-3).
Under the workout mode, pressing UP or DOWN key button adjusts the resistance level.
There are 10 Exercise/Rest cycles for each workout time.
When workout completes, the buzzer sounds with a long beep. If paddling continues, the
time count- down repeats.
Custom Interval
To choose CUSTOM INTERVAL workout mode (Fig. 7-1)
User-defined time (Exercise)/time (Rest): the default is 10 seconds (Exercise)/10 seconds
(Rest)
The value at left side of the matrix window flashes for setting the exercise time. Use
UP/DOWN buttons to adjust and set the workout time. The default time is 10 seconds with
1-second increment of up or down. Press Start/Stop button to confirm the setting and start
the workout mode.
The value at right side of the matrix window flashes for setting the rest time. Use UP/DOWN
buttons to adjust and set the workout time. The default time is 10 seconds with 1-second
increment of up or down. Press Start/Stop button to confirm the setting and start the workout
mode.
The image at the center of LCD: 10 seconds (Exercise)/10 seconds (Rest).
Pressing Start/Stop button starts the workout mode.
The image at the center of LCD shows time count-down of current workout and wave
(Fig. 7-2) or rest time count-down and mark (Fig. 7-3).
Under the workout mode, pressing UP or DOWN key button adjusts the resistance level.
There are 10 Exercise/Rest cycles for each workout time. When workout completes, the
buzzer sounds with a long beep. If paddling continues, the time countdown repeats.
Fig 6-1 Fig 6-2 Fig 6-3
Fig 7-1 Fig 7-2 Fig 7-3
/