Page is loading ...

PRE
C
A
U
TI
O
N
S
SETUP
VC
R F
U
N
C
TI
O
N
S
DVD FUNCTIONS
INF
O
RMATI
ON
DIGITAL
AUDIO OUT
COAXIAL
AUDIO
OUT
DVD VCR
DVD/VCR
S-VIDEO
OUT
COMPONENT
VIDEO OUT
AUDIO IN
VIDEO IN
AUDIO OUT
VIDEO OUT
L
LY
R
L
R
R
C
B
/
P
B
C
R
/
P
R
DVD/VCR
AUDIO OUT
VIDEO OUT
L
R
V
C
R
A
U
DI
O
I
N
VIDE
O
I
N
L
R
If your TV only has an Antenna input
(no A/V inputs), you will need an
RF modulator (NOT INCLUDED) to
connect this Unit
to your TV.
RF modulator
AUDIO IN
RL
VIDEO IN
CHANNEL
43
TO TV
TV
ANT. IN
ANT. IN
No Antenna (RF) Output!
rear of TV
rear of your RF
modulator
AUDIO IN TO TVANT. IN
LR
CHANNEL
43
VIDEO IN
ANT. IN
Set channel 3 or 4
rear of this Unit
RF coaxial cable
RF coaxial
cable
VHF / UHF
antenna
cable TV
company
or
RCA video cable
RCA audio cable
DVD / CD P
l
a
y
er wit
h
Vi
d
eo Cassette Recor
d
e
r
C
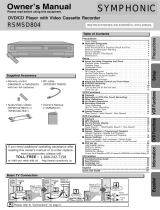
DV22
5
FX
4
O
wner’s M
a
n
ual
Please read be
f
ore using this Unit
.
PRECAUTIONS
Safet
y
Instruction
s
...................................................................................
2
Sy
mbols Used in This Manua
l
..............................................................................
4
Ma
in
te
n
a
n
ce
..............................................................................................................
4
A
bout Cassette Tapes and Disc
s
.............................................................
5
P
layable Medi
a
..........................................................................................................
5
Unplayable Disc
s
......................................................................................................
5
S
ETU
P
C
onnection
s
.............................................................................................
6
Connection to a TV
..................................................................................................
V
6
C
onnection to an Audio Syste
m
.........................................................................
7
C
onnection to an External Tuner
(
Cable/Satellite or DTV to analog TV Converter Set-top box
)
.................
7
P
reparation
f
or Us
e
................................................................................
.
8
T
urning on Unit
f
or the First Tim
e
.....................................................................
8
C
lock Settin
g
..............................................................................................................
8
Function Overview
..................................................................................
w
9
Front Panel Indicator Light
s
.................................................................................
9
S
e
l
ecting DVD or VCR Operatio
n
........................................................................
9
Fr
o
n
t
&
R
ea
r T
e
rmin
als
...........................................................................................
9
Re
m
ote
Co
n
t
r
ol
........................................................................................................
1
0
Installing the Batteries
f
or the Remote Contro
l
...........................................
1
0
V
CR FUNCTI
O
N
S
Playback
.................................................................................................
k
11
W
hen You Pla
y
back a Cassette Tape Recorded in Hi-Fi Stere
o
.............
1
1
O
ther O
p
eration
s
....................................................................................
11
In
de
x
Sea
r
ch
..............................................................................................................
1
1
T
im
e
Sea
r
ch
...............................................................................................................
1
1
Auto Re
p
ea
t
...............................................................................................................
12
R
ecor
d
in
g
................................................................................................
12
R
ecording & One-touch Timer Recording (OTR
)
..........................................
12
T
imer Recor
d
in
g
......................................................................................................
12
N
otes for Timer Recordin
g
& One-touch Timer Recordin
g
(OTR
)
.........
1
3
Satellite Link
..............................................................................................................
k
14
C
opying a
C
assette Tap
e
......................................................................................
14
D
VD F
U
NCTI
O
N
S
Playback
.................................................................................................
k
15
On-Screen Display
..................................................................................
y
16
Search Function
s
....................................................................................
17
Using Track Searc
h
..................................................................................................
17
Using Title / Chapter Search
................................................................................
17
Using Time Searc
h
..................................................................................................
17
M
arker Settin
g
..........................................................................................................
17
Repeat / Random / Programmed Playback
...........................................
k
18
Repeat Playback
.......................................................................................................
k
1
8
Repeat A-B Playback
..............................................................................................
k
1
8
Random Playback
....................................................................................................
k
1
8
Programmed Playback
..........................................................................................
k
1
8
Specia
l
Setting
s
......................................................................................
19
S
ubtitle Lan
g
ua
ge
...................................................................................................
1
9
Au
d
io Lan
g
ua
ge
......................................................................................................
1
9
C
amera An
g
le
s
.........................................................................................................
1
9
B
lack Level Settin
g
..................................................................................................
1
9
Ste
r
eo
Sou
n
d
M
ode
................................................................................................
1
9
D
VD Setting
............................................................................................
20
LANGUAGE
S
ettin
g
................................................................................................
.
20
D
I
S
PLAY
S
ettin
g
......................................................................................................
.
21
AUDI
O
Settin
g
..........................................................................................................
21
P
ARENTAL
S
ettin
g
...................................................................................................
22
O
THERS Settin
g
........................................................................................................
22
R
eset to the Default Setting (Except for PARENTAL Setting
)
..................
23
I
NF
O
RMATI
ON
T
rou
bl
es
h
ooting Gui
de
..........................................................................
23
S
p
eci
f
ication
s
.........................................................................................
24
Language Code List
................................................................................
t
24
LIMITED WARRANTY
...............................................................................
Y
Y
24
Supplied Accessorie
s
R
emo
t
e
C
on
t
ro
l
U
n
it
RtCt
l
Uit
NB681UH
O
wner
’
s
M
anua
l
O
’
M
l
AA
1.5 V D
C
battery x
2
RCA audio / video cable
s
Q
uick Start Guide
Owner’s Manual
© 2013 Funai E
l
ectric Co., Lt
d.
If
y
our
TV
h
as an
t
enna
i
n
j
ac
k
on
ly
,
it
i
s s
till
poss
ibl
e
t
o
connect this Unit to your TV by using an RF modulator. In
this case
,
f
ollow the instructions below.
1
)
Disconnect the power cords o
f
the Unit
f
rom the AC outlet
.
2
)
M
a
k
e
t
h
e
co
nn
ect
i
o
n
as
ill
ust
r
ated
be
l
o
w
.
3
)
Set
y
our RF modulator’s channel 3/4 switch to either 3
o
r
4
, whichever the TV channel is least used in
y
our area. I
f
y
our RF modulator has a modulator/antenna switch, set it
accordin
g
to the manual supplied with the RF modulator.
4
)
Plug in the power cords of the Unit to the AC outlet
.
5
)
Turn on your TV an
d
c
h
oose t
h
e same c
h
anne
l
as
you set t
h
e RF mo
d
u
l
ator’s c
h
anne
l
3/4 switc
h
to
.
F
or more details,
f
ollow the manual supplied with the
RF mo
d
u
l
ator
.
Note
(
s
):
•
RF mo
d
u
l
ator is not supp
l
ie
d
wit
h
t
h
is Unit. You nee
d
to
purchase this separatel
y.
•
The picture qualit
y
ma
y
suffer if this Unit is connected through
an RF mo
d
u
l
ator to an RF on
l
y TV.
If TV h t i j k l
it i till ibl t
Connecting to RF Mo
d
u
l
ator
N
ot Supp
l
ie
d
PRECAUTION
S
Co
ntent
s
I
f
y
ou need additional operating assistance after reading this Owner’s Manual, please call
T
O
LL FREE
:
1-
8
77-
3
9
3
-
86
2
4
o
r vi
s
i
t
ou
r W
eb
S
i
te
at:
w
ww.
f
unaiamerica.com/su
pp
or
t
Quick Start Guide

PRE
C
A
U
TI
O
N
S
–
2
–
EN
PRECA
U
TI
O
N
S
Safety Instructions
y
T
he model and serial number’s
f
or this Unit may be
f
ound on the cabinet
.
Y
ou
s
h
ou
l
d
r
eco
r
d
a
n
d
r
eta
in
t
h
ose
n
u
m
be
r’
s
f
o
r f
utu
r
e
r
e
f
e
r
e
n
ce.
Se
ri
al
N
o.:
Model
N
o.:
WARNING:
T
O REDUCE THE RISK OF FIRE OR ELECTRIC SHOCK, DO NOT EXPOSE THIS APPARATUS
T
O RAIN OR MOISTURE
.
APPARATUS SHALL NOT BE EXPOSED TO DRIPPING OR SPLASHING AND NO OBJECTS
FILLED WITH LIQUIDS, SUCH AS VASES, SHALL BE PLACED ON THE APPARATUS.
C
A
U
TI
O
N
:
TO REDUCE THE RISK OF ELECTRIC
SHOCK, DO NOT REMOVE COVER
(
OR BACK
)
. NO USER
SERVICEABLE PARTS INSIDE. REFER SERVICING TO
Q
UALIFIED SERVICE PERSONNEL
.
C
A
U
TI
ON
RISK OF ELECTRIC SHOCK
DO NOT OPEN
Th
e exc
l
amation point wit
h
in an equi
l
atera
l
trian
gl
e is
i
ntended to alert the user to the presence of important
operatin
g
and maintenance (servicin
g
) instructions in
t
h
e
l
iterature accompan
y
ing t
h
e app
l
iance.
The lightning flash with arrowhead symbol, within an
e
quilateral triangle, is intended to alert the user to the
presence of uninsulated “dan
g
erous volta
g
e” within the
product’s enclosure that may be of sufficient magnitude
to constitute a risk of electric shock to persons
.
The important note and rating are located on the rear or bottom o
f
the cabinet
.
IMP
O
RTANT SAFETY INSTRUCTI
O
N
S
1
.
R
ead
t
h
ese
in
st
r
uct
i
o
n
s.
2
.
Kee
p
these instructions.
3.
Hee
d
a
ll
warnin
g
s
.
4
.
F
o
ll
o
w
a
ll in
st
r
uct
i
o
n
s.
5.
Do not use this a
pp
aratus near water
.
6.
C
l
ean on
ly
wit
h
d
r
y
c
l
ot
h.
7
.
Do not block an
y
ventilation openings. Install in
acco
r
da
n
ce
wi
t
h
t
h
e
m
a
n
u
f
actu
r
e
r’
s
in
st
r
uct
i
o
n
s.
8.
Do not insta
ll
near an
y
h
eat sources suc
h
as ra
d
iators,
h
eat
re
g
isters, stoves, or other apparatus (includin
g
amplifiers)
that
p
roduce heat
.
9.
Do not de
f
eat the sa
f
et
y
purpose o
f
the polarized or
g
rounding-t
y
pe plug. A polarized plug has two blades
with one wider than the other. A grounding t
y
pe plug
h
as two
bl
a
d
es an
d
a t
h
ir
d
g
roun
d
in
g
pron
g
. T
h
e wi
d
e
blade or the third prong are provided for
y
our safet
y
. If
the provided plug does not fit into
y
our outlet, consult an
e
lectrician
f
or re
p
lacement o
f
the obsolete outlet
.
1
0.
Protect the power cord from bein
g
walked on or
p
inched particularl
y
at plugs, convenience receptacles,
and the point where the
y
exit
f
rom the apparatus.
11
.
Onl
y
use attachments/accessories specified b
y
the
ma
n
u
f
actu
r
e
r
.
12
.
Use on
ly
wit
h
t
h
e cart, stan
d
, tripo
d
,
b
racket, or table specified b
y
the
m
anufacturer, or sold with the a
pp
aratus.
W
h
en a cart is use
d,
use caution w
h
en
m
ovin
g
the cart/apparatus combination
to avoid injur
y
from tip-over
.
1
3.
Unp
l
u
g
t
h
is apparatus
d
urin
g
l
i
gh
tnin
g
storms or w
h
en
unused for lon
g
periods of time.
14.
Refer all servicin
g
to qualified service personnel.
Servicin
g
is require
d
w
h
en t
h
e apparatus
h
as
b
een
d
amaged in an
y
wa
y
, such as power-suppl
y
cord or
p
lug is damaged, liquid has been spilled or ob
j
ects
h
ave
f
allen into the a
pp
aratus, the a
pp
aratus has been
e
xposed to rain or moisture, does not operate normall
y
,
o
r has been dro
pp
ed.
F
CC
WARNING
This equipment ma
y
generate or use radio frequenc
y
energ
y
. Changes or modifications to this equipment ma
y
cause
harm
f
ul inter
f
erence unless the modi
f
ications are expressly approved in the manual. The user could lose the authority to
operate this equipment i
f
an unauthorized chan
g
e or modi
f
ication is made
.
RADI
O
-TV INTERFERENCE
T
his equipment has been tested and
f
ound to comply with the limits
f
or a Class B digital device, pursuant to Part
15 o
f
the FCC Rules. These limits are designed to provide reasonable protection against harm
f
ul inter
f
erence in
a
residential installation. This equipment generates, uses, and can radiate radio
f
requency energy and, i
f
not installe
d
and used in accordance with the instructions, may cause harm
f
ul inter
f
erence to radio communications. However,
there is no guarantee that inter
f
erence will not occur in a particular installation. I
f
this equipment does cause harm
f
ul
inter
f
erence to radio or television reception, which can be determined by turning the equipment o
ff
and on, the user
is encouraged to try to correct the inter
f
erence by one or more o
f
the
f
ollowing measures
:
1
Reorient or re
l
ocate t
h
e receiving antenna.
2
Increase the separation between the equipment and receiver
.
3
Connect the equipment into an outlet on a circuit di
ff
erent
f
rom that to which the receiver is connected
.
4
Consult the dealer or an experienced radio/TV technician
f
or help
.
CAN ICES-3
(
B
)
/NMB-3
(
B
)
Disconnect the mains plug (the AC plug) to shut the Unit o
ff
when trouble is
f
ound or when not in use. The mains plug
(t
h
e AC p
l
ug) s
h
a
ll
remain rea
d
i
ly
avai
l
a
bl
e
.
C
ontinued on next page
.

PRECAUTI
O
N
S
E
N
–
3
–
C
A
U
TI
O
N
:
Danger o
f
explosion i
f
batter
y
is incorrectl
y
replaced. Replace onl
y
with the same or equivalent t
y
pe
.
WARNING
:
Batteries (Batter
y
pack or batter
y
installed) shall not be exposed to excessive heat such as sunshine, fire or the like
.
LA
S
ER
S
AFET
Y
T
his a
pp
aratus is classified as a CLASS 1 LASER PRODUCT.
T
his apparatus emplo
y
s a laser. Onl
y
a qualified service person should remove the cover or attempt to
service this apparatus, due to possible eye injury
.
CAUTION
:
Use of controls or adjustments or performance of procedures other than those specified herein may result
in hazardous radiation exposure
.
IMPORTANT COPYRIGHT INFORMATIO
N
Unauthorized copying, broadcasting, public performance and lending of discs are prohibited. This item incorporates
copy protection technology that is protected by U.S. patents and other intellectual property rights of Rovi Corporation.
Reverse engineering and disassembl
y
are prohibited.
Do not place the Unit on the furniture that is capable of being tilted b
y
a child and an adult leaning, pulling, standing
or climbing on it. A falling Unit can cause serious injury or even death
.
Never use a
g
as duster on this Unit
.
T
he gas trapped inside of this Unit may cause ignition and explosion
.
T
his a
pp
aratus should not be
p
laced in a built-in installation such as a bookcase or rack unless
p
ro
p
er ventilation i
s
provided. Make sure to leave a space o
f
7.8 inches (20cm) or more around this apparatus
.
To
Av
o
i
d
the H
a
z
a
r
ds
o
f Electric
a
l Sh
o
ck
a
n
d
Fire
•
Do not handle the power cord with wet hands.
•
Do not pull on the power cord when disconnecting it
f
rom an AC outlet. Grasp it by the plug.
•
Do not put your fingers or objects into the Unit
.
Location and Handling
•
Do not install the Unit in direct sunlight, near strong magnetic
f
ields or in a place subject to dust or strong vibration
.
•
Avoi
d
a p
l
ace wit
h
d
rastic temperature c
h
anges
.
•
Install the Unit in a horizontal and stable position. Do not place anything directly on top or bottom o
f
the Unit.
Depending on your external devices, noise or disturbance o
f
the picture and/or sound may be generated i
f
the Unit is
p
l
ace
d
too c
l
ose to t
h
em. In t
h
is case, p
l
ease ensure enoug
h
space
b
etween t
h
e externa
l
d
evices an
d
t
h
e Unit
.
•
Depending on the environment, the temperature o
f
this Unit may increase slightly. This is not a mal
f
unction.
•
Be sure to remove the disc and unplug the AC power cord
f
rom the outlet be
f
ore carrying the Unit.
Dew Con
d
ensation Warning
•
Dew condensation ma
y
form inside the Unit in the following conditions. If so, do not use this Unit at least for a few
hours until its inside gets dr
y.
- The Unit is moved
f
rom a cold
p
lace to a warm
p
lace.
- Under conditions of high humidit
y
.
- After heatin
g
a cold room
.
Note about Recycling
•
T
his Unit’s packaging materials are recyclable and can be reused. Please dispose of any materials in
accordance with your local recycling regulations
.
•
Batteries should never be thrown awa
y
or incinerated but disposed of in accordance with
y
our local
re
g
ulations concernin
g
chemical wastes
.
•
For product recycling information, please visit - www.funaiamerica.co
m
and click on the Rec
y
cle S
y
mbol
.
Notice for Pro
g
ressive Scan Output
•
Consumers should note that not all high definition television sets are fully compatible with this product and may
cause artifacts to be displayed in the picture. In case of picture problems with 525(480) progressive scan output
,
it is recommended that the user switch the connection to the ‘standard de nition’ out
p
ut. If there are
q
uestion
s
regarding your TV set compatibility with this 525p(480p) DVD player, please contact our customer service center
.
C
ontinue
d
on next page
.

PRE
C
A
U
TI
O
N
S
–
4
–
EN
S
y
mbols Used in This Manual
T
he
f
ollowing s
y
mbols appear in some headings in this manual
.
: Descri
p
tion refers to video cassette ta
p
es
.
Descri
p
tion re
f
ers to DVD-VIDEO
.
: Description re
f
ers to audio CD
.
N
ote to CATV system installer
:
• This reminder is provided to call the CATV system installer’s attention to
Article 820-40 of the NEC that provides guidelines for proper grounding
and, in particular, speci
f
ies that the cable ground should be connected
to the grounding system of the building, as close to the point of cable
entry as practica
l.
Maintenance
Serv
i
c
i
n
g
g
•
Please refer to relevant topics on the “Troubleshooting Guide”
on page 23 before returning the product.
•
I
f
this Unit becomes inoperative, do not try to correct the
problem b
y
y
ourself. There are no user-serviceable parts inside.
T
urn off, unplu
g
the power plu
g
and please call our toll free
customer support line
f
ound on the cover o
f
this manual to
l
ocate an aut
h
orize
d
service center.
C
l
eanin
g
t
h
e Ca
b
inet
g
•
Wi
p
e the front
p
anel and other exterior surfaces of the Unit with
a
soft
c
l
ot
h
.
•
Never use a so
l
vent
,
t
h
inner
,
b
enzene or a
l
co
h
o
l
to c
l
ean
t
h
e Unit. Do not spray insectici
d
e
l
iqui
d
near t
h
e Unit. Suc
h
chemicals may discolor the sur
f
ace or damage the Unit.
C
l
eanin
g
Disc
s
g
•
When a disc becomes dirt
y
, clean it with a cleaning cloth. Wipe
the disc
f
rom the center to the outside o
f
the disc. Do not wi
p
e
in
a
c
ir
cu
l
a
r m
ot
i
o
n
.
•
Do not use solvents such as benzene, thinner, commerciall
y
a
vailable cleaners, detergent, abrasive cleaning agents or antistatic
s
pra
y
intended
f
or analog records
.
C
l
eanin
g
t
h
e Disc Lens
g
•
If this Unit continues to perform improperl
y
even after
y
ou
h
ave referred to the relevant manual sections and to the
“
Trou
bl
es
h
ooting Gui
d
e” in t
h
is manua
l
, t
h
e
l
aser optica
l
pic
k
up
Unit ma
y
b
e
d
irt
y
. Consu
l
t
y
our
d
ea
l
er or an aut
h
orize
d
service
center for inspection and cleaning of the laser optical pickup
Un
i
t.
Disc Han
dl
in
g
g
•
When
y
ou handle a disc, hold it b
y
its edge and tr
y
not to touch
the sur
f
ace o
f
the disc.
•
A
l
ways store t
h
e
d
isc in its protective case w
h
en not in use.
A
uto Hea
d
C
l
eanin
g
g
•
Automatica
lly
c
l
eans vi
d
eo
h
ea
d
s as
y
ou insert or remove a
cassette tape, so
y
ou can see a clear picture
.
•
Pla
y
back picture ma
y
become blurred or interrupted while the
TV program reception is c
l
ear. Dirt accumu
l
ate
d
on t
h
e vi
d
eo
h
eads after a lon
g
period of use or the usa
g
e of rental or worn
cassette tapes can cause this problem. I
f
a streak
y
or snow
y
picture appears
d
uring p
l
a
yb
ac
k
, t
h
e vi
d
eo
h
ea
d
s in
y
our Unit
ma
y
need to be cleaned
.
1
. Please visit your local audio/video store and purchase a good
quality VHS video head cleaner
.
2.
I
f a Video head cleanin
g
tape does not solve the problem, please
call our toll free customer support line found on the cover of this
m
anual to locate an authorized service center
.
N
ote(s)
:
•
Remember to read the instructions along with the video head cleaning
ta
p
e before use
.
•
Clean video heads onl
y
when problems occur
.
FUNAI is a registered trademark of Funai Electric Co., Ltd
.
an
d
may not
b
e use
d
in any way wit
h
out t
h
e express written
consent of Funai
.
© 2013 Funai E
l
ectric Co., Lt
d
.
A
ll
rig
h
ts reserve
d.
No part of this Owner’s Manual may be reproduced, transmitted,
d
isseminated or transcribed, in any form or for any purpose without
the express prior written consent of Funai. Furthermore, any
unauthorized commercial distribution of this manual or any revision
h
ereto is strict
ly
pro
h
i
b
ite
d.
In
f
ormation in this document is sub
j
ect to change without
notice. Funai reserves t
h
e rig
h
t to c
h
ange t
h
e content
h
erein
without the obligation to noti
f
y any person or organization o
f
s
uc
h
c
h
anges.
M
anu
f
actured under license
f
rom Dolby
La
b
oratories. Do
lb
y an
d
t
h
e
d
ou
bl
e-
D
s
ymbol are trademarks o
f
Dolby
La
b
oratories.

PRECAUTI
O
N
S
EN
–
5
–
A
b
out Cassette Ta
p
es an
d
Disc
s
p
Playable Media
Unp
l
aya
bl
e Disc
s
NEVER pla
y
the following discs as a malfunction ma
y
result!
DVD-RAM, DVD-audio, CD-i, photo CD, video CD, DVD with region codes other than 1 or ALL, DTS-CD, DVD-ROM
f
or personal computers,
CD-ROM
f
or personal computers, CD-RW/-R with MP3, Windows Media™ Audio or JPEG
f
iles, HD DVD, Blu-ray Disc™.
On the followin
g
disc, the sound MAY NOT be heard
.
super au
d
io C
D
N
ote(s)
:
• On
ly
t
h
e soun
d
recor
d
e
d
on t
h
e norma
l
CD
d
isc
l
a
y
ers can
b
e
d
e
l
ivere
d
. T
h
e soun
d
recor
d
e
d
on t
h
e
h
ig
h
d
ensit
y
super au
d
io CD
d
isc
l
a
y
ers cannot
b
e
d
e
l
ivere
d.
An
y
discs without compatibilit
y
indications and not mentioned in the “Pla
y
able Media” chart above are not pla
y
able.
I
f
y
ou cannot pla
y
back a disc which bears one o
f
the marks above, check the
f
ollowing
.
*1: This Unit con
f
orms to the NTSC color s
y
stem. Discs recorded in other color s
y
stems such as PAL cannot be pla
y
ed back.
*2: Certain DVD-VIDEO does not o
p
erate as described in this manual due to the intentions of the disc’s
p
roducers
.
*3: Scratc
h
e
d
or staine
d
d
iscs ma
y
not
b
e p
l
a
y
e
d
b
ac
k.
*4: Some discs cannot be pla
y
ed back because o
f
incompatible recording conditions, characteristics o
f
the recorder or special prop-
e
r
t
i
es
of
d
i
scs.
*5: You can pla
y
back discs which bear the marks above. I
f
y
ou use nonstandardized discs, this Unit ma
y
not pla
y
them back. Even i
f
t
h
e
y
are p
l
a
y
e
d
b
ac
k
, t
h
e soun
d
or vi
d
eo qua
l
it
y
wi
ll
b
e compromise
d
.
*6: You ma
y
pla
y
back the unfinalized DVD-RW/-R recorded in the video format on our brand’s DVD recorder. However, depending
on the recording status o
f
a disc, the disc ma
y
not be pla
y
ed back at all or normall
y
(the picture or sound ma
y
not be smooth,
etc.). In this case,
y
ou need to finalize the disc with the DVD recorder. Refer to the manual accompan
y
ing the DVD recorder.
*7: Onl
y
discs recorded in the video format and finalized can be pla
y
ed back
.
Unfinalized discs cannot be pla
y
ed back. Depending on the recording status of a disc, the disc ma
y
not be pla
y
ed back at all (the
picture or soun
d
ma
y
not
b
e smoot
h
, etc.).
*8: If the recorded portion of the disc is too small (less than 2-3/16 inches (55 mm) across), it ma
y
not pla
y
back properl
y
.
*9: Do not g
l
ue paper or put stic
k
ers on to t
h
e
d
isc. T
h
ese ma
y
d
amage t
h
e
d
isc an
d
t
h
e Unit ma
y
not rea
d
it correct
ly.
*10: Discs recorded in the VR (video recording) format cannot be pla
y
ed back.
is a trademark of DVD Format/Logo Licensing Corporation.
T
ype o
f
me
d
i
a
M
ark (logo)
R
egion cod
e
R
ec
o
r
d
e
d
s
igna
l
s
Media size Tape speed and disc t
y
pe
s
casse
tt
e
tap
e
ana
l
o
g
vi
d
e
o
ta
p
e wi
d
t
h
1/2 inc
h
e
s
(
12.65 mm
)
S
P: 1-5/16 inc
h
/sec. (33.40 mm/sec.
)
S
LP: 7/16 inc
h
/sec. (11.12 mm/sec.
)
DVD-VIDE
O
*
1, 2, 3, 5,
9
or
d
igital vide
o
(
MPEG2
)
5
in
c
h
es
(12 cm
)
o
r
3
in
c
h
es
(
8 cm
)
e.g.)
title 1 title 2
chapter 1 chapter 2 chapter 1
chapter 2
chapter 3 chapter 4
DVD-R
W
D
V
D
-
R
*
1, 3, 4, 5, 6,
7,
8
,
9
, 1
0
audio C
D
*
3, 5, 9
d
i
g
ital audi
o
5
in
c
h
es
(12 cm
)
or
3
in
c
h
es
(
8 cm
)
e.g.)
track 1 track 2 track 5 track 6track 3 track 4
C
D-R
W
C
D-
R
*3, 4, 5, 8,
9
C
ontinued on next pa
g
e
.

SETUP
–
6
–
EN
VCR and Basic DVD Connection Available for DVD only
D
VD’s picture qualit
y
analog audi
o
standard pictur
e
good pictur
e
better pictur
e
A
U
DI
O
OUT
VIDE
O
OUT
S
-VIDE
O
OUT
CO
MP
O
NENT
VIDE
O
OUT
SET
UP
C
onnect
i
on
s
TV
This Unit
Note
(
s
):
•
Connect this Unit directly to your TV. If RCA audio/video cables are connected to a VCR, pictures may be distorted due to the copy protection system
.
•
DIGITAL AUDIO OUT (COAXIAL), DVD AUDIO OUT, S-VIDEO OUT and COMPONENT VIDEO OUT jacks are onl
y
useful in DVD mode
.
Co
nnect
io
n t
o
a
TV
I
f
y
our TV does not have AUDIO/VIDEO input jack, see the section “Connecting to RF Modulator (Not Supplied)” on the
f
ront page o
f
the
owner’s manual.
A
f
ter connecting to your TV:
You will need to switch to a VIDEO input on
y
our TV. This is usuall
y
marked INPUT, SOURCE, TV/VIDEO or AUX.
P
lease re
f
er to
y
our TV Owner’s manual
f
or details.
or
o
r
an
d
I
f
your TV is compatible with 525 (480) progressive scanning and you want to enjoy that high quality picture
f
or DVD playing
;
You must se
l
ect t
h
e connection COMPONENT VIDEO OUT a
b
ove an
d
progressive scanning mo
d
e. To set t
h
e mo
d
e, set
“PROGRESSIVE” to “ON” in “DISPLAY” menu, so that the P-SCAN indicator on this Unit lights up. Re
f
er to pages 20-21
f
or more details.
•
When “PROGRESSIVE” is “ON”, video signals
f
rom the Unit’s VIDEO OUT and S-VIDEO OUT jacks will be distorted or not be output at
a
ll
f
or DVD playing. The picture will be OK
f
or VCR use
f
rom the VIDEO OUT jack.
I
f
your TV is not compatible with progressive scanning
;
U
se this Unit in interlace mode and set “PROGRESSIVE” to “OFF” either in “DISPLAY” menu or b
y
pressing and holding
[
PLAY
B
]
on
t
he front of the Unit on the DVD side for more than 5 seconds or until the P-SCAN indicator on this Unit turns off
.
Supplied cables used in this connection are as follows:
• RCA audio cable (L/R) x 1
• RCA video cable x 1
Please purchase the rest of the necessary cables at your local store.
C
ontinued on next page
.
AUDIO IN
VIDEO IN
L
R
DIGITAL
AUDIO OUT
COAXIAL
AUDIO
OUT
DVD VCR
DVD/VCR
S-VIDEO
OUT
COMPONENT
VIDEO OUT
VIDEO IN
AUDIO OUT
VIDEO OUT
L
LY
C
B
/
P
B
C
R
/
P
R
R
AUDIO IN
L
R
R
V
C
R
V
IDE
O
IN
A
U
DI
O
I
N
L
R
DI
G
ITA
L
A
U
DI
O
OU
T
COAXIAL
VCRDVD/VCR
AUDIO OUT
L
R
AUDIO IN
L
R
AUDIO
OUT
DVD
L
R
VCRDVD/VCR
VIDEO OUT
VIDEO IN
S-VIDEO IN
DIGITAL
AUDIO OUT
COAXIAL
AUDIO
OUT
DVD
S-VIDEO
OUT
COMPONENT
VIDEO OUT
DIGITAL
AUDIO OUT
COAXIAL
AUDIO
OUT
DVD
S-VIDEO
OUT
COMPONENT
VIDEO OUT
Y
C
B
/
P
B
C
R
/
P
R
COMPONENT
VIDEO IN
COMPONENT
VIDEO IN
C
B
C
R
P
B
P
R
or
YY
R
C
A vi
deo
cab
l
e
R
C
A
aud
i
o
cab
l
e
S
-vi
deo
cab
l
e
c
omponent video cable
or

SETUP
EN
–
7
–
Playing 2 Channel Analog Audio Playing Multi Channel Digital Audio
AUDIO OU
T
DIGITAL AUDIO OU
T
SETUP > QUICK >
DOLBY DIGITAL
Connecting to a Do
lb
y Digita
l
d
eco
d
er
for Dolby Digital audio output.
BIT
S
TREA
M
Connectin
g
to other device (an MD dec
k
or DAT deck etc.) without Dolby Digital
d
ecoder.
P
CM
Connection to an Au
d
io S
y
stem
*
To complete these settings, re
f
er to pages 20-21.
N
ote
(
s
):
•
The audio source on a disc in a Dolby Digital
mu
l
t
i
c
h
a
nn
e
l
su
rr
ou
n
d
format cannot be recorded as digital sound b
y
an MD or DAT deck
.
•
B
y
hooking this Unit up to a Dolb
y
Digital decoder,
y
ou can enjo
y
high-qualit
y
Dolb
y
Digital multi channel surround sound as heard in the
mo
vi
e
theate
r
s.
•
P
l
a
y
ing
b
ac
k
a DVD using incorrect settings ma
y
generate noise
d
istor
-
t
ion and ma
y
also damage the speakers
.
Connection to an External Tuner (Cable/Satellite or DTV to analo
g
TV Converter Set-top box)
Usin
g
the Unit with an External Tuner (Cable/Satellite
or Converter Set-to
p
Box
)
1.
Connect RCA audio and video cables to the audio and video
o
utput jacks of
y
our External Tuner (Cable/Satellite or Converter
S
et-top Box) and to the audio and video input
j
acks at the rear
o
f the Unit.
2. Press
[
INPUT SELECT
]
on
y
our Remote Control until “L1” is
displa
y
ed on
y
our TV
.
DIGITAL
AUDIO OUT
COAXIAL
AUDIO
OUT
DVD VCR
DVD/VCR
S-VIDEO
OUT
COMPONENT
VIDEO OUT
VIDEO IN
AUDIO OUT
VIDEO OUT
L
LY
R
AUDIO IN
L
R
R
AUDIO IN
VIDEO IN
L
R
C
B
/
P
B
C
R
/
P
R
AUDIO IN
VIDEO IN
VCRDVD/VCR
AUDIO OUT
L
VIDEO OUT
R
L
R
VIDEO IN
AUDIO IN
L
R
AUDIO OUT
VIDEO OUT
L
R
Audio
This Unit
RCA au
d
io ca
bl
e
RCA video cable
R
C
A
aud
i
o
cab
l
e
RCA video cable
rear o
f
T
V
rear o
f
the Unit Externa
l
Tuner (Ca
bl
e/Sate
ll
ite or Converter Set-top Box
)
L
1: Rear
p
anel terminal
s
L
2: Front
p
anel terminal
s
Re
f
er to “Front & Rear Terminals” on page 9
f
or more in
f
ormation.
L1
Note
(
s
):
• Your Ca
bl
e/Sate
ll
ite Set-top Box can
b
e accesse
d
on
l
y
b
y connecting it
to L1 (rear pane
l
jac
k
s) on t
h
e Unit
.
Connection
Setting
Supplied cables used in this connection are as follows:
• RCA audio cable (L/R) x 1
• RCA video cable x 1
Please purchase the rest of the necessary cables at your
local store.
Special Note when connected to an External Tuner
(Cable/Satellite or Converter Set-top Box)
:
•
Onl
y
the active channel on
y
our External Tuner ma
y
be viewed
o
r recor
d
e
d
w
h
en connecte
d
to t
h
is Unit.
Do not chan
g
e channels durin
g
a recordin
g
. You cannot record
o
n the active channel while viewin
g
another channel.
•
Always use the LEFT (white) audio output jack
f
rom the External
T
uner to ensure that the audio is mixed down correctl
y
to mono
for this Unit. If
y
ou use the RIGHT (red) jack,
y
ou will record the
rig
h
t au
d
io on
l
y.
Supplied cables used in this connection are as follows:
• RCA audio cable (L/R) x 1
Please purchase the rest of the necessary cables at your
local store.
Continue
d
on next page
.
L R
DIGITAL
AUDIO OUT
COAXIAL
AUDIO
OUT
DVD VCR
DVD/VCR
S-VIDEO
OUT
COMPONENT
VIDEO OUT
AUDIO IN
VIDEO IN
AUDIO OUT
VIDEO OUT
L
LY
R
L
R
R
C
B
/
P
B
C
R
/
P
R
V
CR
A
UDIO IN
V
IDE
O
IN
L
R
D
I
G
ITA
L
A
U
DI
O
OU
T
CO
AXIAL
VCRDVD/VCR
AUDIO OUT
L
R
AUDIO
OUT
DVD
L
R
ana
l
og au
d
io
input jacks
RCA audio cable
d
i
g
ital audio
i
nput jac
k
d
igital audio coaxial cable
DIGITAL
AUDIO OUT
COAXIAL
AUDIO
OUT
DVD
S-VIDEO
OUT
COMPONENT
VIDEO OUT
COAXIAL
Dolb
y
Digital decoder,
M
D
d
eck
o
r DAT
d
eck
o
r

SETUP
–
8
–
EN
1
Be sure
y
our TV’s input is set to VIDEO. (Name ma
y
vary with TV manu
f
acturer. See your TV manual
f
or
details.
)
2
Select
y
our on-screen language
.
T
hen press
[
B
]
to continue
.
3
Wh
en “CLOCK SET” menu a
pp
ears,
go to step 2 in “C
l
oc
k
Setting” on t
h
is page
.
o
r
1
Press
[
SETUP
]
an
d
se
l
ect “CLOCK SET”
.
T
h
en press
[
B
]
t
o go
t
o nex
t
s
t
ep.
•
If the clock is not set, “CLOCK SET” menu appears when you press
[
SETUP
]
. In t
h
is case, go to step 2
.
2
Se
l
ect t
h
e current mont
h.
Then
p
ress
[
B
]
to go to next step.
3
Select the current da
y.
Then
p
ress
[
B
]
to go to next step.
4
Select the current
y
ear
.
T
h
en press
[
B
]
to go to next step.
5
Se
l
ect
t
h
e
cu
rr
e
n
t
h
ou
r
.
T
h
en press
[
B
]
t
o go
t
o nex
t
s
t
ep.
6
Se
l
ect
t
h
e
cu
rr
e
n
t
min
ute.
T
h
en press
[
B
]
t
o go
t
o nex
t
s
t
ep.
7
Se
l
ect “AM” or “PM”
.
8
Pr
ess
[
SETUP
]
to
e
xi
t
“
C
L
OC
K
S
ET” m
e
n
u.
To C
h
an
g
e t
h
e Se
l
ecte
d
On-screen Lan
g
ua
ge
ggg
Pre
p
aration for Us
e
p
N
ote
(
s
):
•
To go
b
ac
k
, press
[
s
]
d
uring steps 2 to 7
.
•
Clock settin
g
will be lost a
f
ter a power
f
ailure or this Unit has been
unplugged for more than 30 seconds
.
SETUP
or
SETUP
o
r
o
r
o
r
or
or
or
L
ANG
U
AGE
S
ELE
CT
B
ENGLISH [ON]
FRAN
C
AI
S
E
S
PAÑ
OL
- M E N
U
-
TIMER PR
O
GRAMMING
S
ATELLITE LIN
K
AUT
O
REPEAT
[O
FF
]
B
C
L
OC
K
S
ET
LANG
U
AGE
S
ELE
C
T
C
L
OC
K
S
ET
M
O
NTH DAY YEA
R
1 0
/
- - - - - -
HOUR MINUTE AM
/
PM
- -
:
- - -
-
C
L
OC
K
S
E
T
M
O
NTH DAY YEA
R
1 0
/
0 2 TUE 2 0 1 2
HOUR MINUTE AM
/
PM
- -
:
- - -
-
C
L
OC
K
S
E
T
M
O
NTH DAY YEA
R
1 0
/
0 2 TUE 2 0 1 2
H
O
UR MINUTE AM
/
PM
0
5
:
- - -
-
C
L
OC
K
S
E
T
M
O
NTH DAY YEA
R
1 0
/
0 2 TUE 2 0 1 2
H
O
UR MINUTE AM
/
PM
0
5 : 4
0
-
-
CL
O
CK SE
T
M
O
NTH DAY YEA
R
1 0
/
0 2 TUE 2 0 1 2
H
O
UR MINUTE AM
/
PM
0 5 : 4 0
P
M A
M
B
P
M
T
urnin
g
on Unit
f
or the First Tim
e
VCR
VCR
C
l
oc
k
Settin
g
VCR
VCR
P
lease
n
ote:
m
ost
in
st
r
uct
i
o
n
s
in
th
i
s
m
a
n-
ua
l r
e
f
e
r
to
R
e
m
ote
Co
n
t
r
o
l
use.
Note
(
s
):
•
If
y
ou accidentall
y
select Spanish or French and need English
:
P
r
ess
[
SETUP
]
a
n
d
choose
“
S
ELE
C.
IDI
O
M
A
”
or
“
S
ELE
C
TI
O
N LANG
UE
”
.
Pr
ess
[
B
]
and select “ENGLISH”. Finally, press
[
CLEAR
]
.
C
L
OC
K
S
E
T
M
O
NTH DAY YEAR
1 0
/
– – – – –
–
HOUR MINUTE AM
/
P
M
– –
:
– – –
–
o
r
1
P
r
ess
[
SETUP
]
until the main menu appears.
2
Select “LANGUAGE SELECT”
.
T
hen press [B
]
to
g
o to next step
.
3
Select
“ENGLISH”
,
“FRANCAIS” or
“ESPAÑOL”. Then
p
ress
[
CLEAR
]
.
L
ANG
U
AGE
S
ELE
CT
B
ENGLISH
[O
N
]
FRAN
C
AI
S
ESPA
Ñ
O
L
- M E N
U
-
TIMER PR
O
GRAMMIN
G
S
ATELLITE LIN
K
AUTO REPEAT [OFF
]
C
L
OC
K
S
E
T
B
LANG
U
AGE
S
ELE
C
T
SETUP
or
o
r
CLEAR
- M E N
U
-
B
TIMER PR
O
GRAMMIN
G
S
ATELLITE LIN
K
AUTO REPEAT
[
OFF
]
C
L
OC
K
S
E
T
LANG
U
AGE
S
ELE
C
T
CL
O
CK SET
M
O
NTH DAY YEA
R
1 0
/
0 2 - - - -
H
O
UR MINUTE AM
/
PM
- -
:
- - -
-
C
ontinue
d
on next pa
g
e
.

SETUP
EN
–
9
–
F
u
nct
io
n
O
verv
i
e
w
You must first select either DVD or VCR o
p
eration.
V
C
R M
O
DE
Pr
ess
[
VCR
]
o
n
t
h
e
R
e
m
ote
Co
n
t
r
o
l
.
(The VCR SOURCE li
g
ht will illuminate.)
DVD M
O
DE
Press
[
DVD
]
on the Remote Control
.
(The DVD SOURCE li
g
ht will illuminate.
)
Se
l
ecting DVD or VCR Operation
Front Pane
l
In
d
icator Li
gh
ts
Front & Rear Termina
ls
1: DVD AUDIO OUT* (ana
l
og)
j
ac
ks
Connect audio cables from here to the audio input jack of
y
our television
o
r
aud
i
o
de
vi
ce.
2
: DVD/VCR AUDIO OUT jac
ks
Connect audio cables
f
rom here to the audio input jack o
f
your television
or audio device. Standard connection for DVD
/
VCR use
.
3: VCR AUDIO IN jac
ks
Connect a stereo audio cable from the audio output jacks of
y
our
camcorder, VCR, etc. to here. A
f
ter making the connection, press
[
INPUT
SELECT
]
on t
h
e Remote Contro
l
. Se
l
ect “L1” to activate t
h
e rear AUDIO IN
j
acks or “L2” to activate the front
j
acks
.
4
: VCR VIDEO IN
j
ac
k
Connect a video cable
f
rom the video output jack o
f
your camcorder, VCR,
etc. to this Unit. A
f
ter making the connection, press
[
INPUT SELECT
]
on
t
h
e Remote Contro
l
. Se
l
ect “L1” to activate t
h
e rear VIDEO IN
j
ac
k
or “L2” to
activate the
f
ront
j
ack
.
5
: DVD/VCR VIDEO OUT
j
ac
k
C
onnect a video cable from here to the VIDEO input jack of
y
our televi
-
sion or audio device. Standard connection for DVD
/
VCR use
.
6: COMPONENT VIDEO OUT*
j
ac
ks
C
onnect a com
p
onent video cable from here to the com
p
onent video
i
nput jac
k
on
y
our te
l
evision.
7
: S-VIDEO OUT*
j
ac
k
C
onnect an S-video cable
f
rom here to the S-video input jack on your
tele
vi
s
i
o
n
.
8
: DIGITAL AUDIO OUT COAXIAL* jac
k
C
onnect a digital audio coaxial cable from here to the digital audio input
jac
k
on
y
our
d
igita
l
au
d
io receiver
.
*
For en
h
ance
d
DVD viewing. DVD/VCR vi
d
eo an
d
au
d
io connections
require
d
to view cassette tapes
.
N
ote(s)
:
• Audio and video cables are included
f
or both VCR and DVD viewing. You
can enhance
y
our DVD picture and sound qualit
y
with an S-video cable, a
component video cable or a di
g
ital audio coaxial cable. Please
p
urchase
t
he necessary cables at your local store
.
(Re
f
er to pages 6-7.
)
OK
24'84'% 2#75'
6+6.'
%.'#4
5'#4%*
&+5%/'07
0':6
6+/'45'6
64#%-+0)
/1&'
#7&+1
&+52.#; 8%4 &8&
52''&
#0).'
57$6+6.'
4'2'#6 #$
<11/
5'672
4'6740
+0276
5'.'%6
+10
123
456
78
0
9
DVD button
VCR button
VCR SOURCE light
DVD SOURCE light
DIGITAL
AUDIO OUT
COAXIAL
AUDIO
OUT
DVD VCR
DVD/VCR
S-VIDEO
OUT
COMPONENT
VIDEO OUT
AUDIO IN
VIDEO IN
AUDIO OUT
VIDEO OUT
L
LY
R
L
R
R
C
B
/
P
B
C
R
/
P
R
rear pane
l
f
ront pane
l
3
2
7
6
5
3
4
4
1
8
Li
g
hts up when the inserted disc
is
b
eing p
l
aye
d
b
ac
k.
B
l
in
k
s w
h
en an unp
l
aya
bl
e
d
isc
is inserte
d
.
Li
g
hts up when the timer recordin
g
or
one-touch timer recordin
g
(OTR) has been set.
Li
gh
ts up
d
urin
g
a recor
d
in
g
or one-touc
h
timer
r
ecording (OTR). Blinks when a recording is paused.
Lig
h
ts up w
h
en t
h
e Unit is turne
d
on.
Lig
h
ts up w
h
en t
h
is Unit
i
s
in
t
h
e
DVD m
ode.
Lig
h
ts up w
h
en t
h
is Unit is in t
h
e VCR mo
d
e.
Lig
h
ts up w
h
en t
h
e progressive scan s
y
stem is activate
d
.
C
ontinued on next pa
g
e
.
L
1
L
L2

SETUP
–
1
0
–
EN
OK
24'84'% 2#75'
6+6.'
%.'#4
5'#4%*
&+5%/'07
0':6
6+/'45'6
64#%-+0)
/1&'
#7&+1
&+52.#; 8%4 &8&
52''&
#0).'
57$6+6.'
4'2'#6 #$
<11/
5'672
4'6740
+0276
5'.'%6
+10
123
456
78
0
9
Installing the Batteries
f
or
th
e Remote Contro
l
Insta
ll
two AA
b
atteries (su
ppl
ie
d
)
matching the polarity indicated inside
the battery compartment of the Remote
Control
.
Keep in mind the
f
ollowing when using the
Remote Contro
l
:
•
Make
su
r
e
that
the
r
e
a
r
e
n
o
obstacles
b
etween t
h
e Remote Contro
l
an
d
t
h
e
infr
a
r
ed
se
n
so
r win
do
w
o
n
t
h
e
U
ni
t.
• The maximum operable infrared si
g
nal
ranges
f
rom the Remote Control are as
follows.
-
L
ine of sight: approx. 23 feet (7m
)
-
E
ither side of center:
a
pprox. 16 feet (5m) within 30
°
-
A
bo
v
e
:
app
rox. 16 feet (5m) within 15
°
-
Bel
ow
:
app
rox.
10
f
eet
(
3m
)
within 30
°
R
em
o
te
Co
ntr
ol
D
VD m
od
e
VC
R m
od
e
123
456
789
0
+10
•
To se
l
ect c
h
apter or tit
l
e
d
irect
ly.
•
To se
l
ect trac
k
d
irect
ly.
•
To search
f
orward/backward
through a disc
.
•
To be
g
in slow
f
orward/reverse
p
l
ay
b
ac
k
in t
h
e pause mo
d
e.
•
To search forward
/
backward
throu
g
h a disc.
• To forward/backward a ta
p
e
.
• To be
g
in slow forward
playback in the pause mode.
A-B
•
To repeat between your chosen
p
oint A and B.
•
To repeat between your
chosen
p
oint A and B
.
ANGLE
•
To select camera an
g
les on a
disc
.
AUDIO
•
To select audio languages on a
disc
.
•
To select “STEREO”
,
“L-ch” or
“R-ch”
.
• To select “HIFI” or “MONO”
mode during playback.
(
Hi-Fi tapes only)
CLEAR
•
T
o
c
l
ea
r
t
h
e
m
a
rk
e
r
s.
•
T
o
c
l
ea
r n
u
m
be
r
s
e
n
te
r
ed
in
co
r-
rectly.
•
To cancel the
p
oint for A-B
re
p
eat
.
•
To clear the markers.
•
To remove status number in
pro
g
ram input.
•
To clear numbers entered incor
-
rectly
.
•
To cancel the point
f
or A-B
repeat
.
• T
o
e
xi
t
t
h
e
V
C
R m
e
n
u.
• To reset the ta
p
e counter
.
DISC MENU
•
To ca
ll
up t
h
e
d
isc menu on a
d
isc
.
DISPLAY
•
To displa
y
the current disc
m
ode.
•
To displa
y
the current disc
m
ode.
• To displa
y
the current time, tape
cou
n
te
r
a
n
d
L1
o
r L2
.
DVD
•
To se
l
ect DVD out
p
ut mo
d
e.
•
T
o
act
iv
ate
DVD m
ode.
• To se
l
ect t
h
e DVD out
p
ut mo
d
e
.
•
T
o
act
iv
ate
DVD m
ode.
+0276
5'.'%6
• To select in
p
ut “L1” or “L2”
.
MODE
•
To set black level on/o
ff
.
•
To arrange t
h
e p
l
a
y
ing or
d
er or
p
l
a
y
ran
d
om
ly
.
OK
•
To move t
h
e cursor an
d
d
eter-
m
i
ne
i
ts
p
os
i
t
i
on.
•
To move t
h
e cursor an
d
d
eter-
m
i
ne
i
ts
p
os
i
t
i
on.
•
T
o
select
a
n i
te
m
o
n
t
h
e
V
C
R m
e
n
u.
•
T
o
ad
v
a
n
ce
to
the
n
e
x
t
V
C
R m
e
n
u.
•
To
g
o
b
ac
k
one step
d
urin
g
c
l
oc
k
an
d
timer pro
g
rammin
g.
•
To open or close the disc tra
y.
•
To open or close the disc tra
y.
• To eject the cassette tape
f
rom
the cassette compartment.
PAUSE
•
To pause
d
isc p
l
ay
b
ac
k
.
•
To advance playback one
f
rame
at a time
.
•
To pause
d
isc p
l
ay
b
ac
k.
• To pause tape p
l
ay
b
ac
k
or
recor
d
in
g
.
• To advance playback one frame
at a time.
•
To
b
egin
d
isc p
l
a
yb
ac
k
.
•
To
b
egin
d
isc p
l
a
yb
ac
k.
• To
b
egin tape p
l
a
yb
ac
k.
NEXTPREV
•
To ski
p
cha
p
ters or titles.
•
To ski
p
tracks
.
REC
• To start recordin
g
or one-touch
timer recordin
g
(OTR)
.
REPEAT
•
To pla
y
back a chapter or title
repeatedl
y
.
•
To p
l
a
y
b
ac
k
a trac
k
or
d
isc
repeate
dly.
• To select the re
p
eat mode on
/
o
ff
.
RETURN
•
To return to t
h
e previous opera
-
t
i
on
i
n menu
.
•
To return to t
h
e previous opera-
t
i
on
i
n menu
.
SEARCH
•
To search chapter, title or time.
•
To set or search the markers.
•
To searc
h
trac
k
.
•
To searc
h
time.
•
To set or searc
h
t
h
e mar
k
ers.
• To call up the index or time
sea
r
c
h m
e
n
u.
SETUP
•
To call u
p
the DVD setu
p
menu.
•
To call u
p
the DVD setu
p
menu
.
• To call u
p
the VCR menu
.
SPEED
• To se
l
ect t
h
e recor
d
in
g
spee
d.
•
To turn t
h
e Unit on or to turn t
h
e
Unit into t
h
e stan
db
y mo
d
e. (To
completely turn o
ff
the Unit, you
must unp
l
u
g
t
h
e AC power cor
d
.)
g
•
To turn t
h
e Unit on or to turn t
h
e
Unit into t
h
e stan
db
y mo
d
e. (To
completely turn o
ff
the Unit, you
must unp
l
u
g
t
h
e AC power cor
d
.
)
g
• To turn t
h
e Unit on or to turn t
h
e
Unit into t
h
e stan
db
y mo
d
e. (To
c
ompletely turn o
ff
the Unit, you
must unplug the AC power cord.)
g
•
To stop playback
.
•
To stop playback
.
• To stop playback or recording.
SUBTITLE
•
T
o
select
subt
i
tles
o
n
a
d
i
sc.
TITLE
•
To call u
p
the to
p
menu on a
disc
.
TRACKING TRACKING
• To a
d
just t
h
e trac
k
ing manua
ll
y
d
uring p
l
ay
b
ac
k.
TIMER SET
• To put the VCR into standby
mode for a timer recordin
g
.
VCR
• To select the VCR output mode
.
• To activate VCR mode
.
ZOOM
•
To magnify part of a picture.
(
2x/4x
)
B
utto
n
(Alphabetical order)
Me
d
i
a
2
3
1
Note(s)
:
•
Do not mix a
lk
a
l
ine an
d
manganese
b
atteries
.
•
D
o
n
ot
mix
o
l
d
a
n
d
n
e
w
batte
ri
es.
•
Always remove batteries from Remote Control
i
f
they are dead or i
f
the Remote Control is not
t
o be used for an extended period of time.
T
his will prevent batter
y
acid from leaking
into t
h
e
b
atter
y
compartment
.
•
I
f
y
ou turn off this Unit,
[
OPEN/CLOSE
A
]
o
n
t
h
e
U
nit or Remote Control is not available
.

VCR FUNCTI
O
N
S
EN
–
11
–
1
Insert a cassette tape
into this Unit
.
2
T
o start playbac
k
3
To stop p
l
ay
b
ac
k
4
T
o eject t
h
e cassette tap
e
1
P
ress
[
SEARCH
]
once
.
2
To se
l
ect in
d
ex mar
k
3
T
o
r
e
win
d
T
o
f
ast
f
o
rw
a
r
d
4
Wh
en in
d
ex mar
k
is reac
h
e
d
,
p
l
ay
b
ac
k
automatica
ll
y
b
egins
.
1
Pr
ess
[
SEARCH
]
t
wi
ce.
2
Select the desired len
g
th o
f
time
for fast forwardin
g
or rewindin
g.
3
To rewin
d
To
f
ast
f
orwar
d
4
When selected length of time is
reac
h
e
d
, p
l
a
yb
ac
k
wi
ll
start
automatica
lly.
%.'#4
6+/'45'6
64#%-+0)
/1&'
&+52.#; 8%4 &8&
52''&
+0276
5'.'%6
+10
123
456
78
0
9
Note
(
s
):
•
When a cassette ta
p
e
wi
thout
a
r
eco
r
d
tab
is inserte
d
, t
h
e Unit
will start playback
a
utomatically
.
•
Tracking in playback
will be automaticall
y
a
d
j
usted. To ad
j
ust the
tracking manuall
y
, press
[TRACKING
K
/
L
]
d
uring pla
y
back
.
Playback
y
Be
f
ore: Turn on the TV.
Other O
p
eration
s
p
VCR F
U
NCTI
O
N
S
In
d
ex Searc
h
To search b
y
index mark. The index mark will be made
automaticall
y
at the beginning of each recording
.
SEARCH
Pro.1 Pro.2 Pro.3 Pro.4 Pro.5
02 01 01 02 03
beginning of
the contents
end of the
contents
current program
index mark
P
LAY
B
Note(s)
:
• The time
g
ap between index marks should be more than 1 minute for SP
mode
,
2 minutes for LP mode and 3 minutes for SLP mode
.
N
ote for Index Search & Time Search:
•
These
f
unctions are not available during recording.
•
Press [STOP
C
]
to stop t
h
e searc
h
.
•
I
f
a cassette tape ends during a search,
y
our search will be cancelled
a
n
d
t
h
e cassette tape wi
ll
rewin
d
to t
h
e
b
eginning
.
Time Search
T
o search b
y
length of time.
INDEX SEARCH
S
– –
––
s
s
BB
or
SEARCH
TIME SEARCH
S
–
:
–
–
P
LAY
B
o
r
(
1 minute~9
h
ours an
d
59 minutes
)
To cue or review the
p
icture durin
g
p
la
y
back (
p
icture search
)
pgpyp
Use
[
g
]
or
[
h
]
(
[ F.FWD
g
]
or
[REW
h
]
on this Unit)
.
•
Press it a
g
ain and the Unit will search in super hi
g
h speed. (in
onl
y
the SLP mode)
To freeze the
p
icture on TV screen durin
g
p
la
y
back (still mode)
pgpy
P
ress
[
PAUSE
F
]
. Eac
h
time you press t
h
e
b
utton, t
h
e picture wi
ll
be
f
orwarded one
f
rame at a time
.
•
I
f
the picture begins to vibrate vertically in the still mode,
sta
b
i
l
ize t
h
e picture
b
y using
[
TRACKING
K
/
L
]
.
•
I
f
the picture is distorted or rolling vertically, adjust the vertical
hold control on your TV i
f
equipped
.
To Reset t
h
e Cassette Ta
p
e Counter
(
counter reset
)
p
P
r
ess
[
DISPLAY
]
to displa
y
the cassette tape counter on the TV.
P
r
ess
[
CLEAR
]
to
r
eset
t
h
e
cou
n
te
r
to
“
0:00:00
”
.
To
p
la
y
back in slow motion (slow mode)
py
Press
[
PAUSE
F
]
d
uring p
l
ay
b
ac
k
, t
h
en press
[
g
]
(
[
F.FWD g
]
on
t
h
is Unit
).
•
If
y
ou want to change the speed in slow mode, press
[
g
]
o
r
[
h
]
(
[
F.FWD
g
]
o
r
[
REW
h
]
on t
h
is Unit), s
l
ow s
p
ee
d
wi
ll
be
f
aste
r
o
r
s
l
o
w
e
r
.
•
I
f the noise bars appear on the TV screen, you can reduce it by using
[
TRACKING
K
/
L
]
.
T
o rewin
d
t
h
e cassette ta
p
e automatica
lly
(
auto rewin
d)
py
W
hen a cassette tape reaches its end during pla
y
back,
f
ast-
f
orward or recordin
g
(except timer recordin
g
and one-touch
t
imer recor
d
ing), t
h
e cassette tape wi
ll
automatica
lly
rewin
d
to
t
he beginning. A
f
ter rewinding
f
inishes, the Unit will e
j
ect the
c
assette ta
p
e.
VCR
VCR
VCR
VCR
•
Insert a cassette ta
p
e into this Unit
.
VCR
VCR
•
Insert a cassette tape into t
h
is Unit
.
INDEX
S
EAR
CH
0
3
0
1 ~ 2
0
TIME SEARCH
2 : 5 0
0:0
1~ 9
:59
When You Playback a Cassette Tape Recorded in Hi-Fi Stere
o
Press [AUDIO
]
on the Remote Control
,
then select “HIFI” or “MONO”.
• When playing back non Hi-Fi tapes, [AUDIO
]
on the Remote Control is not available.
Your selectio
n
HIFI
M
O
N
O
T
ype of recorded tape
L
-ch
a
nnel R-ch
a
nnel
Hi-Fi tapes recor
d
e
d
in
Hi
-F
i
stere
o
L
R
L+R
ss
BB
N
ote
(
s
):
•
To prevent
d
ama
g
e to t
h
e cassette tape, sti
ll
or s
l
ow mo
d
e wi
ll
a
utomatically stop after 5 minutes.
•
To return to pla
y
back from the picture search, still or slow mode, press
[
PLAY
B
]
.
2
4
3
1
3
4
2
C
ontinued on next pa
g
e
.

V
C
R F
U
N
C
TI
O
N
S
–
12
–
EN
24'84'% 2#75'
%.'#4
0':6
6+/'45'6
64#%-+0)
/1&'
&+52.#; 8%4 &8&
52''&
+0276
5'.'%6
+10
123
456
78
0
9
2
P
r
ess
[
B
]
to
“
A
U
T
O
REPEAT
”
to
set
“O
N
”
o
r
“O
FF
”.
P
r
ess
[SETUP
]
to
e
x
it.
- M E N
U
-
TIMER PR
O
GRAMMING
S
ATELLITE LIN
K
B
AUTO REPEAT
[
ON
]
C
L
OC
K
S
E
T
LANG
U
AGE
S
ELE
C
T
Note(s)
:
•
The auto repeat
f
unction can also be set “ON” or “OFF” b
y
pressing
[
REPEAT
]
on the Remote Control.
•
To cancel auto repeat
f
unction,
f
ollow step 1 above. Then, press
[
B
]
so that “OFF” appears beside “AUTO REPEAT”. Press [SETUP]
to
e
xi
t.
•
The auto repeat pla
y
back will start automaticall
y
if
y
ou select “AUTO REPEAT” to “ON” in the Stop mode
.
1
Press
[
SETUP
]
and choose “AUTO REPEAT”.
-
M
E
N
U
-
TIMER PR
O
GRAMMING
S
ATELLITE LIN
K
B
AUT
O
REPEAT
[O
FF
]
CL
O
CK SET
LANGUAGE
S
ELE
C
T
SETUP
o
r
Auto
R
e
p
eat
When “AUTO REPEAT“ is set to “ON“, the cassette tape will automaticall
y
rewind and start over when it reaches the end.
This will continue until auto re
p
eat function is turned off
.
VCR
VCR
1
P
r
ess
[SETUP]
.
Se
l
ect
“TIMER PR
O
GRAMMING”
.
SETUP
TIMER PR
O
GRAMMIN
G
PR
O
G 12
3
4
56
7
8
D
ATE
S
TART TIME
EN
D
TIME
L1
/
L2
RE
C
S
PEED
- M E N
U
-
B
TIMER PR
O
GRAMMING
S
ATELLITE LINK
AUT
O
REPEAT
[O
FF
]
C
L
OC
K
S
ET
LANG
U
AGE
S
ELE
C
T
A
vailable program number
f
lashes
.
2
Select an empt
y
program number
.
Then
p
ress
[
B
]
to
g
o to next step
.
PR
O
GRAM N
U
MBER
1
DATE – –
/
– –
S
TART TIME – –
:
– – – –
EN
D
TIME – –
:
– – – –
L1
/
L2 – –
RE
C
S
PEED – –
or
1
I
n
se
r
t
a
r
eco
r
dab
l
e
casse
tt
e
t
ape
.
2
Pr
ess
[
INPUT SELECT
]
u
n
t
il “L1”
o
r
“L2” is
d
isp
l
aye
d
on t
h
e TV screen.
Select “L1” to activate rear input jacks.
Select “L2” to activate front input jacks.
3
P
ress
[
SPEED
]
to se
l
ect t
h
e
d
esire
d
tape spee
d
.
4
P
r
ess
[
REC
]
until desired recording time is selected.
5
Pr
ess
[
STOP
C
]
to
stop recor
d
ing
.
6
Pr
ess
[
A
]
to e
j
ect t
h
e recor
d
e
d
cassette ta
p
e
.
Recor
d
in
g
g
Y
ou
C
ANN
O
T
d
u
b
a DVD to a vi
d
eo cassette ta
p
e.
To sto
p
recor
d
in
g
tem
p
orari
ly
(p
ause mo
d
e
)
pgpyp
Pr
ess
[
PAUSE
F
]
.
•
During t
h
e recor
d
ing in pause mo
d
e, 5
C
mar
k
s a
pp
ear on t
h
e
T
V
sc
r
ee
n
.
E
ach
C
mar
k
re
p
resents 1 minute
.
•
Press it again to resume recor
d
ing.
•
Pause mode will be automatically cancelled after 5 minutes to
prevent
d
amage to t
h
e cassette tape an
d
t
h
e vi
d
eo
h
ea
d
s.
N
ote
(
s
):
• Do not change the External Tuner’s (Cable/Satellite or Converter Set-top
B
ox) channel while
y
ou are recording. You
C
ANN
OT
watch one channel
T
wh
i
l
e recor
d
ing anot
h
er c
h
anne
l
at t
h
e same time
.
• Connect
y
our External Tuner (Cable/Satellite or Converter Set-top Box)
t
o the L1 (rear panel) jacks on this Unit. Connect camcorders and other
such devices to the L2 (
f
ront panel) jacks. Re
f
er to page 7, 9.
This Unit has no tuner system so it cannot receive TV broadcasts without an External
Tuner (Cable/Satellite or Converter Set-top Box) or such devices
.
Timer Recordin
g
VCR
VCR
Acci
d
enta
l
Erasure Preventio
n
T
o prevent acci
d
enta
l
recor
d
ing, remove
e
rasure prevention ta
b
on t
h
e cassette tape. To
recor
d
on it
l
ater, cover t
h
e
h
o
l
e wit
h
a
dh
esive
t
ape
.
Recordin
g
& One-touch Timer Recordin
g
(OTR
)
T
a
p
e s
p
eed Recording / pla
y
back time
Type o
f
tape
T
60
T
120
T
160
SP mode
1
hour 2hours 2-2
/
3hours
SLP mo
d
e
3h
ours 6
h
ours 8
h
ours
Note(s)
:
• You can also set to External Tuner. Re
f
er to “Satellite Link” on page 14
.
TV
External Tuner
(Cable/Satellite or
Converter Set-top Box)
this Unit
6
3
2
5
4
1
6
5
RE
C
SP
SPEED
REC
VCR
VCR
erasure prevention ta
b
+0276
5'.'%6
REC OTR (0:30) OTR (1:00).....
(normal recording)
OTR (8:00) OTR (7:30)
S
ee note on the right
.
• Insert a recor
d
a
bl
e cassette tape
.
• Ma
k
e sure to turn on t
h
e Externa
l
Tuner (Ca
bl
e/Sate
ll
ite or Converter Set-top Box)
.
4
C
ontinue
d
on next pa
g
e
.

VCR FUNCTI
O
N
S
EN
–
1
3
–
3
Select “ONCE”
,
“DAILY” (Mon-Fri) or “WEEKLY”
.
Th
en
p
ress
[
B
]
t
o go
t
o nex
t
s
t
ep
.
4
Se
l
ect
t
h
e
des
ir
ed
date.
T
hen
p
ress
[
B
]
to go to next step
.
•
You can program the Unit to record up to 8 programs, for up to
a
y
ear in a
d
vance.
5
S
e
l
ect t
h
e
d
esire
d
starting time
(h
our
)
.
Th
en press
[
B
]
t
o go
t
o nex
t
s
t
ep
.
6
Se
l
ect
“AM”
o
r “PM”
.
T
hen press
[
B
]
to go to next step
.
7
Repeat the procedure in steps 5 and 6 to set the endin
g
time.
8
Se
l
ect
“L1”
o
r “L2”
.
T
hen
p
ress
[
B
]
to
g
o to next step
.
N
ote(s)
:
•
To go back one step, press [
s
]
d
uring steps 3 to 9.
•
Select “L1” to activate rear input jacks. Select “L2” to activate
f
ront input
jacks
.
To c
h
ec
k
, correct or cance
l
a timer
p
ro
g
ram
pg
1)
Press
[
TIMER SET
]
t
h
en
,
[
VCR
]
on t
h
e Remote Contro
l.
2
)
Press
[SETUP
]
to ca
ll
up t
h
e main menu.
3
) Se
l
ect “TIMER PROGRAMMING”
b
y using
[
K
/
L
]
, t
h
en
p
ress
[
B
]
.
4) Se
l
ect t
h
e program num
b
er w
h
ic
h
you want to c
h
ec
k
b
y
u
s
i
ng
[
K
/
L
]
.
The details o
f
the program you selected will
app
ear on t
h
e TV screen.
• Go to t
h
e
d
igit you want to c
h
ange
b
y using
[
s
/
B
]
.
T
h
en,
e
nter correct num
b
ers
b
y using
[
K
/
L
]
.
• You may cance
l
t
h
e entire program
b
y pressing
[
s
]
w
h
i
l
e
t
h
e program num
b
er
bl
in
k
s.
5)
Press
[
CLEAR
]
to ex
i
t
.
6)
Press
[
TIMER SET
]
to return to t
h
e timer stan
db
y mo
d
e
.
To cancel a timer recordin
g
in
p
ro
g
res
s
gpg
P
ress
[
STOP/EJECT
C
A
]
on t
h
e Unit
.
O
NE TIME PR
O
GRAM
PR
O
GRAM N
U
MBER
1
DATE 1 0 / 0 2 TUE
UE
START TIME 0 7 : 3 0 PM
P
END TIME – – : – – – –
––
L1
/
L2 – –
RE
C
S
PEED – –
AM
B
PM
or
or
or
O
NE TIME PR
O
GRA
M
PR
O
GRAM N
U
MBER
1
DATE 1 0
/
0 2 TUE
S
TART TIME
0
7
:
3
0
– –
END TIME – –
:
– – – –
L1
/
L2 – –
RE
C
S
PEED – –
O
NE TIME PR
O
GRA
M
PR
O
GRAM N
U
MBER
1
DATE 1 0
/
0 2 TU
E
S
TART TIME
0
7
:
3
0
P
M
EN
D
TIME
0
8
:
3
0
PM
L1
/
L2 L
1
RE
C
S
PEED – –
or
o
r
O
NE TIME PR
O
GRA
M
PR
O
GRAM N
U
MBER
1
DATE 1 0
/
0 2 TU
E
S
TART TIME – –
:
– – –
–
EN
D
TIME – –
:
– – –
–
L1
/
L2 –
–
RE
C
S
PEED –
–
Notes
f
or Timer Recording & One-touch Timer Recording (OTR)
• I
f
a cassette ta
p
e is not in the Unit or does not have the erasure
p
revention tab, TIMER REC indicator on this Unit blinks and timer
recordin
g
cannot be performed. Please insert a recordable cassette tape
.
• When timer recordings are set, TIMER REC indicator on this Unit lights up. To use the VCR as usual, until the time for the recording,
p
ress
[
TIMER SET
]
so
t
h
at
TIMER REC indicator li
g
ht turns of
f
.
A
f
ter a one-touch timer recordin
g
or a timer recordin
g
has been set, this Unit o
p
erates as described below
:
gg p
• If a cassette tape runs out before a one-touch timer recording or a timer recording is finished, the Unit ejects the cassette tape. Press
[
TIMER SET
]
o
n
t
h
e
R
e
m
ote
Co
n
t
r
o
l
o
r
[
STOP/EJECT
C
A
]
on the Unit, then
p
ress
[
VCR
]
to activate the VCR function a
g
ain.
• Once the Unit turns to the timer standb
y
mode, no VCR functions are available until
[
TIMER SET
]
is
p
ressed.
• To cancel the timer standb
y
mode, press
[
TIMER SET
]
o
n
t
h
e
R
e
m
ote
Co
n
t
r
o
l
o
r
[
STOP/EJECT
C
A
]
on the Unit, then press
[
VCR
]
to activate the VCR
f
unction again.
When an one-touch timer recordin
g
or a timer recordin
g
is com
p
leted...
ggp
• TIMER REC indicator on this Unit flashes if there are no more timer recordings on standb
y
.
• The Unit
g
oes to the DVD mode and all the VCR functions will be unavailable. All the DVD functions are available durin
g
one-touch
timer recordin
g
, timer standb
y
mode and timer recording
.
•
Press
[
STOP/EJECT
C
A
]
o
n this Unit or
[
TIMER SET
]
on the Remote Control to use the VCR when the Unit is turned off.
• Press
[
SOURCE
]
on this Unit or
[
VCR
]
on the Remote Control to use the VCR when the Unit is turned on. In case timer recordin
g
is
i
n standb
y
mode, press
[
STOP/EJECT
C
A
]
on this Unit or
[
TIMER SET
]
on the Remote Control and then
p
ress
[
SOURCE
]
on this Unit
or
[
VCR
]
on the Remote Control
.
If
y
ou want to use the DVD
p
la
y
er durin
g
a timer recordin
g
or while TIMER REC indicator on this Unit is on or blinkin
g
.
ypygg g
• Pr
ess
[
QQ
]
to
tu
rn
o
n
t
h
e
U
ni
t.
Pr
ess
[
DVD
]
on the Remote Control to choose DVD mode, then continue with the other DVD features
as
desc
ri
bed
in
t
hi
s
m
a
n
ua
l
.
PR
O
GRAM N
U
MBER
1
B
O
N
CE
D
AILY
WEEKLY
o
r
or
9
Se
l
ect recor
d
in
g
spee
d
.
T
h
en
p
res
s
[
CLEAR
]
.
•
To set another program after step 9, press
[
B
]
.
Th
en continue wit
h
ste
p
2.
1
0
P
r
ess
[
TIMER SET
]
to set t
h
e timer stan
dby
mo
d
e
.
•
TIMER REC
indicator on this Unit lights up and the Unit goes to
t
he DVD mode
.
O
NE TIME PR
O
GRAM
PR
O
GRAM NUMBER
1
DATE 1 0
/
0 2 TU
E
S
TART TIME
0
7
:
3
0
P
M
EN
D
TIME 0 8 : 3 0
PM
L1
/
L2 L1
RE
C
S
PEED
S
P
B
S
P
SLP
TIMER SET
CLEAR
Note for timer recordin
g:
•
I
f
there is a power
f
ailure or the Unit is unplugged
f
or more than 30 seconds, clock time setting and ALL timer programs will be lost.
W
h
en power is restore
d
or Unit is p
l
ugge
d
in again t
h
e c
l
oc
k
an
d
timer programs wi
ll
nee
d
to
b
e set up again.
C
ontinue
d
on next page
.

V
C
R F
U
N
C
TI
O
N
S
–
14
–
EN
N
ote
(
s
):
• I
f
you have not set the clock, “CLOCK SET” menu will appear at step 2. Re
f
er to “Clock Setting” on page 8
.
• You cannot set the ending time for the satellite link timer recording on this Unit.
• Recording picture will be distorted if the copy protection signal is being detected during satellite link timer recording.
• W
h
en a regu
l
ar timer recor
d
ing an
d
t
h
e sate
ll
ite
l
in
k
timer recor
d
ing are over
l
appe
d
, t
h
ose recor
d
ings are recor
d
e
d
as i
ll
ustrate
d
b
e
l
ow
.
5
Set
t
h
e
des
ir
ed
sta
r
t
min
utes.
If you wish to go back to the left, press [s
]
.
6
Pr
ess
[
B
]
to set satellite link standb
y
mode.
•
TIMER REC indicator on this Unit li
g
hts up and the Unit
g
oes to
the DVD mode. If
y
ou do not use DVD function, turn off the Unit
.
•
Sate
lli
te
U
ni
t
m
ust
be
tu
rn
ed
o
n f
o
r V
C
R
sate
lli
te
link
to
sta
r
t.
If an External Tuner (Cable/Satellite or Converter Set-to
p
Box) is
not set to output signa
l
s, sate
ll
ite
l
in
k
wi
ll
remain in stan
dby
mo
d
e
.
To cancel the satellite link function in standb
y
mode
:
Pr
ess
[
TIMER SET
]
o
n
t
h
e
R
e
m
ote
Co
n
t
r
o
l
o
r
[
STOP/EJECT CA
]
o
n
th
i
s
U
ni
t.
T
o
c
a
ncel the
sa
tellite link f
u
ncti
o
n while the
sa
tellite lin
k
recordin
g
is in pro
g
ress
:
P
r
ess
[
ST
O
P
/
EJECT
C
A
]
o
n
th
i
s
U
ni
t.
Cop
yi
ng a Cassette Tap
e
Warn
i
ng
:
Unauthorized recordings o
f
copyrighted cassette tapes
may be an in
f
ringement o
f
copyright laws.
1) Insert a pre-recor
d
e
d
cassette tape into anot
h
er externa
l
device
f
or playback
.
2
) Insert a recordable cassette tape into this Unit
f
or recording.
3
)
Press
[
SPEED
]
on t
h
e Remote Contro
l
to se
l
ect recor
d
ing
spee
d
(SP or SLP)
.
4) Press
[
INPUT SELECT
]
on t
h
e Remote Contro
l
to se
l
ect L1 or
L
2. Choose L1 i
f
device is connected to rear input jacks or L2
i
f
connected to the
f
ront input jacks. Re
f
er to
“
Front
&
Rear
T
ermina
ls
”
on page 9
f
or more details
.
5
)
Press
[
REC
]
o
n
the
U
ni
t.
6
)
Press “PLAY”
b
utton on t
h
e externa
l
d
evice.
7) To stop recor
d
ing, press
[
STOP/EJECT
C
A
]
on t
h
is Unit
,
then stop playback o
f
the external device.
Note(s)
:
•
For best results during dubbing, use buttons on this Unit whenever
possible. The Remote Control mi
g
ht affect another device’s operation
.
•
A
l
ways use vi
d
eo-qua
l
ity s
h
ie
ld
e
d
ca
bl
es wit
h
RCA-type connectors.
Stan
d
ar
d
au
d
io ca
bl
es are not recommen
d
e
d.
•
L2 input
j
acks are on the
f
ront o
f
this Unit
.
•
Please purchase the necessary cables at your local store. (Re
f
er to page 7.)
1
Pr
ess
[
SPEED
]
to select the desired ta
p
e s
p
eed
.
2
In Sto
p
mode,
p
ress
[
SETUP
]
.
3
Se
l
ect
“
S
ATELLITE LINK”
.
T
hen press
[
B
]
to go to next step.
4
Set t
h
e
d
esire
d
start
h
our.
Th
en press
[
B
]
t
o go
t
o nex
t
s
t
ep.
•
The hour can be selected
f
rom 1-12 with AM or PM
.
•
When the External Tuner (Cable/Satellite or Converter Set-top Box)
si
g
na
l
is stoppe
d
, recor
d
in
g
wi
ll
b
e stoppe
d
.
-
M
E
N
U
-
TIMER PR
O
GRAMMING
B
S
ATELLITE LINK
AUT
O
REPEAT
[O
FF
]
C
L
OC
K
S
ET
LANG
U
AGE
S
ELE
C
T
SATELLITE LINK
0
1
:
3
0
P
M
[O
N
]
e
.g.) In case the timer recording is programmed in the middle
o
f
the satellite link timer recordin
g
timer recordin
g
r
ecor
d
ing resu
lt
satell
i
te
l
in
k
e
.g.) In case the timer recording is overlapped on the existing
sate
ll
ite
l
in
k
timer recor
d
ing
.
timer recordin
g
recor
d
ing resu
lt
satell
i
te
l
in
k
e
.g.) In case the satellite link timer recording is overlapped
on t
h
e existing timer recor
d
ing
.
timer recordin
g
recor
d
ing resu
lt
satell
i
te
l
in
k
SETUP
or
or
Preparation on t
h
e tuner
•
S
atellite link accepts only the connection from L1 (rear) with the
Externa
l
Tuner (Ca
bl
e/Sate
ll
ite or Converter Set-to
p
Box). (T
h
e
connection from L2 cannot read an
y
signals from the Ex
te
rn
al
T
u
n
er
.
)
•
The External Tuner (Cable/Satellite or Converter Set-top Box) should
be equipped with some kind of timer function. Using timer function
for the tuner, set it to output audio/video signals when it comes to the
time you want to start recording and to stop an output of audio/video
signals when it comes to the time you want to finish the recording.
Refer to the External Tuner’s manual on how to set the timer.
•
M
ake sure to turn off the External Tuner when you finish setting it up
.
VCR
VCR
S
P
SPEED
Tape speed Recording / playback tim
e
Ty
pe of tape T
60
T
12
0
T
1
60
S
P m
ode
1
h
ou
r 2h
ou
r
s
2-2
/
3hour
s
S
LP m
ode
3
h
ou
r
s
6
h
ou
r
s
8
h
ou
r
s
S
ATELLITE LINK
1 2
:
0
0
AM
Sa
te
ll
ite Lin
k
Y
ou can set the Unit to start recordin
g
whenever it detects a video si
g
nal
f
rom the External Tuner (Cable/Satellite or Converter Set-top Box)
.
P
reparin
g
for the Satellite Link Timer Recordin
g:
P
reparation on t
h
is Unit
COAXIAL
DVD VCR
DVD/VCR
AUDIO IN
VIDEO IN
AUDIO OUT
AUDIO
OUT
DIGITAL
AUDIO OUT
S-VIDEO
OUT
COMPONENT
VIDEO OUT
VIDEO OUT
L
LY
R
L
R
R
C
B
/
P
B
C
R
/
P
R
External Tuner
(
Ca
bl
e/Sate
ll
ite or
Converter Set-top Box
)
RCA a
u
dio
/
video cable
s
L1
VCR
DVD/VCR
AUDIO IN
VIDEO IN
AUDIO OUT
VIDEO OUT
L
R
L
R
AUDIO OUT
VIDEO OUT
L
R
or
output jacks o
f
externa
l
d
evic
e
rear of the Unit
R
CA au
d
io/vi
d
eo
ca
bl
e
s
L
1
You can use a video disc pla
y
er, Cable/Satellite Set-top Box or other audio
/
v
i
d
eo component wit
h
au
d
io/vi
d
eo output jac
k
s
.
S
ATELLITE LINK
0
1
:
0
0
P
M
or
Note(s)
:
•
Please purchase the necessar
y
cables at
y
our local store. (Refer to page 7.)

DVD FUNCTIONS
EN
–
15
–
%.'#4
6+/'45'6
64#%-+0)
/1&'
&+52.#; 8%4 &8&
52''&
+0276
5'.'%6
+10
123
456
78
0
9
D
VD F
U
NCTI
O
N
S
Playback
y
4
3
2
Lights up when power is on
.
4
1
3
DV
DV
D
D
N
ote
(
s
):
•
Zoom
f
unction does not work while the disc menu is displayed
.
•
4x zoom is not avai
l
a
bl
e on some
d
iscs.
•
T
h
e picture may
b
e
d
istorte
d
w
h
en you press
[
PAUSE
k
]
or
[
h
]
repeate
dl
y in t
h
e zoom mo
d
e
.
•
In t
h
e zoom mo
d
e, it automatica
ll
y c
h
anges x2 (x4) to t
h
e zoome
d
position gui
d
e
.
N
ote
(
s
):
•
For DVD, fast forward or reverse search speed is different dependin
g
on the
d
isc. A
pp
roximate s
p
eed is 1(2
x
)
,
2(
8
x
)
,
3(20
x
),
4(50
x
)
,
5(10
0
x
)
.
•
For audio CD a
pp
roximate s
p
eed is 1(
2
x
)
,
2(
8
x
)
,
3(30
x
)
.
Pause an
d
Ste
p
-
by
-Ste
p
P
l
a
yb
ac
k
py p y
DVDVDD
P
ress
[
PAUSE
F
]
d
uring p
l
ay
b
ac
k
.
T
o continue p
l
ay
b
ac
k
, press
[
PLAY B
]
.
DVDVDD
T
he disc goes forward b
y
one frame each time
[
PAUSE
F
]
is
pressed in the pause mode.
T
o continue pla
y
back, press
[
PLAY B
]
.
Fast Forward
/
Reverse Search
DV
DV
D
D
Pr
ess
[
g
]
or
[
h
]
repeate
dly
d
uring p
l
a
yb
ac
k
to
s
elect the re
q
uired forward or reverse s
p
eed.
T
o use [PREV H ], [NEXT
G
] on t
h
is Uni
t
P
ressing an
d
h
o
ld
ing
[
PREV H
]
or
[
NEXT
G
]
on t
h
is Unit wi
ll
also change
f
orward or reverse playback speed
.
To continue p
l
ay
b
ac
k
, press
[
PLAY
B
]
.
D
i
sc Men
u
DVDVDD
Some
d
iscs contain menus w
h
ic
h
a
ll
ow you to customize DVD
p
l
ay
b
ac
k
. Use
[
K
/
L
/
s
/
B
]
to se
l
ect an item, t
h
en press
[O
K
]
(
or
[
PLAY
B
]
).
C
a
ll
in
g
U
p
a Menu Screen
d
urin
g
P
l
a
yb
ac
k
gp g y
DVDVDD
•
P
ress
[
DISC MENU
]
to ca
ll
up t
h
e
d
isc menu
.
•
P
ress
[
TITLE
]
to ca
ll
up t
h
e tit
l
e menu.
Resume Pla
y
bac
k
y
DVDVDD
Pr
ess
[
STOP
C
]
during pla
y
back.
Resume messa
g
e will appear on the
T
V
sc
r
ee
n
.
Pr
ess
[
PLAY
B
]
,
pla
y
back will resume
from the point at which pla
y
back was
sto
pp
ed.
Press 'PLAY' to play from here.
To play the beginning,
press 'STOP' first and then 'PLAY'.
Resume ON
Note
(
s
):
•
“
”
ma
y
appear at the top-right on the TV screen when the operation is prohibited b
y
t
h
e
d
i
sc
o
r
t
hi
s
U
ni
t.
•
Some DVD ma
y
be pla
y
ed from title 2 or 3 due to specific programs.
•
During the pla
y
back of a 2-la
y
ered disc, pictures ma
y
stop for a moment. This happens while the 1st
la
y
er is being switched to the 2nd la
y
er. This is not a malfunction.
•
Y
ou
can change the on-screen language for DVD function in “PLAYER MENU” menu. Refer to page 20
.
Note(s)
:
•
For DVD, set “STILL MODE” to “FIELD” in “DISPLAY” menu if
p
ictures in
the pause mode are blurred. Re
f
er to pages 20-21
.
N
ote
(
s
):
•
Slow forward or reverse speed is different dependin
g
on the disc.
Approximate spee
d
is 1(1/16x), 2(1/8x), 3(1/2x)
.
•
Set “STILL MODE” to “FIELD” in “DISPLAY” menu if
p
ictures in the slow
pla
y
back mode are blurred. Refer to pages 20-21
.
Zoo
m
DV
DV
D
D
1)
Press [ZOOM]
d
uring pla
y
back
.
2
)
Press [ZOOM]
r
epeatedl
y
to select the required zoom factor:
2x
,
4x or off
.
x2 x4
3)
Pres
s
[
K
/
L
/
s
/
B
]
to s
l
i
d
e t
h
e zoome
d
picture across t
h
e TV
screen.
4) To exit zoom mo
d
e, press [ZOOM] to se
l
ect OFF
.
B
e
f
o
r
e:
T
urn on the TV, ampli
f
ier and an
y
other
components w
h
ic
h
are connecte
d
to t
h
is
U
ni
t.
M
a
k
e
su
r
e
t
h
e
TV
a
n
d
aud
i
o
r
ece
iv
e
r
(not supplied) are set to the correct
c
h
anne
l.
S
l
ow Forwar
d
/
Reverse Searc
h
DV
DV
D
D
P
ress
[
g
]
or
[
h
]
repeate
dl
y in t
h
e pause mo
d
e to
s
elect the required
f
orward or reverse speed
.
To
u
se
[
PREV H
]
,
[
NEXT
G
]
o
n t
h
is
U
nit
Pressing an
d
h
o
ld
ing
[
PREV H
]
or
[
NEXT G
]
on t
h
is Unit in t
h
e
pause mode will also change forward or reverse playback speed.
To continue p
l
ay
b
ac
k
, press
[
PLAY
B
]
.
Note
(
s
):
•
To cancel resume,
p
ress
[
ST
O
P
C
]
one more time in the Sto
p
mode
.
•
The resume pla
y
back in
f
ormation sta
y
s on even when the power is
turned off, as long as the disc sta
y
s in the Unit
.
Note
(
s
):
• Menu operations may vary depending on the disc. Re
f
er to the manual
accompanying the disc for details
.
T
o
u
se
[
PRE
V
H
]
,
[NEXT
G
]
o
n t
h
is
U
nit
DVDVDD
Press once to ski
p
cha
p
ters, tracks or titles to a desired
p
oint.
E
1
1
e.g.
)
DV
D
1
2
In
se
r
t
a
d
i
sc
wi
t
h
Label Facing Up.
3
T
o start p
l
ay
b
ac
k
4
T
o stop p
l
ay
b
ac
k
1
1

DVD FUNCTIONS
–
1
6
–
EN
Y
ou can check the information about the current disc b
y
pressing
[
DISPLAY]
o
n
the
R
e
m
ote
Co
n
t
r
ol.
On-Screen Display
py
DVDVDD
DISPLAY
CH(Chapter)
:
current cha
p
ter number
/
total chapters
TT(Title)
:
current tit
l
e num
b
er / tota
l
tit
l
es
current repeat settin
g
, appears
on
l
y w
h
en t
h
e repeat setting is
a
ct
i
ve
.
C: C
h
a
p
ter re
p
ea
t
T: Tit
l
e repea
t
A
B
: A-
B
repeat
11/16 0:00:00 - 0:03:30
1/3 0:00:00 - 1:23:45
TL1
0
b
it rate: the amount o
f
audio and
v
i
d
eo
d
ata current
l
y
b
eing rea
d
ela
p
sed time of the current
c
h
apte
r
0
r
emaining time of the current
chapte
r
elapsed time o
f
the current title
r
emaining time of the current title
l
a
y
er num
b
ers, appears on
ly
w
h
en
p
la
y
ing a two-la
y
ered disc
.
L0: La
y
er 0 is pla
y
in
g
L1: La
y
er 1 is pla
y
in
g
current p
l
ay
b
ac
k
status
appears on
ly
in a case mu
l
ti-
a
n
g
le is available on the DVD.
1
2
3
4
DISPLAY
DISPLAY
DISPLAY
DVDVDD
4/12 0:03:21 - 0:02:15
T
4/12 0:13:45 - 0:45:40
T
TR(Trac
k
)
:
current trac
k
num
b
er / tota
l
trac
ks
current repeat setting, i
f
activ
e
T: Trac
k
repeat
A: A
ll
Trac
k
s repea
t
A
B
: A-
B
repeat
ALL
:
current trac
k
num
b
er / tota
l
trac
ks
elapsed time of the current track
r
emaining time o
f
the current track
elapsed time o
f
the entire disc
r
emaining time of the entire disc
current pla
y
back status
1
2
3
N
ote
(
s
):
• When you are playing a disc in program or random mode,
PROGRAM (or RANDOM) will be displayed instead o
f
2
.
DISPLAY
DISPLAY
DISPLAY

DVD FUNCTIONS
EN
–
17
–
1
P
ress [PREV
H
] or [NEXT
G
]
d
uring p
l
ay
b
ac
k.
1
Pr
ess
[
RETUR
N
]
.
1
P
r
ess
[
SEARCH
]
repeatedly until the marker display appears
.
2
Select
the
m
a
r
ke
r
.
3
P
r
ess
[O
K
]
at
t
h
e
des
ir
ed
m
a
rk
e
r
.
1
P
r
ess
[
SEARCH
]
repeatedly until the marker display appears
.
2
Se
l
ect
a
m
a
rk
e
r
.
3
P
r
ess
[O
K
]
.
1
P
ress
[
SEARCH
]
repeatedly until the time search display appears.
2
Select a desired disc time b
y
using
[
the
N
umber buttons] wi
t
hin
30
seconds
.
1
Pr
ess
[
PREV
H
]
o
r
[
NEXT G
]
d
uring p
l
ay
b
ac
k.
1
Pr
ess
[
SEARCH
]
once for the cha
p
ter search.
Pr
ess
[
SEARCH
]
t
wi
ce
f
o
r
t
h
e
t
i
t
l
e
sea
r
c
h
.
2
Select title/chapter number b
y
using [the Number buttons
]
wit
h
in 30 secon
d
s
.
1
Pr
ess
[
SEARCH
]
.
2
S
elect track number by using [the Number buttons] within 30 seconds.
Se
a
rc
h
F
u
ncti
o
n
s
1:29:00
TOTAL
To
r
e
t
u
rn t
o
t
he
m
a
r
ke
r
la
t
er
To
e
xit th
e
m
a
rk
e
r
s
cr
een
/29
/29
/12
/12
TR 1 TR 2 TR 3 TR 4
Current Track
(TR)
PREV
NEXT
Using [
P
RE
V
[
[
H
]
or [NEXT
G
]
CH 1 CH 2 CH 3 CH 4
Current Chapter
(CH)
or
TT 1 TT2 TT3 TT4
Current Title
(TT)
PREV
NEXT
PREV
NEXT
Using [
P
RE
V
[
[
H
]
or
[
NEXT
G
]
1:29:00
TOTAL
N
ote
(
s
):
• When there is no need to enter a number, “0” appears automaticall
y.
For example, “0: 0_: _ _” appears in the time search display i
f
the total
t
im
e
o
f
t
h
e
t
i
t
l
e
o
r
t
r
ac
k i
s
l
ess
t
h
a
n 1
0
min
utes.
• Pr
ess
[
CLEAR
]
to erase the incorrect input at step 2
.
• For audio CD, time search is not available
f
or programmed and random
pla
y
back
.
N
ote
(
s
):
•
T
h
e mar
k
er
d
isp
l
ay wi
ll
d
isappear in a
b
out 30 secon
d
s w
h
en t
h
ere is no
o
utput
.
•
To clear a marker, select the marker to be cleared at ste
p
2 in the
s
ection “To set a mar
k
er” or “To return to t
h
e mar
k
er
l
ater” an
d
t
h
en
p
ress
[
CLEAR
]
.
•
Opening the disc tra
y
or turning o
ff
the power will erase all markers
.
•
Selectin
g
“AC” at step 2 in the section “To set a marker” or “To return to
t
h
e
m
a
rk
e
r l
ate
r” will
a
l
so
e
r
ase
a
ll m
a
rk
e
r
s.
SEARCH
SEARCH
or
or
RETURN
• For the disc with less than 10 tracks, press the track number directly.
• For discs with more than 10 but less than 99 tracks, to pla
y
back single
-
digit track, press [0
]
first, then the track number (e.g., for track 3, press
[
0
]
,
[
3
]
). To pla
y
back a double-digit track, press the track number
.
(
If the disc has no chapters)
N
ote
(
s
):
•
[
+10
]
can also bring the track search display, except
f
or the disc with
l
ess than 10 tracks. For such a disc, track search can be performed by
j
ust pressing the track number
.
•
For audio CD, track search is not available for pro
g
rammed and random
pla
y
back
.
Search
f
unction does not work during programmed or random pla
y
back
.
Usin
g
Trac
k
Searc
h
DVDVDD
Using Time Searc
h
DVDVDD
Marker Settin
g
DVDVDD
T
his function allows you to assign a specific point on a disc to be
c
a
ll
e
d
b
ac
k
l
ater.
To
se
t
a
m
a
r
ker
N
ote(s)
:
•
Depending on the disc being played back, this
f
unction can also be
performed b
y
directl
y
entering the desired chapter number with
[
the Number buttons
]
. Re
f
er to the manual accompan
y
ing the disc.
Using Tit
l
e / C
h
apter Searc
h
DVDVDD
SEARCH
SEARCH
123
456
789
0
+10
123
456
789
0
+10
123
456
789
0
+10
SEARCH
OK
OK
NEXTPREV
or
NEXTPREV
o
r

DVD FUNCTIONS
–
1
8
–
EN
1
P
r
ess
[
MODE
]
o
n
ce.
2
Us
i
ng
[
K
/
L
]
to se
l
ect
d
esire
d
trac
k
.
P
r
ess
[O
K
]
.
•
Up to 99 trac
k
s can
b
e programme
d
.
•
If eight or more tracks were in a program,
use [PREV
H
]
o
r [NEXT
G
]
to see all the tracks.
3
P
r
ess
[
PLAY B
]
to start programmed pla
y
back
.
1
P
ress
[
M
O
DE
]
tw
i
ce
.
2
Pr
ess
[
PLAY B
]
to start random pla
y
back
.
1
Pr
ess
[
A-B
]
at
y
our desired starting point (A)
.
2
P
r
ess
[
A-B
]
at
y
our desired ending point (B)
.
•
Point B should be in the same title or track as
p
oint A.
1
Press
[
REPEAT
]
during playback.
Repeat / Random / Programmed Playback
pgy
A-
A-B
PLAY
CD-DA TOTAL 0:45:55
RANDOM PROGRAM
--no indication--
RANDOM
CD-DA TOTAL 0:00:00
CD-DA TOTAL 1:03:30
2/3
1 3:30
5 5:10
10 4:20
11 3:00
12 3:20
17 4:10
22 2:50
Note
(
s
):
•
Repeat settin
g
(except “ALL”) will be cleared when movin
g
to another
t
itle, cha
p
ter or track
.
•
This function is not available with some discs or durin
g
repeat A-B
pla
y
back
.
N
ote(s)
:
•
Pr
ess
[
CLEAR
]
at step 2 to erase t
h
e most recent
ly
entere
d
trac
k.
•
To erase all programmed tracks at once, select “ALL CLEAR’’ and press
[O
K
]
at step
2.
•
W
h
i
l
e a program is
b
eing p
l
aye
d
b
ac
k
,
[
ST
O
P
C
]
works as
f
ollows;
-
P
r
ess
[
STOP
C
]
a
n
d
[
PLAY
B
]
next, so that the pro
g
rammed
pla
y
back restarts. (CD pla
y
back restarts from the current point.
)
- Press
[
ST
O
P
C
]
twice an
d
[
PLAY
B
]
next, so t
h
at p
l
ay
b
ac
k
restarts
f
rom the
f
irst track in the original order. However, your programmed
playback can be restarted when you follow the above steps. (Your
programs are sti
ll
store
d
unti
l
eit
h
er t
h
e
d
isc tray is open or power is
t
urned o
ff
.)
•
To repeat the current track in the program, press
[
REPEAT
]
repeatedl
y
unti
l
“
TRA
C
K’’
appears
d
uring p
l
ay
b
ac
k
.
•
To repeat the entire pro
g
ram, press
[
REPEAT
]
repeatedl
y
until
“
ALL’’ appears during pla
y
back.
N
ote
(
s
):
•
To repeat the current track in the random mode, press
[REPEAT
]
repeatedl
y
until
“
TRACK” appears during pla
y
back.
•
To re
p
eat the entire random selections,
p
ress
[
REPEAT
]
repeatedl
y
until
“
ALL” appears
d
uring p
l
ay
b
ac
k
.
•
During random playback, you cannot go back to the previous track.
A-B
Note
(
s
):
• To exit t
h
e se
q
uence,
p
ress
[
A-B
]
unti
l
“OFF” a
pp
ears
.
• To cancel
p
oint A,
p
ress
[
CLEAR
]
at ste
p
1
.
• This function is not available in the other re
p
eat modes
.
REPEAT
Repeat P
l
ay
b
ac
k
DV
DV
D
D
Repeat
f
unction is available onl
y
during pla
y
back.
Programme
d
P
l
ay
b
ac
k
DV
DV
D
D
Ran
d
om P
l
ay
b
ac
k
DV
DV
D
D
pl
aying t
h
e trac
k
s
b
ac
k
in sequence.
Repeat A-B P
l
ay
b
ac
k
DV
DV
D
D
Repeat
f
unction is available onl
y
during pla
y
back.
Eac
h
time you press
[
REPEAT
],
repeat function chan
g
es as exam
-
p
l
e
b
e
l
ow
.
O
F
F
C
HAPTE
R
TITLE
(
repeat
o
ff
)
(
current chapter repeat)
(
current tit
l
e
r
epeat
)
OFF
TRAC
K
AL
L
(
repeat
o
ff
)
(
current trac
k
repeat
)
(
entire
d
isc
r
epeat
)
e
.
g
.) DVD
A-B
MODE
MODE
o
r
OK

DVD FUNCTIONS
EN
–
19
–
1
P
r
ess
[
AUDI
O
]
during CD pla
y
back
.
Eac
h
time
y
ou press
[
AUDI
O
]
, soun
d
mo
d
e c
h
anges as examp
l
e
b
e
l
ow.
1
P
r
ess
[
ANGLE
]
during pla
y
back.
Each time
y
ou press
[
ANGLE
]
camera an
g
le chan
g
es
.
1
P
ress
[
MODE
]
during playback.
2
P
r
ess
[O
K
]
to a
d
just
t
h
e
b
l
ac
k l
e
v
e
l
.
ON: ma
k
es t
h
e
d
ar
k
areas
b
rig
h
ter
.
OFF: shows the ori
g
inal picture as recorded
.
3
P
r
ess
[
RETURN
]
to
e
xi
t.
1
Pr
ess
[
AUDI
O
]
to c
h
an
g
e au
d
io Lan
g
ua
g
e.
Eac
h
time you press
[
AUDI
O
]
, t
h
e au
d
io Lan
g
ua
g
e c
h
an
g
es as
exam
pl
e
b
e
l
ow
.
1
Pr
ess
[
SUBTITLE
]
during pla
y
back
.
2
P
r
ess
[
s
/
B
]
to
set
subt
i
t
l
e
to
“
O
FF”
.
1
P
ress [SUBTITLE
]
during playback
.
Each time
y
ou press [SUBTITLE
]
, subtitle Language changes as
exam
p
le below
.
S
p
ecia
l
Settin
gs
pg
1.ENG Dolby D 3/2.1ch 48k/3
STERE
O
(
right and left channels are active
)
L-
c
h
(
left channel is active
)
R-ch
(
right channel is active)
T
h
is Unit a
ll
ows you to se
l
ect a soun
d
mo
d
e
d
uring CD p
l
ay
b
ac
k.
STEREO
1 / 8
ON
A
d
j
ust the black level to make the dark
areas of the TV picture brighter
.
OFF
1.ENG/6
OFF
Note
(
s
):
•
If
y
our Language is not shown after pressing
[
SUBTITLE
]
several times
,
the disc ma
y
not have that Language. However, some discs have the
subtitle Lan
g
ua
g
e settin
g
on the disc menu. (Operation varies dependin
g
on the discs, so refer to the manual alon
g
with the disc.)
•
When “NOT AVAILABLE” a
pp
ears on the TV screen, it means no subtitle
i
s
r
eco
r
ded
o
n
t
h
e
sce
n
e.
•
If
y
ou choose a Language that has a 3-letter language code, the code will
be displa
y
ed ever
y
time
y
ou change the subtitle language setting. If
y
ou
choose an
y
other Languages, ‘---’ will be displa
y
ed instead. Refer to page 24.
•
Some discs will onl
y
allow
y
ou to change the subtitle from the disc
menu. Refer to the manual accompan
y
ing the discs for details
.
OK
Note(s)
:
•
If
y
our Language is not shown after pressing
[
AUDI
O
]
several times
,
the disc ma
y
not have that Language. However, some discs allow audio
Language setting on the disc menu. (Operation varies depending on
the disc, so refer to the manual alon
g
with the disc.
)
•
When “NOT AVAILABLE” a
pp
ears on the TV screen, it means audio
Language is not available
.
•
Some discs will onl
y
allow
y
ou to change the audio setting from the
disc menu. Re
f
er to the manual accompan
y
ing the discs
f
or details
.
OFF
(no subtitles
)
EN
G
(En
gl
is
h
su
b
tit
l
es)
F
R
E
(
Frenc
h
su
b
tit
l
es
)
...
EN
G
(
En
g
lish audio)
S
PA
(
Spanis
h
au
d
io)
F
R
E
(
French audio
)
...
1.ENG/6
Subtitle Lan
g
ua
g
e
DVDVDD
T
his Unit allows
y
ou to select a subtitle Language
(
if available)
during DVD pla
y
back
.
C
amera Ang
l
es
DVDVDD
S
ome DVD ma
y
contain scenes which have been shot
s
imultaneousl
y
from various angles. You can change
t
he camera angle i
f
the “ANGLE ICON” appears on the
TV
screen.
If the “ANGLE ICON” is set to “OFF” in “OTHERS” menu
,
it will not
a
ppear. Refer to pa
g
es 20-22.
S
tereo Sound Mod
e
DV
DV
D
D
Black Level Settin
g
DVDVDD
Audio Lan
g
ua
ge
DVDVDD
T
h
is Unit a
ll
ows
y
ou to se
l
ect an au
d
io Language
(
i
f
multi
p
le
Languages are avai
l
a
bl
e)
d
uring DVD p
l
a
yb
ac
k.
RETURN
SUBTITLE
SUBTITLE
AUDIO
ANGLE
MODE
AUDIO
or

DVD FUNCTIONS
–
2
0
–
EN
2
Se
l
ect
“
CUS
T
O
M”
.
D
VD Sett
i
n
g
g
Note(s)
:
*1
• Lan
g
ua
g
e options are not available
wi
t
h
so
m
e
d
i
scs.
• I
f
“OTHER” is selected on “AUDIO”,
“SUBTITLE” or “DISC MENU” screen
,
press 4-digit number to enter the code
f
or the desired Language. Re
f
er to the
“Lan
g
ua
g
e Co
d
e List” on pa
g
e 24.
• Onl
y
the Languages supported b
y
the
d
isc can be selected
.
*2
• “LANGUAGE” settin
g
f
or
“
AUDIO” and
“
SU
BTITLE
”
a
r
e
n
ot
a
v
a
il
ab
l
e
wi
t
h
so
m
e
d
i
scs.
Th
e
n
use
[
AUDIO
]
a
n
d
[
SUBTITLE
]
. Re
f
er to page 19
.
LANGUAGE Settin
g
Follow steps 1 to 3 in the “CUSTOM Menu” section above.
4
Se
l
ect
t
h
e
des
ir
ed
i
te
m
.
6
T
o
e
xi
t
t
h
e
m
e
n
u
5
Se
l
ect t
h
e
d
esire
d
Language.
AU
DI
O:
*
1
*
2
(De
f
ault: ORIGINAL
)
S
ets t
h
e au
d
io Language
.
S
UBTITLE:
*
1
*
2
(
Default: OFF
)
S
ets the subtitle Language
.
D
I
SC
MEN
U:
*
1
(
Default: ENGLISH
)
S
ets the Language
f
or DVD
menu.
P
LAYE
R
MENU:
QUICK
(De
f
ault: ENGLISH)
Sets the Language
f
or the
o
n-screen
d
isp
l
a
y.
SETUP
2 Select the desired item.
•
Re
f
er to the sections “PLAYER MENU”, “TV ASPECT”,
“PROGRESSIVE” or “DOLBY DIGITAL” section on page 20 or 21
.
1
P
ress
[
SETUP
]
in the Sto
p
mode
.
SETUP
QUICK
CUSTOM
INITIALIZE
SETUP
SETUP QUICK
PLAYER MENU
TV ASPECT
PROGRESSIVE
DOLBY DIGITAL
ENGLISH
4:3 LETTER BOX
OFF
BITSTREAM
Q
UICK Men
u
You can select “PLAYER MENU”, “TV ASPECT”, “PROGRESSIVE” or “DOLBY DIGITAL” from “QUICK” menu quickl
y
.
AUDIO
ORIGINAL
ENGLISH
FRENCH
SUBTITLE
OFF
ENGLISH
FRENCH
DISC MENU
ENGLISH
FRENCH
SPANISH
PLAYER MENU
ENGLISH
FRANÇAIS
ESPAÑOL
LAN
GU
A
G
E m
e
n
u
P2
0
A
Step
5
P21
B
Step
5
P21
C
Step
5
SETUP LANGUAGE
AUDIO
SUBTITLE
DISC MENU
PLAYER MENU
ORIGINAL
OFF
ENGLISH
ENGLISH
3
Select
the
des
ir
ed
i
te
m
.
1
Pr
ess
[
SETUP
]
in the Sto
p
mode.
SETUP CUSTOM
LANGUAGE
DISPLAY
AUDIO
PARENTAL
OTHERS
C
U
STOM Men
u
SETUP OTHERS
ANGLE ICON ON
SETUP AUDIO
DRC
DOWN SAMPLING
DOLBY DIGITAL
ON
ON
BITSTREAM
SETUP DISPLAY
TV ASPECT
STILL MODE
PROGRESSIVE
4:3 LETTER BOX
AUTO
OFF
You can change the Settings of the Unit.
•
QUICK
on pages 20-21 indicates DVD setting menus also accessible from “QUICK” menu
.
S
ET
U
P m
e
n
u
A
U
DI
O
m
e
n
u
D
I
S
PLAY m
e
n
u
O
THER
S
m
e
n
u
SETUP LANGUAGE
AUDIO
SUBTITLE
DISC MENU
PLAYER MENU
ORIGINAL
OFF
ENGLISH
ENGLISH
LAN
GU
A
G
E m
e
n
u
page 20
A
p
age 2
1
B
p
age 2
1
C
p
age 22
SETUP PARENTAL
PASSWORD
Please enter a 4-digit password.
P
A
R
ENTAL m
e
n
u
p
age 2
2
D
SETUP
QUICK
CUSTOM
INITIALIZE
SETUP
QUICK
CUSTOM
INITIALIZE
E
A
o
r
or
or
o
r
or
SETUP menu
Confirm that “
Q
UICK” is selected
.
DVDVDD
Note
(
s
):
• In “QUICK” menu
,
“PLAYER
MENU”
,
“TV ASPECT”
,
“PROGRES
-
S
IVE”
o
r “D
O
LBY DIGITAL”
a
r
e
a
vailable. “QUICK “ menu consists
o
f
the setting menu
f
requentl
y
use
d
an
d
t
h
e
y
are accompanie
d
wit
h
QUICK
. You can ma
k
e a
ll
settings in “CUSTOM” menu
.
SETUP
OK
OK
OK
OK
OK
OK
C
ontinue
d
on next page
.
/