Page is loading ...

Fyre-Stones Set “C”
Installation Instructions (sku 94700764)
Page 1 of 14 17601709 - 7/17/12 © Travis Industries, Inc.
Items Required
¼” Crushed Glass (see page 14 for quantities):
-- Platinum (94500580)
-- Reflective Bronze (94500581)
-- Cobalt (94500582)
Compatibility
33 DVI
DVL GSR NB with Dancing-Fyre Burner
864 HO NB with Diamond-Fyre Burner
Cypress Stove
Installation Warnings
The glass must be installed in accordance with this installation manual or instruction sheet.
Failure to install the glass correctly may lead to a safety hazard and will void the warranty
The stones must be placed before placing the glass to prevent sooting.
The stones are fragile, especially after being exposed to heat.
Make sure the gas control valve is “OFF” and the heater is cool prior to conducting service.
Failure to position the parts in accordance with these diagrams or failure to use only parts specifically
approved with this appliance may result in property damage or personal injury.
The burner must be correctly positioned before installing the stones. Make sure the burner is fully seated
and the pilot is properly aligned. See the Owner’s Manual for details on burner removal.
HINT: If using propane (LP), convert the appliance before installing the stones.
HINT: If using optional firebacks, first make the modifications to the burner. After modifying the burner, install
the firebacks then the stones.

Fyre-Stones Set “C”
Installation Instructions (sku 94700764)
Page 2 of 14 17601709 - 7/17/12 © Travis Industries, Inc.
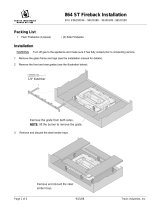
Packing List
Stone Grid Parts:
Stone List
NOTE: Each stone is numbered on the bottom.
#9 (2 stones)
#1 (3 stones)
#10
#2 (2 stones)
#11
#3
#12
#4
#13
#5 - 33 DVI / DVL GSR NB ONLY
#14 (2 stones)
#7
#16
#8
#20
Left Stone Grid:
33 DVI
DVL GSR NB
Cypress
Left Stone Grid:
864 HO NB
Stone Grid Brackets:
864 HO NB
Stone Grid Brackets:
Cypress
Right Stone Grid:
All models
Rear Stone Grid:
864 HO NB
Cypress
Rear Stone Grid:
33 DVI
DVL GSR NB
NOTCH
NO NOTCH

Fyre-Stones Set “C”
Installation Instructions (sku 94700764)
Page 3 of 14 17601709 - 7/17/12 © Travis Industries, Inc.
1. The stone set requires the burner to be modified. Remove the two screws holding the ember trays in place
(see below). Remove the ember trays.
2. Remove the two screws holding the burner in place (see below). Grasp the burner with both hands and lift it
straight up and out of the firebox. Place the burner on a suitable work surface.
Newer Units
Older 33 DVI

Fyre-Stones Set “C”
Installation Instructions (sku 94700764)
Page 4 of 14 17601709 - 7/17/12 © Travis Industries, Inc.
Preparing the Burner for Stone Installation
Pilot Shield and Left Log Plate
3. Remove and discard the pilot shield (except 864 HO).
IMPORTANT: 864 HO: You must use the pilot shield shipped with the burner kit.
4. All models: Remove and discard the left log plate.

Fyre-Stones Set “C”
Installation Instructions (sku 94700764)
Page 5 of 14 17601709 - 7/17/12 © Travis Industries, Inc.
5. Remove and discard the side air deflector. Replace the screws.
33 DVI / DVL / Cypress: On older burners the deflector is riveted in place. Simply bend the extension
repeatedly until it snaps off.
6. 33 DVI / DVL / Cypress: Remove and discard both rear log supports and rear air deflector. Keep the screws.
IMPORTANT: 864 HO: You must retain the rear air deflector.
7. Follow the directions on the following pages to prepare the burner for your heater model.
IMPORTANT: You must use the stone grid brackets supplied with this kit.

Fyre-Stones Set “C”
Installation Instructions (sku 94700764)
Page 6 of 14 17601709 - 7/11/16 © Travis Industries, Inc.
33 DVI / DVL GSR NB
Attach the rear stone grid as shown below.
Cypress
Remove and discard the fireback shelf/high deflector and install the low deflector (included with the Cypress
stove).
FIREBACK NOTE: Place the fireback on the low deflector at the rear of the firebox and secure with the upper
clips.
Fireback Shelf/High Deflector Low Deflector
Attach the rear stone grid brackets as shown below.

Fyre-Stones Set “C”
Installation Instructions (sku 94700764)
Page 7 of 14 17601709 - 7/17/12 © Travis Industries, Inc.
864 HO NB
Attach the burner brackets.
Slide the rear air deflector into place as shown below.
NOTE: The rear air deflector is shipped with the 864 HO NB Diamond-Fyre burner.
IMPORTANT: Make sure to install the pilot shield shipped with this 864 HO Diamond-Fyre kit (sku 96900142).
8. All models: Replace the burner and return the firebox to the correct configuration.

Fyre-Stones Set “C”
Installation Instructions (sku 94700764)
Page 8 of 14 17601709 - 7/17/12 © Travis Industries, Inc.
Stone Grid Installation
Make sure to use the correct left stone grid.
1. The tabs on the stone grids are shipped flat. Bend the 2 tabs on the left stone grid as shown below.
2. Attach the left stone grid to the burner as shown below.
864 HO NB
DVL / 33 DVI
Cypress
No notch
Notch

Fyre-Stones Set “C”
Installation Instructions (sku 94700764)
Page 9 of 14 17601709 - 7/17/12 © Travis Industries, Inc.
3. Bend the 2 tabs on the right stone grid as shown below.
4. Attach the right stone grid to the burner as shown below.
NOTE: When installed, the grid sits flat on the burner.
5. Bend the tab behind the pilot with a flat screwdriver as shown below. This prevents the grid from warping.

Fyre-Stones Set “C”
Installation Instructions (sku 94700764)
Page 10 of 14 17601709 - 7/17/12 © Travis Industries, Inc.
6. Prepare the rear stone grid by bending down the appropriate tabs.
33 DVI / DVL: Skip this step.
a) Cypress: Bend the “A” tabs DOWN.
b) 864 HO NB: Bend the “B” tabs DOWN.
7. Place the rear stone grid on the burner. The holes at the ends of the grid fit over the pegs on the burner.
NOTE: When in place, the #3 tab will be located to the left.
A
A
A
B
B
B B

Fyre-Stones Set “C”
Installation Instructions (sku 94700764)
Page 11 of 14 17601709 - 7/17/12 © Travis Industries, Inc.
Placing Stones
Each stone has a number etched into it and a slot that fits over the corresponding numbered
tab. Place the stones onto the stone grid, matching the number on the stone to the number
on the grid.
EXAMPLE: Place stone “3” over the tab marked “3” on the stone grid.
NOTE: Numbers on the stones always face the rear of the firebox.

Fyre-Stones Set “C”
Installation Instructions (sku 94700764)
Page 12 of 14 17601709 - 7/17/12 © Travis Industries, Inc.
1. Starting in the left rear corner, place the stones in a clockwise manner on the stone grid, paying close
attention to the notch/tab alignment and making sure the numbers face the rear of the firebox. The stone
placement sequence is shown below.
NOTE:
33 DVI / DVL GSR NB: This is Stone #5.
Cypress / 864 HO NB: This is Stone #1.
2. Place the pilot stone (#20) on the pins in the right center of the firebox, as shown below.
The pilot stone is shown below as an example (the pilot stone also has an indentation that allows room for the
pilot light).

Fyre-Stones Set “C”
Installation Instructions (sku 94700764)
Page 13 of 14 17601709 - 7/17/12 © Travis Industries, Inc.
3. Continue to place the stones in a cluster at the right of the firebox, as shown below.
4. Place the stones in a cluster at the left of the firebox as shown below.
Left Stone
Numbers
Right Stone
Numbers
1 20
2 13
12 7
14 4
9 9
10 14
11
5. Place stone #16 at the left front of the firebox as shown below. This stone does not fit on a pin, but lies loosely
on the burner.
#16

Fyre-Stones Set “C”
Installation Instructions (sku 94700764)
Page 14 of 14 17601709 - 7/17/12 © Travis Industries, Inc.
Crushed Glass Installation
It is better to use too little glass than too much. Excessive glass, especially when using propane
(LP), will lead to sooting. Place the glass as thinly as possible over the burner ports for optimum burner
performance. Do not place glass over the pilot assembly.
Crushed Glass Part Numbers
The glass is ¼” American Fireglass crushed glass. Three colors of glass are available from Travis Industries (10
lbs. – shipped in four 2.5 lb. bags):
Platinum (94500580)
Reflective Bronze (94500581)
Cobalt (94500582)
Glass Quantity
Use the following amount of glass based on the model being used:
QUANTITY USED
MODEL
Bags
Rounded
Cups
Rounded
ml
33 DVI / DVL GSR NB with Dancing-Fyre Burner 0.5 1-1/4 300
Cypress 0.7 1-3/4 420
864 HO NB with Diamond-Fyre Burner 2 5 1200
The glass is supplied from the manufacturer in 2.5 lb. bags. Depending upon appliance, you may need to
measure glass quantity. Use a liquid measuring cup to accurately determine the amount of glass used.
1 Level Cup (8 fl. oz.) (240ml) = 0.95 lbs.
So...1 Slightly Rounded Cup = 1 lb.
WARNING: Make sure the glass is a maximum
1 layer thick on LP units (NG can be up to 2
layers). If the glass is too thick it will impair
burner performance and create soot.
WARNING: Make sure the pilot is not obscured
with glass. Clear away glass, if necessary, to
ensure the pilot flame lights the burner quickly.
The completed installation looks like
the photo to the right.
/