Fender SPL-M500 User manual
- Category
- Musical Equipment
- Type
- User manual
This manual is also suitable for

POWER AMPLIFIERS
From Fender Pro Audio
Owner's Manual for
SPL-M500
P/N 050253
REV B

Fender Musical Instruments
7975 North Hayden Road, Scottsdale, Arizona 85258 U.S.A.
Fender knows the importance of sound reinforcement. From the simple box-top mixer
to today's professional touring concert systems, the need to communicate, to make the
connection between the performer and the audience is foremost in Fender's mind.
Perhaps no other single piece of gear can make or break your band's sound. You see,
your sound system is more than just a combination of dials, wires and speakers. It is
an integral part of the audio chain and should be treated with special care and attention
to detail.
At Fender, we know what building quality musical instruments and sound reinforcement
equipment is all about. In fact, many of the world's best sounding electric musical
instruments and sound reinforcement equipment proudly wear the Fender name.
Whether you need a simple box top powered mixer for your Saturday afternoon jam, or
a professional full-size concert system, Fender has the sound reinforcement equipment
to meet your needs. Likewise, your decision to purchase Fender pro audio gear is one
you will appreciate with each performance for years to come.
Wishing you years of enjoyment and a heartfelt thank you,
Bill Schultz
Chairman
Fender Musical Instruments Corporation
Bill Schultz

3
500 Watts into 2Ω
Variable high pass filter (12 dB per octave,
sweeping from 12 Hz to 150 Hz)
Variable low pass filter (12 dB per octave,
sweeping from 2.5 kHz to 30 kHz)
Three independent variable notch filters for
feedback control
Built in switchable DELTACOMP
™
Compressor
Forced air cooling with automatic 2-speed fan
Bi-amp patch point connect for versatility in
larger monitor systems
Balanced TRS phone jack and female 3-pin XLR
input connectors
Rugged “road proof” 14 gauge steel chassis
Two rack space (3.5 in, 8.8cm) chassis
Optional rear rack supports (P/N 040661)
Thank you for your purchase of a Fender SPL-M500
Stage Monitor Power Amplifier. We are sure you will
find it to be a useful and unique product, providing
years of trouble free service in both permanent and
portable applications. Although intended primarily
for portable stage monitor use, the SPL-M500 is
also effective in sound reinforcement applications
where fixed microphones are used and feedback is
a problem.
Employing a unique design, the SPL-M500 provides
a powerful tonal control system which fights
feedback while optimizing sound. This design is
comprised of a sweepable high pass filter, a
sweepable low pass filter and three advanced
narrow band notch filters.
This manual is arranged into four sections:
- A description of the SPL-M500 panel features.
- A section on basic connections and wiring.
- A guide on operating the SPL-M500.
- Product specification sheet.
WARNING:
-To reduce the risk of fire or shock hazard, do
not expose this amplifier to rain or moisture.
-No user serviceable parts inside, refer
servicing to qualified personnel only.
-This amplifier must be earth grounded.
SPL-M500
SPL-M500
™
™
ST
ST
AGE
AGE
MONITOR
MONITOR
POWER AMPLIFIER
POWER AMPLIFIER
INTRODUCTION

A. INPUT LEVEL CONTROL - Variable attenuator
controls the amplifier's input sensitivity. Control
settings can vary between +8dB (fully up) and infinite
attenuation (fully down). At the full up position, a
360mV input signal is required for rated output. At
0, a 360mV input signal will yield an output power of
1/8th rated power.
B. NOTCH FREQUENCY CONTROL - Higher
notch frequencies are selected as the knobs are
rotated in the clockwise direction. Each knob
covers a specified frequency range, but two
adjacent knobs do have overlapped frequencies.
This feature is intentional. Refer to the "Hints and
Precautions" found on page 7 for details concerning
this feature.
C. NOTCH DEPTH CONTROL - These sliders
provide attenuation control for each notch filter
frequency band. At the highest position, 0dB of
attenuation is obtained. At the lowest position, they
can provide more than 25 dB of attenuation at the
selected frequency. Refer to the "Hints and
Precautions" found on page 7 for details concerning
this feature.
D. HIGH FREQUENCY ROLL OFF CONTROL
(LOW PASS FILTER) - Useful for smoothing out
"edgy" sounding speakers. When this knob is fully in
its clockwise position, all signals below 30 kHz are
allowed to enter the power amplifier. If set fully
counter clockwise, only signals below 2.5 kHz will be
permitted to pass through. Start with this control set
at 30 kHz. If the performers complain of "edgy"
sounding monitors and want smoother sounding
ones, rotate this control counter clockwise until they
are pleased with the sound.
E. LOW FREQUENCY ROLL OFF CONTROL
(HIGH PASS FILTER) - Useful for removing rumble
(mechanical noise) or resonance and L.F. leakage.
When this knob is fully in its counter clockwise
position, all input signals above 12Hz are allowed to
pass. When it is positioned fully clockwise, only
frequencies above 150 Hz are permitted to enter the
power amplifier. Start with this control set at 12 Hz.
If the performers want crisper sounding sounding
monitors slowly rotate this control clockwise until
they are pleased with the sound.
F. POWER LED INDICATOR - LED is illuminated
when the monitor amplifier is turned on, and the AC
mains voltage is present. If the indicator does not
light when the power switch is turned on (and does
not trip the circuit breaker), check the AC power
supply and fuse.
G. DELTACOMP
™
SWITCH - This switch activates
the internal compressor circuit. Peak clipping is
minimized when the compressor circuit is active.
This will also "clamp" feedback, helping protect your
monitor speakers. During normal operation, keep
this switch engaged.
4
225
50 500
70
NOTCH DEPTH
LOW
INPUT LEVEL
+6dB
0dB
- 00
430
2k
400 5k
700
NOTCH DEPTH
MID
4k
4k
800 10k
NOTCH DEPTH
HIGH
9k1k
60
FLAT 150
12 016
LOW FREQ. ROLLOFF
12k
2k FLAT
35k4k
HIGH FREQ. ROLLOFF
POWER
DELTACOMP
TM
0dB
-6
-3
-12
0dB
-6
-3
-12
0dB
-6
-3
-12
FREQUENCY FREQUENCY FREQUENCY
FREQUENCY FREQUENCY FREQUENCY
MAX. MAX. MAX.
FEEDBACK CONTROL FILTER
A
BBB
C
CC
D
E
F
G
H
I
POWER
ON
DESCRIPTION OF FEATURES
FRONT PANEL

5
TYPE: PR 308
CAUTION: CHASSIS SURFACE HOT
WARNING: TO REDUCE THE RISK OF FIRE
OR ELECTRIC SHOCK , DO NOT EXPOSE THIS
EQUIPMENT TO RAIN OR MOISTURE
AVIS: RISQUE DE CHOC ELECTRIQUE NE PAS OUVRIR
ATTENTION: SUPERFICIE DE CHASSIS CHAUDE
RETURN SEND
PATCH POINT
BALANCED INPUTS
OUTPUTS
500W
2Ω
MIN
TOTAL
CLASS 2 WIRING
PARALLEL SPKR. JACKS
ATTENTION:
UTILISER UN FUSIBLE DE
RECHANGE DE MEME
TYPE ET CALIBRE
CAUTION:
TO REDUCE THE RISK OF
FIRE, REPLACE FUSE WITH
SAME TYPE AND RATING
900W
SERIAL NUMBER
F10A
250V
FUSE
DO NOT BLOCK FAN OPENING
JK L
M
N
O
O
L
H. PEAK LED INDICATOR - The red Peak LED
Indicator illuminates when the output voltage of the
amplifier reaches clipping (maximum output voltage).
The threshold for the peak indicator automatically
adjusts for load impedance and supply voltage
variations.
I. POWER SWITCH - The power switch turns the
unit on and off. The LED (item F) is illuminated when
the amplifier is turned on and main voltage is present.
REAR PANEL
J. POWER CORD - The SPL-M500 is equipped
with a grounding type supply cord to reduce the
possibility of shock hazard. Be sure to connect it to
a grounded AC receptacle. DO NOT ALTER THE
AC PLUG.
K. EXTERNAL FUSE - When necessary, replace the
external fuse ONLY with one of the same type and
rating as shown on the label next to the external fuse
holder.
L. OUTPUT SPEAKER JACKS - Two parallel-wired,
1/4"output connectors are provided capable of
providing 500 Watts of power into a 2Ω minimum load
total. (One 2Ω speaker or two speakers at 4Ω each).
M. PATCH POINT RETURN CONNECTOR -
Provides the possibility of using the power amplifier
by bypassing the preamp section of the unit. When
this connector is used, the preamp is totally
disconnected from the power amplifier section. If
nothing is plugged into this jack, it normally takes its
signal from the preamp output, via the PATCH POINT
SEND
jack. (See section N).
N. PATCH POINT SEND CONNECTOR - This
connection can be used with the patch point return
connector, if further signal processing by an external
unit is desired. Processing could include the
insertion of a 1/3 octave graphic equalizer for tonal
shaping, an external compressor/limiter and/or the
insertion of an active electronic crossover network
for bi-amped monitor systems. The output of this
jack is normally tied to the patch point return
connector. Using this connector will not disconnect
the preamp section from the power amplifier section.
O. BALANCED INPUT CONNECTORS - This unit
provides two types of input connectors: a 1/4 inch
TRS and an XLR female connector. The 1/4 inch
TRS connector polarities are: tip (+), ring (-), and
sleeve (ground). The XLR female connector
polarities are: pin 2 (+), pin 3 (-), and pin 1 (ground).

Power and audio signal cables are the most
common sources of sound system failure. Well
made and carefully maintained cables are essential
to the reliability of the entire system. If long speaker
cables are required, make sure the wire is of
sufficient size to transfer all of the available amplifier
power to the speakers rather than absorbing power
itself. As a rule of thumb, the larger the wire the
better (larger wire has smaller "gauge numbers").
Below are two charts listing speaker wire gauges
and recommendations for best results.
Larger diameter (small gauge number) wire is
expensive and long cables made from it are heavy.
Rather than running long speaker cables, it is better
to locate power amplifiers near speakers and run a
line-level signal cable over the long distance to the
amplifier. This approach eliminates most of the
signal loss due to speaker cable resistance so the
speakers are fed all of the amplifier's power without
the need for heavy cables. In cases where speakers
and power amplifiers are located far away from the
signal source, "balanced line" cables are a wise
choice. Doing so can actually save money.
The use of stranded wire is highly recommended
since it is flexible and less prone to metal fatigue
breakage. If an end is nicked while insulation is
being stripped for connection, only one or two
strands will break and not the entire wire.
NEVER use coiled cords for
speaker hookup, even in an
emergency.
Coiled guitar-type cords usually have higher internal
resistance than the speakers themselves. This is
due to the light-gauge wire used to keep the coil
cords flexible. Unfortunately, these types of cord
prevent most of the power from reaching the
speakers. In high power operation, a coil cord can
melt causing a fire hazard and possible damage to
the amplifier. As a general rule, both straight and
coiled guitar-type connecting cords make poor
speaker cables.
The SPL-M500 can produce enough power output
to damage electronic equipment connected to its
output. Besides being capable of destroying
speakers, shock and / or fire hazards are also
possible. High power amplifiers should always be
properly applied and used with care in a clean and
dry environment.
Be sure to turn on all other equipment before turning
on the SPL-M500 power amplifier. This will prevent
turn-on "thumps" from the mixer or other pieces of
gear that could possibly damage speakers.
Likewise, the reverse logic should also be applied --
turn OFF the amplifier FIRST -- when shutting down
the system.
6
BASIC CONNECTIONS and WIRING
*Example - If the speaker wire length
required is between 25-50 feet (7.60-15.25
meters) and the speaker impedance is 8Ω,
the minimum recommended speaker wire
gauge is 16.
10
12
14
12
14
16
14
*16 18
16
18
18
18
18
18
8
10
12
14
16
4Ω
*8Ω
16Ω
2Ω
100'-UP
(30.5 m-UP)
50'-100'
(15.25-30.5 m)
*25'-50'
(7.60-15.25 m)
10'-25'
(3.05-7.60 m)
0'-10'
(0.00-3.05 m)
SPEAKER WIRE GAUGE
SPEAKER IMPEDANCE [z]
SPEAKER WIRE LENGTH
AWG
Resistance in Ω per foot
(30.5 cm) @ 77º F (25º C)
18
16
14
12
10
.00651
.00409
.00258
.00162
.00102
8
.00064
0.83
1.32
2.10
3.32
5.27
8.38
mm
2

The SPL-M500 is timed to turn on the speaker
outputs after the amplifier's power supply is fully
charged up, thus preventing any turn-on noise.
Timing of the amplifier's turn-on circuit is usually
sufficient to accommodate all the turn-on anomalies
from other pieces of gear in a system, making it
acceptable to use a single switched power string in
a permanent or semi-permanent application.
The SPL-M500 can draw a lot
of AC power. Be sure the AC
power source for your AC distribution system
has adequate current capability.
In multiple amplifier installations, a sequential turn-on
(either manually or via timed relays) is recommended
to avoid a sudden major drain on the AC line.
Remember, severe reduction of power line voltages
affects the amount of power you can get FROM the
amplifier. If you need to run long AC extension
cords, make sure their conductors are as large as
practical (small gauge number). Just as smaller
diameter wire causes speaker lines loss, smaller
power lines cause loss. The effect of small AC lines
is one of the intermittent clipping under severe
conditions.
1. Turn all equipment OFF.
2. Plug the AC cord into a power source with the
correct voltage. In the U.S. and Canada, this is a
120 Volt, 60 Hz AC. In other countries, this voltage
may vary from 100 to 240 Volts, 50 to 60 Hz AC.
3. Connect the wiring from the signal source to the
amplifier's input jack(s).
4. Connect the speaker(s) to the to the output
terminals.
5. Adjust the input control level to the minimum
(infinity) setting. Set the notch sliders at 0 dB (top).
6. Turn all other equipment ON first, then the SPL-
M500 monitor amplifier.
7. Slide the level control slowly up and listen for any
feedback problem(s) that may occur.
8. If feedback is encountered, slide the appropriate
(LOW, MED or HIGH band) notch depth control down to
its lowest position. Next, turn the frequency control
knob to pinpoint the location of the problem
frequency and cancel it.
9. Slide the control level up until feedback or ringing
is heard, then move down until the feedback or
ringing stops.
10. Step 8 may need to be performed more than
once if several feedback problems occur
simultaneously.
HINTS AND PRECAUTIONS
A. To reduce the chance of unwanted noise in your
system, keep all patch cables and input signal
cables away from all AC power cords, lighting
cables and speaker wires. Always use shielded
cables for all low level (input and patch point)
connections to this unit. Never use shielded cable
for speaker wires.
B. When a problem frequency occurs within the
overlapping part of the two adjacent frequency
bands, the notches can be dialed to have the same
center frequency. By doing so, the resulting notch
depth provided by the two notches will be deeper
than a single notch depth.
C. When two notches are juxtaposed, the result will
be a wider notch. This can be helpful in some
cases, but may not be desirable in normal operation
of the unit as audible frequency loss will occur.
D. When notches are not in use, all the notch sliders
must be at the top of their travel. A narrow band is
NOT a graphic equalizer. Do NOT put the notch
depth sliders in the middle of their travel to boost or
cut frequencies. These are CUT ONLY controls.
E. To help prevent overdriving this unit and unwanted
distortion, keep the Deltacomp
™
switch "in".
F. If you wish to obtain either the optional rear rack
ear supports (P/N 040661), please contact your
local authorized Fender Pro Audio dealer.
7
AMPLIFIER OPERATION

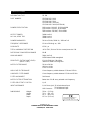
DESIGNATION TYPE PR 308
PART NUMBER 071-5000-070 100V
071-5000-000 120V
071-5000-060 230V
071-5000-040 230V (UK)
071-5000-030 240V (AUSTRALIA)
POWER SPECIFICATION 100V version: 100 VAC, 50-60 Hz 900W
120V version: 120 VAC, 60 Hz 900W
230V versions: 230 VAC, 50 Hz 900W
240V versions: 240 VAC, 50 Hz 900W
OUTPUT POWER 200W into 8 Ω
At 1 kHz, 0.20% THD 330W into 4 Ω
500W into 2 Ω
POWER BANDWIDTH 20 Hz to 50 kHz, 500W +0, -3dB into 2 Ω
FREQUENCY RESPONSE 12 Hz to 28 kHz @ +ø, -3dB
SLEW RATE 6.55V / µs
TOTAL HARMONIC DISTORTION <0.2% THD, 20 Hz to 20 kHz at rated power into 2 Ω
DELTACOMP COMPRESSOR RANGE 18 dB
HUM AND NOISE 200µV into 2 Ω
105dB below 500W unweighted
SENSITIVITY (PATCH POINT LEVEL) 1.2V for 500W into 2 Ω @1kHz
(INPUT LEVEL) 360mV for 500W into 2Ω @ 1kHz
NOTCH FILTER BANDS 50 Hz to 500 Hz
400 Hz to 4 kHz
1 kHz to 10 kHz
HIGH PASS FILTER RANGE Corner frequency variable between 12 Hz and 150 Hz
LOW PASS FILTER RANGE Corner frequency variable between 2.5 kHz and 30 kHz
FILTER ALIGNMENT Sub-Bessel
NOTCH FILTER ATTENUATION Better than -20 dB at any selected notch frequency
FILTER SELECTIVITY FACTOR Q = 8
INPUT IMPEDANCE 1/4 in Phone Jack: 21 kΩ unbalanced input
32 kΩ balanced input
XLR Connector: 27 kΩ balanced input
DIMENSIONS Weight 25 lbs. (11.3 kg)
Height 3.5 in. (8.9 cm)
Width 19 in. (48.3 cm)
Depth 12.3 in. (31.2 cm)
THIS EQUIPMENT CONFORMS TO
THE FOLLOWING DIRECTIVES :
EMC 89/336/EEC AND LV 73/23/EEC
A PRODUCT OF:
FENDER MUSICAL INSTRUMENTS CORP.
CORONA, CA 91720 USA
SPECIFICATIONS
-
 1
1
-
 2
2
-
 3
3
-
 4
4
-
 5
5
-
 6
6
-
 7
7
-
 8
8


Fender SPL-M500 User manual
- Category
- Musical Equipment
- Type
- User manual
- This manual is also suitable for
Ask a question and I''ll find the answer in the document
Finding information in a document is now easier with AI
Related papers
-
Fender SPL User manual
-
-
-
-
-
-
-
-
-
