Page is loading ...

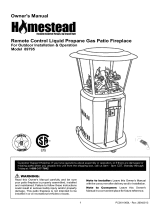
Owner's Manual
Liquid Propane,
Gas-Fired Infrared
Outdoor Patio Heater
Model 22899
//_ WARNING:
Read this Owner's Manual carefully and be sure your
patio heater is properly assembled, installed and
maintained. Failure to follow these instructions could
result in serious bodily injury and/or property damage.
This patio heater is intended for outdoor use only and
is not intended to be installed in or on
recreational vehicles, campers or boats.
Z_ WARNING:
THIS PATIO HEATER IS FOR OUTDOOR
USE ONLY.
Note to Installer:
Leave this Owner's Manual with the consumer after
delivery and/or installation.
Note to Consumer:
Leave this Owner's Manual in a convenient place for
future reference.
Customer Service Helpline:
If there are damaged or missing parts when you
unpack this unit from the shipping box, or you have
questions about assembly, call us 8am - 8pm CST,
Monday through Friday at: 1-888-317-7642.
P47B5A - Date: 10/16/2004

Warranty ..................................................... 2
Safety Instructions ..................................... 2
Clearance Requirements ........................... 3
Parts Diagram and Part List ............ 6-7
Assemblylnstructions ..................................... 8
Lightinglnstructions .................................. 11
Frequently Asked Questions .................. 12
For one year from the date of purchase Grand Hall
Enterprise Co., Ltd. ("Grand Hall") will repair or
replace, at our option, any patio heater part that is
defective in material or workmanship.
This warranty does not cover:
• Reshaping or dents in soft, aluminum Reflector
that may be caused by, but not limited to,
falling debris.
• Patio heater if it is used for commercial or
rental purposes.
This warranty applies only when the patio heater
is used in the United States.
This warranty is void if the patio heater head
assembly has been altered or disassembled.
This patio heater is manufactured to Liquid Pro-
pane specifications and is CSA Design Certified as
such. Any attempt to convert this Liquid Propane
patio heater for natural gas use is dangerous and
will void your product warranty.
This warranty gives you specific legal rights, and
you may also have other rights which vary from
state to state.
z_ WARNING
Combustion by-products produced when
using this product contain chemicals
known to the State of California to cause
cancer, birth defects, or reproductive
harm.
Z_WARNING
Failure to comply with these instructions
could result in a fire or explosion that
could cause serious bodily injury, death,
or property damage.
FOR YOUR SAFETY:
1. Children and adults should be alert to high
surface temperature of areas above the post
when operating this patio heater.
2. Children should be carefully supervised when
they are in the area of the patio heater.
3. NEVER hang anything including clothes or
other flammable items on the patio heater.
4. DO NOT operate this patio heater unless
it is fully assembled with reflector in place.
5. DO NOT store or use gasoline or other
flammable vapors and liquids in the
vicinity of this or any other appliance.
6. This Patio Heater is for outdoor use
only.
Z_WARNING
Improper installation, adjustment, alteration,
service or maintenance can cause injury or
property damage. Read the safety, installation,
operating and maintenance instructions thoroughly
before installing or servicing this equipment.
z_WARNING
A strong gas smell, or the hissing sound of
gas indicates a serious problem with your
patio heater or the LP gas cylinder. Failure
to immediately follow the steps listed below
could result in a fire or explosion which
could cause serious bodily injury, death, or
property damage.
• Shut off gas supply to the patio heater.
• Extinguish any open flame.
• Get away from the LP gas cylinder.
• Do not try to fix the problem yourself.
• If odor continues or you have a fire you
cannot extinguish, call your fire department.
Do not call near the LP gas cylinder
because your telephone is an electrical
device and could create a spark resulting
in fire and/or explosion.

Priorto assemblingyourpatioheater,thefollowing
mustbereviewed.Compliancewiththefollowing
shouldresultin satisfactoryheateroperation.This
Owner'sManualshouldberetainedforfuture
reference.Theinstallationmustconformwithlocal
codesof yourarea.
1. Thisgasfiredinfraredpatioheateris intended
foroutdoorheating.Theinstallationmustconform
with localcodesor, in theabsenceof local
codeswiththeNationalFuelGascode,ANSI
Z223.1.In Canada,heaterinstallationmust
conformwithlocalbuildingcodesor, in the
absenceof localcodes,withthecurrent
NationalStandardsof CanadaCAN/CGA-B149.2.
2. Thefollowingmustbemaintainedat alltimes
whenthe patioheateris in operation:
• Adequateclearancearoundairopeningsinto
thecombustionchamber.
• Clearancesfromcombustiblematerials.
• Provisionsfor accessibility.
• Combustionandventilatingairsupply.
3. Properclearancefromcombustiblematerials
mustbe maintainedat all times.SeeFig. 1
Minimum clearances are as follows:
Sides/Rear 12" Top 12"
Below Reflector Head 30"
Combustible materials include wood, compressed
paper, plant fibers, plastic, Plexiglas or other
materials capable of being ignited and burned.
Such materials are considered combustible even
if flameproof, fire-retardant treated or plastered.
Figure 1
I
Ceiling or Overhang
.
.
WARNING
Certain materials or items, when stored
under the heater, will be subjected to
radiant heat and could be seriously
damaged.
Additional clearance may be required for glass,
painted surfaces and other materials which may
be damaged by radiant or convection heat.
Patio heater must be placed on a level surface.
You must use only the gas regulator provided
with this patio heater. This regulator is set for
an outlet pressure of 11 inches water column.
Any replacement regulator must be UL listed.
The minimum inlet pressure to the regulator
from the cylinder is 10 psi and maximum
pressure is 150 psi.
The patio heater must be inspected before each
use, and annually by a qualified service person.
All gas connections should be checked for
leaks utilizing a soapy water solution (50%
mixture of both). Never use a flame for this
purpose.
The flame pattern can be observed through
the perforated emitter grid on the heater
head assembly and should be visually
checked whenever the patio heater is
operated (see Fig. 2).If flames extend more
than 2 inches in height or 1/2 inch outside
the surface of the emitter grid or black
soot is accumulating on the emitter grid or
reflector, the heater should be turned off
immediately. The heater should not be
operated again until repairs are made.
• The patio heater area must be kept clear
and free of combustible materials, gasoline
and other flammable vapors and liquids.
Figure 2.
NORMAL FLAME POSITION
2 II
-- 1 it
0

Thepatioheaterheadanditscomponents
mustbe keptclearof dirtandcobwebs.
Flowof combustionandventilationair
throughtheperforatedportionsof the
heatermustnotbe obstructed.
• Keep the bottom ventilation opening of the
cylinder enclosure (Patio Heater Base) free
and clear from debris.
• Clean patio heater only with noncombustible,
noncorrosive cleaning agents.
The stainless steel emitter grid should be
kept free of debris. Never spray cleaners
into the emitter grid because of potential
harm to internal components. NEVER paint
the emitter grid or reflector.
7. Installation and use of this patio heater must
conform with local codes or, in the absence of
local codes, with the Standards of Storage and
Handling of Liquefied Petroleum Gases, ANSI/
NFPA 58.
8. The self contained gas system for this mini
table top patio heater is designed to be used
with a 16.4 oz (disposable) LP gas cylinder
(not included). The gas cylinder must be
constructed and marked in accordance with
specifications of the U.S. Department of
Transportation for LP Gas Cylinders. NEVER
refill disposable cylinders.
9. A leak test should be performed with soapy
water (50% mixture of both) whenever
connecting a new cylinder. Never use a match
to test for leaks.
10. When the patio heater is stored indoors, the
connection between the LP gas cylinder and
the heater must be disconnected and stored in
accordance with Chapter 5 of the Standard for
Storage and Handling of Liquefied Gases, ANSI/
NFPA 58.
11. Clothing or other flammable materials should
not be hung from the heater, or placed on or
near the heater. The area above the post may
be extremely hot. Direct contact with these
metal surfaces should be avoided in order to
prevent burns or clothing ignition.
12.
13.
This patio heater is for outdoor use only. If
stored indoors, you MUST remove and store
the LP gas cylinder outdoors. The LP gas
cylinder must be disconnected when patio
heater is not in use.
CAUTION: You must use only the gas
regulator provided with this patio heater. This
regulator is set for an outlet pressure of 11
inches water column.
WARNING
• DO NOT shorten the post length
• DO NOT bypass the thermocouple safety
• DO NOT operate heater without a reflector
• DO NOT operate without Base Assembly
• DO NOT attempt to convert the patio heater
for natural gas use.
Failure to comply with these instructions
could result in a fire or explosion which
could cause serious bodily injury, death,
or property damage.

The following table illustrates a breakdown of the hardware pack. It highlights what components are used
in the various stages of assembly.
Ref. Component Qty. to Use
PHO09
PH018
PH019
1/4" Spring Washer 3
1/4" Cap Nut 3
M4 x 10 mm Round Head Screw 4
Purpose of Components
Install Reflector to Emitter Grid
Install Reflector to Emitter Grid
Install Emitter Grid to Burner Assembly
Quantity and Actual Size of Each Hardware Piece:
1/4" Spring Washer
Qty. 3
Part # PH009
1/4" Cap Nut
Qty. 3
Part # PH018
M4xlO Round Head Screw
Qty. 4
Part # PH019

Removeallcomponentsfromtheshippingboxandplacewithineasyreach.Inspectpatioheaterpartsfordamage
asyouproceed.Donotassembleoroperateyourpatioheaterif partsappeardamaged.
REARVIEWOFPATIO
HEATERBASESHOWN
ALREADYATTACHED
TOBASE

REF# DESCRIPTION
1. Aluminum Reflector
2. Emitter Grid
3. Safety Guard
4. Burner Assembly
5. Control Knob
6. Base
7. Cylinder Access Door
8. Plastic Pad
--- Owner's Manual
--- Hardware Pack
PART#
P7091A
P7092A
P7093A
P7094A
P3417C
P7095A
P7096A
P7097A
P47B5A
P55J7A
QTY
1
1
2
1
1
1
1
3
1
1
If there are damaged or missing parts when you
unpack this unit from the shipping box, or you have
questions about assembly, call the Customer Ser-
vice Helpline 8am - 8pm CST, Monday through
Friday at 1-888-317-7642.
For the repair or replacement parts you need:
Call 8am - 8pm CST, Monday through Friday at
1-888-317-7642
To make sure you obtain the correct replacement
parts for your Table Top Patio Heater, please
refer to the part numbers on this page. The
following information is required to assure you
receive the correct parts:
1. Model Number (found on the CSA Warning
Label located on the rear Cylinder Access
Door. See Fig. 3 below.)
2. Part Number
3. Part Description
4. Quantity of parts needed
Important: Keep this Owner's Manual for conve-
nient referral and for part replacement.
Important: Use only Grand Hall authorized parts.
The use of any part that is not Grand Hall
authorized can be dangerous and will also void
your product warranty.
Figure 3
CSA label
located here

Beforeassemblingthe patioheater,usethe parts
list to checkthat all necessarypartshavebeen
included.Inspectpatioheaterfor damageas you
proceed.Donotassembleoroperatethepatioheater
if it appearsdamaged.Ifyouhavequestionsduring
the assembly process, call 1-888-317-7642,
8am- 8pmCST,MondaythroughFriday.
CAUTION:
Removeall partsandhardwarefromshippingbox.
Refertothepartslistandhardwarepackillustrations
andassemblethepatioheaterona protectivework
surfacetoavoidscratchingheatersurfaces.
• Protective gloves
• Eye protection
• One #2 Phillips Head Screwdriver
• One Adjustable Wrench
Attach the Reflector (Parts List Item #1) onto
Emitter Grid (Parts List Item #2) by using 3
of the 1/4" Spring Washers and 1/4" Cap Nuts
provided. See Fig. 1. Use adjustable wrench
to tighten the Nuts.
2. Position the assembled Emitter Grid and
Reflector onto the Burner Assembly. See
Fig. 2. Rotate the Emitter Grid so the vertical
welding line is in the back and the screw
holes line up with the holes on Burner
Assembly. Insert 4 of the M4xl0 mm round
head screws and tighten securely.
3. Position the top assembly (created in figures 1
and 2) on the Base. Be sure to line up the 4
Tabs on Burner Assembly with the 4 openings
on Base. Make sure the Cylinder Access Door
is located in the back and the Control Knob is
located in front. Push the Burner Assembly
downward onto Base until the Tabs snap into
place. See Fig. 3.
Figure 1
REFLECTOR
EMITTER
GRiD
Figure 2
REFLECTOR
EMITTER
GRID
ASSEMBLY
Figure 3
HOLE ON BASE
FORTAB EMITTER
GRID
TAB ON BURNER
ASSEMBLY
BURNER
ASSEMBLY

4. Figure 4
Insert the bottom wire of each Safety Guard
(Parts List Item #3) through the hole on the
burner post. Connect the Safety Guards
together. See Fig. 4.
REFLECTOR
WARN ING
Any Safety Guard or other protective
device removed for servicing the patio
heater must be replaced prior to operat-
ing the patio heater.
5. Attach the Cylinder Access Door (Parts List
Item #7) to the patio heater base.
See Fig. 5.
BURNER
ASSEMBLY
BASE_
GRID
SAFETY
GUARD
Figure 5
REFLECTOR
\
SAFETh
GUARD
EMITTER
GRID
BURNER
ASSEMBLY
CYLINDER
ACCESSDOOR ///-
BASE

Connecting a Liquid Propane Gas Cylinder to
your Patio Heater. (Must use LP gas only)
CAUTION: During and after each use, your patio
heater will be hot. NEVER touch your patio
heater or attempt to change the LP Gas Cylinder
until you are certain it is cool to the touch.
1. Turn gas Control Knob, located on front of
Patio Heater to the off position.
2. Remove the Cylinder Access Door. See Fig. 6.
Position the Cylinder (not included) under the
regulator. Support the Cylinder with one hand
and Connect the Cylinder head into the
Regulator Inlet as shown Fig. 7. With your
other hand turn the Cylinder from left to right
until the Cylinder is securely connected to the
Regulator Inlet.
4. Attach the Cylinder Access Door onto the
Patio Heater Base.
Figure 6
CYLINDER
ACCESS DOOR
Congratulations
Your Patio Heater is now ready for use.
Before the first use and at the beginning of
each season (and whenever the LP gas tank
has been changed):
1. Read all safety, lighting and operating
instructions.
2. Check gas valve orifices, burner tubes and
burner ports for any obstructions.
3. Perform gas leak check according to
instructions found on page 11 of this
Owner's Manual.
Figure 7
REGULATOR
CYLINDER
BASE
Disconnecting a Liquid Propane Gas Cylinder
from your Patio Heater
1. Turn gas Control Knob, located on front of
Patio Heater to the off position. Allow Patio
Heater to cool before removing Cylinder.
2. Remove the Cylinder Access Door.
.
Turn the Cylinder from right to left by hand,
until Cylinder is disconnected from the
Regulator Inlet, and remove from Patio Heater
Base.
4. Replace the Cylinder Access Door to the
Patio Heater Base.
t
CAUTION: When the patio heater is not in use,
the gas must be turned off at the supply tank.
Never store an LP Cylinder indoors.
10

Checkall gasconnectionswitha soapywater
solutionto be suretheyare tightandleakproof.
To makesoapsolution,mixonepartwaterwith
onepartliquiddetergent.
With the gas valve knob in the "OFF" position,
connect disposable propane cylinder to regulator
fitting by turning the cylinder left to right. Use a
soapy water solution to check all connections for
leaks before attempting to use your patio heater.
If bubbles appear in the soap solution the connec-
tions are not properly sealed. Check each fitting and
tighten or repair as necessary.
If you have a gas leak that cannot be repaired
by tightening, turn off the gas at the source,
disconnect fuel line from your patio heater and
call 1-888-317-7642 or your gas supplier for
repair assistance.
.
Push and HOLD the Control Knob in fully. Rotate
knob left and STOP about 1/4 inch before the IGN/
HIGH position. Hold Control Knob at this position
for 3 to 4 seconds allowing gas to travel up to the
burner. Then SLOWLY turn Control Knob left to
the" IGN / HIGH " position, until a click sound is
heard. You may have to repeat this step 3 or 4
times to light the burner.
.
Once the burner flame is lit, continue pressing
the Control Knob for 15 seconds to ensure
the burner remains lit. Then release the
Control Knob and adjust the heat to desired
level from "HIGH" to "LOW".
. If the burner does not stay lit, turn the
Control Knob to the "OFF" position, wait 5
minutes for gas to clear, then repeat the
lighting procedure again.
Note: At first use, the Patio Heater Reflector
may emit a slight odor and smoke due to the
burn-off of oils used in the manufacturing process
of this aluminum part. This is to be expected.
Familiarize yourself with the safety instructions
and warnings at the front of this Owner's Manual.
Do not smoke while lighting patio heater or check-
ing the gas supply connection.
Be sure your patio heater is placed in accordance
with the minimum clearance from combustibles as
described on page 3 of this Owner's Manual.
2. Be sure your LP Gas Cylinder is filled.
3. Check the cylinder connection for leaks by apply-
o o
ing a mixture of 50 Yowater and 50 Yoliquid
soap solution.
. The Control Knob must be in the full "OFF"
position.
z WARNING
A strong gas smell, or the hissing sound of
gas indicates a serious problem with your
Patio Heater or the LPG Cylinder. Failure to
immediately follow the steps listed below
could result in a fire or explosion which
could cause serious bodily injury, death, or
property damage.
Shut off gas supply to the Patio Heater.
Extinguish any open flame.
Get away from the LPG Cylinder.
Do not try to fix the problem yourself.
If odor continues or you have a fire you
cannot extinquish, call your fire department.
Do not call near the LPG Cylinder, be
cause your telephone is an electrical
device and could create a spark resulting
in fire and/or explosion.
1. Turn gas Control Knob to the off position. Allow
unit to cool before removing 1 pound LP Cylinder.
2. Open the rear mounted Cylinder Access Door and
turn the cylinder by hand right to left until discon-
nected from regulator inlet.
3. NEVER store an LP Cylinder indoors.
4. Replace the rear mounted Cylinder Access Door.
11

Question:WhodoIcallwithquestionsaboutmy
GrandHallPatioHeaterassemblyorifpartsare
damagedormissingfrommyshippingbox?
Answer:CalltheCustomerServiceHelpline
8am-8pmCST,MondaythroughFriday,at
1-888-317-7642.
Question:CanIconvertmyPatioHeaterfromLPgas
tonaturalgas?
Answer:No,thispatioheaterismanufacturedtoexact
specificationsandisCSADesignCertifiedforLPgas
useonly.Foryourownsafety,conversionkitsarenot
availableandanyattempttoconvertyourpatioheaterto
naturalgaswillvoidyourproductwarranty.
Question:WhenIoriginallystartedmypatioheater
therewassomesmokeandanodorcomingfromthe
Reflector.tsthisnormal?
Answer:Yes,atfirstuse,thePatioHeaterReflector
mayemitaslightodorandsmokeduetothebum-off
ofoilsusedinthemanufacturingprocessofthis
aluminumpart.Thisistobeexpected.
Question:Theradiusofwarmthfrommypatioheater
seemstovary,sometimesgreaterandsometimeswith
lesscoveragearea.Whataffectsthisradius?
Answer:Variousweatherconditionsaswellasthe
placementofyourpatioheatercanaffecttheradius.
Withoutwindsandwithtemperaturesabove40de-
greesFahrenheityoucanwarmaradiusupto4feet.
Higherwindsandcolderairwillreducethewarming
radius.
Question: The Patio Heater will not light. Why?
Answer:
• The burner is not lit.
• Low gas pressure. Be sure LPG Cylinder is filled.
• Manual valve not in "IGN / HIGH" position.
• The gas line may need to be purged.
Question: Why won't the burner stay lit?
Answer:
• May be excessive winds. Position your patio
heater in a more protected area away from
wind of 10 mph or more, with proper
clearances.
• Low gas pressure. Be sure LPG Cylinder is filled.
• The gas line may need to be purged.
Question: Howshould I clean my Patio Heater?
Answer: Keep the Burner Assembly and its compo-
nents clear of dirt cobwebs by brushing or wiping the
areas clean. Do not spray cleaners into the emitter
grid because of potential harm to internal components.
The stainless steel post and reflector can be cleaned
with a stainless steel spray cleaner and a soft cloth.
Do not use gasoline, paint thinner or any other cleaning
agent that can be combustible or corrosive.
Question: Where can I buy replacement parts?
Answer: For the repair or replacement parts you need
call 8am - 8pm CST, Monday through Friday at
1-888-317-7642. Use only Grand Hall authorized parts.
The use of any part that is not Grand Hall authorized
can be dangerous and will also void your product
warranty.
Question: Sometimes Ihear a humming sound
coming from my regulator. What causes this?
Answer: This is not to be confused with the "hissing"
sound associated with leaking gas. The humming noise
you may hear is the sound of gas flowing through the
regulator. You may have heard a similar sound at the
gas meter at your home. Reasonable humming should
be expected and will not affect the performance of your
patio heater.
12

J_WARNING: Improperinstallation,adjustment,alteration,serviceormaintenancecan
resultinafireorexplosion that could cause serious bodily injury, death, or property damage.
Read the installation, operating and maintenance instructions thoroughly before installing
or servicing this equipment.
If there are damaged or missing parts, including your Owners Manual, when you unpack this unit
from the shipping box, or if you have questions about assembly or operation, call the
Customer Service Helpline, 8am - 8pm CST, Monday through Friday at: 1-888-317-7642.
Caution: The gas pressure regulator provided with this appliance must be used. This regulator
is set for an outlet pressure of 11" W.C.
,_ WARNING: Fuels used in gas or oil fired appliances and the products of combustion
of such fuels, contain chemicals known to the state of California to cause cancer, birth defects
and other reproductive harm.
Caution: Hot while in operation. Do not touch. Keep children, clothing, and furniture away.
Caution: Keep gasoline and other liquids which have flammable vapors away.
Lighting Instructions:
1. Be sure your patio heater is placed in accordance with the minimum clearance from
combustibles as described below*.
2. Be sure your LP Gas Cylinder is filled.
3. Check the cylinder connection for leaks by applying a mixture of 50% water and 50% liquid soap
solution.
4. The Control Knob must be in the full "OFF" position.
5. Push and HOLD the Control Knob in fully. Rotate knob left and STOP about 1/4 inch before
the "tGN / HIGH" position. Hold Control Knob at this position for 3 to 4 seconds allowing
gas totravel up to the burner. Then SLOWLY turn Control Knob left to the "IG N/ HIGH" position,
until a click sound is heard. You may have to repeat this step 3 or 4 times to light the burner.
6. Once the Burner flame is lit, continue pressing the Control Knob for 15 seconds to ensure
the Bumer remains lit. Then release the Control Knob and adjust the heat to desired level
from "HIGH" to "LOW".
7. If the Burner does not stay lit, turn the Control Knob to the "OFF" position, wait 5 minutes
for gas to clear, then repeat the lighting procedure again.
Shutdown Instructions:
1. Turn gas Control Knob to the off position. Allow unit tocool before removing 1 pound LP Cylinder.
2. Open the rear mounted Cylinder Access Door and turn the cylinder by hand right to left
until disconnected from regulator inlet.
3. Never store an LP Cylinder indoors.
4. Replace the rear mounted Cylinder Access Door.
MODEL# 22899 BTU RATING: 6,500 to 11,000
GAS: 1 pound Liquid Propane Cylinder
SUPPLY PRESSURE: 11.0" W.C. MANIFOLD PRESSURE: 10.5" W.C.
CSA STANDARD NO. 5.90 for gas fired infrared patio heaters. FOR OUTDOOR USE ONLY. IF
STORED INDOORS YOU MUST REMOVE AND STORE THE GAS CYLINDER OUTDOORS.
*Minimum clearance from combustible materials: Sides: 12", Top: 12", Below Reflector: 30"
Made in Taiwan
Exported By: Grand Hall Enterprise Co., Ltd.
9th Fl., No.289, Rueiguang Rd., Neihu, Taipei, Taiwan (114)
P47B5A- Date: 10/14/2004
/