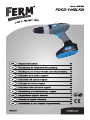
Ferm CDM1093 Owner's manual
- Category
- Cordless combi drills
- Type
- Owner's manual
This manual is also suitable for
Page is loading ...
Page is loading ...
Page is loading ...
Page is loading ...

GB
5
Ferm
CORDLESS DRILL
Thank you for buying this Ferm product.
By doing so you now have an excellent product,
delivered by one of Europe’s leading suppliers.
All products delivered to you by Ferm are
manufactured according to the highest standards
of performance and safety. As part of our
philosophy we also provide an excellent customer
service, backed by our comprehensive Warranty.
We hope you will enjoy using this product for
many years to come.
The numbers in the text refer to the diagrams
on pages 2 - 4.
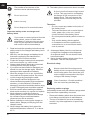
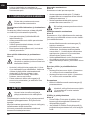
Read the operating instructions carefully
before using this device. Familiarise
yourself with its functions and basic
operation. Service the device as per the
instructions to ensure that it always
functions properly. The operating
instructions and the accompanying
documentation must be kept in the
vicinity of the device.
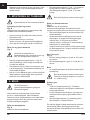
Contents
1. Machine information
2. Safety instructions
3. Mounting accessories
4. Operation
5. Service & maintenance
1. MACHINE INFORMATION
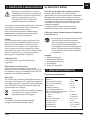
Technical specifications
Voltage 14.4 V
Charger voltage 230 V~
Charger frequency 50 Hz
Battery output 1.5 Ah
Charging time 3-5 hours
Chuck capacity 0.8-10 mm
Drill speeds 2
Max. torque (low speed) 12 Nm
No-load speed
Position I 0-400/min
Position II 0-1150/min
Weight (incl. battery) 2.0 kg
Lpa (acoustic pressure) 80,0+3 dB(A)
Lwa (acoustic power) 91,0+3 dB(A)
Vibration <2.5 m/s
2
Vibration level
The vibration emission level stated in this
instruction manual has been measured in
accordance with a standardised test given in
EN 60745; it may be used to compare one tool
with another and as a preliminary assessment of
exposure to vibration when using the tool for the
applications mentioned
- using the tool for different applications, or with
different or poorly maintainted accessories,
may significantly increase the exposure level
- the times when the tool is switched off or when
it is running but not actually doing the job, may
signifi cantly reduce the exposure level
Protect yourself against the effects of
vibration by maintaining the tool and its
accessories, keeping your hands warm, and
organizing your work patterns
Contents of packing
1 Cordless drill
1 Battery
1 Charger
2 Double-sides bits
1 Operating instructions
1 Safety instructions
1 Warranty card
Check the appliance, any loose parts and
accessories for damage caused during transport.
Product information
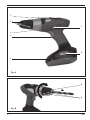
Fig. A
Direction switch1.
Battery release button2.
Battery3.
On/Off switch4.
Torque setting ring5.
Chuck6.
Speed selection switch7.
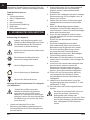
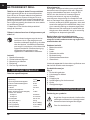
2. SAFETY INSTRUCTIONS
Explanation of the symbols
Denotes risk of personal injury, loss of
life or damage to the tool in case of non-
observance of the instructions in this
manual.
Indicates electrical shock hazard.

GB
6
Ferm
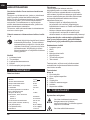
The number of revolutions of the
machine can be electronically set.
Do not use in rain.
Indoor use only.
Do not dispose of in household waste.
Important safety notes on charger and
battery block
If you come in contact with acid from the
battery block, rinse it off with water
immediately. If acid gets into your eyes,
rinse out your eyes at once with water
and contact a doctor immediately!
Read and note the operating instructions and 1.
safety notes for the charger and battery block
before use!
NB! Only use the charger and battery block 2.
that were supplied by the manufacturer -
otherwise you will risk an accident.
Protect the charger, battery block and power 3.
tool from moisture, e.g. rain or snow.
Always check that all cables are connected 4.
correctly before using the charger.
If you discover that a cable is damaged, you 5.
should not use the charger again. Have the
damaged cable replaced immediately.
When the charger is not in use, it should be 6.
removed from the power socket. Do not pull
out the charger by grasping the cable.
If the charger has been dropped or has 7.
otherwise been exposed to high mechanical
stresses, you should have it checked for
damage by an authorised dealer before using
it again. Damaged parts should be repaired.
Exercise caution when handling the battery 8.
block and do not drop it or expose it to impacts.
Never attempt to repair the charger or 9.
battery block yourself. Repairs must always
be carried out by an authorised dealer -
otherwise you risk an accident.
Before cleaning or servicing the charger or 10.
battery block, always pull the plug from the
charger socket.
Never charge the battery block when the 11.
ambient temperature is below 5 °C or above
40 °C.
The battery block must not be short-circuited.12.
A short-circuit will cause a high current
to flow. This may result in overheating,
the danger of fire or explosion of the
battery block. This may damage the
battery block or the user may risk an
accident.
Therefore:
Do not connect any cables to the poles of •
the battery block.
Take care that there are no metal objects •
(nails, paper clips, coins, etc.) on the
contact surface of the battery block.
Do not expose the battery block to water or •
rain.
Only use the battery block supplied •
in combination with this cordless drill/
screwdriver so as to avoid faults and/or
risks to persons.
13. A damaged battery block or one that can
no longer be charged must be disposed
of as special waste. Do not discard it with
household waste.
14. Never throw the battery block onto a fire or
into water. This will risk explosion!
Electrical safety
Always check that the voltage on the
battery block corresponds to the voltage
on the rating plate. Also check that your
mains voltage corresponds to the input
voltage of the battery charger.
Class II machine – Double insulation –
You don’t need any earthed plug.
Replacing cables or plugs
Immediately throw away old cables or plugs when
they have been replaced by new ones.
Remove the battery block when the power tool •
is not being used and prior to maintenance.
The tool is suitable for use as a screwdriver •
and drill. Any other application is specifically
excluded.

GB
7
Ferm
3. MOUNTING ACCESSORIES
Prior to mounting an accessory always
remove the battery.
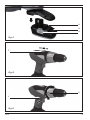
Fitting and removing drill cutters
Fig. B
In addition to screwdriver bits with a hexagonal
shaft, this tool can also accommodate drill bits
with a hexagonal shaft.
Loosen the drill chuck (6) by rotating the hand-•
grip (8).
Insert the shaft of the drill cutter into the •
chuck.
Tighten the drill chuck so that the drill cutter is •
firmly clamped.
Rotate the drill chuck in the opposite direction •
when you wish to change the cutter.
Connecting and removing the battery
Fig. C
Ensure that the exterior of the battery
block or tool is clean and dry before
connecting the charger.
Ensure that the direction reversing switch •
(1, Fig. A) is in the central position in order to
prevent the appliance from being switched on
unexpectedly.
Insert the battery (3) into the base of the •
appliance, as shown on the illustration. Push
the battery until it latches in.
Press the locking buttons (2) on both sides •
before removing the battery, and disengage
the battery from the base of the appliance.
OPERATION
4. OPERATION
Always follow the safety notes and the
relevant safety code.
Hold the appliance firmly and press the drill
steadily onto the workpiece. Do not overload
the appliance. Only use drills with no visible
wear. Worn drills will have a bad effect on the
functioning of the appliance.
Adjusting the speed
Fig. D
The appliance has two drill speeds.
For slow drilling or for driving or removing •
screws, set the speed selection switch (7) to ‘1’.
For fast drilling set the speed selection switch •
(7) to ‘2’.
Never switch over when the motor is
running!
Adjusting the torque
Fig. E
The appliance has 16 different torque settings
with which to set the power for driving and
removing screws.
Set the torque adjustment ring (5) to the •
desired position. The available torque settings
are indicated on the adjustment ring by the
numbers 1 to 8 and by dots between the
figures to define intermediate settings (16 in
total).
You should preferably choose a setting as •
low as possible when using the screwdriver.
Select a higher setting if the motor slips.
Driving and removing screws
Fig. A
Set the direction reversing switch (1) to •
position ‘’ in order to drive screws.
Set the direction reversing switch (1) to •
position ‘±’ in order to remove screws.
Drilling
Rotate the torque adjustment ring (5) to the •
drilling position.
Ensure that the direction reversing
switch (1) is always set to ‘’ during
drilling.
Switching the device on and off
Fig. A
Depress the on/off switch (4). It regulates the •
speed of the appliance by transmitting power
to the switch.
Release the on/off switch (4) to halt the drill •
chuck immediately, it will no longer run on.
Move the direction reversing switch (1) to the •
centre in order to lock the appliance in its
disabled state.

GB
8
Ferm
Only lay down the appliance when it has stopped
running completely. Do not place it on a dusty
surface as particles of dust could get into the
mechanism.
Charging the battery
The included battery is delivered in partly •
charged condition.
Only use the battery charger in a temperature •
range between + 5 °C to + 40 ºC.
Only use the battery charger in dry, ventilated •
rooms.
Charging
Fig. F
One advantage of using Lithium-Ion batteries is
that, until the battery is almost empty, hardly any
power fading is noticeable. The machine can be
used until you start noticing that the power of the
drill is elapsed. The battery is discharged now
and needs to be charged.
Remove the battery from the tool.•
Put the adapter plug of the net adapter in the •
connector on top of the battery.
Put the net adapter in the socket.The red •
charging LED on the net adapter will illuminate
indicating the battery is being charged.
When the battery is charged the red LED will •
change into green.
The charging process of a fully discharged •
battery will take approximately 5 hours the first
time and afterwards approximately 3-5 hours.
After the charging time the red light will
switch to green! Remove the battery
within 5 hours from the charger.
In comparison to NiCd and NiMH cells,
Lithium-Ion cells have no memory effect due
to intermedial charging. While NiCd and NiMH
batteries need to be discharged before charging,
a Lithium-Ion block does not need to completely
discharged. This battery block can be charged at
any time despite its current power level without
losing much of its original power and endurance.
The charger is equiped with a special plug. This
Lithium-Ion battery pack is only to be charged
with this dedicated charger. The integrated
electronics in this dedicated charger is custom
made for this Lithium-Ion battery pack. Using
other chargers/adapters will cause irreversible
damage to the battery.
Lithium-Ion cells can be stored for a
long period without losing much of their
charge. When the machine is not being
used over a longer period of time, it is
best to store the battery in charged
condition.
. SERVICE & NTNCE
Make sure that the machine is not live
when carrying out maintenance work on
the motor.
These machines have been designed to operate
over a long period of time with a minimum of
maintenance. Continuous satisfactory operation
depends upon proper machine care and regular
cleaning.
Cleaning
Keep the ventilation slots of the machine clean
to prevent overheating of the engine. Regularly
clean the machine housing with a soft cloth,
preferably after each use. Keep the ventilation
slots free from dust and dirt. If the dirt does not
come off use a soft cloth moistened with soapy
water. Never use solvents such as petrol, alcohol,
ammonia water, etc. These solvents may damage
the plastic parts.
Lubrication
The machine requires no additional lubrication.
Faults
Should a fault occur, e.g. after wear of a part,
please contact the service address on the
warranty card. In the back of this manual you find
an exploded view showing the parts that can be
ordered.
Environment
To prevent damage during transport, the
appliance is delivered in a solid packaging which
consists largely of reusable material. Therefore
please make use of options for recycling the
packaging.
Faulty and/or discarded electrical or
electronic apparatus have to be
collected at the appropriate recycling
locations.
Warranty
The warranty conditions can be found on the
separately enclosed warranty card.
Page is loading ...
Page is loading ...
Page is loading ...
Page is loading ...
Page is loading ...
Page is loading ...
Page is loading ...
Page is loading ...
Page is loading ...
Page is loading ...
Page is loading ...
Page is loading ...
Page is loading ...
Page is loading ...
Page is loading ...
Page is loading ...
Page is loading ...
Page is loading ...
Page is loading ...
Page is loading ...
Page is loading ...
Page is loading ...
Page is loading ...
Page is loading ...
Page is loading ...
Page is loading ...
Page is loading ...
Page is loading ...
Page is loading ...
Page is loading ...
Page is loading ...
Page is loading ...
Page is loading ...
Page is loading ...
Page is loading ...
Page is loading ...
Page is loading ...
Page is loading ...
Page is loading ...
Page is loading ...
Page is loading ...
Page is loading ...
Page is loading ...
Page is loading ...
Page is loading ...
Page is loading ...
Page is loading ...
Page is loading ...
-
 1
1
-
 2
2
-
 3
3
-
 4
4
-
 5
5
-
 6
6
-
 7
7
-
 8
8
-
 9
9
-
 10
10
-
 11
11
-
 12
12
-
 13
13
-
 14
14
-
 15
15
-
 16
16
-
 17
17
-
 18
18
-
 19
19
-
 20
20
-
 21
21
-
 22
22
-
 23
23
-
 24
24
-
 25
25
-
 26
26
-
 27
27
-
 28
28
-
 29
29
-
 30
30
-
 31
31
-
 32
32
-
 33
33
-
 34
34
-
 35
35
-
 36
36
-
 37
37
-
 38
38
-
 39
39
-
 40
40
-
 41
41
-
 42
42
-
 43
43
-
 44
44
-
 45
45
-
 46
46
-
 47
47
-
 48
48
-
 49
49
-
 50
50
-
 51
51
-
 52
52
-
 53
53
-
 54
54
-
 55
55
-
 56
56


Ferm CDM1093 Owner's manual
- Category
- Cordless combi drills
- Type
- Owner's manual
- This manual is also suitable for
Ask a question and I''ll find the answer in the document
Finding information in a document is now easier with AI
in other languages
- italiano: Ferm CDM1093 Manuale del proprietario
- français: Ferm CDM1093 Le manuel du propriétaire
- español: Ferm CDM1093 El manual del propietario
- Deutsch: Ferm CDM1093 Bedienungsanleitung
- Nederlands: Ferm CDM1093 de handleiding
- português: Ferm CDM1093 Manual do proprietário
- dansk: Ferm CDM1093 Brugervejledning
- svenska: Ferm CDM1093 Bruksanvisning
- suomi: Ferm CDM1093 Omistajan opas
Related papers
Other documents
-
Einhell Blue BT-CD 14,4 2B Operating instructions
-
Makita BDF450 User manual
-
Dolmar AK-3622 Owner's manual
-
Makita UK360D Owner's manual
-
-
-
Makita BHP448 User manual
-
Makita BDF458 Owner's manual
-
-