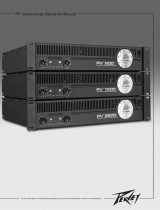
Peavey 110 User manual

Category
Musical Instrument Amplifier
Type
User manual

This manual is also suitable for

www.peavey.com
Envoy
®
110 & Bandit
®
112
TransTube® Series Amplifiers
Operating
Manual
3
IMPORTANT SAFETY INSTRUCTIONS
WARNING: When using electrical products, basic cautions should always be followed, including the following:
1. Read these instructions.
2. Keep these instructions.
3. Heed all warnings.
4. Follow all instructions.
5. Do not use this apparatus near water.
6. Clean only with a dry cloth.
7. Do not block any of the ventilation openings. Install in accordance with manufacturer’s instructions.
8. Do not install near any heat sources such as radiators, heat registers, stoves or other apparatus (including amplifiers)
that produce heat.
9. Do not defeat the safety purpose of the polarized or grounding-type plug. A polarized plug has two blades with one
wider than the other. A grounding type plug has two blades and a third grounding plug. The wide blade or third prong is
provided for your safety. If the provided plug does not fit into your outlet, consult an electrician for replacement of the
obsolete outlet.
10. Protect the power cord from being walked on or pinched, particularly at plugs, convenience receptacles, and the point
they exit from the apparatus.
11. Only use attachments/accessories provided by the manufacturer.
12. Use only with a cart, stand, tripod, bracket, or table specified by the manufacturer, or sold with the apparatus. When a
cart is used, use caution when moving the cart/apparatus combination to avoid injury from tip-over.
13. Unplug this apparatus during lightning storms or when unused for long periods of time.
14. Refer all servicing to qualified service personnel. Servicing is required when the apparatus has been damaged in
any way, such as when power-supply cord or plug is damaged, liquid has been spilled or objects have fallen into the
apparatus, the apparatus has been exposed to rain or moisture, does not operate normally, or has been dropped.
15. Never break off the ground pin. Write for our free booklet “Shock Hazard and Grounding.” Connect only to a power
supply of the type marked on the unit adjacent to the power supply cord.
16. If this product is to be mounted in an equipment rack, rear support should be provided.
17. Note for UK only: If the colors of the wires in the mains lead of this unit do not correspond with the terminals in your
plug‚ proceed as follows:
a) The wire that is colored green and yellow must be connected to the terminal that is marked by the letter E‚ the earth
symbol‚ colored green or colored green and yellow.
b) The wire that is colored blue must be connected to the terminal that is marked with the letter N or the color black.
c) The wire that is colored brown must be connected to the terminal that is marked with the letter L or the color red.
18. This electrical apparatus should not be exposed to dripping or splashing and care should be taken not to place objects
containing liquids, such as vases, upon the apparatus.
19. Exposure to extremely high noise levels may cause a permanent hearing loss. Individuals vary considerably in suscep-
tibility to noise-induced hearing loss, but nearly everyone will lose some hearing if exposed to sufficiently intense noise
for a sufficient time. The U.S. Government’s Occupational Safety and Health Administration (OSHA) has specified the
following permissible noise level exposures:
Duration Per Day In Hours Sound Level dBA, Slow Response
8 90
6 92
4 95
3 97
2 100
1 1⁄2 102
1 105
1⁄2 110
1⁄4 or less 115
According to OSHA, any exposure in excess of the above permissible limits could result in some hearing loss. Earplugs or protectors to
the ear canals or over the ears must be worn when operating this amplification system in order to prevent a permanent hearing loss, if
exposure is in excess of the limits as set forth above. To ensure against potentially dangerous exposure to high sound pressure levels, it is
recommended that all persons exposed to equipment capable of producing high sound pressure levels such as this amplification system be
protected by hearing protectors while this unit is in operation.
SAVE THESE INSTRUCTIONS!
7
Envo110 and Bandit® 112
TransTube® Series Instrument Amplifiers
So, you are the owner of a new Peavey TransTube Series instrument amplier. Congratulations! Whether you are a beginner or
seasoned pro, you could not have found a more practical, feature-packed amplier.
Peavey’s patented TransTube circuitry has moved forward into the third generation of products, leading the industry in tube
emulation. There is no other solid-state amp that more closely replicates the characteristics of a tube amp.
Before you begin playing through your amplifier, it is very important to ensure that the product has the proper AC line
voltage supplied. You can find the proper voltage for your amp printed next to the IEC line (power) cord on the rear panel
of the unit. Each product feature is numbered. Refer to the front panel diagram in this manual to locate the particular
features next to it's number.
Please read this guide carefully to ensure your personal safety as well as the safety of your TransTube amplifier.
COMMON FEATURES:
• High and Low Gain Inputs accommodate a variety of instruments
• Two distinct TransTube channels each featuring:
Separate Volume/Gain controls
Low, Mid and High EQ
EQ/Gain voicing switches
• Channel select switch on front panel
• Reverb with reverb level control
ENGLISH
VENTILATION: For proper ventilation, allow 24" clearance from nearest combustible surface.
ENVOY 110 FEATURES:
• 10” Blue Marvel® speaker
• 40 watt power amplifier
• Preamp output
• Headphone jack
• Footswitchable boost and channel selection
• Speaker Simulated Direct Output
BANDIT 112 FEATURES
• 12” Blue Marvel® speaker
• 100 watt power amplifier (80 watts into internal speaker)
• Footswitchable boost and channel selection
• Effects Loop
• Speaker Simulated Direct Output with adjustable level
• External speaker jack
8
HIGH GAIN INPUT
Used for most electric guitars. The High Gain Input is 6 dB louder than the Low Gain Input (2).
LOW GAIN INPUT
Provided for instruments with extremely high outputs, which can result in overdriving (distorting) the
High Gain Input (1). If both inputs are used simultaneously, their levels are both Low Gain.
VOLUME
This control sets the volume level for the Clean channel.
VINTAGE/CLASSIC/WARM SWITCH
The CLASSIC position maintains a standard voicing. The VINTAGE position changes the overall function
of the EQ and adds a hint of brightness to emulate classic amp designs. The WARM setting also recon-
gures the EQ and is provided for darker sounds. Experiment with this switch, along with Clean EQ (5)
adjustments, to capture your desired tone. Refer to page 12 for suggested settings.
CLEAN EQ
These passive tone controls regulate the low, mid, and high frequencies of the Clean channel.
CHANNEL SELECT SWITCH
The Channel Select Switch determines which channel, LEAD or CLEAN, is active. This switch must be in
the “LEAD” position in order for the footswitch to function.
PRE GAIN
The Pre Gain controls the input volume level of the Lead channel.
Front Panel
1
2
3
4
5
6
7
1
2
3
6
74 5
1 2
3
6
74 5
'SPOU1BOFM
$-"44*$.0%&3/)*()("*/48*5$)
5IJTTXJUDIDIBOHFTCPUIUIFHBJOBOEWPJDJOHPGUIF-FBEDIBOOFM5IF.0%&3/TFUUJOHJODSFBTFTUIF
PWFSBMMHBJOBOEOPUDIFTDVUTUIFNJEGSFRVFODJFTFTUBCMJTIJOHBNPEFSOUPOFPGUFOBTTPDJBUFEXJUI
)BSE3PDLBOE.FUBMTUZMFT5IF$-"44*$TFUUJOHFNVMBUFTPWFSESJWFOUVCFTPVOETPGUIFQBTU5IF
)*()("*/TFUUJOHJODSFBTFTUIFPWFSBMMHBJOBOEDIBOHFTUIF&2DSFBUJOHBUJHIUFSSFTQPOTFBUMPXFS
1SF(BJOTFUUJOHTPSBO²PWFSUIFUPQ³TPVOEBUIJHIFS1SF(BJOTFUUJOHT&YQFSJNFOUXJUIUIJTTXJUDITFU
UJOHXIJMFBEKVTUJOHUIF-FBE&2UPIFMQZPVPCUBJOZPVSEFTJSFEUPOF3FGFSUPQBHFGPSTVHHFTUFE
TFUUJOHT
-&"%&2
5IFTFQBTTJWFUPOFDPOUSPMTSFHVMBUFUIFMPXNJEBOEIJHIGSFRVFODJFTPGUIF-FBEDIBOOFM
1045("*/
6TFUIJTDPOUSPMUPTFUUIFPWFSBMMMFWFMPGUIF-FBEDIBOOFMPODFZPVSUPOFIBTCFFOBDIJFWFE
3&7&3#
5IF3FWFSCDPOUSPMBEKVTUTUIFPWFSBMMSFWFSCMFWFM
70-6.&#0045
5IJTLOPCGVODUJPOTBTBMJNJUFENBTUFSWPMVNFDPOUSPMXJUIPVUUIFGPPUTXJUDI'PSTPMPTBOEMPVEQBT
TBHFTVTFUIFGPPUTXJUDIUPCPPTUUIFWPMVNFCZE#
108&3-&%
5IJT-&%JMMVNJOBUFTJOEJDBUJOHUIFBNQJTPO
108&348*5$)-PDBUFEPOUIFSFBSQBOFMPGUIF&OWPZ
5PBQQMZQPXFSUPUIFVOJUQSFTTUIFTXJUDIUPUIFPOQPTJUJPO5IF-&%XJMMJMMVNJOBUFJOEJDBUJOH
QPXFSJTCFJOHTVQQMJFE
10
11
12
13
14
8 9
9
8
10
10
11 12 13
11 12 13 14
8
9
CAUTION: The on/off switch in this unit does not break both sides of the primary mains.
Hazardous energy can be present inside the chassis when the on/off switch is in the OFF postion.
10
AC POWER INLET (Power Cord Located Under Chassis)
This is the receptacle for an IEC line cord, which provides AC power tot the unit. Connect the line cord to
this connector to provide power to the unit. Damage to the equipment may result if improper line volt-
age is used. (See voltage marking on unit.)
Never break off the ground pin on any equipment. It is provided for your safety. If the outlet used
does not have a ground pin, a suitable grounding adapter should be used and the third wire should be
grounded properly. To prevent the risk of shock or re hazard, always make sure that the amplier and
all associated equipment is properly grounded.
NOTE: FOR UK ONLY
As the colors of the wires in the mains lead of this apparatus may not correspond with the colored mark-
ings identifying the terminals in your plug, proceed as follows: (1) The wire which is colored green and
yellow must be connected to the terminal which is marked by the letter E, or by the earth symbol, or
colored green or green and yellow. (2) The wire which is colored blue must be connected to the terminal
which is marked with the letter N, or the color black. (3) The wire which is colored brown must be con-
nected to the terminal which is marked with the letter L, or the color red.
To avoid the risk of electrical shock, do not place ngers or any other objects into empty tube sockets
while power is being supplied to unit.
HEADPHONE JACK (Envoy 110 ONLY)
This stereo 1/4” jack accepts a standard pair of headphones. Using this jack defeats the
output to the speaker making it ideal for quiet practice applications.
SPEAKER SIMULATED DIRECT OUTPUT
The signal produced in this convenient 1/4" direct output jack is specically voiced to accurately simu-
late speaker cabinet response. The output can be used for direct recordings or sent to a mixer or PA
system. Users can adjust output levels with the adjacent control knob (Bandit 112 Only).
Rear Panel
15
16
17
15
16 1714
15
17
11
Rear Panel
POWER LEVEL (Bandit 112 ONLY)
This switch provides three power level options: 25%, 50% and 100%. This circuit is actually a patented
tube power amplier simulator that "squashes" the signal. Use as desired for different playing environ-
ments, for example an apartment at 25% or live big at 100%.
EXTERNAL SPEAKER JACK (Bandit 112 ONLY)
This 1/4” jack is provided for the connection of an external speaker cabinet. The minimum external
speaker impedance is 8 ohms.
DAMPING (Bandit 112 ONLY)
This three position switch offers damping level adjustment; loose, medium and tight.
EFFECTS LOOP (Bandit 112 ONLY)
This pair of mono 1/4” jacks provides an effects SEND and RETURN path for the preamp signal. Connect
the SEND jack to the input of an external, low-level, signal processing effects unit. Return the signal
from your external effects unit to the RETURN jack. This setup is known as an Effects Loop since the
signal exits your amp (send) and loops (return) back to it.
REMOTE SWITCH
The multi-functional remote footswitch is used to select between the Clean and Lead channels as well as
to boost the volume.
NOTE: On both units, the Channel Select Switch (6) must be in the LEAD position for the Remote Switch
to work.
20
21
22
22
18
19 20 22
19
18
21
Clean/Metal
Jazz/Moderate Distortion
Clean Blues/Dirty Blues
Clean/Metal
Jazz/Moderate Distortion
Clean Blues/Dirty Blues
Clean/Metal
Jazz/Moderate Distortion
Clean Blues/Dirty Blues
Jazz Moderate Distortion
Clean Channel:
Volume: As Desired
Classic
Low: 7-9
Mid: 6-8
High: 3-4
Lead Channel:
Pre Gain: 3-5
High Gain/ModerateVintage: High
Low:7-9
Mid: 4-6
High: 5-7
Post Gain: As Desired
Master Section:
Reverb: As Desired
Boost: As Desired for solo level
12
Suggested Settings
NOTE: The Bandit 112 is used for demonstration purposes. The settings illustrated above are also
applicable to the Envoy 110.
Clean Metal
Clean Channel:
Volume: As Desired
Classic
Low: 7-9
Mid: 2-4
High: 5-7
Lead Channel:
Pre Gain: 8-10
High Gain/ModerateVintage: Moderate
Low: 8-10
Mid: 0-2
High: 6-8
Post Gain: As Desired
Master Section:
Reverb: As Desired
Boost: As Desired for solo level
Clean Channel:
Volume: 8-10
Classic
Low: 5-7
Mid: 7-9
High: 3-5
Lead Channel:
Pre Gain: 3-5
High Gain/ModerateVintage: Vintage
Low: 5-7
Mid: 7-9
High: 2-4
Post Gain: As Desired
Master Section:
Reverb: As Desired
Boost: As Desired for solo level
Clean Blues Dirty Blues
13
Series Specications
Power Amplifier Section:
Power @ Clipping (Typically):
(1 kHz, 120 VAC line)
40 W RMS into 6 Ω
Frequency Response:
+0, -2 dB 100 Hz to 20 kHz @ 35 W
RMS into 6 Ω
Hum and Noise:
Greater than 86 dB below rated
power
Power Consumption:
(Domestic)
75 W @ 60 Hz, 120 VAC
(Export)
75 W @ 50/60 Hz, 220-240 VAC
Preamp Section:
The following spec are measured @
1 kHz with the controls preset as
follows:
Channel Select, Clean
Clean Mode Switch, Modern
Low and High @ 10
Mid @ 0
Lead Pre and Post Gain @10
Lead Mode Switch, Vintage
Reverb @ 0
Nominal Levels are with Clean
Volume @ 5
Minimum Levels are with
Clean Volume @ 10
Headphone Output:
Load Impedance: 16 Ω or greater
0.3 W RMS
System Hum & Noise @
Nominal Input Level:
(20 Hz to 20 kHz unweighted)
Greater than 78 dB below rated power
Speaker Simulated Direct
Output Level:
0.4 V RMS Nominal
Equalization:
Special Low, Mid, and High passive
type EQ.
Modern/Vintage switch (Clean):
Two distinct EQ voicings.
Vintage/Modern/High Gain switch (Lead):
Three different EQ and Gain voicings
External Footswitch Functions:
Clean or Lead channel selection
and volume Boost
Dimensions (H x W x D):
17" x 19.375" x 9.250"
43.18 cm x 49.21 cm x 23.46 cm
Weight:
24.5 lbs (11.13 kg)
Envo110
Features and specifications subject to change without notice.
14
Series Specications
Power Amplifier Section:
Rated Power and Load:
Power specs measured with
Power Level @ 100%
80 W RMS into 8 Ω
100 W RMS into 4 Ω
Power @ Clipping (Typically):
(1 kHz, 120 VAC line)
80 W RMS into 8 Ω
100 W RMS into 4 Ω
Frequency Response:
+0, -3 dB 100 Hz to 20 kHz @ 65 W
RMS into 8 Ω
Hum and Noise:
Greater than 90 dB below rated
power
Power Consumption:
(Domestic)
300 W @ 60 Hz, 120 VAC
(Export)
300 W @ 50/60 Hz, 220-230 VAC
Effects Send:
Load Impedance: 1 k Ω or greater
Nominal Output Level:
-5.4 dBV, 535 mV RMS
Effects Return:
Load Impedance: High Z, 22 k Ω
Designed Input Level:
-5.4 dBV, 535 mV RMS
Boost Level @ 10:
+ 10 dB Boost
Speaker Simulated Direct
Output Level @ 10:
700 mV, -3 dBv
System Hum & Noise @
Nominal Input Level:
(20 Hz to 20 kHz unweighted)
Greater than 80 dB below rated power
Equalization:
Special Low, Mid, and High passive
type EQ.
Vintage/Classic/Warm switch (Clean):
Three distinct EQ voicings.
Classic/Modern/High Gain switch (Lead):
Three different EQ and Gain voicings
External Footswitch Functions:
Clean or Lead channel selection
and volume Boost
Dimensions (H x W x D):
20.875" x 23.25" x 11.25"
53.02 cm x 59.06 cm x 28.58 cm
Weight:
40.9 lbs (18.55 kg)
Bandit® 112
Features and specifications subject to change without notice.
15
PEAVEY ELECTRONICS CORPORATION LIMITED WARRANTY
Effective Date: July 1, 1998
What This Warranty Covers
Your Peavey Warranty covers defects in material and workmanship in Peavey products purchased and serviced in the U.S.A. and Canada.
What This Warranty Does Not Cover
The Warranty does not cover: (1) damage caused by accident, misuse, abuse, improper installation or operation, rental, product modification or neglect; (2) dam-
age occurring during shipment; (3) damage caused by repair or service performed by persons not authorized by Peavey; (4) products on which the serial number
has been altered, defaced or removed; (5) products not purchased from an Authorized Peavey Dealer.
Who This Warranty Protects
This Warranty protects only the original retail purchaser of the product.
How Long This Warranty Lasts
The Warranty begins on the date of purchase by the original retail purchaser. The duration of the Warranty is as follows:
Product Category Duration
Guitars/Basses, Amplifiers, Pre-Amplifiers, Mixers, Electronic
Crossovers and Equalizers 2 years (+ 3 years)*
Drums 2 years (+ 1 year)*
Enclosures 3 years (+ 2 years)*
Digital Effect Devices and Keyboard and MIDI Controllers 1 year (+ 1 year)*
Microphones 2 years
Speaker Components (incl. speakers, baskets, drivers,
diaphragm replacement kits and passive crossovers)
and all Accessories 1 year
Tubes and Meters 90 days
[*Denotes additional warranty period applicable if optional Warranty Registration Card is completed and returned to Peavey by original retail purchaser within 90 days of pur-
chase.]
What Peavey Will Do
We will repair or replace (at Peavey's discretion) products covered by warranty at no charge for labor or materials. If the product or component must be shipped to
Peavey for warranty service, the consumer must pay initial shipping charges. If the repairs are covered by warranty, Peavey will pay the return shipping charges.
How To Get Warranty Service
(1) Take the defective item and your sales receipt or other proof of date of purchase to your Authorized Peavey Dealer or Authorized Peavey Service Center.
OR
(2) Ship the defective item, prepaid, to Peavey Electronics Corporation, International Service Center, 412 Highway 11 & 80 East, Meridian, MS 39301 or Peavey
Canada Ltd., 95 Shields Court, Markham, Ontario, Canada L3R 9T5. Include a detailed description of the problem, together with a copy of your sales receipt or
other proof of date of purchase as evidence of warranty coverage. Also provide a complete return address.
Limitation of Implied Warranties
ANY IMPLIED WARRANTIES, INCLUDING WARRANTIES OF MERCHANTABILITY AND FITNESS FOR A PARTICULAR PURPOSE, ARE LIMITED IN DURATION TO THE
LENGTH OF THIS WARRANTY.
Some states do not allow limitations on how long an implied warranty lasts, so the above limitation may not apply to you.
Exclusions of Damages
PEAVEY'S LIABILITY FOR ANY DEFECTIVE PRODUCT IS LIMITED TO THE REPAIR OR REPLACEMENT OF THE PRODUCT, AT PEAVEY'S OPTION. IF WE ELECT TO
REPLACE THE PRODUCT, THE REPLACEMENT MAY BE A RECONDITIONED UNIT. PEAVEY SHALL NOT BE LIABLE FOR DAMAGES BASED ON INCONVENIENCE, LOSS OF
USE, LOST PROFITS, LOST SAVINGS, DAMAGE TO ANY OTHER EQUIPMENT OR OTHER ITEMS AT THE SITE OF USE, OR ANY OTHER DAMAGES WHETHER INCIDENTAL,
CONSEQUENTIAL OR OTHERWISE, EVEN IF PEAVEY HAS BEEN ADVISED OF THE POSSIBILITY OF SUCH DAMAGES.
Some states do not allow the exclusion or limitation of incidental or consequential damages, so the above limitation or exclusion may not apply to you.
This Warranty gives you specific legal rights, and you may also have other rights which vary from state to state.
If you have any questions about this warranty or service received or if you need assistance in locating an Authorized Service Center, please contact the Peavey
International Service Center at (601) 483-5365 / Peavey Canada Ltd. at (905) 475-2578.
Features and specifications subject to change without notice.
Logo referenced in Directive 2002/96/EC Annex IV
(OJ(L)37/38,13.02.03 and defined in EN 50419: 2005
The bar is the symbol for marking of new waste and
is applied only to equipment manufactured after
13 August 2005
Features and specifications subject to change without notice.
Peavey Electronics Corporation • 711 A Street • Meridian, MS 39301
(601) 483-5365 FAX (601) 486-1278 • www.peavey.com
© 2006 80303158
  • Page 1 1
  • Page 2 2
  • Page 3 3
  • Page 4 4
  • Page 5 5
  • Page 6 6
  • Page 7 7
  • Page 8 8
  • Page 9 9
  • Page 10 10
  • Page 11 11
  • Page 12 12
  • Page 13 13
  • Page 14 14
  • Page 15 15
  • Page 16 16

Peavey 110 User manual

Category
Musical Instrument Amplifier
Type
User manual
This manual is also suitable for

Ask a question and I''ll find the answer in the document

Finding information in a document is now easier with AI

in other languages