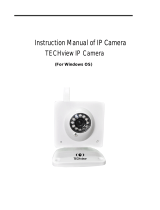
Approx appIP01WV4 User manual

Category
Security cameras
Type
User manual
appIP01WV4
Wireless IP Camera
VERSION 4
15
English
1. PRODUCT INTRODUCTION
Thank you for choosing the APPIP01WV4 wireless IP Camera
solution.
1.1 Product overview
This is an integrated wireless IP Camera solution. It combines
a high quality digital Video Camera with network connectivity and a
powerful web server to bring clear to your desktop from anywhere
on your local network or over the Internet.
The basic function of it is transmitting remote video on IP net-
work. The high quality video image can be transmitted with 30fps
speed on the LAN/WAN by using MJPEG hardware compression
technology.
It is based on TCP/IP standard, build-in WEB server which could
support Internet Explore. Therefore the management and mainte-
nance of your device become more simply by using network to
achieve the remote configuration, start-up and upgrade firmware.
You can use this IP Camera to monitor some special places such
as your home and your office. Also controlling and managing ima-
ges are simple by clicking the website through the network.
1.2 PRODUCT FEATURES
• Powerful high-speed video protocol processor
• High-sensitivity 1/4’’ CMOS sensor
• Picture total 300k pixels
• Support PT control, Pan 270°, Tilt 120°
• Optimized MJPEG video compression for transmission
• Multi-level users’ management and passwords definition
• Embedded Web Server for users to visit by IE
16
• Support wireless network (WI-FI/802.11/b/g)
Supporting Dynamic IP (DDNS) and UPNP LAN and Internet
(ADSL, Cable Modem)
• Giving alarm in cause of motion detection
• Supporting image snapshot
Support multiple protocols: HTTP/TCP/IP/UDP/SMTP/DDNS/
SNTP/DHCP/FTP
• Support WEP/WPA/WPA2 encryption
• Support 3G phone, Smart phone control and surveillance
• Support Firefox, Safari, Google chrome browser
• Support Hotmail, Gmail, Yahoo accounts.
2. PRODUCT DESCRIPTION
2.1 Front View
1Sensitive Hole: For light sensitive
2 Infrared LED: For night vision
3 LENS: CMOS sensor with fixed focus lens. (Default is 6mm, 3.6mm
optional)
4 Network Indicator LED: If there is network activity, the LED will blink
5 Microphone: Build-in microphone
6 Speaker: Build-in speaker
7 Wireless Antenna: WI-FI Antenna
English
17
English
2.2 Rear Panel
LAN: RJ-45/10-100 base T
Power: DC 5V/2A power supply
Network Light: The green LED will on when connect to the network, the
yellow LED will blink when data transferred
Audio Output: The jack is used to plug external speaker
I/O PINS: 1 Output A 2 Output B 3 Alarm input 4 Input (GND)
2.3 Botton View
RESET BUTTON: Press and hold the RESET BUTTON for 15
Seconds, then the IPCAM will be reset back to the factory default
Parameter. (Please keep the power on when do RESET)
There are some stickers at the
bottom of IPCAM, such as MAC
address sticker, QC sticker etc.
If your camera does not have
these stickers, it may be a fake one,
fake IPCAM could not use the origi-
nal firmware and obtain our good
after sale service.
18
2.4 PC System Requirements
System configuration requirements: (Example for viewing four IPCAM)
CPU: 2.06GHZ or above
Memory: 256M or above
Network Card: 10M or above
Display Card: 64M or above memory
Recommendable Operating system: Windows 2000/ XP/ Vista/ 7
3. PACKAGE CONTENTS
Open the package and check the items contained against the following list:
• 1 Wireless IP Camera
• 1 Wi-Fi Antenna
• 1 DC Power Supply
• 1 CD
• 1 Network Cable
• 1 Mounting bracket
• 1 Quick Guide
4. SPECIFICATIONS
English
Item Specifications
Video Compression MJPEG video compression
Video Resolution Adjustment 640 x 480 Pixels (300k Pixels)
Video Parameters Brightness, contrast
Video Frame 15fps(VGA), 30fps(QVGA)
Communication interface 10Base-T/100Base-TX Ethernet Port
Wi-Fi Module Supporting IEEE802.11b/g
Supported Protocol
TCP/IP, DHCP, SMTP, HTTP, DDNS, UPNP,
PPPoE, FTP, DNS, UDP, GPRS
19
English
5. INSTALATION GUIDE
5.1 Hardware installation.
1. Install the Wi-Fi antenna.
2. Plug the power adaptor into camera.
3. Plug the network cable into camera, the other side to the
router/switch.
Item Specifications
Power Supply 5VDC/2A External Power Adapter
Maximum Power 5W (Max.)
Operating Temperature 0°C ~ 55°C (14°F~131°F)
Storage Temperature -10°C ~ 60°C (14°F ~140°F)
Operating Humidity 20%-85% non-condensing
System Requirements
Microsoft Windows 98/ME/2000/XP/
Vista/7
Browser
IE6.0, IE7.0, IE8.0, Firefox, Safari, Google
Chrome etc
20
5.2 Software installation
1. IP Camera Tool: Open the CD, click “IPCamSetup.exe”—
“Next”—“Next”—“Close”.
2. ActiveX: Click “Appinstall.exe”—“Next”—“Install”—“Finish”.
After this done, the icon will be displayed on desktop.
6. CONFIGURATION GUIDE
1. Login: Double click “IP Camera Tool” icon on desktop, search
the IP address, choose the one of your camera, double click to
go to IE login interface.
Default username: admin
Password: no password
English
“IP Camera Tool”
21
2. Choose the language: English, Chinese, Spanish, Korean,
German, French, Italian, Portuguese optional.
3. Choose the work mode.
IE browser: choose ActiveX mode.
Safari, Firefox, Google chrome browser: Server push mode/
VLC mode.
Mobile phone: sign in mobile phone mode.
4. Sign in. Click Sign In, then can get video on real-time.
6.1 Question 1: ActiveX Settings for IE Browser
If use IE browser to connect the camera for the 1st time, ma-
ybe there is no image displayed, there will be an ActiveX prompt,
please click the prompt and choose Run Add-on, refresh the IE
interface, and login the camera again, then will see live video.
English
22
If there is still no live video after run ActiveX, please try to enable
the ActiveX options of IE security settings, please do the follow
steps:
1. Close the firewall of your computer.
2. Change the ActiveX settings, “IE” browser > “Tool” > “Internet Op-
tions” > “Security”> “Custom Level” > “ActiveX control and Plug-ins”, all
the ActiveX options set to be “Enable”: Especially:
Enable: Download unsigned ActiveX controls
Enable: Initialize and script ActiveX controls not marked as safe
Enable: Run ActiveX controls and plu-ins
In Addition: you can also click “start” menu->“Internet Explorer”, choose
“Internet attributes “ to enter, or via “Control Panel” ->“Internet Explorer”,
enter to Security setting.
3. If there is still no image, please close your anti-virus software, and
then try step 1 & 2 again.
English
23
6.2 Question 2: How to do Wireless Settings
1. Make sure the router is a wireless router.
2. Make sure the Wi-Fi antenna installed.
3. Make sure whether there is encryption of the WLAN of router,
if there is encryption, keep the key.
4. Login the camera, click “Network”>”Wireless Lan
Settings”>”Scan”, please scan 2 times, then you will find the
WLAN from the list, choose the one you use.
5. If there is no encryption, just click “Submit”, if there is encryp-
tion, please input the key, then click “Submit”.
6. Wait about 30 seconds, the camera will reboot, then unplug
the network cable.
English
24
6.3 Question 3: How to use DDNS
1. Login the camera: Click “Network”>”DDNS Service Settings”.
2. Choose the DDNS, there are 2 options:
- Manufacturer’s DDNS: This domain is provided by manufacturer.
- Third Party DDNS: This domain is provided by the 3rd party,
such as Dyndns, Oray, 3322 etc.
If you use third party DDNS, please choose the server you use, such as
“3322.org” or “dyndns.org” as below:
English
25
English
You have to register an account firstly, keep the user, password,
host, then fill in it.
Note: Only one DDNS can be chosen, for example, if you use
manufacturer’s DDNS, the 3rd one won’t work, if use the 3rd
DDNS, the manufacturer’s one won’t work.
3. Change the camera’s port: The default port of camera is “80”,
please change “80” to any other one you like, such as “81”,
“100”, “8091” etc. Click “OK”, the camera will reboot, wait about
30 seconds.
Make sure the “Subnet Mask”, “Gateway”, “DNS Server” is the
same as your router.
4. Set Port Forwarding in the router: This is the most important
step. Set port forwarding in router refer to the IP of your camera
correctly, then the DDNS will work. Because there are so many
kinds of routers from all over the world, so it’s difficult to show a
fix steps, but there are some samples of different routers’ port
forwarding settings as below, just for reference:
26
APPROX ROUTER:
1. Login the router.
2. Choose “Forwarding”, select “Virtual Servers”
3. Click the Add New button, pop-up below:
GENERIC ROUTER:
1. Login the router.
2. Choose “Firewall”, select “Virtual Servers”
3. Input the port (except 80) and IP address, then click save.
English
Fill the service port (except 80), IP
address of the camera, then click
Save
The port and IP address should be
the same as Camera.
Note: The port
and IP address
should be
the same as
Camera.
27
English
GENERIC ROUTER:
1. Login the router.
2. Choose “Advanced”, select “Virtual Servers”
3. Input the port, IP address, Protocol, then click save.
Note: The “public port” & “private port” should be the same as camera’s
port, choose the protocol to be “both”.
After all these 4 steps done, then you can use the DDNS freely, check
the DDNS status from the camera as below, and get the link of DDNS
for internet view.
Step: “Login”>”System”>”Device Info”:
28
6.4 Question 4: How to know the WAN IP of the device.
1. From internet: If you want to know the WAN IP of your device,
please go to http://www.whatismyip.com. You will find the cu-
rrent WAN IP of your device.
2. From router: You can also get the WAN IP address from your
router.
7. OBTAINING TECHNICAL SUPPORT
While we hope your experience with the IP CAMERA network
camera is enjoyable and easy to use, you may experience some
difficulties or have some questions that this User Guide has not
answered. Please contact your reseller and ask them for help
first. If they are unable to resolve your issue, please contact our
company.
This user manual is based on the latest version of our came-
ra. System Firmware: 17.22.2.30 Web UI: 20.8.1.88
If your cameras does support some special functions showed
in the manual, please contact our technical support team to ob-
tain the latest Firmware and WEB UI file for doing upgrade.
NOTE: Some older versions cannot be upgraded to the latest version. It
is not only due to the software difference, but also due to the hardware
difference. If you cannot make sure of it, please contact our technical
support team directly.
Thank you for your support and attention, for further operation details,
please consult the full version of the user manual of our IP Cameras.
English
127
www.printyourideas.com
Importado por
/
Imported by:
APPROX IBERIA S. L.
CIF: B-91202499
Soporte técnico / Technical support:
MADE IN CHINA
  • Page 1 1
  • Page 2 2
  • Page 3 3
  • Page 4 4
  • Page 5 5
  • Page 6 6
  • Page 7 7
  • Page 8 8
  • Page 9 9
  • Page 10 10
  • Page 11 11
  • Page 12 12
  • Page 13 13
  • Page 14 14
  • Page 15 15
  • Page 16 16
  • Page 17 17
  • Page 18 18
  • Page 19 19
  • Page 20 20
  • Page 21 21
  • Page 22 22
  • Page 23 23
  • Page 24 24
  • Page 25 25
  • Page 26 26
  • Page 27 27
  • Page 28 28
  • Page 29 29
  • Page 30 30
  • Page 31 31
  • Page 32 32
  • Page 33 33
  • Page 34 34
  • Page 35 35
  • Page 36 36
  • Page 37 37
  • Page 38 38
  • Page 39 39
  • Page 40 40
  • Page 41 41
  • Page 42 42
  • Page 43 43
  • Page 44 44
  • Page 45 45
  • Page 46 46
  • Page 47 47
  • Page 48 48
  • Page 49 49
  • Page 50 50
  • Page 51 51
  • Page 52 52
  • Page 53 53
  • Page 54 54
  • Page 55 55
  • Page 56 56
  • Page 57 57
  • Page 58 58
  • Page 59 59
  • Page 60 60
  • Page 61 61
  • Page 62 62
  • Page 63 63
  • Page 64 64
  • Page 65 65
  • Page 66 66
  • Page 67 67
  • Page 68 68
  • Page 69 69
  • Page 70 70
  • Page 71 71
  • Page 72 72
  • Page 73 73
  • Page 74 74
  • Page 75 75
  • Page 76 76
  • Page 77 77
  • Page 78 78
  • Page 79 79
  • Page 80 80
  • Page 81 81
  • Page 82 82
  • Page 83 83
  • Page 84 84
  • Page 85 85
  • Page 86 86
  • Page 87 87
  • Page 88 88
  • Page 89 89
  • Page 90 90
  • Page 91 91
  • Page 92 92
  • Page 93 93
  • Page 94 94
  • Page 95 95
  • Page 96 96
  • Page 97 97
  • Page 98 98
  • Page 99 99
  • Page 100 100
  • Page 101 101
  • Page 102 102
  • Page 103 103
  • Page 104 104
  • Page 105 105
  • Page 106 106
  • Page 107 107
  • Page 108 108
  • Page 109 109
  • Page 110 110
  • Page 111 111
  • Page 112 112
  • Page 113 113
  • Page 114 114
  • Page 115 115
  • Page 116 116
  • Page 117 117
  • Page 118 118
  • Page 119 119
  • Page 120 120
  • Page 121 121
  • Page 122 122
  • Page 123 123
  • Page 124 124
  • Page 125 125
  • Page 126 126
  • Page 127 127
  • Page 128 128
  • Page 129 129

Approx appIP01WV4 User manual

Category
Security cameras
Type
User manual

Ask a question and I''ll find the answer in the document

Finding information in a document is now easier with AI