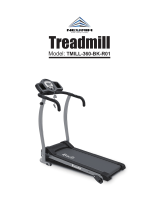
Trojan Walker 110 Owner's manual

Category
Fitness, gymnastics & weight training
Type
Owner's manual

This manual is also suitable for

Trojan Walker 110 treadmill is a great choice for home use. It features a 1.5HP motor, which is powerful enough to provide a challenging workout for users of all fitness levels, a spacious 40 x 120 cm running belt, and a sturdy frame that can support users up to 100 kg. The Walker 110 also comes with a variety of built-in programs to help you get the most out of your workouts, and a large LCD display that tracks your progress. Whether you're a beginner or a seasoned runner, the Trojan Walker 110 treadmill is a great option for getting a great workout at home.

Trojan Walker 110 treadmill is a great choice for home use. It features a 1.5HP motor, which is powerful enough to provide a challenging workout for users of all fitness levels, a spacious 40 x 120 cm running belt, and a sturdy frame that can support users up to 100 kg. The Walker 110 also comes with a variety of built-in programs to help you get the most out of your workouts, and a large LCD display that tracks your progress. Whether you're a beginner or a seasoned runner, the Trojan Walker 110 treadmill is a great option for getting a great workout at home.

TROJAN
MY SPACE MY TIME
®
CAUTION
READ ALL PRECAUTIONS AND
INSTRUCTIONS IN THIS MANUAL
BEFORE USING THIS EQUIPMENT.
KEEP THIS MANUAL FOR
FUTURE REFERENCE
WALKER 110
TREADMILL
TREADMILL CARE, INSTRUCTION
AND ASSEMBLY MANUAL
INDEX PAGE
1. SAFETY INSTRUCTIONS 3
2. PRE ASSEMBLY CHECK LIST 5
3. HARDWARE LIST 6
4. ASSEMBLY STEPS 7
5. UNFOLDING/FOLDING/TRANSPORT 8
6. MAINTENANCE 9
7. GROUNDING INSTRUCTIONS 10
8. COMPUTER FUNCTIONS 11
9. FITNESS TIPS & TECHNIQUES 14
10. CONDITIONING GUIDELINES 15
11. WARM -UP AND COOL-DOWN 16
12. FREQUENTLY ASKED QUESTIONS 17
13. PARTS LIST 18
14. EXPLODED DRAWING 20
15. TROJAN 1 YEAR LIMITED WARRANTY 21
16. TROJAN REPAIRS PROCEDURE 22
10200-3
1. SAFETY INSTRUCTIONS
It is the sole responsibility of the purchaser of TROJAN products to read the owner’s manual, warning labels and instruct all
individuals, on proper usage of the equipment. Understanding each and every warning to the fullest is important. If any of these
instructions or warnings are unclear please contact Trojan Customer Services on 0861 876 526 (0861 Trojan), within the Republic of
South Africa.
The equipment is only intended for HOME USE and is NOT INTENDED FOR COMMERCIAL, INSTITUTIONAL AND/OR
STUDIO FACILITIES USE.
Contact TROJAN with any questions regarding this classication. It is recommended that all users of TROJAN be informed of the
following information prior to use.
HEALTH WARNING
• Beforestartinganyexerciseorconditioningprogramyoushouldconsultwithyourpersonalphysiciantoseeifyourequirea
completephysicalexam.Thisisespeciallyimportantifyouareinactive,pregnantorsufferfromanyillness.
• Ifatanytimeduringexerciseyoufeelfaint,dizzyorexperiencepain,stopexercisingimmediatelyandconsultyourphysician.
• Toavoidmuscularpainandstrain,begineachworkoutbystretchingandwarmingupandendeachsessionbycoolingdownand
stretching.
ACCESS CONTROL
TROJAN recommends that all tness equipment be used in a supervised area. It is recommended that the equipment be located in
an access controlled area. Control is the responsibility of the owner. Keep children away from all equipment. Parents or others
supervising adults must provide close supervision of children if the equipment is used in the presence of children.
INSTALLATION
TROJAN recommends that all equipment:
• Besecuredtoorsetuponasolid,levelsurfacetostabilizeandeliminaterockingortippingoverduringtraining.
• Besetupinsideyourhomeawayfrommoistureanddust(theequipmentisnotdesignedforoutdooruse).
• Besetupwithsufcientventilationtoensureproperoperation.
• Besetupwithsufcientspacearoundtheequipmentsothatallexercisescanbecompletedsafely.Itisrecommendedthatthere
shouldbeatleast1mofspacearoundtheequipmentwhereaccessisrequiredtoexercise.
• Beinstalledbyourteamofinstallers.
PROPER USAGE
• Donotusetheequipmentinanywayotherthanasdesignedorintendedbythemanufacturer.Itisimperativethat
TROJAN equipment is used properly to avoid injury.
• Injuriesmayresultfromexercisingimproperlyorexcessively.
• YourTROJANequipmentshouldonlybeusedbyonepersonatatime.
• Becarefultomaintainyourbalancewhileusing,mounting,dismounting,folding,unfoldingorassemblingyourTROJAN
equipment to avoid injury.
• Donotattempttoadjustanyseats/pads/pulleysetc.whileyouareonyourTROJANequipment.
• Servicingotherthantheproceduresinthismanualshouldbeperformedbyanauthorizedservicerepresentativeonly.
10200-4
INSPECTION
• Donotuseorpermituseofanyequipmentthatisdamagedorhaswornorbrokenparts.ForallTROJANequipmentuseonly
replacement parts supplied by TROJAN.
• Alwaysmakesurethatallnutsandboltsaretightenedpriortoeachuse.
• Routinelyinspectallaccessoryclipsthatjoinattachmentstothecablesandreplaceattherstsignofwear.
• Maintainlabelsandnameplates–donotremovelabelsforanyreason.Theycontainimportantinformation.
• Equipmentmaintenance–preventativemaintenanceisthekeytosmoothoperatingequipment.Pleaseensurethatyou
follow our maintenance tips to ensure the continued correct function of your TROJAN equipment.
• Beforeanyuse,examineallaccessoriesapprovedforusewiththeTROJANequipmentfordamageorwear.
• ShouldyourTrojanequipmentappeardamagedorworndonotattempttouseorrepairtheequipmentyourself.
Please contact our service department on 0861 876 526 (0861 Trojan) to arrange a repair.
OPERATING WARNINGS
• Itisthepurchaser’sresponsibilitytoinstructallusersastotheproperoperatingproceduresofallTROJANequipment.
• Keepchildrenawayfromallmovingpartsandawayfromallstrengthequipment.Parentsmustprovideclosesupervisionof
children if the equipment is used in the presence of children.
• Donotwearloosettingclothingorjewellerywhenusingtheequipment.Itisalsorecommendedthatuserstieuplonghair
to avoid contact with moving parts.
• Ensurethatanyonenotusingtheequipmentstaysclearoftheuser,accessoriesandmovingpartswhilethemachineisin
operation.
USER WEIGHT LIMITATIONS
• ThisTROJANWALKER110TREADMILLmaynotbeusedbypersonsweighingmorethan100kg.
SAVE THIS INSTRUCTION MANUAL FOR FUTURE USE AND REFERENCE
If any of these instructions or warnings are unclear please contact Trojan Customer Services on 0861 876 526 (0861 Trojan), within
the Republic of South Africa or visit www.trojanhealth.co.za.
1. SAFETY INSTRUCTIONS (CONT.)
10200-5
Consol
Safety Key
Upright
Running Belt
Main Frame
Wheel
2. PRE ASSEMBLY CHECK LIST
ThankyouforchoosingtheTROJAN WALKER 110 treadmill.Wetakegreatprideinproducingthisqualityproductand
hopeitwillprovidemanyhoursofqualityexercisetomakeyoufeelbetter,lookbetterandenjoylifetoitsfullest.
Yes,itisaprovenfactthataregularexerciseprogramcanimproveyourphysicalandmentalhealth.Toooften,ourbusy
lifestyleslimitourtimeandopportunitytoexercise.TheTROJAN WALKER 110 treadmill provides a convenient and
simple method to begin your assault on getting your body in shape and achieving a healthier lifestyle.
Before reading further, please familiarise yourself with the parts that are labelled.
Read this manual carefully before using the TROJAN WALKER 110 treadmill.
Motor Cover
End Cap
10200-6
3. HARDWARE LIST
ITEM DESCRIPTION Qty
101 ScrewM5xP0.8x18 2
78 AllenBoltM8xp1.25x15 4
7 SelfTappingScrewø3.5x16 4
72 AllenBoltM8xp1.25x52 2
57 AllenBoltM8xp1.25x45 2
12 POP-Pin Rod 1
10 POP-Pin Head 1
11 Spring 1
75 Allen Key & Screwdriver 5mm
(70mmx70mm)
1
74 Safety Key / Clip 1
102 Silicon 1
65 ArcWasherØ20xØ8.5x1.5t
(R19.05)
2
71 Nylon Nut M8 2
87 Spannersize13 1
ITEM DESCRIPTION Qty
1 Computer Consol 1
23 Frame 1
2 Handrail 1
84 Bottle Holder 1
10200-7
4. ASSEMBLY STEPS
Recheck
All bolts and nuts are
tightened securely
before using the machine
•Twopeoplearerequiredtocompletetheassembly.
•Followthestepsbelowtoavoidinjury.
STEP 1 – UPRIGHT ASSEMBLY
•RaisetheLeftandRightUprightsintothevertical
position and secure them into place with one Bolt (72),
one Arc Washer (65), one Nylon Nut (71) and one
Bolt (57).
•TightenthePop-PinHead(10)ontheRightUpright.
STEP 2: HANDRAIL ASSEMBLY
•ThreadtheControlWiresintotheholeoftheLower
Computer Shelf (2), then pull them out of the hole of
the Upper Computer.
•ConnecttheControlWiresoftheUprighttothe
Control wires in the Handrail.
•InserttheHandrailsintotheUprightsandsecurewith
two Allen Bolts (78) on each side.
STEP 3 – COMPUTER AND BOTTLE
HOLDER ASSEMBLY
•PlacetheBottleHolder(84)onthetopofthe
Computer Handrail and secure it with two Screws (101).
•HoldtheComputerConsol(1)abovethetopoftheWater
BottleHolderandconnectalltheControlWires.Makesure
theconnectedwiresarepushedbackintotheHandrail
Tube (2) once connected.
•AttachtheComputerConsol(1)ontotheHandrail(2),
securing with four Screws (7).
CAUTION:
Ensure that cables are not damaged
during assembly or when tightening screws.
10200-8
FOLDING
Tofoldawaythetreadmillrunningdeck,turnoffthetreadmilland
remove the power cord. Pull out the Pop Pin and then lift up the
runningdeckintotheverticalposition.MakesurethePopPin
clicksintoplacetosecuretherunningdeckinplace.Donotletgo
oftherunningdeckuntilyouhearthePopPinclickintoplace.
UNFOLDING
Ifyouwanttousethetreadmill,holdthetreadmillrunningdeck
rmly in one hand and with the other hand pull out the Pop Pin.
Donotlettherunningdeckgo,slowlylowerittotheground,then
re-insert the Pop Pin into the frame.
Note:Loweringoftherunningdeckcancauseinjuryifcautionis
nottakenwhenloweringthedeck.Pleasekeepsmallchildrenaway
fromthetreadmillwhenloweringthedeck.
TRANSPORT
Place your right foot onto the right base foot tube.
With two hands holding the left and right handgrip tubes, pull the
treadmill toward you.
You can now easily move the treadmill to the desired position by
pushing it on its wheels.
ELEVATION
Ifyouwanttochangetherunningdeckelevation,youwillrst
needtofoldtherunningdeckintotheupposition.Pulltheiron
incline bar, up or down, to select the desired elevation level. Now
youmaylowertherunningdeckandbeginrunning.
5. UNFOLDING / FOLDING / TRANSPORT
10200-9
HOW TO APPLY LUBRICANT
• Liftonesideoftreadbelt.
• Pouronehalfofthelubricantbottleunderthecentreofthetreadbeltonthetopsurfaceofthetreadboard.
• Walkonthetreadmillataslowspeedfor3to5minutestoevenlydistributelubricant.
NOTE:DONOToverlubricatetreadboard.Anyexcesslubricantthatcomesoutshouldbewipedoff.
NOTE: ONLY USE HALF THE BOTTLE OF LUBRICANT PER APPLICATION.
LUBRICATION SCHEDULE.
• Checkthetreadboardlubricationduringinstallation.Ifit’snecessary,lubricatethetreadboard,usingonehalfofthe
lubricant provided, before using the treadmill for the rst time.
• Ifthetreadmillisusedonaregularbasis,therunningdeckshouldbelubricatedonceamonth.
• Ifthetreadmillisnotusedfortwomonthsormore,thetreadmillmustbelubricatedbeforeuse.
6. MAINTENANCE
HOW TO CHECK TREADBELT FOR PROPER
LUBRICATION
•Liftonesideofthetreadbeltandfeelthetopsurfaceofthe
treadboard.
•Ifthesurfaceisslicktothetouch,thennofurtherlubricationis
required.
•Ifthesurfaceisdrytothetouch,applyonepacketoflubricant
or half of the bottle of lubricant.
BELT TRACKING ADJUSTMENT
• Ifduringuseyounoticethattherunningbelteithershiftstotherightortheleftofcentre,switchoffthetreadmill,
remove the “Safety Key” and unplug the equipment from the AC power source.
• Iftherunningbeltshiftsleft,usingM6AllenKeyprovided,turn
 theleftrearrolleradjustmentclockwisenomorethe1/4”ofaturn
(if the running belt shifts right, adjust the right rear roller).
• RemovetheM6AllenKey,insertthe“SafetyKey”andinsertthe
AC power cord into the AC outlet. Turn on your treadmill and
observe after running for a few minutes to see if the problem
has been corrected.
• Thismaytakeseveraladjustments,sorepeattheaboveprocedure.
Your treadmill should require little maintenance other than to periodically apply lubricant. Lubricating under the
treadbeltwillensuresuperiorperformanceandextendthetreadmill’slifeexpectancy.
10200-10
7. GROUNDING INSTRUCTIONS
Thisproductmustbegrounded.Ifamalfunctionorbreakdownoccurs,groundingprovidesapathofleastresistancefor
electriccurrenttoreducetheriskofelectricshock.Thisproductisequippedwithacordhavinganequipment-grounding
conductor and a grounding plug. The plug must be plugged into an appropriate outlet that is properly installed and
grounded in accordance with all local codes and ordinances.
DANGER-improperconnectionoftheequipment-groundingconductorcanresultinariskofelectricshock.Checkwith
a qualied electrician or serviceman if you are in doubt as to whether the product is properly grounded. Do not modify
the plug provided with the product - if it will not t the outlet; have a proper outlet installed by a qualied electrician.
Thisproductisforuseonanormal220-240voltcircuitandhasagroundingplugthatlooksliketheplugillustratedin
thegure.Makesurethattheproductisconnectedtoanoutlethavingthesamecongurationastheplug.Noadaptor
should be used with this product.
10200-11
8. COMPUTER FUNCTIONS
I. GENERAL OPERATION:
1. Turn on the treadmill.
 2.Putthesafetykeyintherecessoftheconsol.
The beeper will sound, and all the windows will display values. The initial values are 0, and do not flash. This means the
treadmill is in the START/READY mode. In this mode the user can hold the grip pulse sensor to detect heart
rate values.
 **Ifthesafetykeyisnotplacedintherecessoftheconsol,theTIMEwindowwilldisplay“-------”indicatingthetreadmillcan’tbe
operated normally.
 **Duringaworkout,ifthesafetykeycomesoff,thebeeperwillsoundawarningandthetreadmillwillstop.Torestart,
  putthesafetykeybackintotherecessoftheconsol.Allthevalueswillrevertbacktotheinitialvalues.
** Under the START/READY mode, if you do not hold the Hand Pulse Sensor, then the PULSE window will display
HP. When the user holds both sides of the Hand Pulse Sensors, the PULSE window displays the heart rate values.
** PULSE value range: 40~240 beats/min.
** Refer to table on page 15 for different age and heart rate values.
II. OPERATION MODE:
1.
Under START/READY status, press tostartthetreadmillatthespeedof1.0km/hr.Press or
to increase or decrease the speed. When the user presses the treadmill will stop. Press once and all
thevalueswillstopchanging,andthetreadmillwillpausefor4minutes,thenitwillrevertbacktotheSTART/
READY position. If the user presses and holds it for 3 seconds, it will reset to the START/READY position.
2. Under START/READY status, press or to select the program setting and press to preset
the function values.
3. Program mode: Press or to choose a Program from P0~P6 and the PROGRAM window will start
flashing. Press to move to the LEVEL option. The LEVEL can be set at L1~L3 and you can change it by
pressing or . After confirming the LEVEL, press to move to the TIME option.
The initial manual TIME value is 20min and the initial program TIME value is 32min,with a range of 5 ~ 99 min
,
and increments of 1 minute. After setting, press to start. If the user presses the keyduringsetting,
the rest of the unset functions will adopt the initial values.
10200-12
II. MANUAL AND PROGRAM OPERATION INSTRUCTION
In this mode the user has 1 MANUAL and 6 PROGRAMS pre-installed to choose from.
1. MANUAL (P0): In this mode, you can set up the TIME, DISTANCE as your need.
1.1. When the PROGRAM light is flashing, press
to enter the MANUAL mode.
1.2. Now you can press or to set up the TIME, then press or to start immediately.
Program pre-set value is 20 min
Time range: 5~99 min, with increments of 1 min
2. PROGRAM: In this mode, the user has 6 PROGRAMS (P1~P6) to choose from.
2.1 When the PROGRAM light is flashing, press or to choose P1~P6 , then press to go
into the chosen program
2.2 P1~P3 is TIME, DISTANCE and CALORIES.
2.3 After entering P1 program, you can set the target TIME. Time range is 5~99min. The preset value is 20min.
After setting, press or to start immediately. The treadmill will run at the lowest speed. You
canadjustthespeedduringworkout.
2.4AfterenteringP2program,youcansetthetargetDISTANCE.Distancerangeis1~99.9km(km).The
presetvalueis5km.Aftersetting,press or to start immediately. The treadmill will run at
thelowestspeed.Youcanadjustthespeedduringworkout.
2.5 After entering P3 program, you can set target CALORIE. Calorie range is 40~999cal. Preset value is
200cal. After setting, press or to start immediately. The treadmill will run at the lowest speed.
Theusercanadjustthespeedduringworkout.
2.6 After entering P4~P6, you will see the LEVEL window begin to flash. In PROGRAM mode P4~P6, each
have 3 LEVELS you can choose from.
2.7 Now you can press or to choose the desired LEVEL. Now press . The treadmill
will begin to operate, or press to program TIME setting.
2.8 After entering into TIME setting, you can press or to set TIME. Now press or
to start immediately.
Program pre-set is 32 min.
Time range:5~99 min, with increments of 1 min.
2.9 Refer to the tables to see the preset levels for P4~P6. For each program there are 3 levels.
8. COMPUTER FUNCTIONS (cont.)
10200-13
8. COMPUTER FUNCTIONS (cont.)
PROGRAM 4 PROGRAM 5
LEVEL 1 LEVEL 1 LEVEL 1
LEVEL 2 LEVEL 2 LEVEL 2
LEVEL 3 LEVEL 3 LEVEL 3
PROGRAM 6
MINUTES
KM/H
MINUTES
KM/H
MINUTES
KM/H
MINUTES
MINUTES
MINUTES
MINUTES
MINUTES
MINUTES
KM/H
KM/H
KM/H
KM/H
KM/H
KM/H
10200-14
Tr apezius
Posterior
Tricep
Latissimus Dorsi
Gluteals
Hamstrings
Gastrocnemius
Tr apezius
Anterior
Pectoralis Major
Serratus Anterior
Biceps
Abdominal
Sartorius
Quadriceps
Tibialis
AEROBIC EXERCISE
•Aerobicexerciseisanysustainedactivitythatsendsoxygentoyourmusclesviayourheartandlungs.
•Aerobicexerciseimprovesthetnessofyourlungsandheart-yourbody’smostimportantmuscle.
•Aerobicexercisetnessispromotedbyanyactivitythatusesyourlargemuscleeg.arms,legsorbuttock.
Yourheartbeatsquicklyandyoubreathedeeply.
•Aerobicexerciseshouldbepartofyourexerciseroutine.
WEIGHT TRAINING
Alongwithaerobicexercisingwhichhelpsgetridofandkeepofftheexcessfatthatourbodiescanstore,weighttrainingis
anessentialpartoftheexerciseroutineprocess.Weighttraininghelpstone,buildandstrengthenmuscle.Ifyouareworking
aboveyourtargetzone,youmaywanttodoalessamountofreps.
MUSCLE CHART
TREADMILL
Theexerciseroutinethatisperformedonthetreadmillwilldevelopthelowerbodymusclegroupaswellasconditionthe
circulatorysystemandprovideagoodaerobicworkout.Thesemusclegroupsarehighlightedonthemusclechartbelow.
9. FITNESS TIPS AND TECHNIQUES
TrojanandtheHeartandStrokeFoundationhavejoinedforcestoKEEPSOUTHAFRICAMOVING.
TheHeartandStrokeFoundationSouthAfricaencouragesallSouthAfricanstomakeheart-healthychoices
thatincludedailyphysicalactivity,exerciseandabalanceddiet.UseTrojan,SA’sNo.1sellingHomeFitness
brandtogivesyoutheabilitytoboostyourtnesslevelandloweryourriskofcardiovasculardisease.
Visit www.trojanhealth.co.zaforequipmentchoicesandexerciseprograms,and
www.heartfoundation.co.za for information on how to adopt a healthy lifestyle.
10200-15
10. CONDITIONING GUIDELINES
Howyoubeginyourexerciseprogramdependsonyourphysicalcondition.Ifyouhavebeeninactiveforseveralyears,or
areseverelyoverweight,youmuststartslowlyandincreaseyourtimeontheequipment;afewminutesperworkout.
Initially,youmaybeabletoexerciseonlyforafewminutesinyourtargetzone,however,youraerobictnesswillimprove
overthenextsixtoeightweeks.Don’tbediscouragedifittakeslonger.It’simportanttoworkatyourownpace.
Ultimately,you’llbeabletoexercisecontinuouslyfor30minutes.Thebetteryouraerobictness,theharderyouwillhave
toworktostayinyourtargetzone.Pleaseremembertheseessentials:
•Haveyourdoctorreviewyourtraininganddietprogramstoadviseyouofaworkoutroutineyoushouldadopt.
•Beginyourtrainingprogramslowlywithrealisticgoalsthathavebeensetbyyouandyourdoctor.
•Monitoryourpulsefrequently.Establishyourtargetheartratebasedonyourageandcondition.
•Setupyourequipmentonaat,evensurfaceatleast3feetfromwallsandfurniture.
EXERCISE INTENSITY
Tomaximizethebenetsofexercising,itisimportanttoexercisewiththe
proper intensity. The proper intensity level can be found by using your heart
rateasaguide.Foreffectiveaerobicexercise,yourheartrateshouldbe
maintainedatalevelbetween65%and85%ofyourmaximumheartrate
asyouexercise.Thisisknownasyourtargetzone.Youcanndyourtarget
zoneinthetablebelow.
Duringtherstfewmonthsofyourexerciseprogram,keepyourheartratenearthelowendofyourtargetzoneasyou
exercise.Afterafewmonths,yourheartratecanbeincreasedgraduallyuntilitisnearthemiddleofyourtargetzoneas
youexercise.
Tomeasureyourheartrate,stopexercisingbutcontinuemovingyourlegsorwalkingaroundandplacetwongerson
yourwrist.Takeasix-secondheartbeatcountandmultiplytheresultsby10tondyourheartrate.Forexample,ifyour
six-secondheartbeatcountis14,yourheartrateis140beatsperminute.(Asix-secondscountisusedbecauseyour
heartratewilldroprapidlywhenyoustopexercising.)
Adjusttheintensityofyourexerciseuntilyour
heart rate is at the proper level.
Formoreinformationvisitwww.trojanhealth.co.za
10200-16
1
2
3
4
5
11. WARM-UP AND COOL-DOWN
WORKOUT GUIDELINES
Eachworkoutshouldincludethefollowingthreeparts:
Awarm-up,consistingof5to10minutesofstretchingandlightexercise.Aproperwarm-upincreasesyourbody
temperature,heartrate,andcirculationinpreparationforexercise.
Trainingzoneexercise,consistingof20to30minutesofexercisingwithyourheartrateinyourtrainingzone.(Note:
Duringtherstfewweeksofyourexerciseprogram,donotkeepyourheartrateinyourtrainingzoneforlongerthan
20 minutes.)
Acool-down,with5to10minutesofstretching.Thiswillincreasetheexibilityofyourmusclesandwillhelptoprevent
post-exerciseproblems.
EXERCISE FREQUENCY
Tomaintainorimproveyourcondition,planthreeworkoutseachweek,withatleastonedayofrestbetweenworkouts.
Afterafewmonthsofregularexercise,youmaycompleteuptoveworkoutseachweek,ifdesired.Remember,thekey
tosuccessismakeexercisearegularandenjoyablepartofyoureverydaylife.
SUGGESTED STRETCHES
The correct form for several basic stretches is shown at the right. Move slowly as you
stretch, never bounce.
1. Toe Touch Stretch
Standwithyourkneesbentslightlyandslowlybendforwardfromyourhips.Allow
yourbackandshoulderstorelaxasyoureachdowntowardyourtoesasfaraspos-
sible.Holdfor15counts,thenrelax.Repeat3times.Stretches:Hamstrings,backof
kneesandback.
2. Hamstring Stretch
Sitwithonelegextended.Bringthesoleoftheoppositefoottowardyouandrestit
againsttheinnerthighofyourextendedleg.Reachtowardyourtoesasfaraspos-
sible.Holdfor15counts,thenrelax.Repeat3timesforeachleg.Stretches:Ham-
strings,lowerbackandgroin.
3. Calf/Achilles Stretch
With one leg in front of the other, reach forward and place your hands against a wall.
Keepyourbacklegstraightandyourbackfootatontheoor.Bendyourfrontleg,
leanforwardandmoveyourhipstowardthewall.Holdfor15counts,thenrelax.
Repeat 3 times for each leg. To cause further stretching of the achilles tendons, bend
yourbacklegaswell.Stretches:Calves,achillestendonsandankles.
4. Quadriceps Stretch
Withonehandagainstawallforbalance,reachbackandgrasponefootwithyour
otherhand.Bringyourheelasclosetoyourbuttocksaspossible.Holdfor15counts,
thenrelax.Repeat3timesforeachleg.Stretches:Quadricepsandhipmuscles.
5. Inner Thigh Stretch
Sitwiththesolesofyourfeettogetherandyourkneesoutward.Pullyourfeet
towardyourgroinareaasfaraspossible.Holdfor15counts,thenrelax.Repeat3
times. Stretches: Quadriceps and hip muscles.
For more information visit www.trojanhealth.co.za
10200-17
12. FREQUENTLY ASKED QUESTIONS
1. My consol is showing LS
• Treadmill has not received a speed signal for 8 seconds.
• Turn off computer, unplug, leave for 30 seconds, then restart the treadmill.
• If the error persists please contact our call centre on 0861 876 526 (0861 TROJAN).
2. My consol is showing E1
• Memory of the consol is malfunctioning or the CPU is having accessing problems
• Turn off computer, unplug, leave for 30 seconds, then restart the treadmill.
• If the error persists please contact our call centre on 0861 876 526 (0861 TROJAN).
3. My computer consol is not working
• Checkthatyourpowercordisinyourpoweroutletandison.
• Checkthatyouhaveapowersupplytoyourhome.
• Ensurethattheconsolcomputercableshavebeenconnectedproperlyintheneckpiecewhenassemblingtheunit.
4. The consol cannot read the hand pulse signal
• Thehandpulsesensorswillnotoperatecorrectlyifyourskinisextremelydry.Moistenyourhandsandtryagain.
• Avoidmovingyourhandswhileexercisingandholdthehandspulsesensorsrmlywhileexercising.Ifyoudo
moveyourhandswhileexercising,givethecomputerafewsecondstore-sampleanddisplayyourcorrectheart
pulse rate.
• Clean the hand pulse sensors to ensure good contact between your body and the pulse sensor.
If the error persists, please contact 0861 876 526 (0861 TROJAN).
5. My LCD is dim
• Checkifunitisindirectsunlight,moveifnecessary.Ifdisplaydoesnotimprove,pleasecontact
0861 876 526 (0861 Trojan).
5. Maintenance and cleaning.
• Useaclean,damp,softragtocleanthesurface.
• Useamilddetergenttocleanthedirtyspots.
• Donotuseasteelbrushoremeryclothtocleanthesurface.
• Immediatelyafterexercisewipeoffanysweatfromthesurfaceoftheequipment.Perspirationcontainssaltwhich
could ruin the equipment.
10200-18
13. PARTS LIST
No. Description Qty
1 Computer Console 1
2 Computer Handrail Tube Assembly 1
3 Hand Pulse Set NAZNO2531&FBOP1136 2
4 FoamGripØ36x2.5tx280(FAE2536280) 2
4A FoamGripInnerSpanØ34x2.5tx560 2
5 Hand Pulse Screw Cover 2
6 Hand Pulse Sensor Wire(Lower) 2
7 TrussPhilipsSelfTappingScrewØ3.5x16 4
8 --- --
9 SocketPhilipsSelfTappingScrewØ4x25 2
10 POP-Pin Head 1
11 Spring 1
12 Pin 1
13 Upright(Left) 1
14 Upright(Right) 1
15 Control Wire 1
16 Upper Motor Cover 1
17 Running Belt 1
18 Pedal 2
19 Double Sided Tape 4
20 Running Board 1
21 SocketPhilipsScrewM6xP1.0x45 6
22 CounterSinkHexScrewM8xP1.25x30 2
23 Frame Assembly 1
24 Rubber Pad PECP1434 6
25 Front Roller 1
No. Description Qty
26 SocketPhilipsScrewM6xP1.0x25 1
27 Rear Roller 1
28 Rear End Cap(Left) 1
29 Rear End Cap(Right) 1
30 WasherØ6xØ10x1.0t 2
31 CKSHexScrewM6xP1.0x55(FullThread) 2
32 Incline Base 1
33 TrussPhilipsScrewM5xP0.8x10 5
34 Controller 1
35 WasherPhilipsSelfTappingScrewØ4x16 4
36 Power Cord Clip 1
37 CircuitBreaker 1
38 Power Switch 1
39 ExtensionWire
16AWGx90mm,(FBG16AWG90WH)
1
40 ExtensionWire16AWGx250,(FBG16AWG250) 1
41 Power Cord 1
42 Sensor 1
43 Wire Clip Knob UC-0.5 1
44 Wire Clip Knob UC-0 2
45 Washer Drilling Philips Self Tapping Screw
Ø4x16
4
46 CKSHexScrewM8xP1.25x80(40mm) 1
47 Spring Washer M8 3
48 WasherØ16xØ8x1.5t 1
49 Nut M8 1
50 Motor Set 1
51 Drive Belt 1
10200-19
No. Description Qty
52 Motor Adjustment Plate NAZ409185 1
53
54 Outer Cap PAD30 2
55 CKSHexScrewM8xP1.25x105(15mm) 1
56 CKSHexScrewM8xP1.25x15 2
57 CKSHexScrewM8xP1.25x45 4
58
59 Rubber Pad 3
60 EndCapmatchwith□25x50x1.5t 2
61 Lower Motor Cover 1
62 Washer Drilling Philips Self Tapping Screw
Ø4x12
10
63 Base Assembly 1
64 TrussHexScrewM8xP1.25x35 2
65 ArcWasher-OuterSpan20x8.5x1.5t(R19.05) 2
66 Foot Pad PCFP1155 6
67 WasherØ6xØ16x1.0t 6
68 Washer Drilling Philips Self Tapping Screw
-Ø4x20
6
69 Wheel PCZ21-ZTXA 2
70 TrussHexScrewM8xP1.25x50(12mm) 2
71 NylonNutM8xP1.25 9
72 TrussHexScrewM8xP1.25x52 2
73 TrussHexScrew1/2”-20UNFx80(30mm) 2
74 Safety Key 1
75 HexSpanner+PhilipsScrewdriver
5mm(70mmx70mm)
1
76 Wire Clip Knob UC-1 1
77 Round Head Drilling Philips Self Tapping Screw
Ø4x16
2
No. Description Qty
78 TrussHexScrewM8xP1.25x15 4
79 EndCapRoundTube30x1.2t 2
80 NylonNutM6xP1.0 4
81 ExtensionWire
16AWGx250,(FBG16AWG250WH)
1
83 Nut M8 4
84 Plastic Bottle Seat 1
85 Wheel PBKHM068 2
86 PlasticWasherØ8xØ22x6t 2
87 Spannersize13 1
88
89 FixingPlasticPEZP319 2
90 RoundHeadPhilipsScrewM6xP1.0x42 4
91 WasherØ19xØ6x1.5 4
92 ExtensionWire(Kelly)14AWGx150mmx1T1R 1
93 Filter 1
94 TrussPhilipsScrewM5xP0.8x10 2
95 Aluminum Control Board 1
96
97 L-shaped Plastic PDD54540 1
98 Washer Drilling Philips Self Tapping Screw
Ø4x12
3
99 Spring 1
100 RoundHeadPhilipsScrewM4xP0.7x8 2
101 TrussPhilipsScrewM5xP0.8x18 2
102 SILICON 1
103
104 Choke 1
105 TrussPhilipsScrewM4xP0.7x10 2
13. PARTS LIST (cont.)
10200-20
14. EXPLODED DRAWING
  • Page 1 1
  • Page 2 2
  • Page 3 3
  • Page 4 4
  • Page 5 5
  • Page 6 6
  • Page 7 7
  • Page 8 8
  • Page 9 9
  • Page 10 10
  • Page 11 11
  • Page 12 12
  • Page 13 13
  • Page 14 14
  • Page 15 15
  • Page 16 16
  • Page 17 17
  • Page 18 18
  • Page 19 19
  • Page 20 20
  • Page 21 21
  • Page 22 22

Trojan Walker 110 Owner's manual

Category
Fitness, gymnastics & weight training
Type
Owner's manual
This manual is also suitable for

Trojan Walker 110 treadmill is a great choice for home use. It features a 1.5HP motor, which is powerful enough to provide a challenging workout for users of all fitness levels, a spacious 40 x 120 cm running belt, and a sturdy frame that can support users up to 100 kg. The Walker 110 also comes with a variety of built-in programs to help you get the most out of your workouts, and a large LCD display that tracks your progress. Whether you're a beginner or a seasoned runner, the Trojan Walker 110 treadmill is a great option for getting a great workout at home.

Ask a question and I''ll find the answer in the document

Finding information in a document is now easier with AI