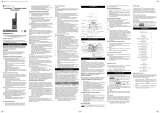
of Emergency Alert mode, the radio controls and buttons are locked to
maximize reception of the emergency message.
1. Press and hold the Emergency button for three seconds.
2. To initiate the alert tone, release the button.
NOTE: You do not need to continue to hold the Emergency
button or use the PTT button to transmit your message.
3. After the alert tone ends, speak into the microphone.
●Your voice or incidental sounds is transmitted.
●Your radio speaker emits a Talk Confirmation Tone after 30
seconds. Operation then returns to the normal Two-Way mode.
●If your radio is connected to the Talkabout application when an
Emergency Alert is triggered, the S.O.S message that is pre-
saved in your Talkabout application is sent out to everyone in
range that has Talkabout application and is connected with the
application. You must have the Talkabout application connected
to receive the S.O.S message.
4. To customize the S.O.S message, refer to the Talkabout application
in radio setting.
NOTE: All Motorola Solutions Talkabout EM, MJ, MR, MT, MU,
T400, T500, T600, T800 series radio (except for the T400
model) are fully compatible with the Emergency Alert feature.
Radios other than EM, MJ, MR, MT, MU, T400, T500, T600,
T800 series can receive the emergency alert signal, but do not
respond with adjusted volume settings, locked controls, or a
warbling alert tone. Users of other radio models set to the same
channel and Interference Eliminator Code hear a steady tone
for eight seconds followed by the voice transmission for 22
seconds.
WARNING: The Emergency Alert feature must only be used in
the event of an actual emergency. Motorola Solutions is not
responsible if there is no response to the emergency alert from
the receiving group.
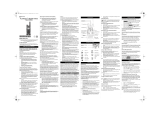
Operating Easy Pairing
The Easy Pairing feature allows all radios in a group to be programmed
simultaneously to the same channel and Interference Eliminator Code.
Any one radio in the group can be set as the leader. The channel and
Interference Eliminator Code settings of the leader can be copied to the
other radios in the group.
1. Pick any radio as the leader. Program the channel and Interference
Eliminator Code to the desired settings on this radio.
See Selecting Channels on page 11 and Selecting the Interference
Eliminator Codes on page 11.
2. To copy the channel and Interference Eliminator Code combination
to all the other member radios, press and hold the Easy Pairing/
Location Sharing button on the member radios until you hear a
beep.
To program all the radios at the same time, the radios in the group
must perform these step at the same time.
The Easy Pairing icon blinks indicating that the radio is in Easy
Pairing Mode and waiting to receive the settings from the leader. The
radio stays in this mode for three minutes.
3. Release the button after the beep and wait for the transmission from
the leader radio.
4. On the leader radio, press and hold the Easy Pairing/Location
Sharing button until you hear a double beep.
At the double beep, the radios in the group copy the transmitted channel
and Interference Eliminator Code settings of the leader.
NOTE:
The leader radio must make this transmission when all the member
radios are still in the Easy Pairing mode. Otherwise the transmission
is not picked up.
The leader must not release the Easy Pairing button at the first
tone. Otherwise the radio becomes a recipient. If this action
happens, you must press the PTT button to escape and then retry
the step.
Sharing Your Location
To share and request a location update, perform one of the following
actions:
●Use the Talkabout application to set your preferences on sharing
your location.
English
16