78025-00 (2/10)
Springs Window Fashions • Middleton, WI 53562-1096
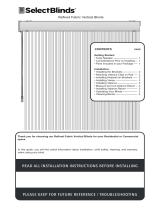
Rotate stems to open position. Push louvers up into stems. Gently pull down on
louvers to ensure that it catches on stem hook. S-shaped louvers are installed
with the high side on the right.
To remove louvers, insert credit card between the louver and the long leg of
stem as shown.
To remove headrail, insert screwdriver between headrail and release tab on clip.
INSTALLING LOUVERS
TO REMOVE BLIND
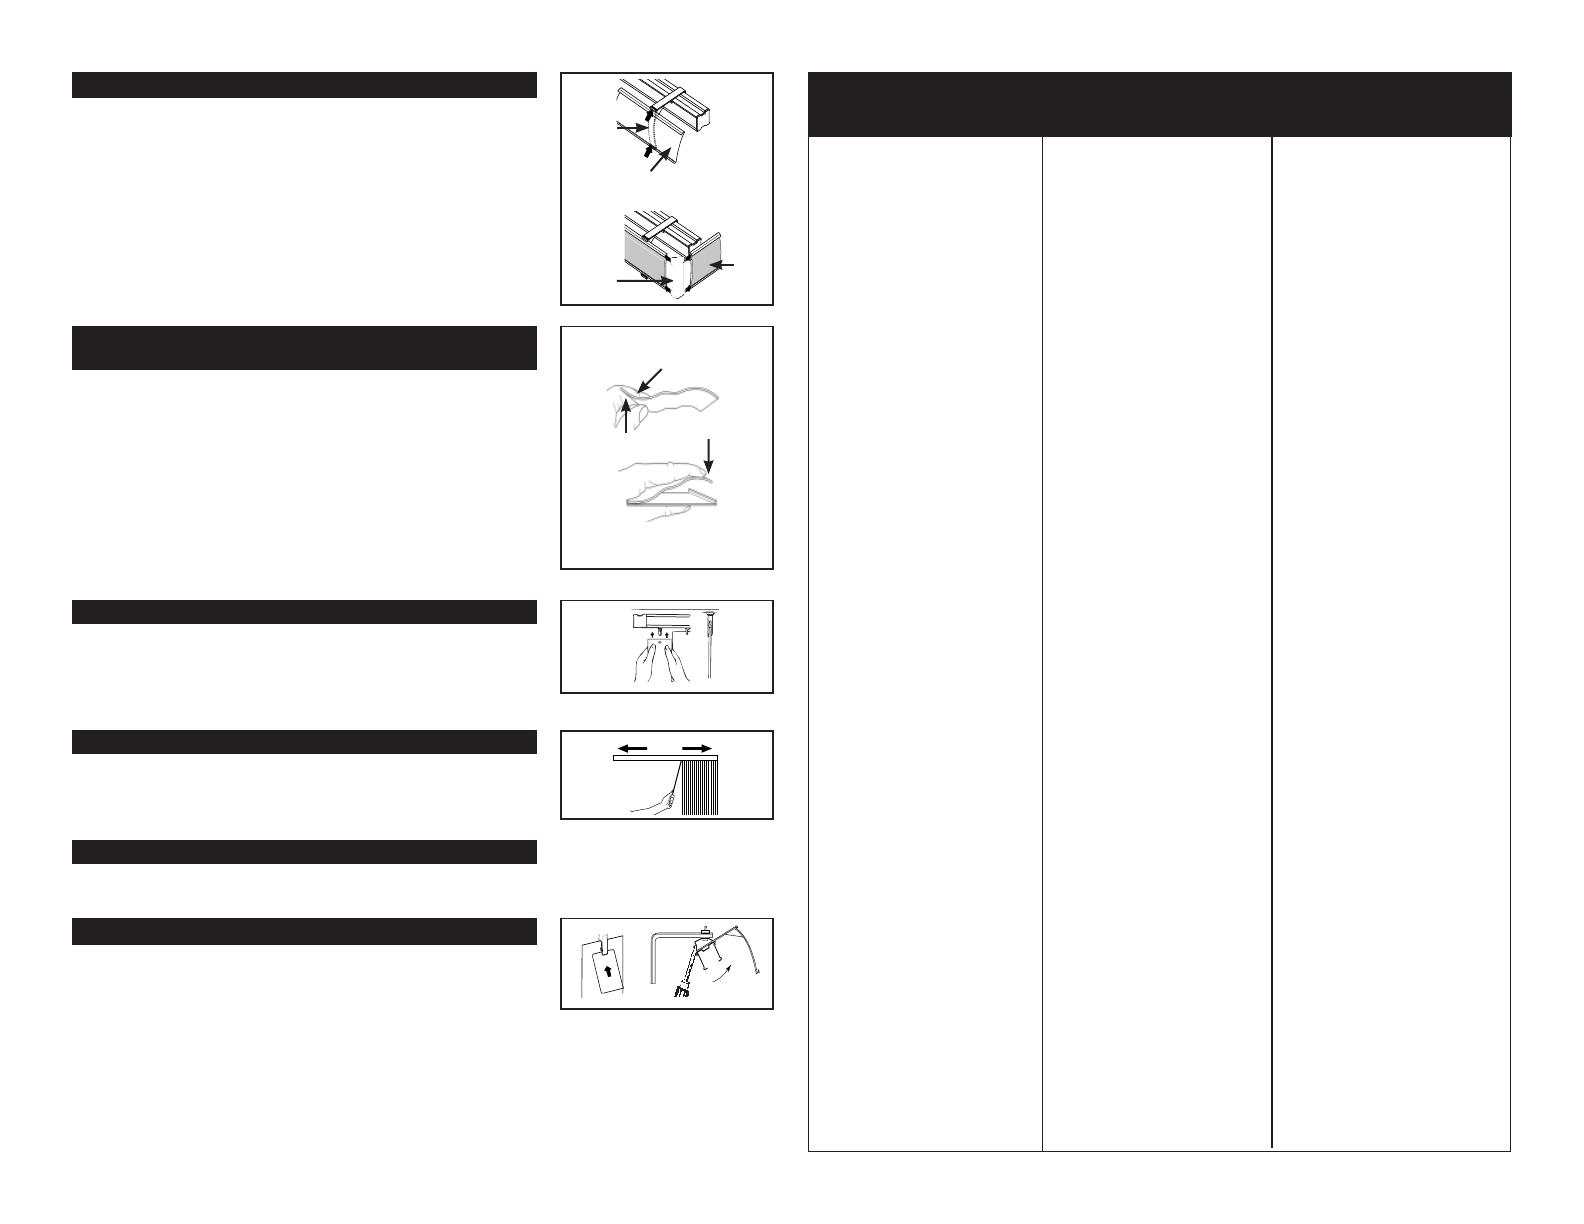
Rotate wand in direction you would like the louvers to rotate. Using the wand,
rotate louvers to open position before opening or closing the blind.
OPERATING INSTRUCTIONS
Clean with damp cloth and mild soap.
CARE AND CLEANING
Slide louver into channel panel and returns (see below for s-shaped louvers).
Attach channel panel to valance clips.
For inside mount, go to “Installing Louvers.”
For outside mount, attach valance corner to channel panel return.
Attach valance corner with returns to valance.
1. Channel panel valance
2. Valance clip
3. Valance return
4. Valance corner
INSTALLING VALANCE
1
2
1
3
4
1
2
Do not try to slide the louver in the valance from the end.
1. Locate the edge of the louver that is on
the upward slope. It is next to the valley of
the louver.
2. This edge is inserted into the entire width of the valance base.
3. Push down on the remaining edge of the louver untill it snaps into the chan-
nel.
4. Once both edges are installed, the return brackets and returns can be
attached.
5. The valance can now be installed to the track.
INSTALLING S-SHAPED LOUVER INTO CHANNEL
1
2
Springs Window Fashions
Three-year Warranty
Tringle porteuse
Springs Window Fashions
Garantie trois ans
Garantía de tres años
para Riel de Springs Window Fash ions
®
(NO VÁLIDA EN MÉXICO)
This warranty is provided to you by Springs
Window Fashion. This warranty applies only
to Springs Window Fashions products that
meet the following conditions: (1) You are the
original retail purchaser of the product; (2) The
product was purchased after September 1,
1992; (3) The product was properly installed
in a residential dwelling, and; (4) The product
was made or assembled exclusively from
Springs Window Fashions’ materials and
components.
WARRANTY: Springs Window Fashions war-
rants the product against original defects in
materials or workmanship for three years from
the date of purchase. Our sole obligation under
the warranty is to repair or replace defective
products or components without charge.
Springs Window Fashions is not responsible
for transportation costs to or from the retailer
or costs for measuring and installing the prod-
ucts. If repairs are made under this warranty,
the repairs will be made with like or similar
parts. Conditions or damages caused by
accidents, alterations, misuse or failure to fol-
low instructions for measurement, installation,
cleaning or maintenance are excluded from the
warranty. In addition, normal wear and tear is
not covered by the warranty.
THIS WARRANTY IS EXCLUSIVE AND IN
LIEU OF ALL OTHER WRITTEN OR ORAL
WARRANTIES OR OBLIGATIONS AND
LIABILITIES. No person is authorized to
extend or alter this warranty. SPRINGS
WINDOW FASHIONS SHALL HAVE NO
LIABILITY WHATSOEVER FOR INCIDENTAL OR
CONSEQUENTIAL DAMAGES. Some states
do not allow the exclusion or limitation of
incidental or consequential damages, so this
limitation or exclusion may not apply to you.
This warranty gives you specific legal rights,
and you may also have other rights which vary
from state to state.
SERVICE: If you believe a product is defec-
tive, please return the product with your
original sales receipt to the place of purchase.
This store will arrange for inspection of the
product and repair or replacement, if warrant-
ed, by a licensed fabricator or Springs Window
Fashions. If you need further assistance
regarding this warranty, you may write, call or
email Springs Window Fashions at the address
or telephone number provided below.
Springs Window Fashions LLC
P.O. Box 500, 8467 Route 405 South,
Montgomery, PA 17752
Tel. (800) 221-6352
Esta garantía se la ofrece Springs Window
Fashions. Esta garantía se aplica solamente
a productos Springs Window Fashions que
cumplen con las siguientes condiciones: (1) Si
usted es el comprador original del producto;
(2) Si el producto fue comprado después del
1 de Septiembre de 1 992; (3) Si el producto
fue instalado en forma adecuada en un hogar
residencial, y; (4) Si el producto fue fabricado
y ensamblado exclusivamente con materiales y
componentes de Springs Window Fashions.
GARANTÍA: Springs Window Fashions garantiza
el producto contra defectos originales de su
material o mano de obra durante el tiempo
que usted posea el producto. Nuestra única
obligación bajo esta garantía es la de reparar
o reemplazar productos o componentes defec-
tuosos sin cargo alguno. Springs Window
Fashions no es responsable del costo de
transporte desde y hacia el comerciante o de
costos por instalación y medición del producto.
Si se efectúan reparaciones bajo esta garantía,
las reparaciones se harán con piezas iguales o
similares. Los daños o condiciones causados
por accidentes, alteraciones, mal uso o por
no seguir las instrucciones de medición,
instalación, limpieza o mantenimiento están
excluidas de esta garantía. Además, esta
garantía no cubre problemas causados por el
uso normal.
ESTA GARANTÍA ES EXCLUSIVA Y EN LUGAR
DE TODAS LAS OTRAS GARANTÍAS ESCRITAS
O VERBALES U OTRAS OBLIGACIONES O
RESPON SABILIDADES. Ninguna persona
tiene autorización para extender o alterar esta
garantía. SPRINGS WINDOW FASHIONS NO
TENDRÁ RESPONSABILIDAD DE NINGUNA
MANERA DE LOS DA—OS INCIDENTALES O
CONSECUENTES. Algunos estados no permite
la exclusión o limitación de daños incidentales
o consecuentes, de modo que esta limitación
o exclusión puede no aplicarse a usted.
Esta garantía le da a usted derechos legales
específicos y usted puede también tener otros
derechos que varían de un estado a otro.
SERVICIO: Si usted cree que el producto está
defectuoso, devuelva el producto con su recibo
de venta original en el lugar donde lo compró.
Ese almacén se encargará de inspeccionar el
producto y repararlo o reemplazarlo, si está
garantizado, por un fabricante licenciado o por
Springs Window Fashions. Si necesita ayuda
adicional respecto a esta garantía, puede
escribir o llamar a Springs Window Fashions a
la dirección o teléfono indicado más adelante:
Springs Window Fashions LLC
P.O. Box 500, 8467 Route 405 South,
Montgomery, PA 17752
Tel. (800) 221-6352
Cette garantie vous est fournie par Springs
Window Fashions. Cette garantie ne couvre
que les produits Springs Window Fashions
qui répondent aux conditions suivantes: (1)
Vous êtes l’acheteur d’origine du produit
chez le détaillant; (2) Le produit a été acheté
après le 1er septembre 1992 (3) le produit
a été installé de manière conforme dans un
logement résidentiel et; (4) le produit a été
fabriqué ou assemblé uniquement avec des
matériaux et des pièces de Springs Window
Fashions.
GARANTIE: Springs Window Fashions garan-
tit le produit contre tout défaut d’origine de
fabrication ou de matériel aussi longtemps
que vous restez propriétaire du produit.
Notre seule obligation dans le cadre de cette
garantie consiste à réparer ou à remplacer
gratuitement les pièces ou produits défec-
tueux. Springs Window Fashions n’est pas
responsable pour le coût du transport en
provenance et à destination du détaillant, ni
pour les frais encourus pour la mesure et
l’installation des produits. Toute réparation
faite dans le cadre de cette garantie le sera
avec des pièces identiques ou semblables.
Les conditions ou dégâts provoqués par les
accidents, modifications, abus ou la non
exécution des instructions pour la mesure,
l’installation, le nettoyage ou l’entretien
sont exclus de cette garantie. De plus,
l’usure normale n’est pas couverte par cette
garantie.
CETTE GARANTIE EST EXCLUSIVE ET
REMPLACE TOUTE AUTRE GARANTIE ÉCRITE
OU ORALE OU TOUTE AUTRE OBLIGATION
ET RESPONSABILITÉ. Nul n’est autorisé
à prolonger ou modifier cette garantie.
SPRINGS WINDOW FASHIONS N’A AUCUNE
RESPONSABILITÉ POUR TOUT DOMMAGE
FORTUIT OU CONSÉCUTIF. Certaines juridic-
tions interdisent l’exclusion ou la limitation
des dommages fortuits ou consécutifs, par
conséquent cette limitation ou cette exclu-
sion peuvent ne pas s’appliquer à votre
situation. Cette garantie vous confère des
droits légaux spécifiques et vous pouvez
également bénéficier d’autres droits qui vari-
ent d’une juridiction à l’autre.
SERVICE: Si vous pensez qu’un produit est
défectueux, veuillez rapporter ce produit
avec le reçu d’origine à l’endroit où vous
l’avez acheté Le détaillant organisera
l’examen du produit ainsi que sa réparation
ou son remplacement, si nécessaire, par
un technicien agréé de Springs Window
Fashions. Pour toute aide complémentaire
concernant cette garantie, prenez contact
par écrit ou par téléphone avec Springs
Window Fashions à l’adresse et au numéro
de téléphone suivants:
Springs Window Fashions LLC
P.O. Box 500, 8467 Route 405 South,
Montgomery, PA 17752
Tel. (800) 221-6352
windowfashions@springswindowfashions.
com