Page is loading ...

1
1
PRO-145
-INTRODUCTION-
The Motion Sound PRO-145 provides drawbar organ and organ keyboard sounds with the best
possible rotary sound in a portable, rugged, modern design. We have incorporated suggestions
from many musicians and added our years of experience with rotary amplification into the PRO-
145.
The encompassing 360-degree liquid sound of the PRO-145 permeates stages, halls, and churches
in a way that drives the creativity and inspiration of all involved to new musical levels.
Although operation may seem intuitive, we suggest that you read this manual for helpful tips
and/or details about the adjustable parameters, controls and operation of the PRO-145 in various
venues and environments.
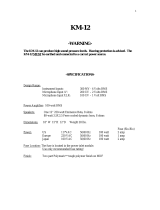
-WARNING-
The PRO-145 can produce high sound pressure levels, hearing protection is advised!
The PRO-145 must be earthed for safe operation!
-SPECIFICATIONS-
Input Design Range - 1 volt to 4 volts P-P (5 volts P-P maximum)
Input Impedance – 100K balanced TRS tip = + (plus), ring = - (minus), and sleeve ground
Pre Amplifier – 12AX7EH tube, mode adjustable
Power Amplifiers – Horn > 800 Hz 70-watt RMS
Speaker < 800 Hz 130-watt RMS
Horn Driver – Motion Sound diaphragm – model MS-1.2 80-watt, 8 ohms
Rotor Speaker – 12” Eminence Beta 250-watt, 8 ohms
Power Voltage Frequency Watts Fuse (slo-blo)
US 117 VAC 60 Hz 400 5 Amp
Europe 230 VAC 50 Hz 400 2.5 Amp
Japan 100 VAC 60 Hz 400 5 Amp

2
2
Fuse – located in AC inlet module CAUTION-Use correct value only!
Finish – two part Polymaric on MDF (proprietary polymer )
Dimensions – 24.5” Height – 20” Width – 17” Depth Weight 65 lbs.
-Quick Start Setup-
1. Turn organ or sound source ON first and set volume at 50-70%
2. Set all PRO-145 controls straight up at 12 o’clock position, volume at “0”
3. Turn on the PRO-145
4. Advance PRO-145 volume-quiet room 2-4
5. Advance PRO-145 volume-loud room 6-9
-Sound –
-What to expect-
The quality of sound will depend on a good organ sound source; the PRO-145 will provide the
incredible rotary effect. The PRO-145 emulates a 147 type rotary speaker with both back covers
removed and the horn rotor diffuser removed. Sound will radiate approximately 50% front, 20%
each side and 10% out the back. As you listen to the front of the cabinet remember plenty of
sound is being “spun” around the room from the sides and back of the cabinet.
Classic rotary speakers have limited frequency response and are designed to work with and
compliment tone wheel organs. The PRO-145 has many adjustable parameters that work with
classic and modern digital organs to provide maximum versatility in sculpting your sound.
Guidelines for all adjustments are present here, but we encourage experimentation as you become
familiar with each controls range of effect.
-Control Panel-
The audio section of the panel has two identical ¼” inputs, 12AX7EH pre-amp gain, volume,
pre-amp mode control, bass, middle, treble, high cut, horn volume and subwoofer volume.
The rotor controls are small trim pots that are adjustable to preference and usually not changed.
Individual control of the horn and low rotor dynamics is provided.
¼” TRS balanced inputs – Both inputs are balanced with tip = + (plus), ring = - (minus), and
sleave ground. If your keyboard has a ¼” balanced output, using a ¼” TRS cable will greatly

3
3
reduce any ground loop “hum”. Standard ¼” cords can be used but ground loop rejection will
not operate.
Gain Control – “Gain” control affects both inputs and adjusts the drive into the 12AX7EH tube
pre-amplifier, lower settings provide clean transparent sound while higher settings produce over
drive distortion. The gain control works in conjunction with your keyboards volume control and
volume control pedal if used. Do not use analog volume pedals made for guitars, the impedance
of such pedals will produce a large loss in volume and over drive.
Pre-Amp Mode – Classic tube circuits typically have resistive or inductive plate loads that
provide different audio “color” to sound. You can vary the type of load from resistive “R”
through inductive “I” to find the sound that’s right for you. The sonic difference between modes
is more noticeable at higher overdrive levels but some tonal change and harmonics are present at
all volume levels, above and below tube overdrive point.
Resistive Mode – “R” has a sharper onset knee into distortion with overdrive rising rapidly as
gain is increased. The overdrive harmonics sound hasher and brighter. The resistive mode
provides the cleanest sound when not overdriven.
Inductive Mode – “I” has a softer onset knee into distortion with a more gradual rise into
overdrive. The overdrive harmonics are mellow and somewhat compressed with less volume and
bass. You can add the bass and volume back in with the EQ controls.
12AX7EH Tube and Bias – Every tube is different and even a selected tube can be finely adjusted
with the bias trim. We recommend 12AX7EH and 5751 tubes only. If you replace the tube,
adjust the bias for the loudest signal without distortion; use the gain control to gradually adjust
the volume while "tweeking" the bias. Other brands of 12AX7 may not work correctly and
reduced power may result. (Refer
www.motion-sound.com
tech & legacy page for more tube
information).
Volume Control – After the pre-amp mode and gain are adjusted, the overall volume of the PRO-
145 can be set. This control also allows gain variation between tubes to be compensated. For
clean sound, set the volume higher and gain lower. For overdrive, set the volume lower and gain
higher. Too much volume may produce unwanted “tube” hiss, and settings will vary some if
tubes are changed.
-EQ Controls-
The PRO-145 EQ controls are of 100% attenuation design. If a control is set to zero, frequencies
outside of its range will drop at 6 Db/octave to a zero level. If the bass, middle, and treble are set
to zero no sound will pass through the EQ section. All controls set to “N” provides flat response.
Bass – Frequencies at 150Hz and below are adjusted. Bass uses a great deal of power so we
recommend a setting of “N” or less if you work with a bass player. If you use a subwoofer
amplifier set the bass at “N” or less and adjust the subwoofer amplifier as needed.
Middle – Covers a range from 150Hz to 3kHz. Middle frequencies are fundamental to the classic
147 type sound. Start with a setting of “N” to 8 and then experiment.

4
4
Treble – Frequencies from 3kHz to the “high cut” setting are adjusted. Treble affects “key click”
and “percussion” as well as overall brightness. Remember that classic 147’s did not have much
treble so start out at “N”. The treble and “high cut” can over lap so both controls can be tried at
different settings to refine your sound.
High Cut – This control is very useful for reducing the shrillness and brightness of some digital
instruments. Classic 147 and 122 rotary speakers had high frequency limits of about 5kHz. A
setting of “N” (3kHz) through 7 (6kHz) will emulate those classic cabinets high frequency tone.
Horn – The balance between the low rotor and horn volume can be adjusted to preference.
Higher numbers make the horn louder. The “N” setting is equal volume but room brightners and
listening position can change this perception.
Sub Volume – A front panel ¼” output provides line level audio < 100 Hz 18 dB/octave roll off.
Set the volume to “5” and then set your subwoofer amplification to desired level. Adjustments
can then be easily made from the PRO-145.
Direct Output – Provides a non-rotary line-out signal that includes all pre amp and EQ controls.
Another amplifier can be used to provide non-rotary sound. A second PRO-145 can also be
connected here.
Speed Control – The supplied dual button LED pedal is connected here and functions as
described. Buttons are, Push ON- Push OFF.
Fast – “LED on” – rotors ramp up to fast speed settings. (TRS tip open)
Slow – “LED off” – rotors ramp down to slow speed settings. (TRS tip grounded)
Stop – “LED on” overrides speeds, rotors ramp down to a complete stop. Pressing the
“stop” button again LED goes off and rotors ramp to the speed setting fast or slow.
Stop overrides all speed settings. (TRS ring open)
Front Panel Fast LED – Is ON only when fast speed is selected and stop is not engaged.
-Motor Controls-
The PRO-145 uses electronic speed control for all dynamics of the horn and low rotor drum.
Precision low noise DC motors and ball bearing rotor supports are utilized providing a zero
maintenance, modern rotary system. Adjustments cover the dynamics of a well used but
maintained 147.
Accel – Trims the ramp up time of the rotors. CW=Faster ramp up
Decel – Trims the ramp down time of the rotors. CW=Faster ramp down
Fast – Trims the terminal fast speed of the rotors. CW=Faster

5
5
Slow – Trims the terminal slow speed of the rotors. The range of adjustment includes stop.
CW = Faster
*Re-trimming of fast/slow may be necessary after Accel or Decel adjustment.
-Microphones and XLR Outputs-
*
The PRO-145 is a mechanical device so background noise on fast speed will increase. Play the
PRO-145 at higher volumes for best signal to noise ratio.
The PRO-145 contains three built in microphone dynamic elements for convenient connection to
a PA or recording console. The XLR low impedance outputs are on the rear of the cabinet and
are labeled Horn left and right, and Low Rotor. In a classic stereo application the horn
microphones are panned hard left and right respectively, and the low rotor is panned center. The
horn microphones need only reproduce the horn’s frequency response from about 400 Hz to
10khz. The low rotor response covers about 50 Hz to 2kHz. Setting the mixer channels EQ
accordingly can improve signals to noise ratio and limit adjacent bleed through.
Mono PA – Use the right or left horn microphone only (never both) and the low rotor
microphone, pan both microphones to center. Set EQ for each microphone as described above.
Caster Set - The casters (4) are mounted via sockets so they can be removed for transport.
-Maintenance-
Polymaric Finish – This rugged proprietary polymer finish is very durable and will withstand
most bumps and nicks. Clean with mild soap and water. Avoid getting water on the grill cloth.

6
6
Rotors and Motors – No maintenance required.
Rotor Speaker – The Eminence speaker is a Beta 12” 8 ohm 250-watt. Remove the back cover
(19 screws) to gain access. All screws are in steel threaded inserts and the speaker wires are
removable spade lugs. If you replace the speaker use 8 ohm models only.
Horn Diaphragm – Only use a Motion Sound MS-1.2 diaphragm. Stock Eminence
diaphragms will quickly fail.
1. To gain access, remove the axle support on the cabinet top (3 screws).
2. Remove the rear cover (19 screws).
3. Remove the 4 screws from the top of the horn rotor assembly. (use a ¼” wrench)
4. Carefully move the horn assembly towards the rear of the cabinet (be careful of the
microphones) so you can easily remove the motor connector and the two spade connectors
from the diaphragm. Note the polarity and color of the wires.
5. Slide the rotating assembly through the top slot out of the cabinet.
6. Remove the 3 screws from the diaphragm.
7. Follow the instructions on the sheet sent with the replacement diaphragm.
8. Reassemble in reverse order; be sure to connect the motor plug so the orange wire is towards
the top. Place a small amount of silicone rubber to hold the connector in place.
Low Rotor Belt Adjustment – The motor, belt, and ball bearing rotors are carefully adjusted at
assembly and require no maintenance. If you notice any belt noise, you can tighten the belt by
loosening the two screws on the motor mount and sliding the motor assembly away from the
speakers. DO NOT over-tighter the belt. Tension just enough to stop slipping or noise and no
more. The Polyurethane belt will last a very long time if properly adjusted.
Tube
1. Remove the rear cabinet cover (19 screws).
2. Loosen the tube holder bracket and rotate it aside.
3. Remove the tube from the socket.
4. Replace only with a gain selected tube such as: 12A7EH or GE 5751 N.O.S.
5. Detailed tube information is on our web site www.motion-sound.com tech & legacy.
6. Normal tube life in the PRO-145 is 5 years or more.

7
7
/