Page is loading ...

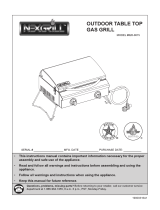
ASSEMBLY & OPERATING INSTRUCTIONS FOR OUTDOOR
GAS GRILL
FOR MODEL 720-0001-R OUTDOOR GRILL

T
T
A
A
B
B
L
L
E
E
O
O
F
F
C
C
O
O
N
N
T
T
E
E
N
N
T
T
S
S
Safety Instructions…………………………...1-4
Assembly Instructions………………………..5
Lighting Instructions…………………………6
Care & Maintenance…………………………7
Cooking Instructions…………………………8
Lighting Rod Assembly Instructions………..9-10
Illustrated Parts Breakdown………………...11
Parts List……………………………………...11
Trouble Shooting……………………………..12
Limited Warranty…………………………...13

Safety Instructions
READ THE FOLLOWING INSTRUCTIONS CAREFULLY AND BE SURE YOUR GRILL IS PROPERLY
INSTALLED, ASSEMBLED AND MAINTAINED. FAILURE TO FOLLOW THESE INSTRUCTIONS MAY
RESULT IN SERIOUS BODILY INJURY AND/OR PROPERTY DAMAGE. IF YOU HAVE QUESTIONS
CONCERNING ASSEMBLY OR OPERATION, CALL OUR SERVICE CENTER AT 1-800-913-8999,
MONDAY THROUGH FRIDAY 8:00AM-5:00PM, PACIFIC COAST TIME.
NOTE TO INSTALLER:
LEAVE THESE INSTRUCTIONS WITH THE CONSUMER AFTER INSTALLATION.
NOTE TO THE CONSUMER:
RETAIN THESE INSTRUCTIONS FOR FUTURE REFERENCE.
THIS OUTDOOR COOKING GAS APPLIANCE IS NOT INTENDED TO BE INSTALLED IN OR ON
RECREATIONAL VEHICLES AND/OR BOATS.
DANGER!
If you smell gas:
1. Shut off gas to the appliance.
2. Extinguish any open flame.
3. Open lid.
4. If odor continues, keep away from the appliance and immediately call your gas
supplier or your fire department.
FOR YOUR SAFETY
1. Do not store or use gasoline or other flammable vapors and liquids in the vicinity of
this or any other appliance.
2.
When cooking with oil/grease, do not allow the oil/grease to exceed 350 F (176.5C).
Do not store or use extra cooking oil in the vicinity of this or any other appliance.
3.
An LP cylinder not connected for use shall not be stored in the vicinity of this or any
other appliance.
- 1 -

Safety Instructions
Read carefully before assembling and operating your gas grill.
INSTALLATION
This gas grill must be installed in accordance with the local codes or, if in an area without local codes, with the latest
edition of the National Fuel Gas Code ANSI Z223.1. In Canada, installation must conform to the standard
CAN/CGA 1-b149.1 and/or .2 (Installation Code for Gas Burning Appliances and Equipment) and any local codes.
THE LOCATION FOR YOUR GRILL
Do not use your gas grill in garages, porches, breezeways, sheds or other enclosed areas. Your gas grill is to be used
outdoor only, at least 21” from the back and side to any combustible surface. The grill should not be placed under
any surface that will burn. Do not obstruct the flow of combustion and ventilation air around the grill housing.
This outdoor cooking gas appliance is not intended to be installed in or on recreational vehicles and/or boats.
DANGER !
If you smell gas:
1. Shut off gas to the appliance.
2. Extinguish any open flame.
3. Open lid.
4. If odor continues, keep away from the appliance and immediately call your gas supplier
or your fire department.
FOR YOUR SAFETY
Do not store or use gasoline or other flammable vapors and liquids in the vicinity of this or
any other appliance.
Do not store empty or full spare gas cylinders under or near this or any other appliance.
Keep the fuel hose and any electrical cord away from hot surfaces. Protect fuel hose from
dripping grease. Avoid unnecessary twisting of hose. Visually inspect hose prior to each use
for cuts, cracks, excessive wear or other damage. Replace hose, if necessary.
Never test for gas leaks with a lighted match or open flame. Never light grill with lid closed.
Never lean over cooking surface while lighting grill. Use barbecue tools with wood handles
and good quality insulated oven mitts when operating the grill.
The Fuel System
Gas grills are used safely by millions of people when following simple safety precautions.
The items in the fuel system are designed for operation with the Beefmaster Explorer grill. They must not be
replaced with any other brand. (See parts list for replacement items.)
GAS BURNER: The gas burner is constructed of tubular stainless steel and should not require maintenance other
than inspection for insects/nests inside the air intake slots.
- 2 -

BURNER VALVE/REGULATOR: The burner control is actually a regulator/valve assembly. The regulator
attaches directly to the end of the burner, which extends out of the right end of the grill body, a 1-pound propane
cylinder threads into the regulator. The burner control operates in the following positions indicated by the pointer at
the top of the regulator as installed on the grill:
OFF – This stops the flow of gas to the burner.
PUSH TO TURN ON – You must push “IN” on the knob to release the knob from the locked “OFF” position.
HIGH – This position provides the highest gas flow and hottest cooking temperatures.
MED – This position provides cooking temperatures between HIGH and LOW.
LOW – This position provides the lowest cooking temperatures.
ONLY A FACTORY SUPPLIED GAS VALVE/REGULATOR SHOULD BE USED. See parts list for replacement
items.
LP GAS REGULATOR CAUTION
The gas pressure regulator provided with this appliance must be used. This regulator is equipped with the required
orifice and is set for the required outlet pressure for this appliance. This combination of orifice size and pressure
regulation specifications provides the cooking performance intended by Beefmaster Explorer. Substitution of
regulator by any other device or any other manufacturer is dangerous and could result in serious injury.
LP GAS REGULATOR
The gas pressure regulator is shipped loose and must be installed prior to operating your grill. This is a “slip-fit”
requiring no tools. See assembly instructions for proper installation. The regulator may be removed from grill after
use. Turn the regulator control knob to the “OFF” position; disconnect the LP cylinder and allow the grill to cool for
at least 30 minutes prior to removing regulator.
Care should be taken to store the regulator in a clean, secure location when the grill is not in use. The threaded
cylinder connection area should be kept clean and free off dust, dirt, sand or any foreign materials. Clean both the
regulator and LP cylinder threaded areas prior to connecting cylinder to regulator.
PROPANE FUEL: Warning – propane is a flammable gas. Improper handling may result in an explosion and/or
fire and serious accident or injury. Your grill is designed to operate with propane (LP) gas only and is equipped with
the proper orifice for propane gas.
Caution: Do not connect this grill with any gas supply other than propane. Propane gas is heavier than air and
settles in lower areas. Make certain adequate ventilation is available when using your grill .The gas cylinder may be
stored outside in a well ventilated area out of the reach of children when the grill is not in use.
LP GAS CYLINDER: This grill is designed and intended to be used with a disposable propane cylinder with a
nominal fuel weight of 1lb. Such a cylinder is approximately 4” in diameter and 7” long. The Beefmaster Explorer
does not include an LP gas cylinder. This must be purchased separately and be supplied at most hardware stores.
The cylinder used must be constructed in accordance with the specifications for LP cylinders of the U.S. Department
of Transportation (DOT) DOT-39 NRC232/290 M1110.
The LP gas cylinder shall be used only outdoors in a well-ventilated space and not in a building, garage, or any other
enclosed area. The Beefmaster Explorer may be stored indoors if the LP gas cylinder is removed and stored
outdoors.
The LP gas cylinder (not included) is threaded for connection directly to the gas regulator supplied with this
appliance.
The LP gas cylinder is provided with a threaded connection for accessory directly to the gas regulator supplied with
this appliance. Care should be taken when threading the cylinder to the regulator to engage threads correctly to
achieve the proper and intended connection. When disconnecting or connecting the gas cylinder, be careful that the
regulator does not strike the grill, the ground, or any other surfaces. Replace the protective cap over the threaded
cylinder connection when removed from grill. If any difficulty at all occurs when connecting or disconnecting the
cylinder to the regulator assembly, contact your local gas supplier for assistance.
When re-connecting the LP gas cylinder to the regulator, be sure to hand-tighten until snug. This connection should
be inspected for damage and leak tested after re-connection.
- 3 -

The threaded cylinder connection should be kept clean and free of dust, dirt, sand or any foreign materials. Clean
both regulator and LP cylinder threaded areas prior to connecting cylinder with regulator.
Keep any electrical supply cord or fuel supply hose away from any heated surfaces.
COOKING TEMPERATURE SETTINGS
HIGH – Approximately 450 degrees F
MED – Approximately 400 degrees F
LOW – Approximately 350 degrees F
NOTE: A disposable 1lb. cylinder “NEAR EMPTY” can significantly reduce or will significantly reduce internal
pressure and may affect the regulator’s capability to accurately control gas flow. This may cause somewhat hotter-
than-normal cooking temperatures during the final few minutes of cylinder use as it reaches “empty.”
NOTE: A disposable 1lb. cylinder will provide approximately 4-6 hours of cooking time with the Beefmaster
Explorer grill.
- 4 -

Assembly Instructions
PLEASE READ THE INSTRUCTION CAREFULLY AND FOLLOW STEP BY STEP. Your Beefmaster
Explorer grill is pre-assembled. The only part that you need to assemble is to connect gas regulator into your
grill.
1. Locate the gas regulator. Grasp the regulator with the knob facing directly up. Line up the collar on the
regulator with the open end of the burner tube.
2. Screw the regulator into open end of burner.
3. Once the regulator is in as far as it will go. Turn it so knob is facing to the front of the grill.
Note: Always make sure the regulator is secured in the fully lock-in position before attaching propane cylinder.
4. Be sure gas control knob is in the off position. Refer to the figure below. Check to make sure threaded areas on
cylinder and regulator are clean. Thread propane cylinder to engage threads correctly to achieve proper
connection. Removing propane cylinder. Refer to the figure below. Unthread cylinder from regulator as shown.
- 5 -

Lighting Instructions
1. Make sure the regulator is properly secured into the burner end.
2. Make sure the propane cylinder is tightly threaded into the regulator-hand-tighten only.
3. Open lid.
4. Locate lighting access hole on right side of the panel.
5. Insert match or lighter through access hole next to the burner tube. Keep flame next to burner.
6. Push gas burner control knob “IN” and turn counter-clockwise to “Lighting Position”
7. If ignition does not occur in 3-5 seconds, turn burner off. Wait 5 minutes and repeat the lighting procedure.
Note: lf the burner should go out for any reason, turn control knob to “Off” position. Wait 5 minutes before
attempting to re-light.
If the grill fails to light after the second attempt, check with your local dealer for assistance.
With the burner lit, gently close lid and allow grill to warm up for 20-30 minutes prior to use.
Flames should be blue and stable with no yellow tips, excessive noise or lifting. If any of
these conditions exist, check to see if the air shutter or burner ports are blocked by dirt,
debris, spider webs, etc. If you have any questions regarding flame stability, please call
customer service.
Typical flame pattern and proper
flame height.
TURNING GRILL OFF
I. Open lid.
2. Turn regulator control knob to “OFF”.
3. Caution: Do not attempt to re-light without following all lighting instructions.
4. Allow grill body to cool at least 30 minutes before attempting to move or transport.
To adjust for proper flame, use a
Philips screw driver to loosen
screw. Turn clockwise to close the
air shutter, and counterclockwise
to open. After adjusting, tighten
screw to fix air shutter.
- 6 -

Care & Maintenance
There is very little care and maintenance needed. The Beefmaster Explorer is designed and made of materials that
will last many years with normal use. Following these instructions will improve the longevity and quality of
cooking. To ensure safe operation of your grill, the area of cooking should always be kept free of combustible
materials of any type, such as gasoline or other flammable vapors or liquids.
1. Outside of body – This is stainless steel. It can be cleaned easily with warm soapy water or any stainless steel
cleaner.
2. Grid and drip pan – The grid is made of high quality stainless steel. The grid should be brushed with a brass or
stainless steel brush immediately after removing food, while grill is still warm. The drip pan is also stainless
steel and can be cleaned with a flat scraper such as a putty knife. Caution: The drip pan must be kept clean and
free of heavy buildup for grill to perform properly and to eliminate flare-ups. Drip pan should not be washed
completely clean.
3. Inside grill – Use warm soapy water to clean this area. Do not allow grease to build up.
4. Drain pipe – Drain pipe must be kept clear of grease and food particles to allow grease to drain properly from
drip pan. This must be done to maintain proper operation of your grill.
5. General – This grill, like all equipment, will look better and last longer if kept out of weather when not in use.
Caution: Do not store propane cylinders in enclosed spaces. When using a cover or moving the grill, always
wait until the grill has cooled for at least 30 minutes.
Check to be sure all openings into grill body are free of blockages or debris. Make sure there are no objects or
materials blocking the flow of combustion or ventilation. Make sure the stacks are in the up position when using the
grill.
When grill is not in use, turn regulator knob to off, remove propane cylinder from regulator and remove regulator
from burner.
For outdoor use only, if stored indoors, detach cylinder and leave it outdoors.
Cylinders must be stored out of reach of children.
Check burner air inlet openings (behind inlet guard on right end of body) for insect nests or blockages. Make sure
the slots in burner tube are open.
Important
First-time use. It is important that the grill be lit and allowed to operate at least 30 minutes before any food is placed
on the grill grid. Some smoke may appear during the initial operation of the grill. This is normal. These are the
preservatives used during manufacturing. After initial heating, grill is ready for use. After burning off the grill, spray
the cooking grid, drip pan and inside of the lid, so food does not stick to the grid and the inside is easier to clean.
THIS COOKING APPLIANCE IS FOR OUTDOOR USE ONLY AND SHALL NOT BE USED IN A BUILDING,
GARAGE OR ANY OTHER ENCLOSED AREA.
MOVING INSTRUCTIONS
Caution: Never move the grill with burner lit!
Transporting grill: Make sure gas control is off. Disconnect propane cylinder from regulator. Remove regulator from
grill. Be sure grill has completely cooled (for at least 30 minutes.) Close lid and secure latch. Place stacks in down
position if necessary. Carry grill by handle between stacks.
Note: It is best to leave the grease pan in place attached to the bottom of the grill – some grease may continue to drip
from drainpipe during transport.
Setting up for use: Find a flat surface. Grill must be on a level surface to operate properly.
- 7 -

Cooking Instructions
1. Allow grill to warm up with lid closed for 20-30 minutes prior to cooking.
2. This Beefmaster Explorer model is equipped with an adjustable HIGH/MED/LOW burner control. This allows
for complete flexibility in cooking temperatures.
HIGH setting has a cooking temperature of approximately 450 degrees F.
MED is approximately 400 degrees F.
LOW is approximately 350 degrees F.
3. The cooking times we suggest are only that – suggestions. You may want to vary the times as you become used
to your grill.
4. You may cook on the grill in any weather. If the temperature is extremely cold or hot, it will slightly decrease or
increase your cooking times. Keep grill out of reach of excessive winds when operating, as it may increase
cooking times.
GRILLING
1. Steak – T-bone, 1” thick, medium: grill 10 minutes on each side at MED setting.
2. Chicken – Quarters, average size fryer: Cook skin side up for 30 minutes and skin side down for 30 minutes at
MED setting. Check for doneness. If chicken is completely done, only then dip or brush on the sauce or your
choice. Put back on grill for approximately 10 minutes longer. Note: You may want to repeat this process one or
two more times.
3. Pork ribs and chops, ¾” thick: grill 10-20 minutes on each side, MED setting. When done, drip or brush on
sauce. Put back on grill for 5-10 minutes. Repeat if desired.
GRILLING INSTRUCTIONS
• Fish grilling: Allow grill to warm up for 15 minutes. Place fish on grill and season to taste. Allow 20-30
minutes total grilling time, turning at half the grilling time if desired (turning is not necessary).
• Chicken halves or quarters: Place on grill for 60 minutes. Turn at 30 minutes if desired.
• Steak ¾” – 1” thick: Allow grill to warm for 15 minutes, and then place steaks on grill. Allow 6-10 minutes per
side. Ten minutes on each side will produce medium-well to well-done steaks.
• Hamburger: Same as steak.
• Ribs: Allow grill to warm up for 15 minutes, place ribs on grill. Allow 40-60 minutes grilling time. Turn at half
the grilling time if desired (not necessary). Baste or dip in sauce at any time.
• Whole chicken: Allow grill to warm up. Season chicken with seasoning mix. Grill for 1-1/2 hours.
• Turkey breast: Allow grill to warm up. Grill 10 minutes per pound, or until internal temperature reaches 170
degrees F.
- 8 -

Lightning Rod Assembly Instructions
PLEASE READ THE INSTRUCTION CAREFULLY AND FOLLOW STEP BY STEP.
1. Please locate the lightning rod located on the right side of your table top grill.
Please see the following figure.
Lightning
Rod
9
-

2. Please attach the match to the front end of the lightning rod, and stick the lightning
rod into the access to manual lighting hole to light the fire as indicated in below
picture.
Access to manual lighting
10
-

ILLUSTRATED PARTS BREAKDOWN
MODEL 720-0001-R TABLE-TOP GRILL
MODEL 720-0001-R-LP PARTS LIST
REF# DESCRIPTION Q’TY
1 Lid, Front 1 SET
2 Bowl Assembly 1 SET
3 Handle Assembly 1 SET
4 Cooking Grid 1PC
5 Flame tamer 1 PC
6 Grease Tray 1PC
7 Burner 1 PC
8 Name Plate 1 PC
9 Regulator LP 1 SET
10 Foldable Leg 4 SET
11 Gas Collector Box 1PC
12 Latch 1SET
13 Grease Tray Stopper 1PC
11

TROUBLE SHOOTING
SPIDER AND INSECT WARNING!!!
Spiders and insects can nest in the burners of the
grill and cause the gas to flow from the front of the
burner. This is a very dangerous condition, which
can cause a fire to occur, thereby damaging the grill
and making it unsafe to operate.
WHEN TO LOOK FOR SPIDERS
You should inspect the burners at least once a year
or immediately after any of the following conditions
occur:
1. The smell of gas in conjunction with the burner
flames appearing yellow.
2. The grill does not reach temperature.
3. The grill heats unevenly.
4. The burners make popping noises.
BEFORE CALLING FOR SERVICE
If the grill does not function properly, use the
following checklist before contacting your dealer for
service.
CHECK LIST
PROBLEMS WHAT TO DO
Grill won’t light when the control
knob is turned to on.
Check to see if the tank is empty.
Check burner ports for any blockage. Use soft wire brush to clear
plugged ports.
Check the gas orifice on the malfunctioning burner for an obstruction.
If orifice is blocked, Clean it with a needle or a thin wire. NEVER USE
A WOODEN PICK.
Burner flame is yellow or orange,
in conjunction with the odor of
gas.
Call our customer service line 1-800-913-8999.
Low heat with knob in “HI”
position.
Is the fuel hose bent or kinked?
Is the grill in a dusty area?
Is there adequate gas supply available?
If it is only one burner that appears low, does the orifice or burner
need cleaning?
Is the gas supply, or gas pressure low?
Is the grill being preheated for 15 minutes?
12

LIMITED WARRANTY
MODEL 720-0001-R
STAINLESS STEEL OUTDOOR GAS GRILL
Nexgrill Industries, Inc. warrants to the original consumer purchaser of each Outdoor Gas Grill that
when subject to normal residential use, it is free from defects in workmanship and materials for the
periods specified below. This warranty excludes grills used in rental or commercial applications.
Component Warranty Period:
Burners:
3 Years
2 Years
3 Years
1 Year
3 Years
Stainless Steel Flame Tamer:
Stainless Steel Cooking Grids:
Regulator
All Stainless Steel Parts
Our obligation under this warranty is limited to repair or replacement, at our option, of the product
during the warranty period. The extent of any liability of Nexgrill Industries, Inc under this warranty is
limited to repair or replacement. This warranty does not cover normal wear of parts, discoloration of the
stainless steel parts, or damage resulting from any of the following: negligent use or misuse of the
product, use on improper fuel/gas supply, use contrary to operating instructions, or alteration by any
person other than our factory service center. The warranty period is not extended by such repair or
replacement.
Warranty claim procedure: If you require service or parts for your grill, please contact our Warranty
Service Center for factory direct assistance. Our hours of operation are 7 AM to 6 PM PST Monday to
Friday, 8 AM to 12 PM PST on Saturday. Our number is 1-800-913-8999 and our FAX number is
1-800-598-8829. Please direct all correspondence to: Nexgrill Industries, Inc. 280 Machlin Court City
of Industry, CA 91789 ATTN: Warranty Service Center.
Product repair as provided under this warranty is your exclusive remedy. Nexgrill Industries, Inc. shall
not be liable for any incidental or consequential damages for breach of any express or implied warranty
on its products. Except to the extent prohibited by applicable law, any implied warranty of
merchantability or fitness for a particular purpose on this product is limited to the duration of the above
warranty. Some states do not allow the exclusion or limitation of incidental or consequential damages,
or allow limitations on how long an implied warranty lasts, so the above limitations or exclusions may
not apply to you. This warranty gives you specific legal rights, and you may have other rights, which
vary from state to state.
Printed In China
13
/