Pioneer DV-F727 Owner's manual

Category
CD players
Type
Owner's manual
DVI
O
27
'uctions
2
Please read through these operating instructions so you will know how to operate your model properly. After you
have finished reading the instructions, put them away in a safe place for future reference.
This player is not suitable for commercial use.
IMPORTANT
A
TbellghtnlFEflashwithenowheadsymbel,within
=nequi_eral thangin,isintendedtoalerttbeusa
to tbethe_enceofurdnsuletod"da_enuJSVOhebe"
within the product'senclosure that may be of
suftlelent mugnitJ_etocor_tltuteariskofsh_ctrin
shockto ber_
CAUTION:
TO PREVENTTHE RISKOF ELECTRICSHOCK,
DO NOT REMOVE COVER (OR BACK). NO
USER*SERVICEABLEPARTS INSIDE, REFER
SERVICING TO QUALIFtED SERVICE
PERSONNEL
]_e e_brnatinnpointwithinanequlbtemltd_gin
is intendedth inert the user to the m of
impc_aet obemtingendn_inten=nce(se_ining)
instmcbensin the Klerotu(eaccornbenylng the
shpim.
IMPORTANT SAFETY INSTRUCTIONS
READ INSTRUCTIONS -- All the safety m_d
opembeg instructionsshouldbe reedbefo¢e
tbe productisoderated.
RETAIN INmUCTIONS -- The safety and
operatingit_tmctinns shouldbe re_aleedfor
future fthefeRce.
_ WARNING&--AI v_mingson_e thoduct
and in the operatinginstructkxtsshould be
0dberbeto.
r.ou.ow IN$'IRUCTIONS --AI obemtingand
use instructions should be _.
CLEANING-- UnpLugthisproduct fromthe wall
outletbeforecleaning.Theproductshou_ be
cleanedoofywithi poll•hiesclothorasoft dry
cloth.Neverclelnwithfumiturewa0(.ben=the.
lesecticibesor ofherv_atle liqu_sinncethay
may conobetbecshleet.
ATTACHMENll -- Donotm ettachmer.tsnot
recommendedby the I_O_JCtrmmufacturer
asthay maycauseW.
WAILER ANO MOISTURE -- Do not use thin
thoduct nearv_ter -- for example, near a
bathtub,wash bowl.kitchensink.or inunthy
tub; inawet hasemen_ ornear swimming
pool;and the like.
ACCESSORIES-- Donot placethis product on
an unstable ca_ stand, tripod, bracket,or
table. The productmay fall.causing serious
injuryto a childc( adult,endseriousbemin;e
to tbe p_oduct.Usoonly with e cart. stand.
tripod,bracket,c_tat_ recommendedbythe
manufacturer,soldwith the ixoducL Any
moundngof the productshouldfollow the
manufacturer'sinstructions._ sbeuld usee
mountingaccessory recommendedby the
m8 oufactuRK.
CART -- Aprnduct _d cwt c_tlen should
be movedwithcare.Quick stops, excessive
force, and unarm _4Jrfmcesmay c_msethe
productenclcan combinshontooverturn.
®
_.NTILATION -- Slots end of)eningsin the
cabinet we providedfor veofishon •od to
en_m reltshleoperetic_lof theproductandto
WolectItfromovert_ti_ andtheaeopenlegs
mustnotbe bleckodo(covefed.Tbeopenings
sbeuldnev_ be bleckbebypledngtheproduct
on e bed.sofs. rug. or othersirnhr surfuce.
Thle thoduct shouldnot he placod le e bullt_in
instckatlensuchas abookcaseorrockunless
proper ventilation is provided or the
manufacturer's instructions have been
odhered to.
_ SOURCE• -- _3_leprbeuctslmuldbe
obemtbeo_y fromthetybeof power=oume
i_ o_ them=ldng isbel. Lfyou arenot
sure of the type of power supplyto +your
home. consult yourproductbe_er Or local
bewe_ compen'_
LOCATION- _e odpinmceshouldbein._mlledin
=tshle incatlo_.
NONU_ PERIODS- The power cordof the
shphanceshouinbeunplnggedIromtheoutlet
when left unusedfor long p_ind of tinge.
OROUtilOING OR POLARIZA'nON
If this productis equipped with be_dzed
intermdng currentlineplug (_plughe'_ng one
Id_bew_derthan tbeother). Itwiltth intothe
outletoofyone way.ThisisaNthty thmure. If
you•re ur_ble to insertthe pCugfullyintothe
outfur, tryaver •in9tbeplug.IftheI=_Jg=_ld
stiMinlto_ collect youreisofrlckmtoreplica
yourobsofuteoutlet Donotbefwt thes=futy
p_lx_e of tbe posited pkg.
If this p,_oductis eq_Jibeedwnh o thme-wtre
Orou_ ty_ plu_. a plug _ mth_
(grounding)_ itwtl onlyfit into gmuoding
type powe{outlet This isa safety feature,if
you we unable to insert _e plug into the
oultet,co_tlct youreisctrickm to repinceyour
obsolete outint. Do nm defeat the =efuty
be_<_e of the groundingtyodpieS.
POWER-_D PROTECTION-- Fower-supp_
o_be shouldbe muted sothat they am not
_ik_lyto be wakbe _ _ plncbed by items
ubenot Iglinst tbem,paylagpI_itcther
attention to cords at plugs, convenience
receptacins, and the point where they exit
fromtbe ixbeuct
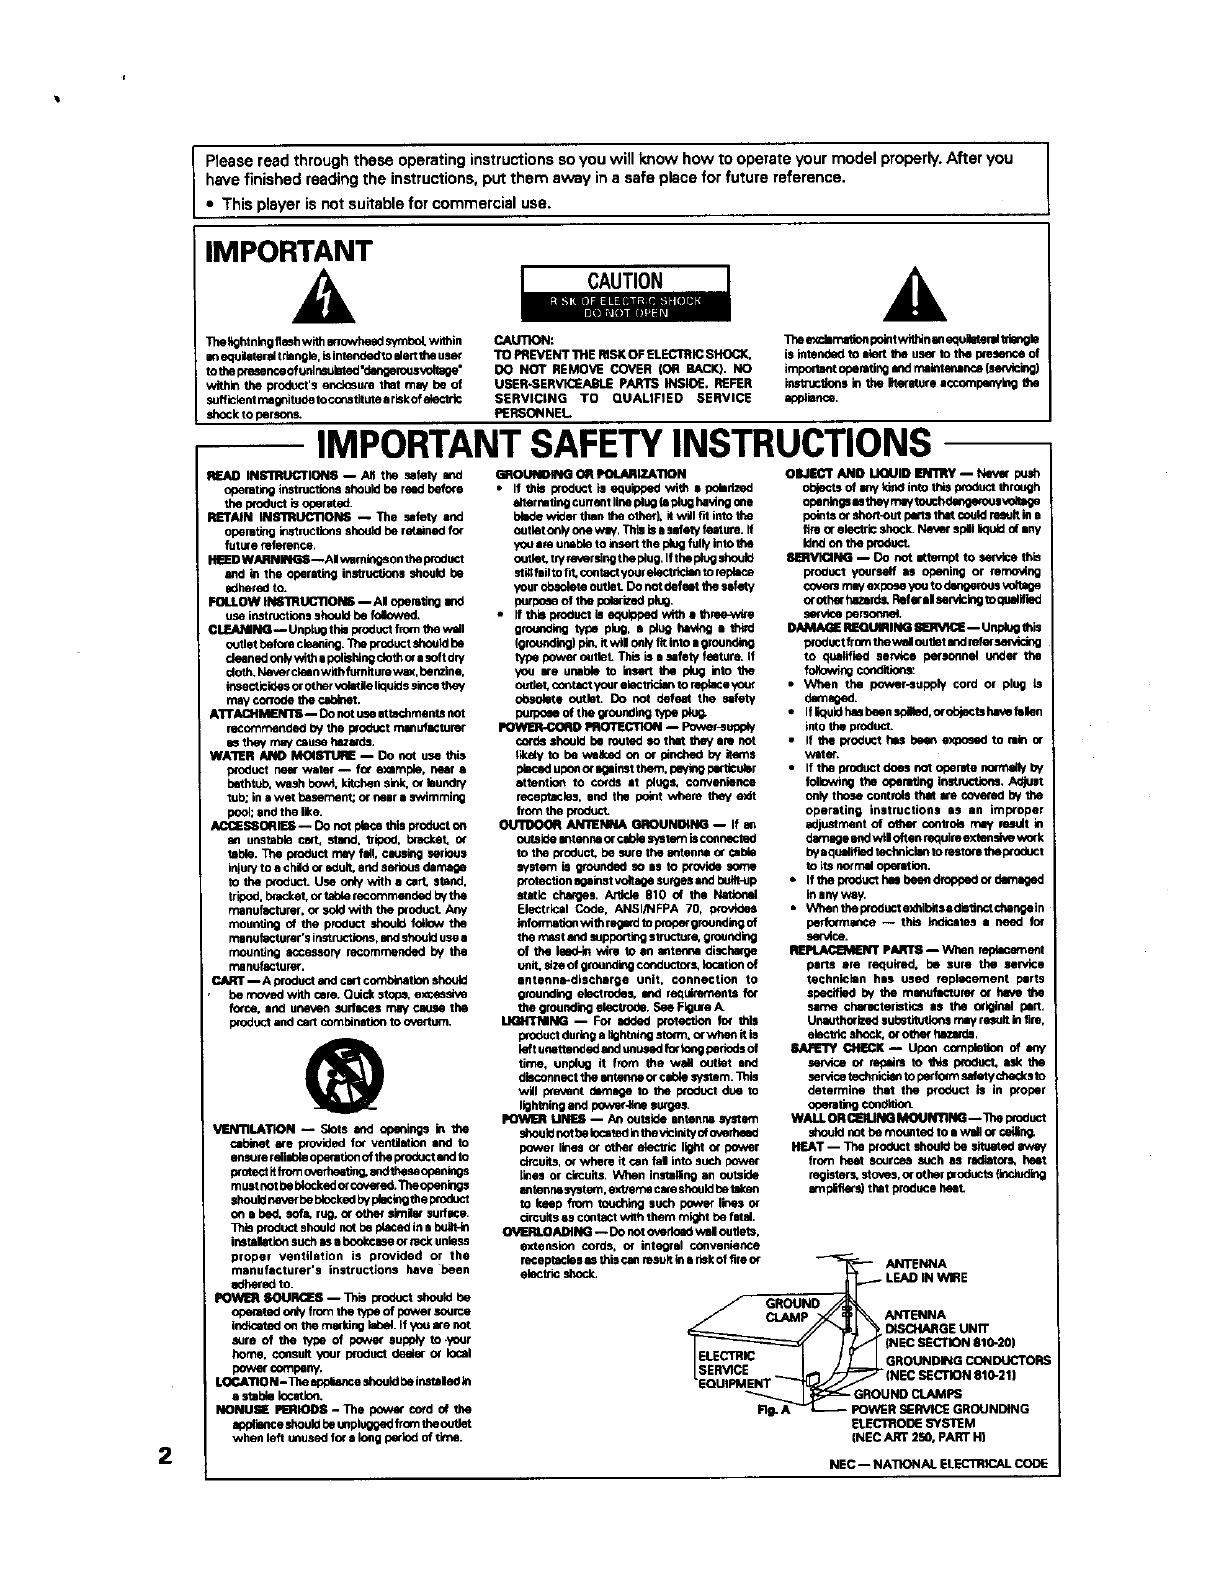
ANI_NNA eROUNBN_ -- If
out•lee antennaOrcablesystemiscoummled
to the I_oduct be surethe antenna er _ald_
system is gmundbeso as to provide some
protectionIg_inst voltagesurges andbeltt_p
static charges. Article 810 of the
Ein_trlcal Code. ANSI/NFPA 70, provides
lethm',etinnwithregardto pmpe;grouodingof
themastandsupporting structure, grounding
of the leggin wire to an intanna di_h_ge
unit.sizeof grouodiFEco_ductm=,locationof
antenn_discharge unit, connection to
groundingeisctrobes_md requbemeofsfor
the groundingelectrode. See FIgmeA.
IJ_NTNIN_ -- For _dod i:_tectinn fm this
productduringaltDhtuingstom_,o(when it is
leftunottended _d unu_d thr lensbedods of
time, unplug it from the wall o_tlet end
disconnectthean_ orcabfu•,/stem.]_ls
will p_mmnthamlge to the i_oductdue to
Ik_htningand po_,e_4_esurges.
POWER UNES -- An outsideantenr_ system
shouldnotbefucatedinthevicinityofovethwd
power lines Or Otherelectdc light or power
circuits,o_where it canfal into auchpowe_
li_es or circuits.When lt,_tallleg an outside
antennaaystem,e_ careshouldbel_en
to heap from touchingsuch bewer lines O_
drcultsas contactwiththem mightbe fldaL
O'v_EJRlt.OAJ_NO-- DOnoto_rlebe w_l oubet_.
extension cords, or integral convenier_e
receplecinsas this canresultinariskof fireor
electricshock.
OBJECT AND _ID IENTRY-- Nev_ bash
objec_ of iny ldod itho this productthrough
pointsOrshort-outberle thatcouldresultin e
fireor electricshock.Ne_ shllt liquinof •ny
lendonthe_
_ --DO _ _ to_e ttiis
m_od_ yourselfms openingor m_
_ exbese,youto_s _
orothe_hazards,Rthe_d seP_cb'Kitothmntied
_uct(mm th_ oubet_ _
to qu_lHled se_ce i_onnel under the
_ng c_ition_
When the power_upply cord or ping is
if_uldi_ been_,o(_tabe_ fulfun
inththeproduct
If the product hl_Sbe_ e)_o_ed to rain o€
_uf.
If tbe thbeuct doesnot opemth nom'_inlyby
followingthe oberatingthstru_Jo_, Adjust
onlythosec_$ _ arecow(be by
operatinsinstructions*) an imm_oper
adjustmentof_ centr_ _ _t in
bemage m_lw_loftenmqutieextenetvev,_xk
byaq_ technicisntomsto_th_t
toi_no_ _inn.
if t_ p_u_t it= be_ d_be_ or darn_od
_11enthe_oduct eshibltsadistlectchengeln
be_io_nmce-- this_ates need for
_ce.
PARTS --V_l_n_ent
parts ere required, be sure the service
technicianhas used repi_ement m_rts
shecifind by 0m manufactureror _
same cf_M_ctemticsas the ork(_l__.
Unauthoritedsubstituben$ mayr_mlt inthe,
elec_ shoch,or_ _.
_ _K _ Upen com_ _ _
sen4o__idan to_ _s to
determine that the product is in Wober
_ ¢ondi_t
WALLOR CL=IUNOMOUNT1NO-- Theproduct
sbe_Idnotbe moumodto i W_l o__ng.
HEAT --Tbe l_Oduct_M be _ _
from _ eour_ such es _or_ le_t
rngister_sto_os,orother_Is (_
em_llers)thatproducebeet
_ ANTENNA
LSAD IN WIRE
GROUND
DISCHARGEUNiT
(NEC SECTION 810-=0)
GROUNDING CONDUCTORS
(NEC SECTION810-21)
_ ;ROUND CLAMPS
noWI.=R SERVICEGR_NI_NG
Et [ffrlRO_ aY_I'E M
[NEC ART 2_. PARTH)
NEC -- NATIONAL ELEC31_AL CODE
CONGRATULATIONS ON YOUR PURCHASE OF
THIS RNE PIONEER PRODUCT.
Pioneer is on the leading edge of DVD research for
consumer products and this unit incorporates the latest
technological developments.
We are sure you will be fully satisfied with the DVD
player.
Thank you for your support.
WARNINg:TO PREVENTFIREOR SHOCKHAZARD,DO
NOT EXPOSETHIS APPUANCETO RAINOR
MOISTURE.
IMPORTANT NOTICE
[For U.S. end Canadian models]
The serial number for this equipment is located on the
rear panel. Please write this serial number on your
enclosed warranty card and keep it in a secure area. This
isfor your security.
CAUTION:This product satisfies FCC regulations when
shielded cables and connectors are used to connect
the unit to other equipment. To prevent
electromagnetic interference with e_ectric appliances
such as radios and televisions, use shielded cables
end connectors for connections.
This equipment has been tested and found to comply
with the Emits for a Class B digital device, pursuant to
Part 15 of the FCC Rules. These limits are designed
to provide reasonable protection against harmful
interference in a residential installation. This
equipment generates, uses, and can radiate radio
frequency energy and, if not installed and used in
accordance with the instructions, may cause harmful
interference to radio communications. However,
there is no guarantee that interference will not occur
in a particular installadon, if this equipment does
cause harmful interference to radio or television
reception, which can be determined by turning the
equipment off and on, the user is encouraged to try
to correct the interference by one or more of the
following measures:
- Reorient or relocate the receiving antenna.
- Increase the separation between the equipment an_
receiver.
- Connect the equipment into an outlet on a circuit
different from that to which the receiver is
connected.
- Consultthe dealeroran experiencedradlo/rv
technicianfor help.
CAUTION
Use of controlsor adjustmentsor performanceof
proceduresotherthanthose specifiedhereinmay
resultinhazardousradiationexposure.
The useofopticalinstrumentswith this product
will increaseeye hazard.
[ForCanadian model]
ThisClassBdigitalapparatuscomplieswith Canadian
ICES-O03
[Pour le modele canadiee]
Cet appereilnum_riquede laclaseaB eat conformeii
ianormeNMB-O03duCanada.
[Forcanadian model[
CAUTION:TO PREVENTELECTRICSHOCK,DO NOT
USETHIS (POLARIZED)PLUGWITH AN EXTENSION
CORD, RECEPTACLEOR OTHEROUTLETUNLESSTHE
BLADESCAN BE FULLYINSERTEDTO PREVENT
BLADEEXPOSURE.
ATTENTION:POURPREVENIRLESCHOCS
ELECTRIQUESNE PASUTILISERCETTEFICHE
POLARISEEAVECUN PROLONGATEUR,UNE PRISE
DE COURANTOU UNEAUTRESORTIEDE COURANT.
SAUFSI LEaLAMES PEUVENTETREINSEREESA
FONDSANS EN LAISSERAUCUNE PARTIEA
DECOUVERT.
This product incorporates copyright protection
technology that is protected by method claims of
certain U.S. patents and other intellectual property
rights owned by Macrovision Corporation and other
rights owners. Use of this copyright protection
technology must be authorized by Macrovision
Corporation, and is intended for home and other
limited viewing uses only unless otherwise
authorized by Macrovision Corporation. Reverse
engineering or disassembly isprohibited.
Information to User
Alterationor modificationscarriedout without
appropriateauthorizationmay invalidatethe user's
rightto operatethe equipment.
3
I/
4
FeaturesofThis Player
DVDs, Video CDs, CDs, and CD-Rs that display the Iogos
shown below can be played back on Pioneer DVD
players. For more information on discs compatible with
this player, refer to the table below.
Types of playable
discs and their marks
DVD VIDEO
o
VIDEO CD
CD,CDTEXT,CD-R
DI_'rAL AUIIIO
Diameter/
Rayable sides
DVO VIDEO
12 cm (5 in.)/ 1 layer
single-sided 2 layer
12 cm (5 in.)/ 1 layer
double-slded 2 layer
VIDEO CD
12 cm (5 in.)/
single-sidnd
VIDEO CD single
8 crn (3 in.)/
singl_sided
CD
12 cm (g in.)/
sing16-sided
CD single
g cm(3in.)/
single-sided
Playback time
Digital audio
Digital video
(MPEG 2)
133 rain.
242 min.
266 min.
484 rain.
Digital audio
Digital video
(MPEG 1)
Max. 74
minutes
Digital audio
Digital video
(MPEG 1)
Max. 20
minutes
Digitalaudio
Max. 74
minutes
Digital audio
Max, 20
minutes
The disc format Iogos shown above are found on disc
labels or on disc jackets.
To prevent malfunction, be sure to use an adapter
when loading 8 cm (3 in.) CDs in the player.
To prevent malfunction, do not use 8 cm (3 in.) CD
adapters with 8 cm (3 in.) DVDs.
Discs other than the ones indicated above cannot be
played on this unit.
DVDs that have incompatible region numbers cannot
be played on this unit. The region number of the
player can be found on the rear panel.
Tbls unit is capable of playing prerecorded audio CD-R discs,
Due to variances in recording processes and disc typos as
well as minor scratches, dust, fingerprints, or condensation
on the disc or pickup lens, playback may not be possible
with some discs,
If a CD-R disc has not undergone a process called
finalization, playback is possible, however other functions
such as fast forward and reverse SCanning, and track
search cannot be performed.
Be sure to read the guidelines for using an audio CD-R disc
in the documentation supplied with the CD-R disc.
DIGITAL
Compatible with a wide range of digital audio
output formats
The digital audio output jacks of this player can output
Dolby Digital*, DTS**. MPEG, and linear PCM digital
bitstrearns to AV components with built-in decoding
capabilities.
Multiple video output formats that can be
selected to best suit your TV or monitor
This player features composite, S-video, and component
jacks to offer ideal connection possibilities to nearly
every type and level of commercially available TV or
monitor on the market today.
Digital Noise Reduction (Video Quality
Enhancement)
DNR (Digital Noise Reduction) can be used to improve
the video image and remove digital noise. Select a
preprogrammsd setting suited to the program's subject
matter, or make manual adjustments to suit your needs
or preferences and save them in the player's memory.
Ce 3l uSurround"
TruSurround and Virtual Dolby Digital
TruSurround*** uses technology that simulates
multichannel surround sound using only two speakers.
Virtual Dolby Digital works in conjunction with Dolby
Digital audio sources to create a realistic surround
sound. Virtual Dolby Digital is selected automatically
when Dolby Digital sources are played.
Manufactured under license from Dolby Laboratories.
"Dolby" and the double-D symbol are trademarks of Dolby
Laboratories. Confidential unpublished works. © 1992-1997
Dolby Laboratories. All rights reserved.
** "DTS" is a trademark of Digital Theater Systems. Inc,
Manufactured under license from Digital Theater Systems.
Inc.
** "TruSurround and the (0) symbol are trademarks of SRS
Labs. Inc. in the United States and selected foreign
countries. TruSurround technology is incorporated under
license from SRS Labs, Inc.
It has never been easier to manage 300 discs than with
this player's on-screen graphical control screens. Using
the player's Sub Setup screen, you can input titles and
artists for the discs loaded in the player, sort them
according to number, disc type, title, or artist, organize
them into groups, and keep the information updated
even ifyou physically reorganize the discs (page 30).
Organize all of the discs in
the rack by inputting disc
titles and artist names for
easy search and reference.
I DVO S_ MdJ_
2_:_,Ir3_mm,_+_d S.Ewa
3VC_ DIn_ Cd. VI_OUt
sco I.kul Rr_l
_W_emr_a_ I_mE_
This title of a disc and the artist name can be easily input
using the remote control or the front panel.
Additionally, you can connect a commercially available
PS/2* compatible keyboard or mouse to this player for
quicker and more efficient data input and other player
functions (page 33).
PS/2isa registeredtrademark of IBM corporation.
This unit can be connected to another DV-F727 unit for
combined control of up to 601 discs (page 66).
By using the single loader slot, you can quickly load
discs, such as rental DVDs. that you may not want to
have loaded in the disc rack all of the time. With the
touch of a single button, this disc can be called up and
played at any time (page 28).
You'll find setting up and adjusting the system easy to
do with on-screen menus conveniently organized and
arranged. Additionally, on-screen information (_))
appears to elari5/the functions and explain the options
available.
Answer a few questions and
have an the necessa W audio,
video, and on-screen
language adjustments set
automatically by the player
using the Setup Navigator
(page 20).
_Set_ 0 up u_g the Setup Navig_or
Additionally, you can create a list of menu items that you
regularly use with the Function Memory so that they can
be easily accessed at any time (page 63).
This player incorporates technology that enables
playback of DVDs and VLdeo CDs in forward and reverse
directions using MULTI DIAL on the remote control
(page 53).
Multi-Language Subtitles (page 44}_
You can select a subtitle language or turn subtitles off
when watching movies or other media with subtitles
available.
Multiple Languages (page 45)_
You can select the language when watching movies or
other media that have multiple language and/or audio
soundtracks recorded on them.
Multi-Angle (page 54)_
You can view scenes from different camera angles when
watching movies or other media with multiple angle
playback available.
_This mark indicates this may nor be possible with certain discs.
This unit is designed to use less than 0.9 W of energy
when this player is in standby mode.
5
Differences in Disc
Composition
DVD
DVDs are divided into units referred to as titles, and
titles are divided into chapters. A DVD which contains a
movie may have only one title with many or no chapter
divisions. Karaoke DVDs may have many titles, assigning
s title to each song on the DVD. Menu screens do not
beleng to any title.
DVD player functions generally apply to titles on a DVD
or chapters within a selected title. The player functions
available may also vary from title to title, depending on
the DVD. When DVDs have a unique title dMsion, it
should be noted that search and program functions may
be affected.
I 1
O DVD
HowtoProceedinThis
Manual
DVD isan incredibleformat thatpresentsthe highest
qualitydigitalaudioandvideoavailabletoday.Because
usingthe DVD playerandDVDs maybe confusingst
first, following theorderbelow shouldhelpyouget
throughthe importantstagesofgettingset upsoyou
canstart usingyourplayeras soonas possible.
Get familiar with the player.
Refer to the section "Before Using" on page 8 to
confirm that all the accessories were included with the
player, if you are new to DVD, it might be beneficial for
you to go through the "Names and Functions" section
starting on page 9 to get familiar with the parts and
buttons on the main unit and remote control.
There is also a list of terms that can be found on page 76
if you are having trouble understanding soma of the
terminology associated with DVD.
Make the necessary connections.
No entertainment system seams to be set up exactly
the same way. The "Making Connections" section
starting on page 15 shows how video and audio
connections may be made to suit your home
entertainment s/stem.
6
Video CD/CD
Video CDs and CDs are divided into units referred to as
tracks (Video CD tracks may also be referred to as
scenes). One song generally corresponds to one track.
Some tracks are further divided into units referred to as
indexes. Video CDs with PBC (Playback Control) also
contain menus recorded on the disc which enable easy
access to the contents of the disc.
When played back on a DVD player, beth Video CDs and
CDs are considered to be s single title, regardless of the
number of tracks.
Track 1 Track 2 Track 3 Track 4
O Video CD
Track I Track2 Track 3 Track 4 Track 5
Set up the player.
Before you can begin to enjoy the benefits of the DVD
format, it isfirst necessary to sot up the player to output
the video and audio corresponding to your system. The
section "Setting Up the Player" staring on page 20
explains hew to use the Setup Navigator, a function that
automatically sets up your player. The Setup screen
menus, described in the section starting on page 39, are
also used in a number of other functions. Learning the
procedure for operating these menus will make using
this prayer much easier and more enjoyable.
Load the disc rack and play discs.
When all the connections and setups have been made,
you are ready to play your DVDs. V_leo CDs, and CDs
with the player. The section "Getting Started Using Your
DVD Player" starting on page 23 outlines the basic
player operations.
Organize the discs in the disc rack.
The section "Disc Management" on page 30 hetpeyou
manage the discs you have leaded in the rack by making
use of the Sub Setup screen menus. By taking advantage
of this player's text input and cross-referencing
capabilities, it is quick and easy to find the disc you want.
Enjoy the other features available.
Once you are comfortable using the basic player
functions, you are ready to take advantage of the various
options DVD and this player have to offer. The section
"Advanced Functions" starting on page 49 describes s
number of functions available with this player.
Table of Contents
Before Using ........................................ 8
Checking Accessories ..................................... 8
Prepadng the Remote Control ......................... 8
Names and Functions ......................... 9
Front Panel ...................................................... 9
Display Window ............................................. 10
Remote Control ............................................. 12
Rear Panel ..................................................... 14
Making Connections ......................... 15
Connecting Your DVD Player ......................... 15
Audio Connections ........................................ 17
Video Connections ......................................... 18
CD-Deck Synchro Connections ..................... 19
System Control Connections ......................... 19
Setting Up the Player ....................... 20
Using the Setup Navigator ............................. 20
Getting Started Using Your DVD
Player .................................................. 23
Loading DVDs, Video CDs and CDs
into the Player .......................................... 23
Playing DVDs, Video CDs and CDs ........... _... 24
Chapter (Track)Skip Forward/Skip Back ........ 27
Forward and Reverse Scanning ..................... 27
Playing a Disc That Is Not Loaded in the Rack
(Singte Loader Play).................................. 28
Stopping Playback and Switching Power Off .. 29
Disc Management ............................. 30
Registering Information and Inputting Text
for Discs Newly Loaded in the Player ...._30
Keeping the Disc Order and Information
Updated ................................................... 31
Inputting and Changing Text Information ......31
Selecting a Disc On-Screen ........................... 35
Searching for a Disc, ntle, Chapter, Track, or
Location on a Disc .................................... 35
Creating and Selecting Custom Files ............. 37
Adjusting Audio and Video
Settings .............................................. 39
Using the Setup Screen Menus .................... 39
Changing to the Setup Screen "Expert"
Menu Mode ............................................. 40
Setting the Digital Audio Output To Be
Compatible with Your AV Component ...... 41
Turning the Digital Output On and Off ........... 42
Adjusting the OSD (On-Screen Display) ........ 42
Setting the TV Screen Size ............................ 43
Setting the Language Options ......... 44
Selecting a Subtitle Language
(Multi-Language Subtitles) ....................... 44
Changing the Audio Language
(M ulti-Language Function) ....................... 45
Setting Language and Subtitle Preferences
in the Setup Screen Menus ..................... 46
Advanced Functions ......................... 49
Getting Surround Sound from
Stereo Speakers ....................................... 49
Adjusting the Dynamic Range of the
Audio Soundtrack ..................................... 49
Adjusting the Video Quality
(Digital Noise Reduction) .......................... 50
Still Frame/Slow Play/Frame
Advance Playback .................................... 52
Scanning in Forward and Reverse
Directions at Different Speeds ................. 53
Viewing from a Desired Camera Angle
(Multi-Angle) ............................................. 54
Repeat Play .................................................... 55
Random Play .................................................. 56
Playbackin a Desired Order (Program Play) .... 57
To make an ongoing program of your favorite
titles, chapters and tracks (Best play) ...... 59
Reviewing Previously Played Discs
(Previous Scan) ........................................ 60
Previewing Discs in the Current Play Mode
(Hi-Lite Scan) ............................................ 60
Continuing Playback from a Specified
Location (Last Memory) ........................... 61
Memorizing Settings for Often Viewed
DVDs (Condition Memory) ....................... 62
Memorizing Regularly Used Menu Settings
(Function Memow) ................................... 63
Viewing Disc Information .............................. 64
Connecting to Another Player for Control
of 601 Discs ............................................. 66
Utilizing the Audio-video Output of
Another AV Component ........................... 68
Selecting External Input ................................. 68
Setting the Parental Lock Level ..................... 69
Turning the Screen Saver On and Off ............ 70
Changing the Background Color
of the Screen ............................................ 70
Additional Information ..................... 71
Disc Care ....................................................... 71
For Proper and Long Use of This Unit ........... 72
Language Code List ....................................... 73
Troubleshooting ............................................. 74
Resetting the Player to System Settings ....... 75
Terms ............................................................. 76
Specifications ................................................ 78
7
Preparingthe RemoteControl
Inserting batteries into the remote
control
CheckingAccessories
Please confirm that the following were received with the
ptayer.
Audio cord
Video cord
Master-Slave control cord
1 Push down on the tab on the battery
compartment cover, and pull out in the
direction indicated by the arrow.
2 insert batteries.
Make sure to match the plus (+) and minus
(-) polarity guides on the batteries with the marks
inside the battery compartment.
Remote control unit
3 Close the cover.
8
AA/R6P batteries
Operating instructions (this manual)
Warranty card (U,S, and Canadian models only) Notes
Do not mix old and new batteries.
When replacing battedes, use all new batteries.
When nor using the remote _ontrol for a long period of time
(over 1 month), remove the batteries to avoid possible damage
from battery corrosion, If batten/leakage occurs, wipe the
batten/liquid from the battery component, then insert new
batteries,
Remote control operation
When operating the remote control, point itat the remote
sensor ([]) located on the player's front panel. The
remote control can be used up to 7 m (23 feet) from the
player and within a 30° angle on each side of the sensor.
Notes
Exposing the remote sensor to direct sunlight or strong light
may cause fault,/operation.
When Master-Slave connections are made to another DV-F727
to create a 601_isc changer, only the remote sensor on the
first DV-F727 will accept signals from the remote control
(page 66).
If the CONTROL IN jack on the player's rear panel is connected
to the CONTROL OUT jack of another component, point the
remote control at the other component to operate the player,
Operation will not be possible when pointed at this player
(page 19).
FrontPanel
(_) PLAY MODE button
Press repeatedly to select one of the player's play
modes. You can select either single play, ALL play,
or custom play (page 26).
(_) Display window
Displayssysteminformation(page10).
TEXT DISPLAY button
Press repeatedly to display the disc title or artist
name in the display window. When text information
is included on the disc, this information will also be
displayed.
(_) TEXT INPUT button
Press to start text input(page33).
(_ TEXT SEARCH button
Press to search for a disc loaded in the rack by
format, disc title, or artist (page 371.
(_ Hood
The hood can be opened and closed by pressing
OPEN/CLOSE (page 23).
(_ DIRECT CUSTOM buttons
Number buttons
Press the number button of the custom fila you
want to play. Playback of the discs in the selected
custom file begins automatically (page 38),
AUDIO/VIDEO button
Press repeatedly to select the audio or video custom
file bank (page 381,
_) UPDATE button
Use to update information on the discs loaded in the
rack (page 31).
® Selection dial
Rotate to select a disc number. When inputting text,
rotate to select a character (pages 23, 26, and 33).
Enter button
Press to select the disc or enter text that has been
selected using the selection dial (pages 26 and 33).
<< (reverse) button
Press to go back to previous chapters/tracks. Press
and hold to perform reverse playback scanning. When
usingthe front panel to edit input text, use to move
the position of the cursor (pages 27 and 33).
9
_) _ _ (forward) button
Press to advance to chapters/tracks. Press and hold
to perform fast-forward scanning. When usingthe
frontpanel to edit inputtext, useto move the pa_tion of
the cursor (pages 27 and 33).
CLEAR button
Useto cance]repeatendrandomplayback,edit
programs,andcleartext entries(pages33, 55, 56, 58,
and62).
(_. (pause) button
Press during playback to pause. Press again to
continue playback (page 52).
_) _- (play) button
Pressto start discplayback(pages24 and 29).
(_ (stop) button
Pressto stopplayback(page29).
(_ KEYBOARD/MOUSE connection jack
A PSi2compatiblekeyboardor mousecanbe
connectedtothisjackforeasyentryandeditingof
text information(pages33and34).
(_ OPENICLOSE button
Pressto open andclosethe hood(pages23 and24).
(_ SINGLE LOADER PLAY button
Press to play the disc loaded in the single loader slot.
This button can be used at any time, even if another
disc is being played (page 28).
(_ SINGLE LOADER ACCESS button
Pressto havethe hoodopenandthe singleloader
slotbroughttothe frontposition(page28).
_) RANDOM button
Pressto startrandom playback(page56).
_) Remote sensor
Point the remote control toward the remote sensor
to operate the player (page 8).
(_ STANDBY/ON button
Press to switch the player on or to put in standby
(pages 20, 23, 29, and 75L
1_ STANDBY indicator
Indicates that the player is in standby, using e
minimum amount of power to maintain system
settings,
DisplayWindow
LA51
10
(_ Character display
Displaystext informationalreadyrecordedonthe
discsuchas COTEXTor DVDtext. andalsotext
manually inputintothe player.
(_ VIDEO CD indicator
Indicates aVideo CD is currently selected in the
player.
(_ DISC Indicator
Indicatesthe discnumber.
(_ TITLE indicator
Indicatesa titlenumberisbeingdisplayed.
(_) TRK and CliP indicators
Indicates a chapter or track number is being
displayed,
(_) REMAIN and TOTAL Indicators
REMAIN indicates the remaining playback time of a
title or chapter/track is being dLeplayed.TOTAL
indicates the disc in the player is stopped and
DISPLAY has been pressed (page 65).
(_) Counter display
Displays title and chapter/track numbers, playback
time, etc.
(_) GUI Indicator
Indicatesanon-screenmenu operationisbeing
performed,
Custom file indicator
Indicatesthe numberofthe currentlyselected
customaudioorvideofile (pages26 and38).
(_ AUDIO and VIDEO indicators
Duringcustomplay,indicatewhether the current
customfileisan audio(CD)orvideo (DVDorV'ideo
CD) customfile(pages26 and38).
1_) ALL, SINGLE, and CUSTOM indicators
Indicatesthe currentplaymode (page26).
ANGLE indicator
indicates Multi-Angle playback is in progress
(page 54).
SCAN indicator
IndicatesaHi-Litescan isbeingperformed[page
60).
PROGRAM indicator
Indicatesprogramplaybackisbeingperformed(page
57).
REPEAT indicator
Indicatesrepeatplaybackis being performed (page
55).
LAST MEMORY indicator
Indicates the Last Memory location is registered in
memory for the DVD currently playing (page 61).
COND. MEMORY indicator
Indicates Condition Memory settings are memorized
for the DVD currently playing (page 62),
RANDOM indicator
Indicates randomplaybackisbeingperformed(page
56).
BEST indicator
IndicatesBest playisbeingperformed(page59).
PREVIOUS SCAN indicator
IndicatesPreviousscanisbeing performed (page
60).
(_) CD TEXT indicator
Indicates the CD is recorded with CD TEXT
information. When a DVD recorded with text is
encountered, only the TEXT indicator lights.
96 kHz indicator
Indicates the DVD currently playing contains an
audio signei with a sempiing frequency of 96 kHz.
PBC PLAY indicator
Indicates PBC (pisVoack control) playback of s Video
CD.
_) DOLBY DIGITAL indicator
IndicatesDolbyDigitalaudioplayback.
DTS Indicator
IndicatesDTSaudioplayback.
00(pause) indicator
indicatesplaybackispaused.
_>(play) indicator
Indicatesa discisplaying.
DVD indicator
IndicatesaDVD iscurrentlyselectedinthe player.
CD indicator
Indicatess CD iscurrentlyselacted inthe player.
i
ca
m,
w
11
RemoteControl
All of the command buttons on the remote control glow
in the dark for easy control of the player even inthe dark,
Hold the unit under a light for optimal results.
®
(Buttons indicated with * are used for menu operation.)
O
®
®
MENU button*
UseTOdisplayorcloeatheDVDmenuscrean(dage25).
0 (standby/on) button
Pressto switchthe playeron orto put in standby
(pages20. 23, and29).
AUDIO button
Press repeatedly to select one of the audio
languages and/or audio formats programmed on a
DVD (page 45).
For Video CD and CO, each press changes the audio
output as follows.
r-. Sterea-,,, t/L (Ldtl -=,2/R (lUght)--j
(_ DISPLAY button
Press during playback to display statistical disc
information. Press repeatedly to display different
information (page 64).
(_) SETUP button*
Press to open and close the Setup screen (pages 20
and 39).
®
MULTI DIAL
In Select Disc Number Mode, use to select one of
the discs in the rack. In Jog Mode, use to control the
rate and direction of playback (pages 23, 26, and 53).
® DNR button
Press DNR to select a preprogrammed picture
quality setting or to adjust various attributes of the
video picture (pages 50 and 51).
® FUNCTION MEMORY button*
Pressto incorporates menu item intoashortcutlist
that isstoredinmemory andcanbe cafledupat any
time (page63).
® PLAY I_ button
Pressto startdiscplayback(pages24 and29).
S'roP II button
Press to stop playback (page 29).
_) PREVIOUS _I4/NEXT HH buttons*
During playback, press PREVIOUS _ to 9o back to
a previous chaptor/_tTackend NID('r 1_4 to advance
to the next chapter/_rack. Also use to display
different sets of information in on-scraen displays
(pages 27, 32, 38, and 58).
_) RETURN o% button*
Use to go one menu back (current settings are
maintained). Use RETURN o%when you do not
want to change the option setting in a menu (pages
25, 40, and 69).
(_ S'nEP/SLOW <11/111_ buttons
Press STEPISLOW II1_ during playback to view slow
playback. In pause mode, pressSTEPISLOW #a, to
advance DVDs and Video CDs frame by frame and
STEPISLOW <111to back up a DVD afew fTamea at a
time (page 52).
_) Number buttons (1-9, 0, +10)*
Usetoselecta disc.performdirecttitle andchapter/
tracksearches,andto inputnumericalvalues(pages
25, 35, and 57).
(_ RANDOM button
Preeatostattrandomplayback(page56).
12
(_ SUB SETUP button*
Pressto openand closethe player'sSubSetup
screen(pages30, 31, 32, 35. and36).
(_) LAST MEMORY button
Press LAST MEMORY during playback to set a Last
Memory point (page 61).
(_ HI-UTE button
Press to perform a highlight scan of all of the discs
included in the current play mode (page 60).
PREVIOUS SCAN button
Press to a play highlight from up to 20 previously
played discs in order from the most recently played
disc (page 60).
_) OPENICLOSE A button
Presstoobenorclosethehood(pages23and24).
_) JOG MODE button
Press to put the player in the Jog Mode. The dial
mode indicator lights red, and turning MULTI DIAL
controls the playback of DVDs and Video CDs in both
forward and reverse directions (page 53).
PAUSE II button
Press to pause playback of a disc. Press again to
continue playback (page 52).
REV 4</FWD _ (fast reverse/fast forward)
buttons
Duringplayback,pressFWD _ toperformfast
forwardscanningandREV <4 toperformfast
reversescanning(page27).
_) SEARCH MODE button*
Press to perform a title, chapter,_rack or elapsed
time search (page 35).
_) CLEAR button
_) SUB'nrTLE button
Press repeatedly to select one of the subtitle Press to cancel repeat and random playback, edit
languages programmed on a DVD or to turn the programs, and clear text envies (pages 32, 55, 56, 57,
subtitles off (page 44). and 62). E
(_ ANGLE button (_ REPEAT button
Press repeatedly to display different camera angles Press to repeat playback (page 55).
as recorded on some DVDs (page 54). A-B button
Press at the beginning and end of the section you
TOP MENU button* want to repeat or to mark s location you want to
return to (page 55). o
Press to call up the top menu programmed on the
DVD. Depending on the DVD, the top menu may be
identical to the DVD menu (page 25).
Cursor control joystick*
Usetomovethe cursorthroughthe optionson
menuscreensand tochangesettings(pages20, 25,
30, 39, and 57).
ENTER button*
Pressto implementsettingsselectedwith the
cursorcontroljoystickor toset itemshighlightedina
menu (pages20, 25, 26, 40, and 57).
SELECT DISC NUMBER button
Pressto turnonthe SelectDiscNumberMode. The
dialmode indicatorlightsgreenand turningMULl1
DIALselectsthe numberofa discloadedinthe rack
(pages23 and26).
Dial mode indicator
Lightsredwhen the player isinthe JogMode and
greenwhen the player isinthe SelectDiscNumber
mode (pages23. 26, and53).
PROGRAM
You canprogramdiscs,titles, chapters,ortracksto
playbackin adesiredorder(page57).
=E
Gt
(_ PLAY MODE button
Press repeatedly to select one of the player's
playback modes. You can select either single play,
ALL play, or custom play mode (page 26),
CONDITION MEMORY button
PressCONDITION MEMORY duringDVDplayback
to memorizeplaybacksettings(page62).
® BESTbutton
Pressduringplaybackto add tracksor chaptersto
the Bestplayprogram. Presswhen theplayer is
stoppedtobeginBest play(page59).
13
RearPanel
O-
J' '1
(_) VIDEO OUT jack
ConnecttheVIDEO OUTjacktothevideoinputona
"IVormonitororto anAV componentwith videoinput
capability.When usingthisjack,be suretoset VIDEO
SELECTto thetop position(pages15and 18).
VIDEO IN Jack
Connectthe VIDEO IN jacktothe videooutputof
anotherDV-F727playeroranothercomponentwith
video outputcapability [page67).
(_ S-VIDEO OUT jack
If your TV or monitor has an S-video input, clear
picture reproduction is possible by connecting the
S-VIDEO OUT jack to your'IV or monitor using a
commercially available S-video cable. When using
this jack, be sure to set VIDEO SELECT to the top
position (pages 16 and 16).
® S-VIDEO IN jack
Connect the S-VIDEO IN jack to another DV-F727
player or component with S-video output capability
(page 67).
VIDEO SELECT switch
Use to set which output is used to output the video
signais. Set to the top position for composite video
and S-video output and to the bottom position for
component video output (pages 15, 16, end 18).
(_ AUDIO OUT jacks
Connect to the stereo audio inputs of a "iV or stereo
AV component, if you are connecting to an AV
component that has both digital and analog input
jacks for DVD player connection, it may be beneficial
to make beth connections (pages 15 and 17).
(_ AUDIO IN jacks
Connecttothe analogaudiooutputsofanother
DV-F727orcomponentwith audiooutputcapability
(page66).
(_) MAS'nER-SLAVE CONTROL jacks
Connect two DV-F727 players for singular control of
both players and a total of 601 discs. Connect the
MASTER jack on the player to be used as the
"Master" to the SLAVE jack of s second "Slave"
player using the supplied Master-Slave control cord.
Do net attempt to make connections to other
components using this jack (page 66).
DIGITAL OPT, OUT loptloal) jack
Connect the D(GITAL OPT. OUT (optical) to the
digital optical input of an AV component with a
built-in decoder, etc. to output the digital audio signal
recorded on discs. (page 17).
DIGITAL OUT [coaxial) jack
Connect the DIGITAL OUT (coaxial) to the digital
coaxial input of an AV component to output the digital
audio signal recorded on discs (pages 16 and 17).
_) DIGITAL IN (coaxial) Jack
Connect the DIGITAL IN (coaxial) jack of another
DV-F727 player or another component with digital
output (coaxial) capability (page 66)+
CONTROLjad_
Use to connect this player to another component
bearing the Pioneer _ mark. This lets you control
this unit as though it were a component in a system.
Player operations are then performed by pointing the
remote control st the component that the player is
connected to (page 19).
@CD-DECK SYNCHRO Jack
If you have a Pioneer cassette deck that has the
CD-Dack svnchro function, connect the CD-DECK
SYNCHRO jacks on this unit to the identical jack on
the cassette deck usinga commercially available
cord with a mini ptug (2.5 mm die. with no
resistance) (page 19).
(_ COMPONENT VIDEO OUT jacks
If your "W,projection monitor, projector, or similar
component has component video inputs, you can
produce a high quality picture by connecting to the
component video outputs on thla unit. When using
these jacks, be sure to set VIDEO SELECT to the
bottom position (page 18).
14
ConnectingYourDVDPlayer
Unlike any other audiovisual media format, DVD offers a
wide array of audio and video output options which
allows playback to be enjoyed in any number of system
configurations from a standard TV with stereo audio
input to a home theater system with a projection
monitor and full surround sound capabilities.
Connecting two DV-F727 players?
If you have chosen to purchase two DV-F727 players for
combined control of up to 601 discs, make connections
to the player to be used as the Master player following
the procedures in this section. When connections are
complete, refer to page 66 for a description of how to
connect the Slave player.
Connection Guide
The illustration on this page shows the basic setup using
the audio and video cords included with this player. Use
this illustration as a guide to setting up your home
system.
An explanation of each type of audio and video
connection available can be found on pages 17 and 18.
To determine the best audio and video connection setup
for your system, refer to the manuals supplied with the
components you are making connections to.
In addition to making physical connections to your TV or
monitor, it is also necessary to assign the TV screen size,
You can use the (Setup NavigatorJ in the Setup screen
General menu to set whether you are using a wide
screen or standard size TV or monitor (page 21).
Additionally, you can use the _ Screeni setting in the
Setup screen Video menu (page 43).
Notes
When making connections to this unit or when changing
connections, check that the unit is off by pressang
O STANDBY/ON and unplug the power cord from the power
outlet,
The video outputs on this player uses copy protect circuitry to
prevent the video playback on DVDs from being copied. If you
connect the player to a TV via a VCR, or record and I_ay back
the contents of a disc with a VCR, the playback picture may
not be normal
©@
Audio cord
(Included)
m
==
.=
'-4
z
¢n
TV or monitor
Video cord
(9
®
Make video connections from the VIDEO OUT jack on the player to the VIDEO IN jack on the TV or
monitor using the video cord included with the player (page 18),
When using the VIDEO OUT jack, set VIDEO SELECT to the top position.
Make audio connections from the AUDIO OUT jacks on the player to the AUDIO IN jacks on the TV or
monitor using the stereo audio cord included with the player. Be sure to match the color of the plugs
with the color of the jacks (red and white) (page 17),
After all connections have been made, connect to a power outlet,
15
Home Theater Component Connections
The connections on this page demonstrate the versatility of this player to conform to any number of home
entertainment systems. Please note that the illustration shown on this page is meant as an example. Please refer to
the manuals supplied with the components to which you are making connections to determine the best possible setup
for your home system.
An explanation of each type of audio and video connection available can be found on pages 17 and 18.
@@@
S-vkl*o cord
®
®
®
@
©
S.1Channel Surround Speaker System
(_ S-vld•o connection to a TV or monitor with S-video inputs (page 18)%
(_ When using the S-VIDEO OUT jack, set VIDEO SELECT to th• top position.
Digital •udio connection• to •n AV compon•nt with built-in decoder, etc. (page 17).
After all connections have been made, connect to power outlet.
It may be possible to make _deo connections through your AV receiver or amplifier, Rease refo_ to the manual supplied with your
component for more information.
16
Audio Connections
This player features two digital (opticst and coaxial) and
also analog audio output connection possibilities.
Digital Audio Connections:
You can enjoy the digital audio recorded on DVD discs
from both optical digital and coaxial digital output jacks.
When making digital audio connectiorm, use either
the coaxial or the optical output jack. It is not
necmmary to make oannections to both digital
output jack_
When a DVD recorded in Dolly Digital, DTS, or MPEG is
playing, noise will be output if you have made
connections via the digital audio jacks to an AV
component that cannot decode s Doily Digital, DTS, or
MPEG digital bitatream. In this case, be sure to set up
the Setup Navigator audio settings to best reflect the
type of system you are using (page 21). Additionally, the
digital audio settings can be adjusted manually in the
Setup screen Audio I menu (page 41).
DIGITAL OUT (Optical)
The digitalsignalistransmittedas lightpulsesthrougha
fiber-opticcable.
Use a commerciallyavailablefiber-opticcableto
connectthe DIGITALOPT. OUTonthe playertothe
digitalopticalinputon anAV component.
v
ooa_
AV ampllflm"or ,
DIGITAL OUT (Coaxial)
The digital signal is transmitted electronically through a
coaxial cable.
Use a commercially available coaxial cable to connect
the coaxial digital output on the player to the coaxial
digital input on an AV component.
AV eompenent
t
Analog Audio Connections:
AUDIO OUT
Analog audio connections can be made to a stereo
amplifier or receiver, or also can be made to e "IV or
monitor with stereo input jacks.
Use the suopliad audio cable to connect the AUDIO
OUT jacks on the player to the audio input jacks on a
stereo amplifier or receiver.
When making analog audio connections, be sure to
match the color of the plugs with the color of the
jacks (red and white).
ooO
Stereo amplifier A
or ruelver
€:)
Z
w
17
VideoConnections
Thisplayerfeatures S-video,composite,andcomponent
videooutputpossibilities. Checkthe manualsupplied
withyourIV or monitor todeterminethe bestpossible
connectionforyoursystem.
Inadditionto makingphysicalconnectionstoyourIV or
monitor, it isalsonecessarytoassignthe IV screensize.
Youcanuse the ]SetupNavigator]inthe Setupscreen
General toset whetheryouare usinga wide screenor
standardsizeTV or monitor (page21).Additionally,you
canusethe [/V Screen]settinginthe Setupscreen
Video menu (page43).
VIDEO OUT
Make composite video connections to a standard IV
or monitor with a video input jack.
Use the supplied video cable to connect the VIDEO
OUT jack on the p_ayerto the video input on the IV or
monitor.
Be sure to match the color of the plug with the color
of the jack (yellow).
When makingvideo connections,make sure to setVIDEO
SELECTon the rear panelof the playerto the top position
to assigncomposite video output.
S-VIDEO OUT
Make S-video connections to a 1'4 or monitor with
S-video input to produce a high quality video image.
Use a commercially available S-video cable to connect
the S-VIDEO OUT jsck on the player to an S-video
input on the IV or monitor.
When making S-video connections, make sure to set
VIDEO SELECT on the rear panel of the player to the
top position to assign S-video output,
"_ or m_tor
COMPONENT VIDEO OUT
Make component video connections to a IV, projection
monitor, or projector with component inputsfor an
exceptional video image that best portrays the high
quality digital video recorded on DVDs.
Use a commercially available component video cable
or 3 video cords to connect the COMPONENT VIDEO
OUT jacks on the player to the component jacks on
the monitor.
When making component video connections, make
sure to set VIDEO SELECT on the rear panel of the
player to the bottom po6ition to assign component
video ou_ut.
"IV,projection monitor,
18 or projector
CD-DeckSynchroConnections
If you have a P_oneer cassette deck that has the
CD-Deck synchro function, connect the CD-DECK
SYNCHRO jacks on this unit to the identical jack on the
cassette deck using a commercially available cord with a
mini plug (2.5 mm dis. with no resistance).
For details on connections and operation, refer to the
operating instructions supplied with the cassette
deck.
When CD-Oeck aynchm recording is carried out using
several discs in the player, use the program play
function (page 57).
The CD-Deck synchro recording function does not
work with Video CDs or DVDs.
m_
T
SystemControlConnections
Using a commercially available cord with a mini plug
(3.5 mm dis. with no resistance) to connect this player's
CONTROL iN jack to the CONTROL OUT jack of another
PIONEER component bearing the ml mark, you can
control the player as though it were a component in s
system (system control).
If you connect for system control, you cannot operate
the p_ayer directly. Point the remote control unit at the
component (AV amplifier, etc.) connected to the
CONTROL OUT jack to operate.
When controlling as a system, be sure to make s
connection to the amplifier u=lng an audio or video
cord, even when using only digital components.
For details, refer to the operation manuals of the
connected components.
L_J
T
Pioneereeml_mmt
wW,IIm.rk _
!
_8
!
0
Z
19
2
Press SETUP.
When SETUP is pressed for the first time, the
following screen appears. Though the Setup
Navigator may be used more than once, this screen
only appears the first time SETUP is pressed.
Usingthe Setup Navigator
The Setup Navigator has been designed to simplify the
process of getting the DVD player ready to perform.
Designed as a series of on-screen multiple-choice
questions, the Setup Navigator automatically sets the
audio, video, and language settings according to how the
questions are answered. Once this procedure is
complete, it will be possible to begin using the DVD
player to enjoy DVDs.
The procedure on this page describes the operations
necessary to function within the Setup Navigator
screens. A detailed description of the contents of each
question that appears on the screen can be found on
the following pages.
When setting up for the first time
If the disc rack is moving or if a disc is playing, the Setup
Navigator will not be displayed as described in the
procedure on this page. Therefore, it is recommended to
wait until the rack has stopped moving before using the
Setup Navigator. If a disc is playing, be sure to press
STOP before proceeding.
)Setd ag up t_ n_ _%eSel_p N a_g_
3
Move the cursor control joystick up or down
to make a selection.
If you are going to use the Setup Navigator, it is
not necessary to change the setting on the first
screen. Please proceed to the next step.
If you do not want to set up the player using
the Setup Navigator, move the cursor control
joystick to select "Not Used" at this time.
The Setup Navigator function may still be used at
a later time in manual Setup screen menu
operation (page 39).
4 Press ENTER.
The selection is entered and the next Setup
Navigator screen appears.
1 _-'-_ _ 5 Repeatsteps3and4toanswerthequestions
on the all of the Setup Navigator screens as
c_ _ described on the following pages.
4 TO change the answer to a prior question
(Cursor)_ NTER) Move the cursor control joystick left to return to previous
screens. Please note, however, that you cannot go
forward by moving the cursor control joystick right, so it
will be necessary to answer all the questions that occur
after the screen that was returned to.
U.......2
1
To exit the Setup Navigator
Press SETUP while on any of the screens to exit the
Setup Navigator. Please note that if the Setup Navigator
is exited before all the questions are answered, no
settings are changed.
To return to the Setup screen
Press RETURN _'.. The Setup Navigator is exited and
the Setup screen General menu screen appears. Please
note that no settings are changed if RETURN ,P- is
pressed before the Setup Navigator is finished.
1 Press 0 STANDBYION on the front panel (0
on the remote control).
2O
  • Page 1 1
  • Page 2 2
  • Page 3 3
  • Page 4 4
  • Page 5 5
  • Page 6 6
  • Page 7 7
  • Page 8 8
  • Page 9 9
  • Page 10 10
  • Page 11 11
  • Page 12 12
  • Page 13 13
  • Page 14 14
  • Page 15 15
  • Page 16 16
  • Page 17 17
  • Page 18 18
  • Page 19 19
  • Page 20 20
  • Page 21 21
  • Page 22 22
  • Page 23 23
  • Page 24 24
  • Page 25 25
  • Page 26 26
  • Page 27 27
  • Page 28 28
  • Page 29 29
  • Page 30 30
  • Page 31 31
  • Page 32 32
  • Page 33 33
  • Page 34 34
  • Page 35 35
  • Page 36 36
  • Page 37 37
  • Page 38 38
  • Page 39 39
  • Page 40 40
  • Page 41 41
  • Page 42 42
  • Page 43 43
  • Page 44 44
  • Page 45 45
  • Page 46 46
  • Page 47 47
  • Page 48 48
  • Page 49 49
  • Page 50 50
  • Page 51 51
  • Page 52 52
  • Page 53 53
  • Page 54 54
  • Page 55 55
  • Page 56 56
  • Page 57 57
  • Page 58 58
  • Page 59 59
  • Page 60 60
  • Page 61 61
  • Page 62 62
  • Page 63 63
  • Page 64 64
  • Page 65 65
  • Page 66 66
  • Page 67 67
  • Page 68 68
  • Page 69 69
  • Page 70 70
  • Page 71 71
  • Page 72 72
  • Page 73 73
  • Page 74 74
  • Page 75 75
  • Page 76 76
  • Page 77 77
  • Page 78 78
  • Page 79 79
  • Page 80 80

Pioneer DV-F727 Owner's manual

Category
CD players
Type
Owner's manual

Ask a question and I''ll find the answer in the document

Finding information in a document is now easier with AI