4
IMPORTANT SAFEGUARDS
Read these instructions carefully and retain them for future use. If this product is passed to a third party, then
these instructions must be included.
When using the product, basic safety precautions should always be followed to reduce the risk of injury including the
following:
• Do not let children climb on or play with the product.
• Always use on a firm, level ground.
• Do not sit on the product.
• Check to ensure that all components and fixings of this product are secure, do not use if you have any doubts about
its fitness for purpose.
• To avoid scratching the floor, assemble the product on a soft surface such as a carpet.
Before First Use
• Check for transport damages.
Risk of suffocation! Keep any packaging materials away from children – these materials are a
potential source of danger, e.g. suffocation.
Assembly
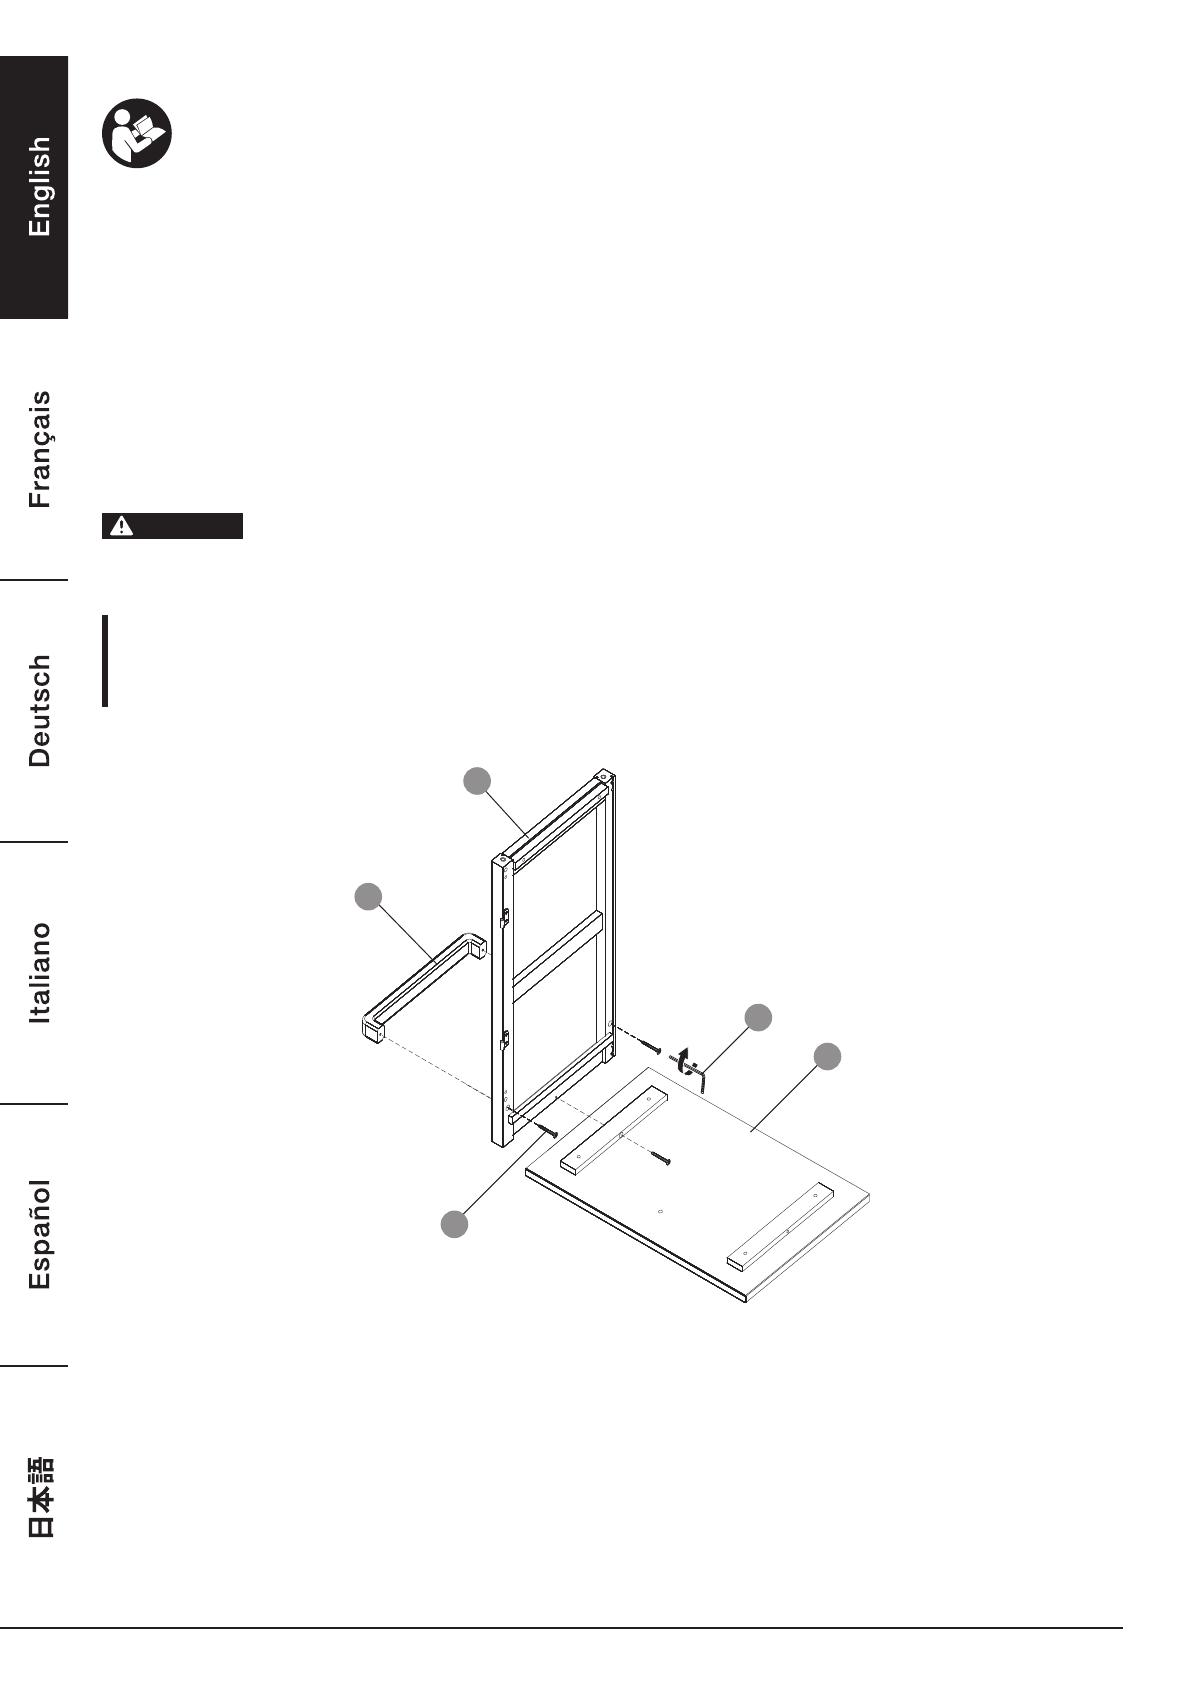
Step 1:
D
L
V
A
Z
• Attach the towel bar (L) to the right panel (D). Secure the connection with 2 screws (V). Rotate the hex key (Z)
clockwise.
• Attach the right panel (D) to the top panel (A). Secure the connection with 1 screw (V).
DANGER