JET 505106 User manual
- Category
- Power impact wrenches
- Type
- User manual
This manual is also suitable for
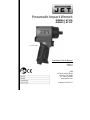
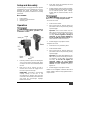
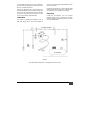
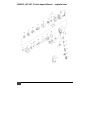
JET 505106 is a pneumatic impact wrench designed for removing and installing threaded fasteners. It features a powerful motor that delivers high torque for tough jobs, and a lightweight and compact design for easy handling.
JET 505106 is a pneumatic impact wrench designed for removing and installing threaded fasteners. It features a powerful motor that delivers high torque for tough jobs, and a lightweight and compact design for easy handling.


-
 1
1
-
 2
2
-
 3
3
-
 4
4
-
 5
5
-
 6
6
-
 7
7
-
 8
8
-
 9
9
-
 10
10
-
 11
11
-
 12
12
-
 13
13
-
 14
14
-
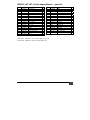 15
15
-
 16
16


JET 505106 User manual
- Category
- Power impact wrenches
- Type
- User manual
- This manual is also suitable for
JET 505106 is a pneumatic impact wrench designed for removing and installing threaded fasteners. It features a powerful motor that delivers high torque for tough jobs, and a lightweight and compact design for easy handling.
Ask a question and I''ll find the answer in the document
Finding information in a document is now easier with AI
Related papers
-
JET 505820 User manual
-
-
-
-
-
-
-
-
-
Other documents
-
NITROCAT 1250-K User manual
-
Husky H4340 Installation guide
-
-
-
 Performance Tool M562DB Owner's manual
-
-
-
 ATD Tools ATD-2112 User manual
-
 Northern Industrial Tools BLACK NICKEL AIR IMPACT WRENCH User manual
-
Rac RAC-HP086 User manual


