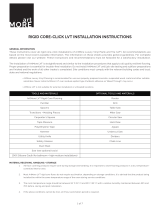
MSI Rigid Core LVT Flooring User manual

Type
User manual

MSI Rigid Core LVT Flooring: Experience the next generation of luxury vinyl tile flooring with unmatched durability and stunning visuals. Crafted with a rigid core construction, this flooring can withstand heavy foot traffic and everyday wear and tear, making it ideal for busy households and commercial spaces. Its innovative locking system ensures a seamless installation, while the 100% waterproof design allows for worry-free maintenance.

MSI Rigid Core LVT Flooring: Experience the next generation of luxury vinyl tile flooring with unmatched durability and stunning visuals. Crafted with a rigid core construction, this flooring can withstand heavy foot traffic and everyday wear and tear, making it ideal for busy households and commercial spaces. Its innovative locking system ensures a seamless installation, while the 100% waterproof design allows for worry-free maintenance.

www.msisurfaces.com
1. Read enclosed detailed installation instructions before beginning install.
2. A flat subfloor is a must!
3. Proper moisture testing is a must!
4. Proper expansion around all permanent structures is a must!
5. Molding, trim, transition, and finish pieces must not prevent the floor from floating.
6. Failure to follow installation instructions will void warranty
7. No acclimation is required under proper conditions.
Please Carefully Read All Instructions Before You Begin Your Installation.
Improper Installation Will Void The Warranty.
Always check flooring planks for defects such as chips and color variations under good light conditions. Check
that groove are free of debris. Use planks from multiple boxes during installation to insure random pattern
variation.
No acclimation is required under proper conditions. However, if the flooring is exposed to temperatures less
than 40⁰ F (5⁰ C) or more than 95⁰ F (35⁰ C) and/or if the flooring is exposed to relative humidity below 35% or
above 70%, flooring must be conditioned by spreading them out in unopened cartons, not stacked, in the room
where they will be installed, for minimum 12 hours under the recommended temperature and humidity ranges
specified in this installation guide.
The area in which the flooring is installed must remain climate controlled with the temperature between 65-
85°F (18-25°C) and humidity levels between 35%-70% for the life of the product.
WARNING: Drilling, sawing, sanding, or machining wood products can expose you to wood dust, a
substance known to the state of California to cause cancer. Avoid inhaling wood dust or use a dust mask
or other safeguards for personal protection. For more information go to www.P65Warnings.ca.gov/wood
www.msisurfaces.com
This product is for indoor use only.
Installation spanning greater than 40 feet in length or width must have a T-molding installed across the width of
the room, archway or at the beginning of the hallway to provide proper expansion space. Doorways of less than
4 feet must always have a T-molding or other transition molding regardless of floor length or width.
While this flooring can be installed above, on, or below grade, below grade must not have a sump pump or floor
drains.
This product is a floating floor and should NOT be secured to the floor. Do not install fixed objects, such as
cabinets, on top of the flooring unless it is fully adhered and do not fasten trim/molding/transition pieces
directly to the floor.
Required Tools and Supplies:
Saw
Safety Glasses
½” spacers
Utility Knife
Straight Edge Ruler or T-Square
Pencil
Tape Measure
Adhesive Tape
Soft-Faced (Rubber) Mallet
Dust Mask or Respirator
If existing baseboard molding is difficult to remove, Quarter Round molding likely will be required to cover the
expansion space need between flooring and baseboard.
SUITABLE TYPES OF FLOORS AND FLOOR PREPARATION
The sub floor must be flat, dry, and clean. Carpet staples or any/all adhesive residue must be removed and
floor must be clean to ensure proper installation. All wooden subfloors must be structurally sound and must be
installed following the American Plywood Association’s (APA) and the manufacturer’s recommendations.
Moisture test is required on all concrete subfloors. Maximum acceptable moisture reading for wood
subfloors is 12%. When using a calcium chloride moisture test for concrete subfloors (ASTM 1869), values
must be less than or equal to 5 lbs/1000ft2/24-hr or <80% with an in situ probe (ASTM F2170). If your
moisture readings exceed those listed above we do not recommend installing this product.
To check for flatness, hammer a nail into the center of the floor. Tie a string to the nail and push the knot
against the floor. Pull the string tight to the farthest of the room and examine the floor for any high/lows relative
to the string. Subfloors must be flat to 3/16” per 10’ (5mm per 3 meters). Any areas in excess of the flatness
specification must be sanded down or filled with an appropriate leveler.
This product can be installed over most existing floors including wood, non-cushioned vinyl or linoleum, and
ceramic/porcelain tile if the existing flooring is intact and properly secured to the subfloor. If installing over
ceramic/porcelain tile, grout lines in excess of 1/16” (0.625) must be filled with a Portland based skim
www.msisurfaces.com
coat/floor leveler according to the manufacturer’s guidelines. Cover the ground surface with a minimum 6 mil
(0.15mm) plastic poly sheeting moisture barrier.
Warning: This product should not be installed over carpet. Installation over carpet will void the
warranty. When installed in rooms with direct sunlight, during the peak hours of sunlight, the use of
blinds/shades or drapes to avoid prolonged direct sunlight period is recommended.
Excess moisture exposure can damage the flooring and breed mold/mildew growth on subfloor and walls. This
is not considered a defect in the flooring.
If considering Radiant heat, flooring can be installed over 1/2” (12mm) embedded radiant heat. Radiant heat
systems must have a minimum of 1/2” (12mm) separation from the product. Maximum operating temperature
should never exceed 85°F (30°C). Use of an in-floor temperature sensor is recommended to avoid overheating.
Before installing over new radiant heat systems, operate the system at maximum capacity to force any residual
moisture. The maximum moisture content should be 2.5% (CM method). Before starting the installation, turn
the heat off for 24 hours before, during, and 24 hours after installation. During installation, make sure the
temperature in the room of installation is between 60-80°F (15-25°C). After installation, the system can be
turned on and the temperature can be raised gradually (5°F per hour) until returning to normal operating
conditions.
Warning: Electric heating mats that are not embedded into the subfloor are not recommended for use
underneath the flooring. Using electric heating mats that are not embedded and applied directly
underneath the flooring will void the warranty.
Installation
•Set spacers to allow an expansion gap of 1/2” (10mm) around the perimeter of the subfloor for movement or
product expansion. Do not remove the spacers until the installation is complete. The expansion gaps should be
covered by molding (Figure A).
Measure the length of the room in inches. Divide it by the length of the planks. If the resulting number is less
than 8”, you will need to cut your first plank accordingly to avoid having planks that are less than 8” on the
opposite end of the room.
Note: Use saw to cut plank to size. If cutting with a jig saw, the wood surface should be turned down. If cutting
with a hand saw, the wood surface should be face up.
Installation should start in a left-hand corner and proceed from the wall with the tongue facing the wall.
Position the first plank 6” (15.2cm) from the starting wall but not up against the spacers (Figure B). The entire
row will be moved against the spacers in a later step.
Interlock the next plank at the end joint of the first plank by inserting the tongue into the groove of the
adjoining planks. Square the joints by tapping the long edge with the profiled tapping block and soft-faced
hammer. Next, lightly tap down on top of the plank at the short joint with the soft-faced hammer (Figure C).
Continue this method to finish the first row. Cut the last piece of the row to fit, and allow for the 1/2” (10mm)
expansion gap. Install as above.
www.msisurfaces.com
To install the second and remaining rows, cut the first plank of the second row to two-thirds its length or make
sure there will be at least an 8” (20.3cm) stagger between end joints. Angle the long tongue edge of the plank
into the long groove edge of the first plank. Drop and lock the end joints together (Figure D). Make sure there
are no gaps and, if necessary, tap along the long groove edge using the soft-faced hammer and profiled tapping
block to ensure a tight fit (Figure C). Do not tap the short end into place if the long joint is not properly
engaged, as doing so can cause damage to the tongue and groove.
Note: When starting a new row, you can use the cut piece from the previous row (Figure E), as long as it is
more than 8” (20.3cm) and the stagger between seams still is greater than 8” (20.3cm).
Attach the second plank by connecting the long side to the first row and sliding it up to the short end of the first
plank (Figure F). Check that the long joints of the planks are properly engaged and then press the short joint
into place with your fingers.
Continue to square the joints by tapping the long edge with the profiled tapping block and soft-faced hammer.
Then, lightly tap down on top of the plank at the short joint with the soft-faced hammer (Figure C). Continue
installing the remainder of the row in this fashion.
After installing the last piece of the second row, slide the entire assembly against the spacer on the starting
wall, maintaining the required 1/2” (10mm) expansion gap (Figure G).
•Install remaining rows, one after the other, and maintain the required 8” (20.3cm) stagger throughout the
install. Tap and square each plank as in the previous steps.
To install the last row, most often, the entire length of the last row will need to be cut so that it is narrow
enough to fit the remaining space. Cut the first plank of the last row to length (if necessary to follow stagger
pattern). Place directly on top of the previously installed row. Then, take another plank and place it against the
wall on top of the plank to be cut for width. Mark the plank (length-wise), cut to size (Figure H). Remember to
allow for the 1/2” (10mm) expansion gap against fixed objects.
Install the plank with the cut side always facing the wall. Use a pull bar to lock the long edges together. Do not
use the pull bar on the short edges. Continue to cut and install remainder of the planks in the last row.
•Door Frames and heating vents also require expansion room. Cur the planks to the correct length. Place the cut
plank next to its actual position, use a ruler to measure the areas to be cut out and mark them. Cut out the
marked points allowing the correct expansion distance on each side. T-molding is suggested in all doorways.
•To trim doorframes, turn a panel upside down to use as a height guide. Using a handsaw, cut door frames to the
necessary height so that the planks slide easily under them.
•To make holes for pipes, measure the diameter of the pipe and drill a hole that is 7/8” (20mm) larger into the
plank. Saw the plank into two pieces perpendicular to the length and bisecting the previously drilled hole. Then
lay the pieces in place around the pipe.
•To finish the perimeter of the room, install quarter round molding using finishing nails. Nail quarter round
directly into the baseboard not the flooring. Do not install over multiple layers of underlayment.
www.msisurfaces.com
Maintenance, Tips, and Warnings
MAINTENANCE:
Sweep or vacuum using soft bristle attachments for daily maintenance. When necessary, clean with a MOIST
cloth or mop and water only heavy use of detergent cleaners will leave a residue and, over time, lead to a
cloudy film.
Immediately wipe away and dry away spills.
NEVER USE floor polish or floor cleaning wax, oils, soaps, etc. These products can damage and/or leave a
film on the flooring. This is not a flooring defect.
TIPS:
- Always use felt tip protectors on all furniture legs/feet, and regularly clean any gathered dirt/grit from the pads
- Entryway/walk off mats are recommended. Warning: Never use vinyl/latex/rubber backed protective mats
- Area rugs are recommended
- Keep pet nails trimmed
- Sharp shoe-heels (e.g. high-heels) may dent the floors
- Never slide furniture across a floor without pads
- Keep floors clean
- For wet areas such as bathrooms, caulk/completely seal the perimeter of the floor with a flexible silicon caulk
  • Page 1 1
  • Page 2 2
  • Page 3 3
  • Page 4 4
  • Page 5 5

MSI Rigid Core LVT Flooring User manual

Type
User manual

MSI Rigid Core LVT Flooring: Experience the next generation of luxury vinyl tile flooring with unmatched durability and stunning visuals. Crafted with a rigid core construction, this flooring can withstand heavy foot traffic and everyday wear and tear, making it ideal for busy households and commercial spaces. Its innovative locking system ensures a seamless installation, while the 100% waterproof design allows for worry-free maintenance.

Ask a question and I''ll find the answer in the document

Finding information in a document is now easier with AI