Page is loading ...

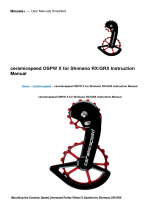
Oversized Pulley Wheel
System for SRAM mechanical
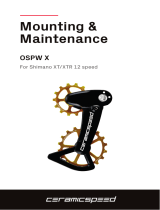
Mounting &
Maintenance

Congratulations with your new
CeramicSpeed Oversized Pulley
Wheel System for SRAM mechanical
Personally, I want to thank you for joining the growing number
of CeramicSpeed users worldwide. The Oversized Pulley
Wheel System you have bought is developed and handmade
in Denmark and contains the unique CeramicSpeed Balls and
components, carefully chosen from high quality suppliers. This
system is compatible with mechanical SRAM Red, Force, Rival
and Apex 10s and 11s groupsets.
Our aim, as the world’s best performing ceramic bearings and
optimised racing chains manufacturer, is to deliver products that
contribute to your performance as a rider. We are condent that
you will love your new purchase.
To ensure the best lifetime and performance, it is important
that your new Oversized Pulley Wheel System is mounted and
maintained correctly. Familiarise yourself with the technical
information supplied in this brochure. Should you have any
concerns or issues, please contact your local dealer or the
technical department at CeramicSpeed, at any time.
Happy and safe riding, and once again welcome to CeramicSpeed.
Best regards,
CeramicSpeed
Martin Banke
Managing Director
Part of the Victory

Mounting Manual
Tools required
A. Chain Tool
B. Phillips screwdriver no. 1
C. Allen key (2.5 mm)
D. We recommend the use of torque tools in order to secure the right
torque when assembling the OSPW System
For the installation of your new
CeramicSpeed Oversized
Pulley Wheel System for SRAM
mechanical (henceforth referred
to as OSPW System) you will
need the following tools:
5
4
6
3
8
A B C D
9
9
2
Pos. Description
1 Pulley wheel bolts
2 Tower bolts
3 Back cage plate
4 Upper pulley
5 Lower pulley
6 Cage pivot
7 Rotation stop screw
8 Front cage plate
9 Pulley wheel lubrication points
7

To ensure the very best in riding performance it is vital that
your new OSPW System is mounted correctly. Follow these
instructions to install your OSPW System for SRAM mechanical
groupsets:
1. Begin with your bike mounted in a stand.
Shift to the lowest (smallest) cog and
remove the rear wheel. Shift the derailleur
to the largest (most open) gear setting for
easier access.
2. Using the proper chain tool, remove your
chain. When completing the installation
of the OSPW System you will need to
use a new, uncut chain. Note: it is not
recommended to add links to a previously
ridden chain.
Mounting the CeramicSpeed Oversized
Pulley Wheel System for SRAM mechanical
3. Press down on the pulley cage body to
access the silver mounting screw on the
bottom of the derailleur body. Using a
Phillips screwdriver remove the silver
mounting screw. Only half of the screw is
threaded. Once the screw is about 1 cm
out and the threads are not engaged, slide
the screw the rest of the way out.

7. Note the three spring tension settings on
the OSPW cage: H (high), M (medium)
and L (low). The L tension setting will
reduce both chain tension and friction,
but will also result in slightly compromised
shifting performance. The H tension
setting provides the best in shifting
performance, yet it will increase friction
performance slightly over the L and the M
tension settings.
4. Hold the cage carefully as there is
still spring tension on the pulley cage.
Gently pull the pulley cage away from
the derailleur, allowing it to rotate in a
clockwise manner to relase the spring
tension. Once the cage is around 7 mm
out, the rotation stop screw will be clear
o the derailleur body and the cage will
rotate forward until there is no spring
tension. Complete removing the pulley
cage, careful to not drop the pulley spring.
5. Using a 2.5 mm Allen key, remove the
silver rotation stop screw (7) from the
OSPW cage (8). Set aside for installation
later.
6. Apply a small amount of grease onto the
cage pivot (6) ange.

11. Pull the cage up and backwards (counter
clockwise) to add spring tension. While
holding the OSPW cage down against the
spring tension, locate the rotation stop
screw mounting hole. Mount the rotation
stop screw (7) and tighten it to 0,3 Nm.
10. Install the original silver mounting screw
using the Phillips screwdriver. Once a
few threads are secured the OSPW cage
should be secured in place. With the
cage secured on the silver mounting
screw, thread the screw in until tight.
This is approximately 0,2 Nm.
9. Insert the OSPW cage pivot (6) and
tension spring into the derailleur body.
The cage should sit ush against the
derailleur body. Test the t by rotating the
OSPW cage counter clockwise and back
forward. Using the original mounting silver
screw (see step 3), press the screw into
the derailleur body until you reach the
threads. The OSPW cage is not secured in
place yet.
8. Align the OSPW cage with the derailleur
body. Select the spring tension setting
desired and insert the end of the spring
into the corresponding hole. Be careful to
align the opposite end of the spring with
the stop hole inside the derailleur.

14. In the ‘small-small’ gear combination,
add tension to the B limit screw (A) to
allow clearance from the upper pulley (4)
and the smallest cog. Be sure to check
the low (B) and high (C) set screws. Now
shift to the largest gear in the rear.
13. Reinstall the rear wheel, carefully pull
down on the OSPW cage to allow room
for the cassette if necessary. Remove the
rear derailleur and verify the alignment
of the hanger both vertically and
horizontally. Reinstall the rear derailleur.
12. Carefully allow the cage to rotate
back until it rests on the rotation stop
screw (7).
15. If the clearance from the upper pulley
(4) to the large cog is greater than 8 mm
you need to remove a link of the chain
and readjust the B limit in the ‘small-
small’ combination. Once the upper
pulley (4) is within 8 mm of the largest
cog and does not rub the smallest cog
you are at the correct chain length. Note
that hanger alignment is crucial for gear
shifting performance. We recommend
that you use a derailleur hanger
alignment gauge to secure the correct
tting of your OSPW System.
A
B
C

Maintenance
No set of rules can be made for how often your Oversized Pulley
Wheels are to be maintained. Maintenance frequency depends on the
weather conditions that you are riding in.
A worn chain will increase the wear on the pulley wheels signicantly, so
make sure that you change your chain before it is completely worn out.
Under normal conditions, we recommend that you maintain the Oversized
Pulley Wheels when you have ridden under wet conditions, washed your
bike or each time you lubricate the chain. For
normal maintenance, add a drop of oil into the
lubrication points (9) for optimal performance.
You will nd the lubrication points on the back
cage plate (3). Make sure to position the OSPW
System horizontally to ensure that the oil
reaches the Oversized Pulley Wheel bearings.
We recommend the use of CeramicSpeed Oil on the OSPW System. This
can be purchased from the CeramicSpeed dealers worldwide or from
our webshop. Watch our maintenance video on ceramicspeed.com in
the Techlab section.
When travelling, your OSPW System will not t in the bike travelling bag.
We recommend that you dismount the whole rear derailleur and pack it
aside.
EXTENDED MAINTENANCE
Approximately once every half a year we recommend that you pr
ovide an extended
maintenance.
In this case, you should dismount the Oversized Pulley Wheels from
the cage, remove the seals from both sides and clean all parts in a shaker with
degreaser. After cleaning, dry the components o, put two drops of oil onto the
CeramicSpeed Balls, place the seals back on and remount the Oversized Pulley
Wheels. When dismounting the cage plates, you will need a 2.5 mm Allen key for
the pulley wheel bolts (1) and a 2 mm Allen key for the tower bolts (2). To remount
the screws, tighten the pulley wheel screws up to a max torque of 1 Nm and the
tower bolts up to 0.3 Nm. For this, a torque tool is recommended.
If you’re riding in
wet and muddy conditions
, we recommend you to provide an extended maintenance
more frequently and replace oil with All Round Grease for a better protection.
/