Page is loading ...

INSTALLATION GUIDE
BARN DOOR EASY CLIP SOFT CLOSE
64215-612
ENGLISH
5 YEAR LIMITED WARRANTY.
Renin warrants all components and hardware for its barn door kit components against defects in workmanship and materials subject to ordinary wear and tear, for
the limited life of these products. Renin's Easy Clip Soft Close attachment are warrantied for a period of ve (5) years from the date of purchase. This warranty shall
not apply if damages are due to abuse, mishandling, improper installation or use; incidental or coincidental water and/or moisture exposure or foreign matter which
includes drippings from ceiling materials or paint; or materials placed on the back or edges of product by others; discoloration and slight hardware rusting when
installed within ve (5) miles of salt water.
This warranty does not extend to any labor charges incurred in the removal, re-installation or replacement of any defective products or parts thereof. In the event of a
defect, malfunction or other failure of the product to which this warranty applies, Renin will remedy the failure or defect, without charge to the consumer within thirty
(30) days from the actual receipt of the product, or refund of the purchase price at Renin’s discretion.
To obtain performance under this warranty, the consumer should contact Renin Customer Service at 1-800-257-4093, between 8:30 am and 4:30 pm EST, Monday to
Friday. This limited warranty is extended to the original purchaser only, and is non-transferable. This limited warranty is in lieu of all others including but not limited
to; the implied warranty merchantability and tness for a particular purpose and excludes all incidental or consequential damages.
Please visit www.renincorp.com for more information.
®/™/MD/MC denote registered trademarks of Renin. ©Renin
RENIN
110 Walker Drive, Brampton, Ontario L6T 4H6 CANADA
EASY CLIP SOFT CLOSE
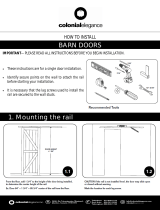
This hardware is designed to be mounted to the back of an existing Barn Door at track. The left and right sided
hardware are each mounted at the ends of the track to provide soft-close and soft-open operation of the door. Secure
each hardware as instructed to ensure ideal location for optimal operation. Once installed correctly, both the triggers
that have been installed to the top of the door will engage each soft close catch, slowing then stopping the door at the
ideal locations across the track. Note: Installation of triggers require the removal of the anti-jump discs.
TOOLS REQUIRED: Pencil, Cordless Drill, Set of Drill Bits, Screw Driver Set and Allen Keys (provided).
LEFT EASY CLIP
HARDWARE
RIGHT EASY CLIP
HARDWARE
BDF960 (LEFT)
BDF960 (RIGHT)

01
INSTALLATION GUIDE
BARN DOOR EASY CLIP SOFT CLOSE
REMOVE
ANTI-JUMP BLOCK
STEP 01
PHILLIPS
SCREWDRIVER
LEFT EASY CLIP
HARDWARE
UNLOAD
TRIGGER
STEP 03
STEP 02
SET DOOR
IN CLOSED
POSITION
DOOR CENTER
TO OPENING
MARK TRACK
WITH A PENCIL
PRE-INSERT ALLEN
KEYS TO EASY CLIP
HARDWARE
POSITION LEFT
EASY CLIP HARDWARE
STEP 04
SLIDE DOOR
CLEAR
SECURE BOTH
EASY CLIP HARDWARE
STEP 05
REMOVE
ANTI-JUMP BLOCK
PHILLIPS
SCREWDRIVER
STEP 07
SET DOOR
IN OPEN
POSITION
DOOR
JAMB
RIGHT EASY CLIP
HARDWARE
STEP 08
UNLOAD
TRIGGER
MARK TRACK
WITH A PENCIL
STEP 06
POSITION RIGHT
EASY CLIP HARDWARE
PRE-INSERT ALLEN
KEYS TO EASY CLIP
HARDWARE
STEP 09
SLIDE DOOR
CLEAR
SECURE BOTH
EASY CLIP HARDWARE
STEP 10

02
INSTALLATION GUIDE
BARN DOOR EASY CLIP SOFT CLOSE
LEFT
EASY CLIP
HARDWARE
STEP 11
SET DOOR
IN CLOSED
POSITION
ALIGN CATCH PLATE
TO UNLOADED
TRIGGER
MARK CATCH
PLATE HOLES ON
THE TOP OF THE DOOR
WITH A PENCIL
DOOR CENTER
TO OPENING
SET DOOR
IN OPEN
POSITION
STEP 12
RIGHT
EASY CLIP
HARDWARE
ALIGN CATCH PLATE
TO UNLOADED
TRIGGER
MARK CATCH
PLATE HOLES ON
THE TOP OF THE DOOR
WITH A PENCIL
DOOR
JAMB
REMOVE DOOR
1/8"
DRILL
PILOT HOLE
LEFT
STEP 13
STEP 14
SECURE
LEFT
CATCHING
PL ATE
DRILL
PILOT HOLE
RIGHT SECURE
RIGHT
CATCHING
PL ATE
1/8"
STEP 15 STEP 16
STEP 17
RE-INSTALL DOOR
LEFT EASY CLIP
HARDWARE
LOAD
TRIGGER
LEFT EASY CLIP
HARDWARE
LOAD
TRIGGER
ENGAGE TRIGGERS
BY SLIDING DOOR
TO OPERATE BOTH
EASY CLIP SOFT
CLOSE HARDWARE

01
GUÍA DE INSTALACIÓN
PUERTA ESTILO COBERTIZO CON FÁCIL ENGANCHE Y CIERRE SUAVE
QUITA EL BLOQUE
ANTI- SALTO
PASO 01
DESTORNILLADOR
PHILLIPS
HERRAJE DE
FÁCIL ENGANCHE
(IZQUIERDO)
LIBERA
EL GATILLO
PASO 03
PASO 02
COLOCA
LA PUERTA
EN POSICIÓN
DE CERRADA
CENTRA LA PUERTA
EN EL VANO
MARCA EL RIEL
CON UN LÁPIZ
PREINSERTA
LAS LLAVES ALLEN
EN EL HERRAJE
DE FÁCIL ENGANCHE
COLOCA EL
HERRAJE IZQUIERDO
DE FÁCIL ENGANCHE
PASO 04
DESLIZA
LA PUERTA
HASTA ABRIRLA
ASEGURA
AMBOS HERRAJES
DE FÁCIL ENGANCHE
PASO 05
QUITA EL BLOQUE
ANTI- SALTO
DESTORNILLADOR
PHILLIPS
PASO 07
COLOCA
LA PUERTA
EN POSICIÓN
DE ABIERTA
JAMB
DE LA
PUERTA
HERRAJE DE
FÁCIL ENGANCHE
(DERECHO)
PASO 08
LIBERA
EL GATILLO
MARCA EL RIEL
CON UN LÁPIZ
PASO 06
COLOCA EL
HERRAJE DERECHO
DE FÁCIL ENGANCHE
PREINSERTA LAS
LLAVES ALLEN EN EL
HERRAJE DE FÁCIL
ENGANCHE
PASO 09
DESLIZA
LA PUERTA
HASTA
ABRIRLA
ASEGURA
AMBOS HERRAJES
DE FÁCIL ENGANCHE
PASO 10

02
GUÍA DE INSTALACIÓN
PUERTA ESTILO COBERTIZO DE FÁCIL ENGANCHE Y CIERRE SUAVE
HERRAJE DE
FÁCIL ENGANCHE
(IZQUIERDO)
PASO 11
COLOCA
LA PUERTA
EN POSICIÓN
DE CERRADA
ALINEA LA PLACA DE CIERRE
CON EL GATILLO LIBERADO
MARCA CON UN
LÁPIZ LOS ORIFICIOS
DE LA PLACA DE CIERRE
EN LA PARTE SUPERIOR
DE LA PUERTA
CENTRA LA PUERTA EN EL VANO
COLOCA
LA PUERTA
EN POSICIÓN
DE ABIERTA
PASO 12
HERRAJE DE
FÁCIL ENGANCHE
(DERECHO)
ALINEA LA PLACA DE CIERRE
CON EL GATILLO LIBERADO
MARCA CON UN
LÁPIZ LOS ORIFICIOS
DE LA PLACA DE CIERRE
EN LA PARTE SUPERIOR
DE LA PUERTA
JAMBA
DE LA
PUERTA
RETIRA LA PUERTA
1/8"
TALADR A
ORIFICIOS PILOTOS
IZQUIERDA
PASO 13
PASO 14
ASEGURA
LA PLACA
DE CIERRE
IZQUIERDA
TALADR A
ORIFICIOS PILOTOS
DERECHA ASEGURA
LA PLACA DE
CIERRE DERECHA
1/8"
PASO 15 PASO 16
PASO 17
REINSTALA LA PUERTA
HERRAJE DE
FÁCIL ENGANCHE
(IZQUIERDO)
CARGA
EL GATILLO
HERRAJE DE
FÁCIL ENGANCHE
(IZQUIERDO)
CARGA
EL GATILLO
ENGANCHA
LOS GATILLOS
DESLIZANDO
LA PUERTA
PARA ACTIVAR
AMBOS HERRAJES
DE FÁCIL ENGANCHE
Y CIERRE SUAVE

01
GUIDE D’INSTALLATION
ACCESSOIRE DE FERMETURE EN DOUCEUR EASY CLIP SOFT CLOSE POUR PORTE DE GRANGE
RETIREZ LE BLOC
ANTI-SAUT
ÉTAPE 01
TOURNEVIS
CRUCIFORME
QUINCAILLERIE
EASY CLIP GAUCHE
LIBÉREZ
L’ÉLÉMENT
DÉCLENCHEUR
ÉTAPE 03
ÉTAPE 02
PLACEZ
LA PORTE
EN POSITION
FERMÉE
DU CENTRE DE LA PORTE
À L’OUVERTURE
MARQUEZ LA LIGNE
AU CR AYON
INSÉREZ
AU PRÉALABLE
LES CLÉS ALLEN DANS
LA QUINCAILLERIE
EASY CLIP
POSITIONNEZ
LA QUINCAILLERIE
EASY CLIP GAUCHE
ÉTAPE 04
GLISSEZ
LA PORTE
POUR VÉRIFIER
LE DÉGAGEMENT
FIXEZ SOLIDEMENT
LES DEUX
QUINCAILLERIES
EASY CLIP
ÉTAPE 05
RETIREZ LE BLOC
ANTI-SAUT
TOURNEVIS
CRUCIFORME
ÉTAPE 07
PLACEZ
LA PORTE
EN POSITION
OUVERTE
PIÉDROIT
DE PORTE
QUINCAILLERIE
EASY CLIP DROITE
ÉTAPE 08
LIBÉREZ
L’ÉLÉMENT
DÉCLENCHEUR
MARQUEZ LE RAIL
AVEC UN CRAYON
ÉTAPE 06
POSITIONNEZ
LA QUINCAILLERIE
EASY CLIP DROITE
INSÉREZ
AU PRÉALABLE
LES CLÉS ALLEN DANS
LA QUINCAILLERIE EASY CLIP
ÉTAPE 09
GLISSEZ
LA PORTE
POUR VÉRIFIER
LE DÉGAGEMENT
FIXEZ SOLIDEMENT
LES DEUX
QUINCAILLERIE
EASY CLIP
ÉTAPE 10
/