Page is loading ...

INSTALLATION AND SAFETY INSTRUCTIONS
• Be sure the electricity to the system you are working on is turned off; either the fuse
removed or the circuit breaker set at off.
• Use of other manufacturers components will void warranty, listing and create a
potential safety hazard.
• Exceeding maximum wattage may result in over-heating conductors.
• Read instructions carefully.
• If you are unclear as to how to proceed, contact a qualified electrician.
• Save these instructions.
IMPORTANT SAFETY INSTRUCTIONS HC-202
INSTALLATION FOR 9488 and 9477
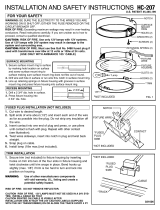
1. Follow instructions supplied with transformer and accessories to install the lighting system
desired.
2. Cut the wire to desired length.
3. Split ends of wire about (1/2") and insert each end of the wire as far as possible into the plug.
Using excessive force can cause wires to fragment which may cause arcing. Do not strip any
insulation off the wire.
4. Insert contact into one end of plug and press or use pliers until contact is flush with plug. Repeat
with other contact (see illustration).
5. Twist wires sideways, insert into notch in plug and twist back straight.
6. Snap plug on track and cable.
FIXTURE
WIRE
NOTCH
CONTACT
PLUG
*CABLE
*TRACK OR
*WIRE CLIP FOR
OUTDOOR USE
031408
* NOT INCLUDED
INSTALLATION AND SAFETY INSTRUCTIONS
• Be sure the electricity to the system you are working on is turned off; either the fuse
removed or the circuit breaker set at off.
• Use of other manufacturers components will void warranty, listing and create a
potential safety hazard.
• Exceeding maximum wattage may result in over-heating conductors.
•
Read instructions car
efully
.
• If you are unclear as to how to proceed, contact a qualified electrician.
• Save these instructions.
IMPORTANT SAFETY INSTRUCTIONS HC-202
INST
ALLA
TION
FOR
9488 and 9477
1.
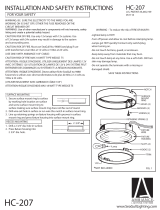
Follow instructions supplied with transformer and accessories to install the lighting system
desired.
2. Cut the wire to desired length.
3. Split ends of wire about (1/2") and insert each end of the wire as far as possible into the plug.
Using excessive force can cause wires to fragment which may cause arcing. Do not strip any
insulation off the wire.
4.
Insert contact into one end of plug and press or use pliers until contact is flush with plug. Repeat
with other contact (see illustration).
5. Twist wires sideways, insert into notch in plug and twist back straight.
6.
Snap plug on track and cable.
FIXTURE
WIRE
NOTCH
CONT
ACT
PLUG
*CABLE
*TRACK OR
*WIRE CLIP FOR
OUTDOOR USE
031408
* NOT INCLUDED

INSTALLATION AND SAFETY INSTRUCTIONS
NOTE: Contacts need to be properly aligned to be able to slide into the plug. If
necessary, use pliers to gently move contact into alignment.
CONTINUED HC-202
INTERFERENCE
CONTACT
PLUG
NO INTERFERENCE
CONTACT
INSTALLATION AND SAFETY INSTRUCTIONS
NOTE: Contacts need to be properly aligned to be able to slide into the plug. If
necessary, use pliers to gently move contact into alignment.
CONTINUED HC-202
INTERFERENCE
CONTACT
PLUG
NO INTERFERENCE
CONTACT
/


