Page is loading ...

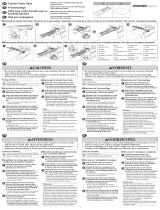
Magnetic Sash Frame Installation Manual
Installationsanleitung Magnetrahmen mit Einzelmagneten
Manuel d’installation du cadre à broder magnétique
Installatiehandleiding voor magneet frame
Manuale di installazione del telaio magnetico
Manual de instalación del bastidor magnético
Manual de instalação do bastidor magnético para
acolchoados
Руководство по установке пялец с магнитными
зажимами
磁吸框安装说明书
磁吸框安装说明书
マグネット原反枠取扱説明書
ENGLISH
DEUTSCH
FRANÇAIS
NEDERLANDS
ITALIANO
ESPAÑOL
PORTUGUÊS
РУССКИЙ
日本語

ENGLISH
1/6
Magnetic Sash Frame Installation Manual
Fabric can be easily and firmly secured in the frame to provide a wide embroidering area.
■ Warning label
This product contains magnets.
1 Be careful not to pinch your fingers between the
magnetic sash frames.
2 Be sure to keep the magnetic sash frame away
from precision electronics (smartphones, etc.),
computer disks, credit cards with a magnetic
stripe, etc.
3 Do not use the magnetic sash frame if you have
a pacemaker.
* Do not attach the magnets for the frame to the
machine. This may affect the internal
electronics and cause the machine to
malfunction.
Verifying the package
contents
Check that the following parts are included. If any
item is missing or damaged, contact your
authorized sales representative.
■ Contents of magnetic sash frame kit
* When the magnetic sash frame is purchased, the
magnets are attached.
Removing the magnets from
the frame
When the magnetic sash frame is purchased, the
magnets are attached. Before attaching the frame to
the machine, remove the magnets from the frame.
1
Grab an edge of the magnet with your
fingers and lift it off the frame.
1. 2.
3. 4.
No.
Part Name Part Code
1 Magnetic sash frame -
2
Magnets (large) × 4
Magnets (small) × 4
XH4664-001
XH4663-001
3 Leverage magnet lifter D01H67-001
4 Installation Manual -
Note
• Before using this frame, make sure that
your machine’s software has been updated
to the latest version.
• When sewing with the magnetic sash
frame, the dedicated wide table for your
machine must be installed for added
stability. For details about the dedicated
wide table, contact your authorized
dealer.
• For details on using the magnetic sash
frame to embroider, refer to the Operation
Manual for the machine.
Memo
• The maximum embroidery area using the
magnetic sash frame is different depending
on the machine model.

2/6
Attaching the magnetic sash
frame
1
Loosen the two thumb screws, and then
remove the embroidery frame holder and
thumb screws.
1 Thumb screws
• The removed thumb screws will be used to
install the magnetic sash frame.
2
Attach the wide table to the machine.
For details on attaching the wide table, refer
to the Operation Manual included with the
machine or the instructions included with the
wide table.
Note
• If it is difficult to remove the magnet from
the frame, insert the included leverage
magnet lifter under an edge of the magnet,
and move it in the direction of the arrow
to remove the magnet.
1 Leverage magnet lifter
• After using the magnetic sash frame, store
it with the magnets attached and fabric in
between. If the magnets are attached
directly to the frame, it will be difficult to
remove them due to their strong magnetic
force.
Note
• After attaching the frame to the machine,
hoop fabric in the frame. If large pieces of
fabric are hooped in the frame before the
frame is attached to the machine, the
thumb screws that secure the frame will be
hidden under the fabric and cannot be
tightened, or the fabric may be pulled out,
knocking off the magnets.

ENGLISH
3/6
3
Hold the magnetic sash frame horizontally,
and insert the pins on the frame-mounting
plate of the carriage into the holes in the
magnetic sash frame.
1 Pins on the frame-mounting plate of the
carriage
2 Holes in magnetic sash frame
4
Secure the magnetic sash frame with the two
thumb screws removed in step
1.
1 Thumb screws
Hooping the fabric in the
magnetic sash frame
1
Spread the fabric over the magnetic sash
frame.
Note
• Do not use the following types of material.
- Stiff material: If the material cannot be
folded to fit the shape of the frame, the
magnets may not attach correctly.
- Elastic material: When the material
contracts, the magnets may fall off.
- Thick jackets, etc.: The material may
catch on the wide table, the pattern may
not be embroidered correctly, or the
magnets may fall off.
• Use fabric with a thickness no more than
2mm.
• When embroidering specially processed
fabrics, such as those with a non-slip
lining, embroidering may not be possible
even if the fabric thickness is less than
2mm.

4/6
2
Fold the fabric to fit the shape of the top edge
of the magnetic sash frame, and then attach
the included magnets so that
▼
points to the
inside of the frame.
• Folding the fabric allows the magnets to
properly attach.
• Be sure to attach the magnets in the correct
orientation. Otherwise, the fabric cannot
be properly secured in the frame.
3
While smoothing the fabric downward with
an included magnet, fold the bottom edge of
the fabric and attach magnets so that ▼
points to the inside of the frame.
4
In the same way, attach the magnets on the
left and right sides so that ▼ points to the
inside of the frame.
• Check that ▼ on all magnets points to the
inside of the frame.
• Make sure that the fabric is taut and has no
wrinkles.
Note
• Make sure that the magnets are fully down
and attached to the frame. If a magnet end
is slightly elevated, or out of position,
there is a risk of hitting the needle bar.

ENGLISH
5/6
5
After hooping the fabric, grab each magnet
on the left and right sides and at the front of
the frame one by one, and check that the
frame can be lifted slightly.
• If the frame can be lifted, the magnet will
hold the fabric well enough.
• Before sewing, check the embroidering
area to make sure that the presser foot does
not hit the frame or catch on the fabric. For
details, refer to the Operation Manual for
the machine.
X The fabric is ready to be embroidered.
Rehooping the fabric
With the magnetic sash frame, you can rehoop the
fabric without removing the frame from the
machine.
Follow the procedure below to move the frame to a
position where the fabric can be easily hooped,
and then rehoop the fabric.
* The icons differ depending on the machine
model.
1
Press .
2
Press .
X The frame moves to a position where the
fabric can be easily rehooped.
3
Remove all magnets and rehoop the fabric.
• For details on removing the magnets, refer
to “Removing the magnets from the frame”
on page 1.
■ Shifting the fabric horizontally
When shifting the fabric horizontally, you may
be able to change the hooping position without
removing all of the magnets from the frame.
1
Follow steps 1 and 2 in “Rehooping the
fabric” on page 5 to move the frame to a
position where the fabric can be easily
rehooped.
Note
• When attaching a magnet (small), make
sure that its end aligns with the line on the
inside of a magnet (large) attached to the
left or right side of the frame. When
pulling the fabric and shifting it
horizontally, the amount that the magnets
are moved at the top and bottom must be
the same.
For details on shifting the fabric
horizontally, refer to “Shifting the fabric
horizontally” on page 5.
1 Line on the inside of magnet (large)

6/6
2
Leave one magnet (small) at the top and
bottom edges of the frame, and then slowly
pull the fabric horizontally while holding the
frame with your hand.
• Hold the frame and fabric near the middle
of the remaining magnets (small) at the top
and bottom of the frame.
3
Make sure that the fabric is taut and has no
wrinkles, and then attach all of the magnets
to the frame.
Embroidering large pieces
of fabric or clothing
When embroidering large pieces of fabric or
clothing, make sure that the fabric can move
smoothly without catching on the wide table or the
presser foot of an unused needle bar.
Note
• Do not secure the fabric edges with clips.
Otherwise, fabric gathered on the wide
table may interfere with sewing, or the
pattern may not be embroidered correctly.

English
German
French
Dutch
Italian
Spanish
Portuguese-BR
Russian
Chinese-simp(简体中文)
Chinese-trad
Korean
Japanese
XH5066-001
磁吸框安装说明书
/