Outdoor Great Room LG24I Owner's manual

Category
Barbecues & grills
Type
Owner's manual

This manual is also suitable for

The Outdoor Greatroom Company • Legacy Gas Grill • Rev. E
1
OWNER’S MANUAL
Assembly•
Operation•
Maintenance•
Models: JAG24c (shown)
JAG24
LG24c
LG24i
JAG36c
JAG36
LG36c
LG36i
CAUTION: DO NOT DISCARD THIS MANUAL
LEGACY CONVECTION RANGE
NOTICE TO INSTALLER AND CONSUMER
These instructions must be left with the
consumer and the consumer should
retain them for future reference.
Read, understand and follow
these instructions for safe
installation and operation.
WARNING
If the information in these instructions
isnotfollowedexactly,areorexplo-
sion may result causing property dam-
age, personal injury or death.
Read the following instructions care-
fully and be sure your grill is properly in-
stalled, assembled and maintained.
Failure to follow these instructions may
result in serious bodily injury and/or
property damage. If you have questions
concerning assembly or operation, con-
sult your dealer, gas appliance service
person or your LP gas company.
WARNING
1. Do not store or use gasoline or other
ammableliquidsorvaporsinthevi-
cinity of this or any other appliance.
2. An LP cylinder not connected for
use shall not be stored in the vicin-
ity of this or any other appliance.
DANGER
If you smell gas:
Shut off gas to the appliance. 1.
Extinguishanyopename.2.
Open lid. 3.
If odor continues keep away from the ap-4.
pliance and immediately call your gas
supplieroryourredepartment.
This outdoor cooking gas appliance is
not intended to be installed in or on recre-
ational vehicles and/or boats.
Installation and service must be performed
bya qualiedinstaller,serviceagency,or
the gas supplier. In the Commonwealth of
Massachusetts installation must be per-
formedbyalicensedplumberorgastter.
760-920E 9/08
DO NOT
DISCARD
GAS-FIRED
LISTED
The Outdoor Greatroom Company • Legacy Gas Grill • Rev. E
2
TABLE OF CONTENTS
WARRANTY .................................................................................. 3
SAFETY INSTRUCTIONS ............................................................. 4
SERVICE PARTS LIST .................................................................. 6
ASSEMBLY INSTRUCTIONS ...................................................... 10
LIGHTING INSTRUCTIONS ........................................................ 16
COOKING INSTRUCTIONS ....................................................... 18
CLEANING AND MAINTENANCE INSTRUCTIONS .................. 19
CONTACT INFORMATION .......................................................... 21
The Outdoor Greatroom Company • Legacy Gas Grill • Rev. E
3
WARRANTY
Legacy - JAG24c / JAG24 / LG24c / LG24i /
JAG36c / JAG36 / LG36c / LG36i Gas Grills
Limited Lifetime Warranty
The Outdoor Greatroom Company extends the following warranty for Legacy Series Gas Grills used in the United
States of America or Canada. Dealers and employees of The Outdoor Greatroom Company have no authority to
make any warranty or authorize any remedies in addition to or inconsistent with the terms of this warranty. This
warranty gives you specic legal rights. You may also have other rights that vary from state to state.
The Outdoor Greatroom Company warrants that this Legacy Series Gas Grill (the “Product”) will be free from
defects in material and workmanship as follows:
• Stainless steel parts - for the life of the Product.
All other parts - for a period of one year from the Product’s date of purchase.
This warranty is subject to the conditions, exclusions and limitations described below.
This warranty applies only to the original owner of the Product and is nontransferable. The Outdoor Greatroom
Company’s obligation under this warranty does not extend to damages resulting from (1) assembly, operation
or maintenance of the Product not in accordance with the Installation/Assembly Instructions, Operating Instruc-
tions and the Listing Agency Identication Label furnished with the Product; (2) installation or use which does not
comply with local building codes and ordinances; (3) shipping, improper handling, improper operation, abuse,
misuse, accident or unworkmanlike repairs; (4) use of fuels other than those specied in the Operating Instruc-
tions; (5) installation or use of components not supplied with the Product or any other components not expressly
authorized and approved in writing by The Outdoor Greatroom Company; and/or (6) modication of the Product
not expressly authorized and approved in writing by The Outdoor Greatroom Company. Any of the circumstances
described in the previous sentence voids this warranty. This warranty is void if the Product or any component has
been removed, repaired or replaced before The Outdoor Greatroom Company has been afforded a reasonable
opportunity to inspect the Product. This warranty does not cover LP tanks.
This warranty is limited to the replacement of defective components and The Outdoor Greatroom Company may
fully discharge its obligations under this warranty by replacing, at its discretion, the defective components. The
Outdoor Greatroom Company will provide replacement parts at no charge and will pay reasonable and necessary
freight costs related to replacing defective components under this warranty. The maximum amount recoverable
under this warranty is limited to the purchase price of the Product and, if The Outdoor Greatroom Company is
unable to provide replacement components in an expedient and cost-effective manner, The Outdoor Greatroom
Company may discharge all obligations under this warranty by refunding the purchase price of the Product.
EXCEPT TO THE EXTENT PROVIDED BY LAW, THE OUTDOOR GREATROOM COMPANY MAKES NO EX-
PRESS WARRANTIES OTHER THAN THE WARRANTY EXPRESSED HEREIN. THE DURATION OF ANY IM-
PLIED WARRANTY IS LIMITED TO THE DURATION OF THE WARRANTY SPECIFIED ABOVE. IN NO EVENT
SHALL THE OUTDOOR GREATROOM COMPANY BE LIABLE FOR ANY INCIDENTAL OR CONSEQUENTIAL
DAMAGES CAUSED BY DEFECTS IN THE PRODUCT. Some states do not allow limitations on how long an
implied warranty lasts, or do not allow exclusion or limitation of incidental or consequential damages, so these
limitations may not apply to you.
To obtain service under this warranty, you must:
1. Obtain service and/or parts at any authorized dealer, or send written notice of the claimed condition to The
Outdoor Greatroom Company, 12400 Portland Ave. So., Burnsville, MN 55337.
2. Provide documentary proof that you are the original owner of the Product.
3. Provide The Outdoor Greatroom Company reasonable opportunity to investigate the claim, including reason-
able opportunity to inspect the Product prior to any repair or replacement work and before the Product or any
component of the Product has been removed.
The Outdoor Greatroom Company • Legacy Gas Grill • Rev. E
4
Read These Safety Instructions
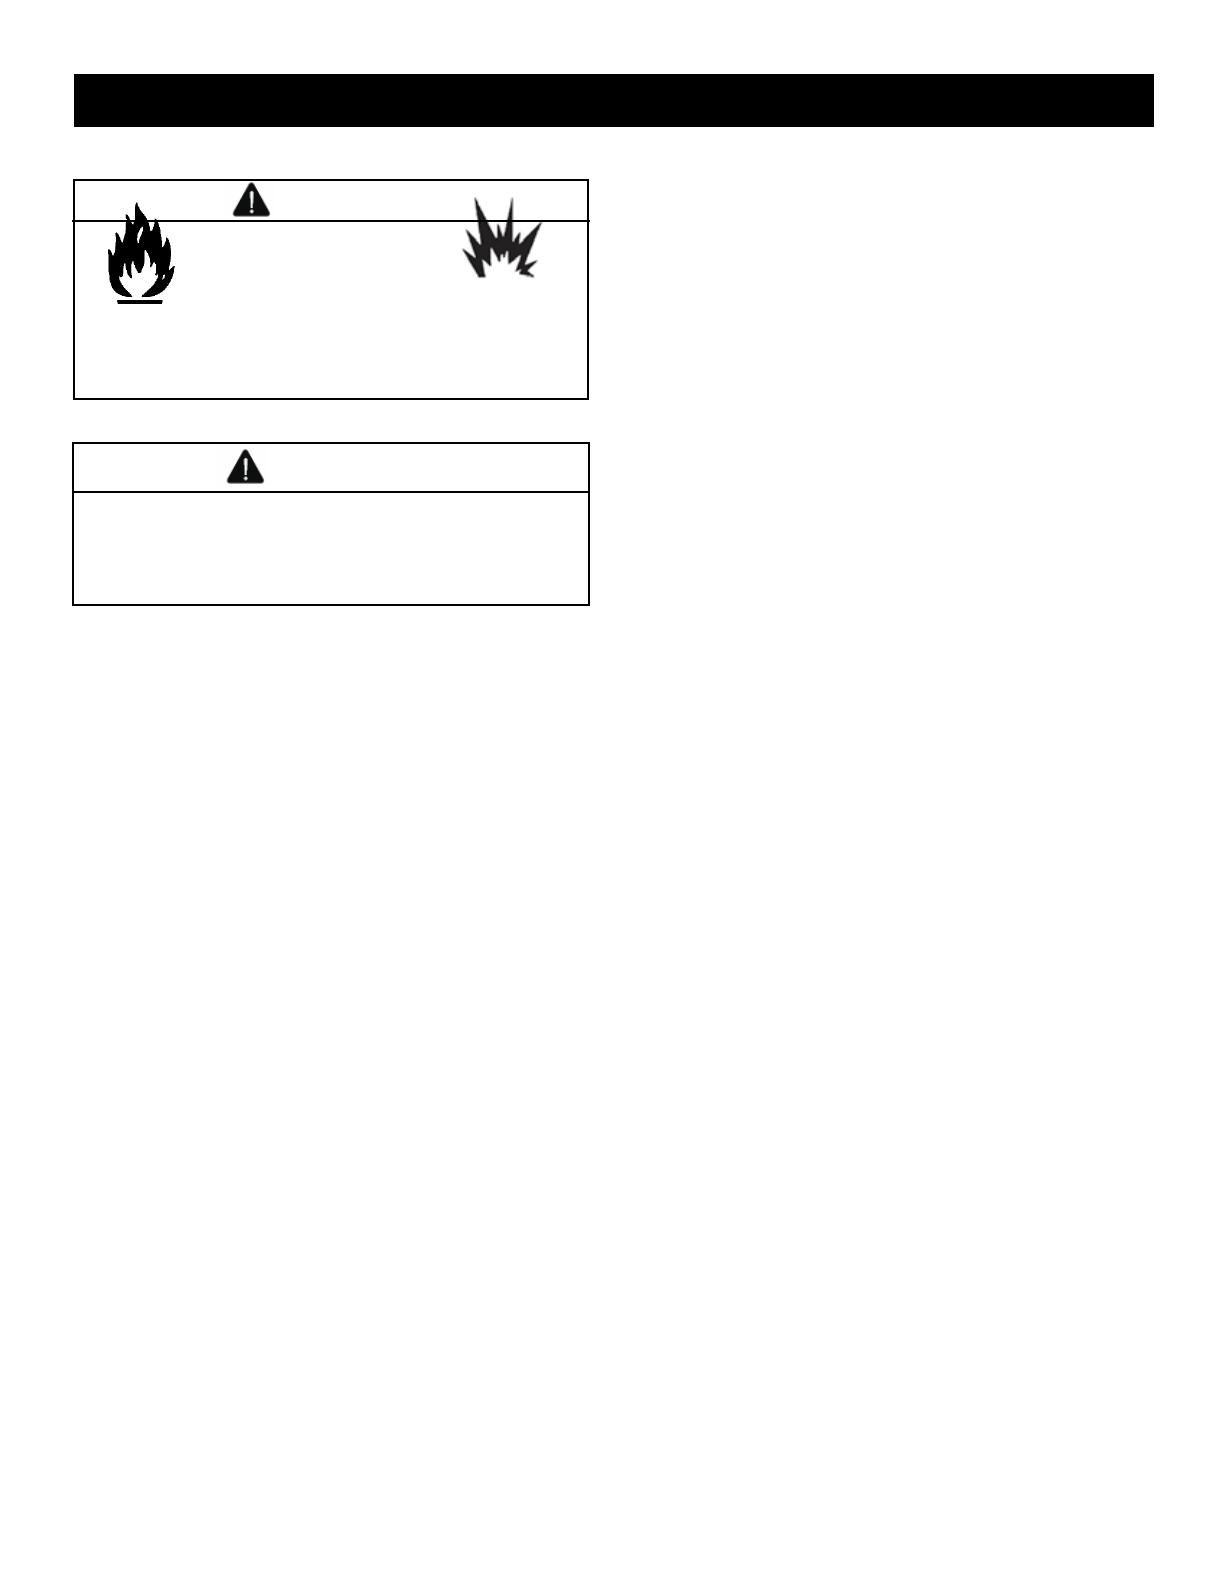
WARNING
Fire Risk
Explosion Risk
Failure to comply with these instructions could
result in a re or explosion which could cause
property damage, serious bodily injury or death.
WARNING
Combustion by-products produced when using this
product contain chemicals known to the State of Cali-
fornia to cause cancer, birth defects, or other reproduc-
tive harm.
Grill Installation Codes
This grill has been tested in accordance with ANSI Z21.58-
2005/CSA 1.6-2005 and ANSI Z21.58a-2006/CSA1.6a-
2006 . The installation of this gas grill must conform with
local codes or, in the absence of local codes with the Na-
tional Fuel Gas Code, ANSI Z223.1/NFPA54 (In the USA)
or Natural Gas and Propane Installation Code, CSA B149.1
or Propane Storage and Handling Code, B149.2 (in Can-
ada).
Never use this gas grill in a garage, porch, shed, breeze-
way or any other enclosed area. The gas grill is to be used
outdoors only, with at least 6 inch clearance from the back
and sides of the grill to any combustible surface. The gas
grill shall not be located under overhead combustible con-
struction. Do not obstruct the ow of combustion or ventila-
tion air around the gas grill housing.
This outdoor gas grill is not intended to be installed in or on
recreational vehicles and/or boats. If installed other than in
the grill cart, refer to ANSI Z223.1 for specic details rela-
tive to installation within a conned space.
Correct LPG Cylinder Use
This gas grill is designed for use with a standard 20 lb.
Liquid Propane Gas (LPG) cylinder, not included with grill
box. Never connect the gas grill to an LPG cylinder that ex-
ceeds this capacity. A cylinder of approximately 12 inches
in diameter by 18-1/2 inches high should be the maximum
size LPG cylinder used. The LPG cylinder must be an
“OPD” gas cylinder which offers an Overll Prevention De-
vice. This safety feature prevents the cylinder from being
overlled which can cause malfunction of the LPG cylinder,
regulator and/or grill.
The LPG cylinder must be constructed and marked in ac-
cordance with the Specications for LP-Gas Cylinders of the
U.S. Department of Transportation (DOT) or the National
Standard of Canada, CAN/CSA-B339, Cylinders, Spheres
and Tubes for Transportation of Dangerous Goods: and
Commission, as applicable.
In addition:
1. The LPG cylinder must also be provided with a listed
overlling prevention device, and a cylinder connec-
tion device compatible with the connection for outdoor
cooking appliances.
2. The LPG cylinder used must have a collar to protect the
cylinder valve.
3. The cylinder supply system must be arranged for vapor
withdrawal. See Figure 11 on page 13. Keep the venti-
lation openings of the cylinder enclosure free and clear
from debris.
4. Never connect an unregulated LPG cylinder to the gas
grill. The gas regulator assembly supplied with this gas
grill is adjusted to have an outlet pressure of 11” water
column (W.C.) for connection to an LPG cylinder.
5. Only use the regulator and hose assembly supplied with
the gas grill. The regulator and hose assembly must be
inspected before each use of the grill. If there is exces-
sive abrasion or wear or if the hose is cut, it must be
replaced prior to the grill being used again. Open the
lower grill cart cabinet doors to access and inspect the
regulator and hose assembly. Replacement pressure
regulators and hose assemblies must be those speci-
ed by The Outdoor Greatroom Company.
6. Have the LPG cylinder lled by a reputable propane
gas dealer and visually inspected and re-qualied at
each lling.
Never ll the gas cylinder beyond 80% full. Have the
propane gas dealer check the release valve after every
lling to ensure that it remains free of defects.
Do not store a spare LP-gas cylinder under or near this
appliance or any other ignition source.
If this information is not followed exactly, a re
causing death or serious injury may occur.
7. Always keep LPG cylinders in an upright position.
8. Do not store (or use) combustible materials, gasoline or
other ammable vapors and liquids in the vicinity of this
gas grill.
9. Do not subject the LPG cylinder to excessive heat.
10. When the gas grill is not in use the gas must be turned
off at the LPG cylinder.
11. Never store an LPG cylinder indoors. If storing the gas
grill in the garage or other indoor location, always dis-
connect and remove the LPG cylinder. Cylinders must
be stored outdoors out of the reach of children and
must not be stored in a building, garage or any other
enclosed area.
The Outdoor Greatroom Company • Legacy Gas Grill • Rev. E
5
Beware of Spiders
Safety Instructions
If the hose appears damaged do not use gas grill. Call
your dealer for a factory authorized replacement hose.
Keep the gas regulator hose away from hot grill surfac-
es and dripping grease. Avoid unnecessary twisting of
hose. Visually inspect hose prior to each use for cuts,
cracks, excessive wear or other damage.
Never light the gas grill with the lid closed or before
checking to insure the burner tubes are fully seated over
the gas valve orices.
Never allow children to operate the grill. Do not allow
children to play near the grill.
Never obstruct the ow of combustion and ventilation
air to the grill.
WARNING
WARNING
Fire Risk
Explosion Risk
A strong gas smell, or the hissing sound of gas indi-
cates a serious problem with the gas grill or the LPG
cylinder.
Get away from the LPG cylinder.
Do not try to x the problem yourself.
Call the re department. (Do not call near the LPG cyl-
inder because the telephone is an electrical device.)
Failure to immediately follow the steps listed above
could result in a re or explosion which could cause
property damage, serious bodily injury or death.
CAUTION: Spiders and small insects occasionally spin
webs or make nests in the grill burner tubes during tran-
sit and warehousing. These webs can lead to a gas
ow obstruction which could result in a re in and
around the burner tubes. This type of re is known as
a “FLASH-BACK” and can cause serious damage to
the grill and create an unsafe operating condition for the
user.
Although an obstructed burner tube is not the only cause of
“FLASH-BACK”, it is the most common cause.
To reduce the chance of “FLASH-BACK”, clean the
burner tubes before assembling the grill, and at least
once a month in late summer or early fall when spi-
ders are most active. Also perform this burner tube
cleaning procedure if the grill has not been used for an
extended period of time.
Natural Gas Safety
(Conversion Kit available through The Outdoor Great-
room Company)
This converted natural gas grill is designed to operate on
natural gas ONLY, at a pressure of 7” water column (W.C.)
(1/4 psig or 1.75 kPa), regulated at the residential meter.
Check with the gas utility for local gas pressure and with
the local municipality for building code requirements. If the
residential gas utility line pressure has not been regulated
to 7” W.C., contact the local gas utility or gas grill dealer for
professional assistance.
Check with the gas utility or with local building codes for
instructions to install gas supply line, or call a licensed and
knowledgeable installer. The grill must be chained to stay
in one location so that it cannot roll.
It is recommended that an “ON-OFF” shut-off valve be in-
stalled at the gas supply source:
outdoors after gas line piping exits outside wall and before
quick-disconnect, or before gas line piping enters ground.
indoors in the branch fuel line in an accessible location
near the supply line.
Converting to Natural Gas
Fire Risk
Explosion Risk
Only factory authorized dealers may convert the grill
from LP to NG.
Any attempt to do otherwise voids the product war-
ranty and releases The Outdoor Greatroom Compa-
ny from all liabilities due to unauthorized conversion.
Failure to comply with these instructions could re-
sult in re or explosion which could cause property
damage, serious bodily injury, or death.
Pipe sealing compound or pipe thread tape of the type re-
sistant to the action of natural gas must be used on all male
pipe threads when making the connection.
Disconnect the gas grill from fuel source when the gas sup-
ply is being tested at high pressures. This appliance and its
individual shut-off valve must be disconnected from the gas
supply piping system during any pressure testing of that
system at test pressures in excess of 1/2 psi (3.5kPa).
Turn off the gas grill when the gas supply is being tested
at low pressures. This appliance must be isolated from the
gas supply piping system by closing its individual manual
shut-off valve during any pressure testing of the gas supply
piping system at test pressures equal to or less than 1/2 psi
(3.5kPa).
The Outdoor Greatroom Company • Legacy Gas Grill • Rev. E
6
Remove all components from the packing carton and place within easy reach. Do not throw the shipping carton away; in-
stead use it as an elevated assembly surface.
LG24i
Service Parts
(NG, LP) Exploded Parts Diagram
Beginning Manufacturing Date: ____
Ending Manufacturing Date: ______
The Outdoor Greatroom Company • Legacy Gas Grill • Rev. E
7
How to Order Replacement Parts
IMPORTANT: THIS IS DATED INFORMATION. The most current information is located on your dealers VIP site. When
ordering, supply serial and model numbers to ensure correct service parts.
LG24i Service Parts List
To order replacement parts, contact the deal-
er where the product was purchased.
To obtain the correct replacement part(s) for
this Patio Gourmet Series III gas grill, please
refer to the service parts list. The following
information is required to assure receipt of
correct parts:
Gas Grill Model Number (see data sticker
on grill)
Part Number AND Part Description
Quantity of parts needed
Important: Keep this assembly and operat-
ing instruction manual for convenient referral
and for part replacement.
Important: Use only factory authorized parts.
The use of any unauthorized factory part can
be dangerous and will also void the product
warranty.
ITEM DESCRIPTION PART NUMBER
1 24 in. Control Panel Assembly JL24-761-107A-L
2 24 in. Control Panel JL24-761-111
3 Logic Box Assembly JL-760-189A
4 Battery Pack Mount JL-760-209
5 Bezel JL-760-145
6 Control Knob - “D” Shaft JL-760-188A
7 Snap Bushing 760-207
8 Snap Bushing JL-760-208
9 Rocker Switch On/Off 230-0730
10 Control Knob - Spline Shaft JL-760-195A
11 Temp Gauge Cover JL-760-187
12 Temp Gauge JL-760-183A
13 24 in. Front Hood Assembly JL24-761-116A
14 Handle JL-761-126A
15 24 in. Vaporizer Plate JL24-761-200A
Items not shown
Battery Pack 593-594A
24 in. Valve 760-191
24 in. Wire Harness JL-24-760-193
Probe 760-144
Searing Plate 760-108
SS Grill 760-109
Hose and Regulator 760-182
Ignitor JL-761-303
Ignition Wire JL-761-304
The Outdoor Greatroom Company • Legacy Gas Grill • Rev. E
8
Remove all components from the packing carton and place within easy reach. Do not throw the shipping carton away; in-
stead use it as an elevated assembly surface.
Service Parts
(NG, LP) Exploded Parts Diagram
Beginning Manufacturing Date:_____
Ending Manufacturing Date: ______
LG36i
The Outdoor Greatroom Company • Legacy Gas Grill • Rev. E
9
How to Order Replacement Parts
IMPORTANT: THIS IS DATED INFORMATION. The most current information is located on your dealers VIP site. When
ordering, supply serial and model numbers to ensure correct service parts.
LG36i Service Parts List
To order replacement parts, contact the deal-
er where the product was purchased.
To obtain the correct replacement part(s) for
this Patio Gourmet Series III gas grill, please
refer to the service parts list. The following
information is required to assure receipt of
correct parts:
Gas Grill Model Number (see data sticker
on grill)
Part Number AND Part Description
Quantity of parts needed
Important: Keep this assembly and operat-
ing instruction manual for convenient referral
and for part replacement.
Important: Use only factory authorized parts.
The use of any unauthorized factory part can
be dangerous and will also void the product
warranty.
ITEM DESCRIPTION PART NUMBER
1 36 in. Control Panel Assembly JL-761-107A-L
2 36 in. Control Panel JL-761-111
3 Logic Box Assembly JL-760-189A
4 Battery Pack Mount JL-760-209
5 Bezel JL-760-145
6 Control Knob - “D” Shaft JL-760-188A
7 Snap Bushing 760-207
8 Snap Bushing JL-760-208
9 Rocker Switch On/Off 230-0730
10 Control Knob - Spline Shaft JL-760-195A
11 Temp Gauge Cover JL-760-187
12 Temp Gauge JL-760-183A
13 36 in. Front Hood Assembly JL-761-116A
14 Handle JL-761-126A
15 36 in. Vaporizer Plate JL-761-200A
Items not shown
Battery Pack 593-594A
36 in. Valve 761-191
36 in. Wire Harness JL-760-193
Probe 760-144
Searing Plate 760-108
SS Grill 760-109
Hose and Regulator 760-182
Ignitor JL-761-303
Ignition Wire JL-761-304
The Outdoor Greatroom Company • Legacy Gas Grill • Rev. E
10
Assembly Instructions
Carton A
2 - Front Swivel Caster with Brakes
2 - Rear Swivel Casters
1 - 3/4 inch Open-end Wrench
Before beginning to assemble the grill, remove all parts
cartons from inside the lower cart cabinet, and the vapor-
izer plate and the searing deck inside the grill hood. (See
Figure 1).
Tools Needed
9/16 inch Open-end Wrench
3/4 inch Open-end Wrench (included with grill)
Philips Screwdriver
Box Cutter or small sharp knife
Supplies Needed (not included with grill)
20 lb. LPG Cylinder (approximately 12 inch diameter by
18 1/2 inch maximum height)
Two “D” size Batteries
Non-corrosive Commercial Leak Check Solution
Figure 2
Figure 1
Front Swivel
Caster w/Brakes
Carton B
3 - Cooking Grids
Figure 3
Carton C
1 - Grease Drawer
Figure 4
Step 1. Check Carton Contents
Carefully open the parts cartons marked A through E and
compare contents with the following Figures 2 through 6.
Contact your dealer if any parts are missing or damaged.
Vaporizer Plate
Searing Deck
Rear Swivel
Caster
Wrench
The Outdoor Greatroom Company • Legacy Gas Grill • Rev. E
11
Step 2. Assemble Casters
1. Parts/Items Needed: Two front swivel castors with
brakes, two rear swivel castors, and the 3/4 inch open
end wrench (from parts Carton A). See Figure 7.
Carton D
1 - Stainless Steel Warming Grid
2 - Warming Grid Legs
1 - Searing Plate
Figure 5
Stainless Steel
Warming Grid
Carton E
2 - Side Tables
2 - Condiment Trays
16 - Philips Head Screws
6 - Grilling Tool Hooks
2 - Handles
Figure 6 (One side table and one condiment tray shown).
Figure 7
Important: Work on a non-abrasive carpet, blanket or
cardboard (outer cardboard shipping sleeve can be used)
or grass while installing the casters.
2. Two people should assist one another during this
procedure.
Carefully tip the grill/cabinet assembly and lay it at
on it’s back. Screw the four castors into the threaded
holes at the corners of the cabinet base. The two cas-
tors without brakes go to the rear and the two castors
with brakes go to the front. Tighten each castor with the
3/4 inch open end wrench.
Step 3. Gas Manifold
1. Parts/Items Needed: 3/4 inch open-end wrench. See
Figure 8.
Figure 8
2. The gas manifold is factory installed as part of the con-
trol panel assembly attached to the front of the grill
cabinet.
Warming
Grid Legs
Searing Plate
Condiment Tray
Screws
Side Table
Front Casters
Rear Casters
Wrench
Flex tube from supply cylinder
bulkhead to top of gas manifold
Flex tube from
oricetobottomof
gas manifold
Tool Hooks
Handles
The Outdoor Greatroom Company • Legacy Gas Grill • Rev. E
12
3. A 3/8 inch gas exible tube is factory installed from the
bulkhead tting under the vaporizer plate to the TOP
tting on the manifold. Gas ows from the cylinder/reg-
ulator through this ex tube to the manifold.
4. A 3/8 inch gas exible tube is factory installed from the
main burner orice to the BOTTOM tting on the mani-
fold. Gas ows from the manifold/gas valve through
this ex tube to the burner orice when the ignitor con-
trol knob is operated.
5. Use a 3/4 inch open-end wrench to ensure both ex
tube swivel nuts are tight, but DO NOT over-tighten or
you may strip the threads.
DONOT use Teon tape or sealant on these
gasmanifoldttings.
WARNING
Step 4. Install Batteries
1. Parts/Items Needed: Two “D” size Batteries
2. The battery box is factory installed as part of the con-
trol panel assembly attached to the front of the grill
cabinet. See gure 9.
3. Install two “D” size batteries in the grill’s battery box.
Push the negative end of the battery (at end) against
the spring and snap the battery up into the battery
box.
Figure 9
NOTE: Before continuing assembly, carefully lift the grill/
cabinet assembly into the upright position. Two people
should assist one another when lifting the unit.
Step 5. Install Grease Drawer
1. Parts/Items Needed: Grease Drawer (from parts Car-
ton C).
2. Open the cart cabinet doors and nd the small “L” -
shaped rails at the top left of the cabinet.
3. Align the back of the grease drawer with the “L”-shaped
rails and slide the drawer towards the rear of the cabi-
net until it stops. See Figure 10.
Figure 10
A. Connecting a Liquid Propane Gas (LPG) Cylinder
to the Grill
1. Place the LPG gas cylinder in the formed hole in the
bottom of the cart with the cylinder valve towards the
front. Make sure the LPG cylinder valve is in the full
OFF position. (Turn clockwise to close.) Secure the
cylinder to the cart by tightening the wing nut found
underneath and to the rear of the cart on the same side
as the cylinder.
2. Check the cylinder valve features to ensure it has prop-
er external mating threads to t the hose and regula-
tor assembly provided. (Type 1 connection per ANSI
Z21.58-2005/CSA1.6-2005).
3. Make sure the burner control knob is in the OFF position.
4. Inspect the cylinder valve connection port and regula-
tor assembly. Look for any damage or debris. Remove
any debris. Inspect hose for damage. Never attempt to
use damaged or plugged equipment.
5. When connecting the hose and regulator assembly to
the cylinder valve, hand tighten nut clockwise to a full
stop (see Figure 11). DO NOT use a wrench to tighten
because it could damage the Quick Coupling Nut and
result in a hazardous condition.
Step 6 Connecting Gas Cylinder
“D” Size Battery
Battery Box
Grease Drawer
Rails
The Outdoor Greatroom Company • Legacy Gas Grill • Rev. E
13
Figure 11
CAUTION
Before the rst use and at the beginning of each sea-
son (and whenever the LPG gas cylinder has been
changed):
1. Read all safety, lighting and operating instructions.
2. Check gas valve orices, burner tubes and burner
ports for any obstructions.
3. Perform gas leak check according to instructions
found in this manual.
PRESSURE
REGULATOR
NUT
6. Checking For LP Gas Leaks
Never test for leaks with a ame. Check for gas leaks prior
to rst use, at the beginning of each season, or every time
the LPG cylinder is changed. Follow these four steps:
Use a commercially-available non-corrosive leak check
solution.
Turn the grill ignitor control knob to the full OFF position
(clockwise), then turn the gas ON at the cylinder (coun-
ter-clockwise).
Apply the leak check solution to all gas connections.
Bubbles will appear in the leak check solution if the con-
nections are not properly sealed. Tighten or repair as
necessary.
If there is a gas leak that cannot be repaired, turn off the gas
at the cylinder, disconnect fuel line from the grill and call the
gas grill dealer, or gas supplier for repair assistance.
CAUTION
When the appliance is not in use, the gas must be
turned off at the supply cylinder.
B. Disconnecting a Liquid Propane Gas (LPG)
Cylinder from the Grill
1. Turn both burner control knobs and LPG cylinder valve
to the full OFF position. (Turn clockwise to close.)
2. Detach the hose and regulator assembly from the LPG
cylinder valve by turning the Quick Coupling Nut coun-
terclockwise.
Figure 12
Step 7. Install Searing Deck and
Vaporizer Plate
1. Parts/Items Needed: Searing deck, vaporizer plate,
and box cutter or small sharp knife.
Note: These parts were inside the grill compartment
and removed to complete previous assembly steps.
2. Open the grill hood and use a box cutter or small sharp
knife to cut the nylon tie-straps securing the burner to
its bracket and securing the exible gas tubes to one
another. Remove and discard these straps and any
other debris found in the burner compartment.
3. Hold the searing deck with the round air holes away
from you and the rectangular cut-outs to the top and
place it into the grill approximately 1/3 inch from the
back. The 5/8 inch bend facing you slides into the small
slots in the ledges on both sides of the compartment.
See Figure 12.
4. Place the three rectangular tabs on the rear edge of the
vaporizer plate into the slots of the cross brace in the
grill compartment. The V-shape bend is down and the
round hole towards the front when properly installed.
See Figure 13.
Figure 13
Ledge
Small Slot
5/8” Bend
Searing Deck
Cross Brace
3 Tabs
3 Slots
Vaporizer Plate
The Outdoor Greatroom Company • Legacy Gas Grill • Rev. E
14
Figure 14
Step 8. Install Searing Plate and
Warming Grid
1. Parts Needed: Searing plate, 2 searing plate tools,
stainless steel warming grid, two warming grid legs
(from parts Carton D).
2. Hold the searing plate with the three slots towards you
and set it into the back of the grill compartment. The
searing plate tools provided can be used to place the
sear plate in the grill. The rear edge of the plate rests
along the rear ledge of the compartment and the front
edge (with slots) rests on top of the previously installed
searing deck. See Figure 14.
Searing Plate
3. Insert the free ends of a warming grid leg into one dou-
ble end of the warming grid with the bend of the leg to
the outside. Repeat on the opposite end.
Figure 15
4. Place the assembled warming grid to the rear of the grill
compartment above the searing plate. The legs will rest
on ledges along each side of the grill compartment. See
Figure 15.
Step 9. Install Cooking Grids
1. Parts/Items Needed:
Cooking Grids (from parts Carton B).
2. Slide the cooking grids into the grill compartment. The
back edges will rest on the xed cross member and the
front edges on the front ledge in the compartment. See
Figure 16.
Figure 16
Cooking Grids
Slots to Front
Searing Deck
Warming Grid
Warming Grid Leg
Ledge
The Outdoor Greatroom Company • Legacy Gas Grill • Rev. E
15
Step 10. Assemble Side Tables
1. Parts Needed: Two side tables (left and right), two con-
diment trays, two handles, eight Philips head mounting
screws, six grilling tool hooks, (from parts Carton E),
Philips head screwdriver (not supplied).
2. Lay a side table upside down on a at work surface.
Turn a condiment tray upside down and align the two
mounting holes with holes on the front face of the side
table. Run two screws through the table into the thread-
ed holes in the tray and tighten the screws with a Phil-
ips head screw driver. Repeat this procedure with the
second side table.
3. Slide three cooking tool hooks onto one side handle
with the open ends of the hooks facing down toward
the work surface. Align the handle with the two holes
on the side bend of the side table. Run two screws
through the table into the threaded holes in the handle
and tighten the screws with a Philips head screwdriver.
Repeat this procedure with the second side table. See
Figure 17.
Figure 17
Condiment Tray
Step 11. Install Side Tables
1. Parts/Items Needed: Two side table assemblies (from
Step 10), eight Philips head mounting screws, (from
parts Carton E), and Philips head screwdriver (not sup-
plied).
2. Position the left side table assembly against the top left
outside cart cabinet. Align the four mounting holes (two
each front and rear). Insert a Philips head mounting
screw into each threaded hole and tighten screws with
a Philips head screwdriver. Repeat this procedure with
the right side table assembly. See Figure 18.
Figure 18
Side Table
Handle
Hooks (Open ends down)
The Outdoor Greatroom Company • Legacy Gas Grill • Rev. E
16
WARNING
WARNING
WARNING
WARNING
Lighting Instructions
Basic Lighting Procedures
1. Familiarize yourself with the safety guidelines at the
front of this manual. Do not smoke while lighting grill or
checking gas supply connections.
2. Be sure the LPG cylinder is lled.
3. Make sure all gas connections are securely tightened.
4. Ensure that 2 - “D” size batteries have been installed.
5. Open the grill lid.
Lighting the Grill by Match
To light the gas grill by match, follow steps 1 through 6 of
the Basic Lighting Procedures. Then remove the cooking
grids and vaporizer plate from the grill. Push the burner
slide lever forward until it stops. Place a long, lit match or a
long lit grill lighter next to the main burner ports and turn the
ignitor control knob to the HIGH setting to release gas. The
burner should light immediately. (See Figure 20). Replace
the vaporizer plate and cooking grids in the grill.
6. Set temperature and ignitor control knobs to OFF and
open the LPG cylinder valve. See Figure 19.
7. Push and turn ignitor control knob to HIGH. The built-in
ignitor will click and spark to ignite burner. Ignitor may
need realignment to generate adequate spark.
8. Conrm ignition by moving the burner forward by push-
ing the handle forward and viewing ame through the
vaporizer plate holes.
9. If the burner does not light, turn the ignitor control knob
to OFF, wait 5 minutes for gas to clear, then retry.
10. Adjust temperature control knob to the desired cooking
temperature.
Explosion Risk / Fire Risk
Failure to open the grill lid during the lighting procedures
could result in a re or explosion which could cause
property damage, serious bodily injury or death.
Explosion Risk / Fire Risk
IF YOU SMELL GAS:
Shut off gas supply to the grill.
Extinguish any open ame.
Open grill lid.
If odor continues, immediately call your gas com-
pany or local re department.
Failure to comply with these instructions could result
in a re or explosion which could cause property dam-
age, serious bodily injury or death.
Fire Risk
Explosion Risk
A strong gas smell, or the hissing sound of gas indi-
cates a serious problem with the gas grill or the LPG
cylinder.
Get away from the LPG cylinder.
Do not try to x the problem yourself.
Call there department. (Do not call near the LPG cyl-
inder because the telephone is an electrical device.)
Failure to immediately follow the steps listed above
could result in a re or explosion which could cause
property damage, serious bodily injury or death.
Hot Surfaces
Never lean over the grill cooking area
while lighting the gas grill.
Keep face and body a safe distance (at
least 18 inches) from the lighting hole or
burners, when lighting the grill by match.
Figure 20
Figure 19
Control Knobs
Burner ports
The Outdoor Greatroom Company • Legacy Gas Grill • Rev. E
17
If the grill fails to light properly:
1. Turn gas off at the cylinder and turn both control knobs
to OFF. Wait at least ve minutes for gas to clear, then
retry.
2. Check gas supply and connections.
3. Repeat lighting procedure. If the grill still fails to oper-
ate properly, turn the gas off at the cylinder, turn both
control knobs to OFF, then check the following:
Problem: Obstruction in gas line
Correction: Remove fuel line from grill. Do not smoke!
Open gas supply for one second to clear any obstruc-
tion from fuel line. Close off gas supply at source and
reconnect fuel line to grill.
Problem: Pugged orice
Correction: Remove the shield above the orice. Re-
move the 3/8 inch gas ex tube from the back of the
orice. Unscrew the 7/8 inch jam nut towards the top of
the orice completely and slide the orice through the
bracket. Gently clear any obstruction with a ne wire.
Then reinstall the orice, nut, gas ex tube, shield and
all cooking components.
If an obstruction is suspected in the gas valve, please
call the gas grill dealer or gas appliance service person
for assistance.
Problem: Misalignment of ignitor on burner
Correction: Check for proper position of the electrode
tip. The tip of the electrode should be pointing over
burner ports at the top of the burner. The gap between
the spark electrode and the burner should be 1/8 inch.
Adjust if necessary. With the gas supply closed press
and turn ignitor control knob counterclockwise and
check for presence of spark. See Figure 21.
Problem: Disconnected Ignition Wires
Correction: Inspect the Ignitor junction box found be-
neath the Control Panel. Connect loose Ignitor wires to
the junction box and try to light the grill.
Problem: Weak batteries
Correction: Replace “D” size batteries on ignitor mod-
ule underneath grill control panel.
4. If all checks or corrections have been made and the
grill still fails to operate properly, turn gas supply off at
the cylinder and call the gas grill dealer or gas appli-
ance service person.
WARNING
Explosion Risk
Fire Risk
If a “FLASH-BACK” re occurs in or around the
burner tubes:
Immediately turn the gas OFF at its source.
Turn the control knobs to OFF position.
Once the grill has cooled down, clean the burn-
er tubes and burners according to the cleaning
instructions in this manual.
Failure to comply with these instructions could re-
sult in a re or explosion which could cause serious
property damage, bodily injury or death.
Figure 21
Spark Electrode
Burner
The Outdoor Greatroom Company • Legacy Gas Grill • Rev. E
18
Cooking Instructions
Important: Before cooking on the grill for the rst time,
wash the cooking grids and sear plates with warm, soapy
water. Rinse and dry thoroughly.
Burn-off
Before cooking on the gas grill for the rst time, you will
want to “burn off” the grill to eliminate any odor or foreign
matter. Just ignite the burner, close the lid, and operate grill
on the HIGH setting for about ve minutes with burner full
forward (convection) and full back (sear). See Figure 22.
Electronic Operation
Step 1. Select the type of food being cooked.
Step 2. Use the temperature control knob to select tem-
perature. Set probe switch to “On” position (this
will set the alarm).
Step 3. Insert probe into meat and close lid. Each light
will turn red once that temperature is reached,
and an alarm will sound once the desired tem-
perature is achieved.
Burner
Slide burner front to back verifying burner operation. Burner
should slide freely.
Sear Cooking - Burner in rear position
Convection Cooking - Burner in front position
Flare-Ups
The fats and juices dripping from grilled food can cause
are-ups. Since are-ups impart a favorably distinctive taste
and color to food cooked over an open ame, they should
be accepted up to a point. Nevertheless, uncontrolled ar-
ing can result in a ruined meal.
WARNING
HOT! DO NOT TOUCH.
SEVERE BURNS MAY RESULT.
CLOTHING IGNITION MAY RESULT.
Surfaces are hot during operation and
cool down.
Keep children away. CAREFULLY SUPERVISE
children in same area as grill.
Alert children and adults to hazards of high tem-
peratures.
Never lean over the cooking area while grill is on.
Preheating
To preheat, light the grill on HIGH, close the lid and follow
this timetable:
For both high and low temperature cooking, preheat
grill 10 minutes.
To slow cook, preheating is not necessary.
Cooking Temperatures
High setting: Use this setting for fast warm-up, searing
steaks or chops and for burning food residue off the grill
after cooking is complete.
NOTE: Temperature settings will vary with the amount of
wind and temperature outside your home.
Figure 22
Burner
Control
Handle
The Outdoor Greatroom Company • Legacy Gas Grill • Rev. E
19
Cleaning and Maintenance Instructions
As with all appliances, proper care and maintenance will keep
this grill in top operating condition and prolong its life. By fol-
lowing these cleaning procedures on a timely basis, the grill
will stay clean and work properly with minimum effort.
Cleaning The Cooking Surfaces
Before initial use and periodically, wash the cooking grids
in a soap and warm water solution. Use a wash cloth or
vegetable brush to clean the cooking grids.
CAUTION: Never try to clean the cooking grids until they
are cool to the touch.
Cleaning The Grease Drawer
To reduce the chance of re, the Grease Drawer should
be visually inspected before each grill use. Remove any
grease and wash grease drawer with a mild soap and warm
water solution.
Cleaning The Burner Tubes and Burner Ports
NOTE: It is not necessary to remove the burner
when cleaning the burner tubes and ports.
To reduce the chance of “FLASH-BACK” follow the proce-
dure below at least once a month in late summer or early
fall when spiders are most active or when the grill has not
been used for a period of time.
1. Turn all burner valves to the full OFF position.
2. Turn the LPG cylinder valve (clockwise) to the full OFF
position.
3. Detach the regulator assembly from the LPG cylinder
by turning the Quick Coupling Nut counterclockwise.
4. Remove the cooking grids and searing plates.
5. Remove vaporizer plate.
Regardless of which burner cleaning procedure is used, we
recommend you also complete the following steps to help
prolong burner life.
1. Clean rear burner ports from area below searing plate.
2. Clean front burner ports from area underneath by re-
moving vaporizer plate.
3. Use a wire brush to clean the entire outer surface of
burner until free of food residue and dirt.
4. Clean any clogged ports with a stiff wire, such as an
open paper clip.
5. Inspect burner for damage (cracks or holes) and if such
damage is found, order and install a new burner. After
installation, check to insure that the gas valve orice is
WARNING
Explosion Risk
Fire Risk
Check to ensure the orice is inside the burner
tube before using the gas grill.
If the burner tube does not t over the valve orice,
lighting the burner may cause explosion and/or re.
Keep surface of even heat vaporizer plate clean
1. Remove cooking grids.
2. Use a putty knife to scrape area clean.
3. Make sure perforations are free of any obstructions.
Checking Burner Flame Patterns
For proper operation the burner ame characteristics should
be steady, not lifting or oating. See Figure 24.
Figure 24
correctly placed inside the end of the burner tube. Also
check the position of the spark electrode. See Figure 23.
Figure 23
Burner Tube
Orice
The Outdoor Greatroom Company • Legacy Gas Grill • Rev. E
20
CAUTION: Be sure the grill is OFF and cool before cleaning.
Annual Cleaning of The Grill Interior
Burning-off the grill after every cookout will keep it ready
for instant use. However, once a year you should give the
entire grill a thorough cleaning to keep it in top operating
condition.
Follow these steps:
1. Turn all control knobs to the full OFF position.
2. Turn the LPG cylinder valve (clockwise) to the full OFF
position.
3. Detach the regulator assembly from the LPG cylinder
by turning the Quick Coupling Nut counterclockwise.
4. Cover burner orice with aluminum foil.
5. Brush the inside and bottom of the grill with a stiff wire
brush, and wash with a mild soap and warm water solu-
tion. Rinse thoroughly and let dry.
6. Remove aluminum foil from orice and check orice for
obstruction.
7. Check spark electrode, adjusting as needed. The Elec-
trode tip should be pointing toward the burner ports
approximately 1/8 inch from the burner surface. See
Figure 25.
WARNING
Cleaning Exterior Surfaces
Before initial use, and periodically thereafter, wash the grill
using a mild soap and warm water solution. Use a wash
cloth or sponge for this process. Do not use a stiff wire or
brass brush that might remove paint during the cleaning
process.
Cleaning Exterior Stainless Steel Surfaces
Weathering and extreme heat can cause exterior stainless
steel surfaces to turn tan in color. Follow these steps for the
best cleaning results.
1. Turn the LPG cylinder valve (clockwise) to the full OFF
position. Disconnect the regulator and hose assembly
from LPG cylinder. Cover exposed gas tting with alu-
minum foil.
2. Remove dirt or grease using a soft cloth and polish
stainless surfaces using a Stainless Steel Foam Clean-
er. Never use abrasive cleaners or scrubbers—they will
scratch and damage the stainless steel.
3. Wipe with a soft cloth and allow to air dry before start-
ing the grill.
8. Reconnect the gas source and observe the burner
ame for correct operation.
Figure 25 LG24i / JAG24
Fire Risk
Explosion Risk
Do not line the bottom of the grill housing with alumi-
num foil, sand or any substance that will restrict the
ow of grease into the grease drawer.
Failure to comply with these instructions could re-
sult in a re or explosion which could cause prop-
erty damage, serious bodily injury or death.
Spark Electrode
Burner
  • Page 1 1
  • Page 2 2
  • Page 3 3
  • Page 4 4
  • Page 5 5
  • Page 6 6
  • Page 7 7
  • Page 8 8
  • Page 9 9
  • Page 10 10
  • Page 11 11
  • Page 12 12
  • Page 13 13
  • Page 14 14
  • Page 15 15
  • Page 16 16
  • Page 17 17
  • Page 18 18
  • Page 19 19
  • Page 20 20
  • Page 21 21

Outdoor Great Room LG24I Owner's manual

Category
Barbecues & grills
Type
Owner's manual
This manual is also suitable for

Ask a question and I''ll find the answer in the document

Finding information in a document is now easier with AI