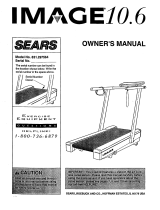
Image 10.6 Owner's manual

Category
Treadmills
Type
Owner's manual

This manual is also suitable for

IMAG El0 6
8F_/AR8
Model No. 831.297563
Serial No.
The serial number can be found in
the location shownbelow. Write the
serialnumber in the space above.
Serial Number
E_xn=- Rc ISa_
EC_UI PM ENT
H I:'LPLI N El
1-800-736-6879
_ CA UI"ION_:g_!_!_!_!__._
:i Read all precautions and instruc_
ifl_hs irt thls'_ahual b_for_'_ln_ _?
_i_ _quipm_n_ Keep this manua!_:::'
OWNER'S MANUAL
I__",:_ ,_!_ __'_:,'_::_!: _:_o_ _:,._, "
I_!MPOR!"A_::Thls tre_dhi!l! features_a s_t_f, the-art Ford-
I _less pulse sensbr. Please read thls manual carefully before
I using the pulse sensor, If youhave questions about the
I__p_i_i_sor_;:piease:_'ee:_g_ 7, 8;_:/,_:13ioefore_iih.g _
I:_our;.t01Hree HELpLINE_:,; ..:_._:_:_.._:_,-:_::_;_. ,.:_:_i_;_" ::
SEARS, ROEBUCK AND CO., HOFFMAN ESTATES, IL 60179 USA
TABLE OF CONTENTS
FULL ONE YEAR WARRANTY ........................................ .
IMPORTANT PRECAUTIONS ...................................
°o ,,
BEFORE YOU BEGIN ...............................................
ASSEMBLY .............................................................. ; ........
HOW TO USE THE PULSE SENSOR ...................................................
OPERATION AND ADJUSTMENT .....................................................
MANUAL MODE OPERATION .....................................................
HOW TO CONTROL THE SPEED ..........................
HOW TO CONTROL THE INCLINE .........................
HOW TO USE THE FAT CALORIE MONITOR .................
PROGRAM MODE OPERATION ..............................
HOW TO USE A PRESET WORKOUT PROGRAM
HOW TO USE THE PULSE MODE ............
HOW TO USE THE FAT BURN AND FAT BURN PLUS PROGRAMS .........
HOW TO USE THE FITNESS TEST PROGRAM ................... . ...................
HOW TO CREATE CUSTOM WORKOUT PROGRAMS .................................
HOW TO USE A CUSTOM WORKOUT PROGRAM ..........
•oo...o°ooo.°..° .... .••.o
TROUBLE-SHOOTING AND STORAGE .................................. ...................
CONDITIONING GUIDELINES ................... ; .......................................
i••°•°°•°o°o=oool,°o,
••°°o°••ooooo•=°l•.,•
.°°,,o•••.*•oo°°°oooo
••*•,•••••°co.l,•,••,
°°°°_oo••°°.o°o,.=°l.°
o•°°•°o°°°*oo•°°°°°,,o
O,tqtQOOQQQ,OQeOO64eQg_I_
°•.•O,•,Q,•,,O*,,O,•••°3
.o Q.*,*, _,,,*, e _*• •°,t4
•O••0,••9
: ...... 11
....... 11
....... 11
...... 12
....... 12
o,.,,°., ,._,.,,.,o•12
o°°°°ooo°°,..=°•._1*13
........ .r ...... 15
.... 15
.... 16
.... 17
.... 20
,oo_.2
ORDERING REPLACEMENT PARTS .................................................. Back Cover
Note: There is an EXPLODED DRAWING and PART LIST attached to the center of this manual. Save the
EXPLODED DRAW1NG and PARTUST for future reference.
I FULL ONE YEAR WARRANTY I
For one (1) year from the date of purchase, iffailure occurs due to defect in material or workmanship in
th.isSEARS TREADMILL EXERCISER, contact the nearest SEARS Service Center throughout the
United States and SEARS will repair or replace the TREADMILL EXERCISER, free of charge.
This _ty does not applywhen the TREADMILL EXERCISER is used commerciallyor for rental pur-
poses.
This warranty gives you specificlegal rights, and you may also have other rights which vary from state
to state,
SEARS, ROEBUCK AND CO., DEPT. 817WA, HOFFMAN ESTATES, IL 60179
2
IMPORTANT PRECAUTIONS
WARNING: Toreduca=eriskofbun,e,tire,ei o ahoc"inl= the
lowing Important precautions end Information before operating th_ treadmlirYL_
1. It is the responsibility of the owner to ensure
that all users of this treadmill are adequately
informed of all warnings and precautions.
2. Use the treadmill only as described in this
manual.
3. Place the treadmill on a level surface, with
eight feet of clearance behind it. Do not place
the treadmill on any surface that blocks air
openings. To protect the floor or carpet from
damage, place a mat under the treadmill.
4. Keep the treadmill indoors, away from mois-
ture and dusL Do not put the treadmill in a
garage or covered patio, or near water.
5. Do not operate the treadmill where aerosol
products are used or where oxygen is being
administered.
6. Keep small children and pets away from the
treadmill at all times.
7. The treadmill should be used only by persons
weighing 300 pounds or less. Do not allow
more than one person on the treadmill at a
time.
8. When connecting the power cord (see HOW TO
PLUG IN THE POWER CORD on page 9), plug
the power cord into e surge protector (not
included) and plug the surge protector into a
grounded circuit capable of carrying 15 or
more amps. No other appliance should be on
the same circuit.
9. Use only a UL-listed surge protector, rated at
15 amps, with a 14-gauge cord of five feet or
less in length. Do not use an extension cord.
10. Keep the power cord end the surge protector
away from heated surfaces.
11. Never move the walking belt while the power is
turned off. Do not operate the treadmill if the
power cord or plug is damaged, or if the tread-
mill is not working properly. (See BEFORE
YOU BEGIN on page 4 if the treadmill is not
working properly.)
12. Wear appropriate clothin_g when-_s!ng the
treadmill; do notweer loose clothing that could
become caught in the treadmill. Athletic sup
port clothes are recommended for both men
and women. Always wear athletic shoes; never
use the treadmill with bare fee_ wearing only
stockings or in sandals.
13. Never start the treadmill while you are standing
on the walking belt. Always hold the handrail
while exercising on the treadmill.
14. The treadmill is capable of high speeds. Adjust
the speed in small increments to avoid sudden
jumps in speed.
15. To reduce the possibility of tile treadmill over-
heating, do not operate the treadmill continu-
ously for longer than I hour.
16. The pulse sensor is not a medical device.
Various factors, Including the user's movement
while exercising, may affect the accuracy of
heart rate readings. The sensor is intended
only as an exercise aid in detarmining heart
rate trends in general.
17. Never leave the treadmill unattended while It is
running. Always remove the key and move the
on/off switch to the "off" position when the
treadmill is not in use. (See the drawing on
page 4 for the location of the on/off switch.)
18. Never insert any object into any opening.
19. Inspect and tighten aii parts of the treadmill
every three months.
20. Always unplug the power cord before perform-
Ing the maintanance and adjustment proce-
dures described In this manual. Servicing other
than the procedures In this manual should be
performed by an authorized service representa-
tive only.
21. This treadmill is intended for In-home use only.
Do not use this treadmill in any commercial,
rental, or institutional setting.
SAVE THESE INSTRUCTIONS
i
BEFORE YOU BEGIN
Thank you for selecting the IMAGE= 10.6 treadmill.
The sophisticated IMAGE 10.6 trsedmill blends state-
of-the-art technology with innovative design to let you
enjoy a motivating and effective form of exercise in the
convenience and privacy of your home.
For your benefit, read this manual carefully before
using the treadmill. If you have additional questions,
please call our toll-frae HELPUNE at 1-800-736-6879,
Monday through Saturday, 7 a.m. until 7 p.m. Central
Time (excluding holidays). To help us assist you,
please note the product model number and serial num-
ber before calling. The model number of the treadmill
is 831.297563. The serial number can be found on a
decal attached to the treadmill (see the front cover of
this manual for the locationof the decal).
Before reading further, please review the drawing
below and familiarize yourself with the parts that are
labeled.
Handrail
Puls4
Console Knob
Foot Rails
FRONT
Circuit Breaker
Belt Tool
Rear Roller
Adjustment Bolt
BACK ;ushion Foot
RIGHT SIDE
4
ASSEMBLY
Assembly requlrea two paople_ Set the treadmill in a cleared area and remove _II _l_att_da_. Do not
dispose ofthe packing materials untilthe treadmill is fully assembled.
Assembly can be completed using the Included 7/32" allen wrench
1. Find the Right Upright (15), which contains the Upright Wire
Harness (12) (see the inset drawing). Hold an Updght Spacer
(25) inside the lower end of the Right Upright. Insert a 3/8" x
3 1/2" Bolt (27), with one of the four Upright Washers (26), into
the lower hole in the Right Updght, and through the Upright
Spacer. Slide a Star Washer (49) onto the Bolt. Finger tighten
the Bolt into the indicated hole in the Frame (50).
Inserta 3/8" x 3 1/2" Bolt(27), with an Upright Washer (26),
through the other hole inthe lower end of the Right Upright (15).
Finger tighten the Boltinto the Frame (50).
Attach the Left Upright (not shown) in the same manner.
26 27
2. Hold the right end of the Console Crossbar (6) near the Right
Upright (15). Connect the Console Wire Harness (10) tothe
Upright Wire Hamess (12). The small latch on the Console
Wire Harness should snap onto the Upright Wire Hamess (see
the inset drawing), ff the Wire Hamesses do not fittogether
easily, tum them; do not forcethe Wire Hamesses together.
Slide the end_ ofthe 6"Cable Looms (30) againstthe ends of
the Wire Harnesses (10, 12). Insertthe Cable Looms into the
Right Upright (15). Be careful not to damage the Wire
Harnesses.
2
10
12
_0
3. Slide the ends of the Console Crossbar (6) intothe Right and
Left Uprights (15, 2) as shown. Insert a Console Knob (3) into
each Upright, and thread the Console Knobs intothe ends of
the Console Crossbar. Rotate the Console (9) tothe desired
angle, and tighten the Console Knobs.
3
15
4_oTap an Upright Endcap (4) into each of the Uprights (15, 2).
See assembly step 1. Using.the included 7/32" allen wrench,
tighten the four 3/8" x 3 1/2" Bolts (27).
5.PlugthelowerendoftheUprightWireHarness(12)intothe
20" Wire Harness (45). The small latch on the Upright Wire
Harness should snap ontothe 20" Wire Harness (see the
upper inset drawing). Ifthe Wire Hamesees do not fittogether
easily, turn them; do notforce the Wire Harnesses together.
Slide the ends ofthe 12"Cable Looms(36) against the ends of
the Wire Hamesses (12, 45) (see the lower inset drawing). Be
careful not to damage the Wire Harnesses.
12
6. Press the Belt Tool (86) intothe opening in the Left Rear
Endcap (82). The use ofthe Belt Tool is explained on page 21.
7. Attach the Pulse Sensor (14) to one of the Headbands (93 or
107). Make sure that the sensorwindow is pressed through
the indicated hole in the Headband.
The use ofthe pulse sensor isexplained on pages 7 and 8.
7
Sensor 93 or 107
Window
Make sure that all pads are tightened before you use the treadmill. The use of all remaining parts will be
explained in other sections of this manual. Note: To protect the floor or carpet from damage, place a mat
under the treadmifl.
6
HOW TO USE THE PULSE SENSOR
The treadmillfeatures a state-of-theft cordless pulse
sensor, specially designed for greater acoumcy, com-
fort,and durability. Please read the foflowing
Instructions before using the pulse sensor.
HOW TO INSTALL BAI-I'ERIES
The pulse sensor requires two "AAA" batteries.
Alkaline batteries are recommended. To Install batter-
ies, firstslide off the battery cover as shown below.
forehead, and that the_ is_o,'l_iL,_be_e_n the sensor
wlndow and your forehead.;
Window
__ _' Batteries
Note the markings inside the battery comp=lment
showingwhich direction batteries must be tumed.
Inserttwo "AAA" batteries intothe battery compart-
ment. Replace the battery cover.
HOW TO ADJUST THE HEADBAND
For the pulse sensor tofunction properly, the head-
band mustfit snugly around your head, without being
uncomfortable. To adjustthe headband, insert the
aajustment
tab through
the appropri-
ate hole in
the head-
band. Note:_
Each time
you exer-
cise, the
headband
may expand
sllghtly dur-
ing the first
few minutes
Adjustment_,.._
of use. It may be necessary to readjust the head-
band periodically.
HOW TO PUT ON THE PULSE SENSOR
Rub your forehead brieflyto stimulate circulation. Put
on the headband as shown at the top ofthis page.
Make sure that the sensor window iscentered on your
PROPER ORIENTATION OFTHE PULSE SENSOR
The transmitter on the pulse sensor isangled down-
ward, as shown below. For the pulse sensor to func-
tion properly, the transmitter must be pointed within
30° ofthe center of the console (the shaded area in
the drawing). If you tum your head too far away from
the console, the signal from the pulse sensor will not
be received.
Pulse Sensor
GUIDELINES FOR OBTAINING ACCURATE PULSE
READINGS
The instructions on page 11 explain how the pulse
sensor is used with the console (see HOW TO USE
THE PULSE DISPLAY). For the bast.results, remem-
ber the following important guidelines: °
1. Before putting on the headband, rub your forehead
for a moment to stimulate circulation.
2. Make sure that the headband fits snuglyaround
your head, without being uncomfortable. Ifthe
headband is too loose or too tight, your pulse may
not be detected.
3,
The headband must be wom with the sensor win-
dow centered on your forehead (see HOW TO PUT
ON THE PULSE SENSOR on page 7). The small
button next to the sensor window must be
depressed, Make sure that there is no hair in front of
the pulse sensor or between the sensor window and
your forehead. Make-up appliedto the forehead
may also interfere with pulse readings.
Note: Ifthe pulse se.nsordoes not detect your pulse
when the sensor window is centered on your fore-
head, try positioningthe sensor window above your
right or left eyebrow. Depending on the shape of
yourforehead, your pulse may be detected more
easily from a slightlydifferent position.
4. Avoid turning your head more than 30° away from
the console, or the console may not pick up the
signal from the pblse sensor.
=
The sensor window should be cleaned weekly when
the treadmill is used regularly. Moisten a cotton
swab with water, and carefully wipe the sensor win-
dow.
6. Because your pulse constantly changes, the pulse
sensor will sample and average your pulse every
few seconds. When you first put on the pulse sen-
sor, it may take up to ten seconds before an accu-
rate pulse is shown.
7. If the pulse sensor does not function properly, check
the batteries (see HOW TO INSTALL BATTERIES
on page 7).
HOW TO CLEAN THE PULSE SENSOR AND
HEADBAND
To clean the pulse sensor, first remove the headband.
Wipe the pulse sensor dean with a damp cloth. Never
Immerse the pulse sensor in water. To clean the
headband, hand wash it in mild detergent, gently wring
it out, and allow it to air dry.
8
OPERATION AND ADJUSTMENT
THE PERFORMANT LUBE TM WA1.KING BELT
Your treadmill features a walking belt coated with
PERFORMANT LUBETM, a high-performance lubricant.
IMPORTANT: Never apply silicone spray or other
substances to the walking belt or the walking plat-
form. They will deteriorate the walking belt and
cause excessive wear.
HOW TO PLUG IN THE POWER CORD
:,:Of the
:!:_result in an i
_Check Withi
Your treadmill, like any other type of sophisticated
electronic equipment, can be seriously damaged by
sudden voltage changes in your home's power.
Voltage surges, spikes, and noise interference can
resultfrom weather con-
ditionsor from other
appliances being turned 1
on or off. To decrease
the possibility of your
treadmill being dam-
aged, always use a
surge protector (not
included) with your
treadmill,
Surge protectorsare
soldat mosthardware
stores and department
stores. Use only a UL-
listedsurge protector,
rated at 15 amps0with a
14-gauge cord of rwe
feet or less in length.
This product must be
grounded. If it should
malfunctionor break
down, grounding pro-
vides a path of least
resistance for electric
current to reduce the
dskof eisctdc shqclL TI_ ,g._ _iuipped with a
cordhaving an e_utpmept-g',r_l_g _l_l_=tor and a
ground'mgplug. Plug thd po_=_ €_rd_lnto a surge
protector, and plug the surge-proteCtor into an
appropriate outlet that is properly Instafled and
grounded in accordance with all local codes and
ordinances.
This productis for use on a nominal 120-volt circuit,
and has a grounding plug that looks like the plug iUus-
trated in drawing I below. A temporary adapter that
lookslike the adapter illustrated in drawing 2 may be
used toconnect the surge protector to a 2-pole recep-
tacle as shown in drawing 2 ifa properly grounded out-
let is not available.
The temporary adapter should be used only until a
properly grounded outlet (drawing 1) can be installed
by a qualified electddan.
The green-colored dgid ear, lug, or the like extending
from the adapter must be connected to a pannanant
ground such as a properly grounded outlet box cover.
Whenever the adapter is used it must be held in place
by a metal screw. Some 2-pole receptacle outlet box
covers are not grounded. Contacta qualified elec-
trician to determine if the outlet box cover Is
grounded before using an adapter.
/Grounded Outlet Box
. ./Grounding Pin
unding Plug
\Grounded Outlet
Treadmill
_= _GroundiGreundedOutlet Box
Adapter
ng Pin
Metal ,_crew
Plug
e Protector
DIAGRAM OF THE CONSOLE
Key
10
THE FEATURES OF THE CONSOLE
The treadmill console offers an impressive array of
features to make your workouts more effectiv_ and
enjoyable, In the manual mode, the speed and incline
of the treadmill can be changed with a touch of a but-
ton. As you exercise, six displays willprovide continu-
ous exercise feedback. If your goal is to bum fat, the
built-in Fat Calode Monitor will show you when your
exercise Intensity is too Iow,.too high, or perfect for
buming fat. In the program mode, the console offers
six preset worko_ progrems and two special fat buru-
ing programs, each designed to guide you through a
different type of workout. In addition, there is e unique
FITNESS TEST program that measures your relative
fdnese level. You can even create your own workout
programs, and save them in the console's memory.
Carefully read these Instructions before operating
the console. Note: Ifthere is a thin sheet ofdear plas-
tic on the face of the console, peel itoff.
HOW TO TURN ON THE POWER
Ifthe key is ir_the con-
sole, remove it. Make
sure that the on/off
switch located near
the power cord is in
the "on"position.
Plug in the power coid (see HOW TO PLUG IN THE
POWER CORD on page 9). All displays and indica-
tors will flash three times. Note: Ifthe key is in the
console when the power cord is plugged in, the letters
"PO" will flash in the SPEED display. Ifth!s occurs,
remove the key.
Stand on the foot rails of the treadmill. Find the clip
attached to the key, and slide the clip onto the waist-
band of your clothing.Always stand on the foot rails
when turning on the power or starting the walklng
belt. Always wear the clip while exercising.
Insert the key intothe console. The NO PULSE
DETECTED indicator,the MANUAL CONTROL indica-
tor, the TIME indicator,and the six displays willlight.
The PULSE display willflash the letters "AGE" three
times, and the CALORIES display will flash the letters
(pounds)three times.
HOWTO EN'[ER YOUR AGE AND WEIGHT
For some of the console's features to function proper-
ly, your age and weight must be entered into the cen-
sole. If you have net entered your age and weight, fol-
low the instructionsbelow.
Press one of
the AGE SET
buttons.
letters "AGE"
willflash in the
PULSE dis-
I=o o
play. Press the AGE SET buttons agais to enter your
age. The firsttime one ofthe buttons is pressed, the
current age setting will be shown. The age settingwill
then change by I year each time one of the buttonsis
pressed. If one of the buttons is held down, the age
setting will change in increments of 5 years.
Afteryou have enteredyourage, press theWEIGHT SET
buttonsto enteryourweight.The first time one of the
buttons is pressed, the current weight setting will be
shown in the CALORIES display. The weight setting
willthen change by 1 poundeach time one of the but-
tons ispressed. Ifone ofthe buttons is held down, the
weight setting willchange in increments of 5 pounds.
Once you have entered your age and weight, they will
be saved in the console's memory, even if the power
cord is unplugged.
MANUAL MODE OPERATION.
HOW TO CONTROL THE SPEED
When the power is turned on, the console will be in
the manual mode. For your safety, the walking belt will
be stationary.
The speed range
ofthe treadmill is
0.5 to 10 miles
per hour. The
speed is con-
trolled with the
INCREASE
SPEED and DECREASE SPEED buttons. Each time
one of the buttons is pressed, the speed will change
by 0.1 mph. The buttons can be held down to change
the speed rapidly.
ARNING., fter SPEED but-..,
_.tons are_pressed_._ will take a moment for the -
_._lk!ng belt.toreach the selected s_ aet_;:::.
_ng;_Adlust the speed In smal!_ncrements :?,.
_;:unti! you are famlllar with the treadmtiL ...o._
Press the INCREASE SPEED button until the walking
belt is moving at slow speed. Hold the handrails and
step carefuUyonto the walking bell Change the speed
of the walking belt as desired by pressing the
INCREASE SPEED and DECREASE SPEED buttons.
To stop the walking belt, press the STOP button.
HOW TO CONTROL THE INCLINE
The inclinerange "-------'_ '-"1
of the treadmill is
1% to 12%. The
inclineiscon-
trolledwith the
INCREASE
INCLINE and
DECREASE INCLINE buttons.Each time one of the
buttonsis pressed, the inclinewill change by 0.5%. The
buttonscan be held down to change the Inclinerapidly.
Note: After the INCLINE buttons are pressed, itwill
take a few seconds for the treadmill to reach the
selected incline setting. Becaus_ the INCLINE display
has two digits,the display willshow 10% when the
incline isset at either 10% or 10.5%, and 11% when
the incline isset at either 11% or 11.5%.
HOW TO USE THE PULSE DISPLAY
Puton the pulse sensor (see HOW TO USE THE
PULSE SENSOR on page 7). After a few seconds, the
heart-shaped ind'_catorbeside the PULSE display will
flash each time_yoarI_.art beats, the_ilO PULSE -
DETECTED indioator;_'l_da_._; ='_Fy_ur. poise will
be shown. Note: Because y_ur=-._ul__ly
changes, the pulse sensorw_ll_le:lb'Kl.'average
yourpulseevery few second,s._tmay _ke up to ten
secondsbefore an accurate p_fse is sh'_wn.. Ifyour
pulseis not shown, see GUIDELINES FOR OBTAIN-
ING ACCURATE PULSE READINGS on page 7.
HOW TO USE THE CALORIES DISPLAY
Forthe CALORIES display to be accurate, your age
and weight must be entered into the console. If you
have not entered your age and weight, see HOW TO
ENTER YOUR AGE AND WEIGHT on page 10. The
CALORIES display willshow the approximate number
ofcalories you have bumed.
To findthe number
of fat calories you
have burned (see
BURNING FAT on
page 22), press
the FAT button
besidethe CALO-
RIES display. The approximate number of fat calories
youhave burnedwillbe shownforthree seconds.
HOW TO USE THE TIME DISPLAY
The TIME display willshow how long the walking belt
has been moving.
Ifdesired, a time
goal can be set.
First,stop the walk-
ingbelt. Press the
TIME SET buttons
tosat the length of
time thatyou plan
toexercise. Each time one of the buttons is pressed,
the time goal will change by10 seconds. If one of the
buttonsis held down, the time goal will change in
increments of I minute. As you exercise, the time will
be counted down. When no time remains, the walking
belt will slow to a,stop. Note: The purpose of the SEG-
MENT TIME button will be explained later. If the
FITNESS TEST program is selected, the TIME display
willbe reset to zero. The display will be reset again
when the program is completed.
(o -, _o,--=)
-.,
HOW TO USE THE DISTANCE DISPLAY
The DISTANCE display will show the distance that
you have walked or run, in miles. Note: If the
FITNESS TEST program isselected, the DISTANCE
display will be reset to zero. The display will be reset
again when the program is completed.
The onso,eaiss
keeps back of the
total number of
milesaccumulat-
ed since the
treadmill was put-
d-Bsed. To find this number, press the TOTAL button
beside the DISTANCE display. The total number of
miles will be shown for three seconds. Note: When
the total exceeds 999 miles, the DISTANCE display
willbe reset to zero.
HOW TO USE THE FAT CALORIE MONITOR
PROGRAM MODE OPERATION
When the console isln the program mode, you can
choose any of six preset workout programs, each
designed to guide you through a different type of
workout. If yoor goal isto bum fat, two additional pro-
grams are included just for you--the FAT BURN and
FAT BURN PLUS programs. Or, you can select the
unique FITNESS TEST program, and measure your
relative fitness level. You can even create your own
custom workout programs, and save them in the con-
sole's memory.
Ifyou want to bum fat, the built-ln Fat Calorie Monitor
isdesigned to help you reach your goaL As you exer-
cisa, your body can bum either fat calodes or carbo-
hydrate calories, depending on the intensity of your
exercise (see BURNING FATon page 22). The Fat
Calorie Monitor will show you when your exercise
intensityis too low, too high, or perfect for burning fat.
For the Fat Calorie Monitor to be accurate, your age
and weight must be entered intothe console. Ifyou
have not entered your age and weight, see HOW TO
ENTER YOUR AGE AND WEIGHT on page 10. In
addition,the pulse sensor must be wom (see HOW
TO USE THE PULSE DISPLAY on page 11).
As you exercise,
one ofthe five
indicators above
the CUSTOM 1
and CUSTOM 2
buttonswill light.
The two red indicators on the left indicate that your
intensityis too low for burning fat effectively. The two
red indicatorson the right indicate that your intensity
is too high for burningfat effectively. When your inten-
sity isperfect for burningfat, the green indicator in the
center will light.Adjust the speed or inclineof the
treadmillso that the green indicator remains lit. Note:
After adjusting the speed or incline, wait for about one
minutebefore adjusting the speed or incline again.
Thiswillallow time for your pulse torespond to the
new speed or inclinesetting.
_RR_N_
HOW TO USE A PRESET WORKOUT PROGRAM
1. Select one of the preset workout programs
Press the INTER- I
VAL, PLATEAU,
VALLEY, RAN-
DOM, MOUNTAIN,
or RAMP button.
The indicator on the button you press will light. Note:
If the walking belt is moving, it will slow to a stop.
2. Select one of the modes(WALK, RUN, INCUNE,
WALWINCUNE, or RUWINCUNE)
When a preset workout program is selected, the
WALK and INCLINE Indicators will light. When both
the WALK and INCLINE modes are selected, the con-
sole will automatically control both the speedand
inclineof the treadmill during the program, and the
speed range will be 1.5 to 4.5 mph. If you want the
speed range to be 3.5 to 8.5 mph, press the RUN but-
ton. The WALK indicator will darken, and the RUN
indicatorwill light.
if you want:the console to automatically control only
the speedof the treadmill during the program, press
the INCUNE button. The INCLINE indicator will dark-
an. (The inclinecan then be controlled manually dur-
ingthe program with the INCREASE INCUNE and
DECREASE INCLINE buttons).
If you want the console to automatically control onty
the incline ofthe treadmill dudng the program, press
the WALK, RUN, and INCLINE buttons until only the
INCLINE indicator is lighted. (The speed can then be
controlledmanually during the program with the
INCREASE SPEED and DECREASE SPEED buttons).
Note: To select the PULSE mode, see HOW TO USE
12 THE PULSE MODE on page 13.
3.The program seUings
Each program is d'widedinto twenty equal_tirneperi-
eds, called segments. One speed setting and/or one
incline setting (depending on which models] you
selected) ere programmed for each segment. The
speed and/or incline settings of the program you have
selected are shown in the columns of indicators in the
center of the console. The setting(s) of the first seg-
ment are shown in the far left column, and the set-
ting(s) of the twentieth segment are shown inthe far
right column.
I _ u 00000000000000000000 Im tt
I L9 7_ 00000000000000000000 14o to
_ 110
O O 0 0
C
Ifyou selected the WALK or RUN mode, red indicators
will show the speed setting of each segment. If you
selected the INCUNE mode, green indicatorswillshow
the incline setting of each segmanL If you selected the
WALK and INCLINE modes orthe RUN and INCLINE
modes, both red and green indicators willbe lit.
4. Adjust the difficulty level of the program
If desired, the difficuify level of the program can be
adjusted with the FITNESS LEVEL buttons (see the
drawing above). Each time the FITNESS LEVEL
increase button is pressed, the speed and/or incline
settings of all segments will increase. Each time the
FITNESS LEVEL decrease button is pressed, the
speed and/or incline settings of all segments will
decrease. Note: The difficultylevel of the program can
be increased only untilthe highest indicator in any of
the columns is lit, and decreased only until the lowest
indicator in any of the columns is lit.
5. Set the program time
The program is set
tola_ for 20 min-
utes, as shown in
the TiME display.
The length of time
can be changed, if
desired, with the
TIME SET buttons. Each time one ofthe buttons is
pressed, the length of time will change by 20 seconds.
Ifone of the buttons is held down, the length oftime
will change in increments of I minute. The program
can be set to last for a minimum of 5 minutes, up toa
maximum of 80 minutes. (If the SEGMENT TIME but-
ton ispressed, the TIME display willshow how many
seconds each of tile .twentysegmet_ will I_isLI
6. Start the program"
Stand on the foot mils
ofthe treadmill and
press the PROGRAM
START button.The first
column of indicatorswill
begin to flash, and the treadmill will 8utomaticaily
adjustto the speed and/or incline setting(s) of the first
segmenL Carefully step onto the walking bolt and
begin exercising. Note: Ifyou selected the INCLINE
mode, the walking belt will begin to move at 1.0 mph.
The speed can then be controlled during the program
with the INCREASE SPEED and DECREASE SPEED
buttons.If you selected the WALK or RUN mode, the
inclinecan be controlledwith the INCREASE
INCLINE and DECREASE INCLINE buttons.
The time remaininginthe programwill be shown in the
TIME display. (If theSEGMENT TIME button is
pressed, the numberof seconds remaining inthe first
segment willbe shown). During the lastthree seconds
of the firstsegment,the TIME display will flash three
times.When the firstsegment is completed, the second
oolumn of indicatorswill beginto flash, and the tread-
millwill automaticallyadjustto the speed and/or incline
setting(s) of the secondsegmenL The program will
continueuntilthe twentieth column is flashing and no
time remains.The walking belt will then slow toa stop.
Note: During the program, the difficultylevel of the
program can be adjusted with the FITNESS LEVEL
buttons.The length of time that the program wg!last
can be changed with the TIME SET buttons. The pro-
gram can be stopped at any time with the STOP but-
ton. The console will then be in the same state as If
the programhad been completed.
HOWTO USE THE PULSE MODE
1. Select the PLATEAU program
Press the PLATEAU
button.The indicator
on the button will
light. Note: If the
walking belt is mov-
ing, itwill slow to a stop.
2. Select the PULSE mode
o:o2o:oo:
4
Press the PULSE button.The PULSE indicator will
light,and the WALK, RUN and INCLINE indicatorswill
darken.
When the
PULSE mode
isselected,
the letters
=AGE=will
flash in the
PULSE display, and the letters"LbS =will flash in the
CALORIES display. If you have not entered your age
and weight into the console, see HOW TO ENTER
YOUR AGE AND WEIGHT on page 10. If you have
already entered your age and weight, simply press
one of the AGE SET buttons, and then press one of
the WEIGHT SET buttons.
3. Put on the pulse sensor
only untilthe lowest ind'_ator inone ofthe columns is
lit.In add'_on, there may be a limitto how far the diffi-
cultylevel can be a_usted depending onyour age.
_.pu!se seffings more then 30 beats per minute, g_
..;_ _.,. _._ . . .............
6. Set the program time
The program is
set to lastfor 20
minutes, as shown
in the TIME dis-
play. The program
can be set to last
for different length
IBBBBI
oftime, if desired, with the TIME SEE buttons. Each
time one ofthe buttons is pressed, the length of time
will change by 20 seconds. Ifone of the buttons is
held down, the length oftime will change in incre-
mants of I minute. The program can be set to last for
a minimum of 20 minutes, up to a maximum of 80
minutes. (If the SEGMENT TIME button is pressed,
the TIME display will show how many seconds each
of the twentysegments will last.)
14
See HOW TO USE THE PULSE DISPLAY on page 11.
4. The program settings
Each program is divided intotwenty equal time peri-
ods, called segments. One pulse setting is pro-
grammed for each segment. The pulse settingsof the
program you have selected are shown In the columns
of indicators in the canter ofthe console. Red indica-
tors will show the pulse settingof each segment.
.=K-,_.
0
I
IO
E
0
5. Adjust the difficulty level of the program
If desired, the difficulty level of the program canbe
adjusted with the FITNESS LEVEL buttons (see the
drawing above). Each time the FITNESS LEVEL
increase button ispressed, the pulse settingsof all
segments will increase. Each time the FITNESS
LEVEL decrease button is pressed, the pulse settings
of all segments willdecrease. Note: The difficultylevel
of the program can be increased only untilthe highest
indicator in one ofthe columns is lit,and decreased
7. Start the program
Stand on the foot rails F_ ^- " _-_
ofthe treadmill and (- " )
press the PROGRAM ( ,,==_'_='_ )
START button. The first
column of indicatorswill
begin to flash. When the walking belt begins to move,
carefully step onto the walking belt and begin exercis-
ing.•The console will automatically change the speed
and/or incline ofthe treadmill at any time to keep your
pulse near the setting ofthe first segment. The SPEED
or INCLINE display will flash three times to warn you
each lime the speed or inclineis about to change.
The time remaining in the program will be shown in
the TIME display. (If the SEGMENT TIME button is
pressed, the number of seconds remaining in the cur-
rent segment will be shown). Dudng the last three
seconds of the firstsegment, the TIME display will
flash three times. When the firstsegment iscompleted,
the second column of indicatorswillbegin to flash. The
console will then change the speed and/or incline of
the treadmill at any time to keep your pulse near the
setting of the second segment. The program will con-
tinue untilthe twentieth column is flashing, and no
"time remains. The walking belt will then slow to a stop.
Note: During the program, the difficultylevel ofthe
program can be adjusted with the FITNESS LEVEL
buttons. The speed of the treadmill can be changed
with the INCREASE SPEED and DECREASE SPEED
buttons. The incline of the treadmill can be changed
with the INCREASE INCLINE and DECREASE
INCLINE buttons• However, ifyou lncreas_he speed,
the incline willautomatically decrease; ifyou decrease
the speed, the incline Willautomatically increase. The
console willalways attempt to keep your pulse near
the setting of the current segmenL Ifyour pulse is not
detected for one minute, the speed of the treadmill will
automatically decrease by half. Ifyour pulse is not
detected for a second minute, the speed will decrease
by half again• If your pulseis not detected for three
minutes, the walking belt willslow to a stop. The pro_
gram can be stopped at any time with the STOP but-
ton. The console will then be in the same state as if
the program had been completed.
HOW TO USE THE FAT BURN AND FAT BURN
PLUS PROGRAMS
1. Select the FAT BURN or FAT BURN PLUS program
Press the FAT BURN _ I
or FAT BURN PLUS
button•The indicator
on the button you press
will light. Note: If the
walking belt is moving, itwill slow to a stop.
When the
FAT BURN
or FAT
BURN PLUS
button is
pressed, the
)(_'v ...A)
letters "AGE" will flash in the PULSE display, and the
letters =LbS"will flash in the CALORIES display. Ifyou
have not entered your age and weight intothe console,
see HOW TO ENTER YOUR AGE AND WEIGHT on
page 10. If you have already entered your age and
weight, simply press one ofthe AGE SET buttons,
and then press one ofthe WEIGHT SET buttons.
When the FAT BURN or FAT BURN PLUS program is
selected, the WALK and iNCLINE indicators will light.
During these programs, the console will automatically
control the speed and inclineof the treadmill, and the
speed range will be 1.5 to 4.5 mph• The RUNand
PULSE modes cannot be selected.
Each program is divided intotwenty equal time ped-
eds, called segments. One speecl,setting and one
inclinesetting are programmed f_r each _segment.
The speed and incline settingsof the program you
have selected are shown in the columns of indicators
inthe center of the console. Red indicators willshow
the speed setting of each segment, and green indica-
tors will show the inclinesetting of each segment• The
speed and incline settingsare optimal for maximum
fat burning. The difficultylevel of the program cannot
be changed with the FITNESS LEVEL buttons.
The FAT BURN program is set to last for 40 minutes,
as shov;n in th_ TIal_._lisplay_(If th_SEGMENT TIME
button is pressad,-4fi_ .TIME d'_pl_y {_HJ.Isllow that
each segment .isleetto_a._t_fo_'_2_se_* nds.) The FAT
BURN PLUS program fs s.ett(_la_ foP60'minutas.
(Each segment is set to lasLf_ 180 ee.co,nds.) The
time settings of these programs cannot be changed.
2. Start the program
Stand on the foot rails _ . _
of the treedmiUand
press the PROGRAM
START button.The
first column of indica-
tors will begin to flash, and the treadmill will automati-
cally adjust to the speed and incline settings of the
first segment• Carefully step onto the walking belt and
begin exercising.
The time remaining in the program will be shown in
the TIME display. (If the SEGMENT TIME button is
pressed, the number of seconds remaining in the first
segment will be shown)• Dudng the last three seconds
of the first segment, the TIME display will flash three
times. When the first segment is completed, the sec-
ond column of indicators will begin to flash, and the
treadmill will automatically adjust to the speed and
inclinesettings of the second segment. The program
will continue in this manner until the twentieth column
isflashing and no time remains. The walking belt will
then slow to a stop.
Note: The program can be stopped at any time with
the STOP button. The console will then be in the
same state as if the program had been completed.
HOW TO USE THE FITNESS TEST PROGRAM
The FITNESS TEST program isdesigned to measure
your relative fitness level. For the best results, take
the FITNESS TEST at a time when your energy level
is high: The FITNESS TEST should not be taken after
you have already exemisad dudng the day.
The FITNESS TEST consists of seven 3-minute seg-
ments, and isfollowed by a 1.minute cool-down peri-
od. The console will automatically control the speed
and incline of the treadmill dudng the FITNESS
TEST. The speed and incline settings cannot be
adjusted.
1. Select the FITNESS TEST program
Press the FITNESS I _ ......
TEST button. The indi- j _u__cator on the button will
light. Note: Ifthe walk-
ing belt is moving, it will slow to a stop•
16
TESTb On ,.,=
ispressed. | _ ._..._,...._..
"AGE"will
flash in the PULSE display, and the letters 'l.bS" will
flash inthe CALORIES display. For the FITNESS
TEST to operate properly,your age and weight must
be entered intothe console. Ifyou have not entered
yourage and weight, see HOW TO ENTER YOUR
AGE AND WEIGHT on page 10. If you have already
entered your age and weight, simplypress one of the
AGE SET buttons, and then press one ofthe
WEIGHT SET buttons. Note: If the PROGRAM
START button is pressed before you have entered
yourage and weight, the words "SET AGE AND
WEIGHT" will move across the center of the consola.
The CALORIES, TIME and DISTANCE displays will
be reset to zero.
2. Put on the pulse sensor
See HOW TO USE THE PULSE DISPLAY on page
11. Note: ifthe PROGRAM START buttonis pressed
beforeyour pulse is shown, the letters "PLS" will flash
in the PULSE display, and the words"ADJUST .
PULSE SENSOR" vallmove across the center of the
console.
3. Start the FITNESS TEST program
Stand onthe foot roils . .
ofthe treadmill and
press the pROGRAM
START button.The
CALORIES display will
show "I. 1," ind'_ating that the first segment of the
FITNESS TEST has begun. The incline ofthe tread-
millwillautomatically adjust to 2.0=/o,and the walking
belt wiJ_begin to move at 1.5 mph. Step onto the walk-
ing belt and begin exercising.
When the TIME display reaches 3 minutes, the
CALORIES display will show ,L 2," indicating that the
second segment has begun. The inclinewill increase
to 3%, and tha speed will increase to2.0 mph. Tha
FITNESS TEST will continue in this manner untilyour
pulsereaches 70% of your maximum heart rate, and
the current segment is completed. The RTNESS
TEST will then be completed, regardless of how many
segments remain.
When the FITNESS TEST iscompleted, the letter "C"
will be shown in the CALORIES display, indicating that
the cool-down period has begun. The words "COOL
DOWN" willmove across the center of the console,
and the TIME display will countdown 1 minute.
When the coet-down period is completed, the walking
belt Willslow toa stop and the words '*FITNESS TEST
COMPLETE" will move across the canter of the con-
sole. The FITNESS LEVEL indicator will light, and
your fdness level will ha shown in the CALORIES dis-
play. There are ten fitness lavels--fltness level 10
(FLI0) is the highest fitness level. Remember, the
Fitness Test is intended only to indicate your relative
fitness level.
Note: If at any time during the program your pulse is
notdetected, the letters "PI_S"will flash in the PULSE
display, and the words "ADJUST PULSE SENSOR"
will move across the canter of the console. If your
pulse is not detected during the last thirty seconds of
any segment, the walking belt will slow to a stop and
the words "PULSE SIGNAL LOST" will move across
the center of the console. The FITNESS LEVEL indi-
cator wil_light, and the CALORIES display will show
an estimated fitness level. The FITNESS TEST can
be stopped at any time by pressing the STOP button.
The words "FITNESS TEST HALTED" will move
across the canter ofthe console, and the CALORIES
display will show an estimated fitness level. The con-
sole wilrthen be in the MANUAL CONTROL mode.
HOW TO CREATE CUSTOM WORKOUT PROGRAMS
When the console is in the program mode, you can
create custom workout programs, and save them in
the console's memory for future workouts. Two differ-
" ent custom programs can be saved at the same time,
and the custom programs can be changed as many
times as desired. Follow the instructions below to ore-
ate a custom program.
1. Select one of the custom workout programs
Press the CUSTOM 1
or CUSTOM 2 button.
(One custom program
can be created using
each button.) The indi-
cetor on.the button you press will light, Note: Ifthe
walking belt is moving, it will slow to a stop.
2. Select the WALK or RUN mode
When a custom pro- I '_
gram is selected, the
WALK and INCLINE
indicatorswill light.The
console will automati-
cally controlthe speed and incline of the treadmill dur-
ingthe program, and the speed range will be 1.5 to
4.5 mph. If you want the speed range to be 3.5 to8.5
mph, press the RUN button. The WALK indicator will
darken, and the RUN indicator will lighL Note: No
other modes can be selected. Ifyou press the PULSE
button, the PLATEAU program willbe selected.
3. Press the LEARN button
When the learn button
is pressed, the indica-
tor on the CUSTOM I
or CUSTOM 2 button
will begin to flash.
4. Set the program time
The fir.st¢oluronof indicators will be flashing. Program
the desired Sl)es_ s_tting for the fi.r_s_ment With the
INCREASE SPEED_and DEC_EAS_ISPEED buttons.
(Note: Ifyou sel_,,cted_le"_A_,K _, _ speed set-
ting willchange in incrdmer_t._of0.3 _phi if you
selected the RUN mode, the t_,peeds_ing will change
in increments of 0.5 mph.) Select the desired incline
setting for the first segment with the INCREASE
INCLINE and DECREASE INCLINE buttons.
Press the TIME
SET buttons to
set the length of
time that you want
the program to
last. Each time
one of the buttons
is pressed, the length of time shown in the TIME dis-
play will change by 20 seconds. If one of the buttons
is held down, the length of time will change in incre-
ments of 1 minute. The program can be set to last for
a minimum of 5 minutes, up to a maximum of 80 min-
utes. (If the SEGMENT TIME button is pressed, the
TIME display will show how many seconds each of
the twenty segments will last.)
5. Start the program
Stand on the foot roils . _._.. ,
of the treadmill and
press the PROGRAM
START button. When
the walking belt begins
to move, carefully step onto the walking belt and
begin exercising.
6. Program speed and incline settings
Each program is divided intotwenty equal time peri-
ods, called segments. One speed setting and one
inclinesetting can be programmed for each segment.
The speed and incline settings will be shown in the
columns of indicators inthe center of the oonsele.
The time remaining in the program will be shown in the
TIME display. (If the SEGMENT TIME button is
pressed, the number of seconds remaining in the first
segment will be shown). Dudng the last three seconds
ofthe first segment, the TIME display will flash three
times. When the first segment is completed, the current
speed and inclinesettings will be saved in memory.
When the firstsegment is completed, the second col-
umn of indicators will begin to flash. Program a speed
setting and an incline settingfor the second segment
as described above. When the second segment is
completed, the current speed and inclinesettings will
be saved in memory. The program will continue in this
manner untilthe twentieth segment isflashing and no
time remains. The walking belt will then slow to a stop.
After the program is completed, one speed setting
and one incline setting will be programmed for each of
the twenty segments. The speed and inclinesettings
yellbe saved in the console's memory. To use {he pro-
gram for future workouts,follow the instructionsbelow.
HOW TO USE A CUSTOM WORKOUT PROGRAM
I. Select one of the custom workout programs
Press the CUSTOM 1
or CUSTOM 2 button.
The indicator on the
button you press will
light. Note: If the walk-
ing belt is moving, itwill slow to a stop.
2. Select the WALK or RUN mode
n
D
Q
m| }
The settings ofthe first segment will be shown in the far
leftcolumn, and the settingsofthe twentieth segment will
be shown in the far right column. Red indicators will
show the speed settingof each segment, and green
indicatorswill show the inclinesetting of each segment.
When a custom program is selected, the WALK and
INCLINE indicators will light. The console will auto- .
matically controlthe speed and incline of the treadmill
dudng the program, and the speed range will be 1.5 to
4.5 mph. If you want the speed range to be 3.5 to 8.5
mph, press the RUN button. The WALK indicato?will
darken, and the RUN indicator will lighL Note: No
other modes can be selected. Ifyou press the PULSE
button, the PLATEAU program will be selected.
3. The program settings
The speed and incline settingsof the program you
have selected will be shown Inthe columns of indica-
tom in the center ofthe console. Red indlcatom will
show the speed settingof each segment, and green
indicators w111showthe inclinesettingof each segment.
4. Adjust the difficulty level of the program
Step ontothe walking beltand begin exercising.
The time remaininginthe program willbe shown inthe
TIME crk._play.(Ifthe SEGMENT TIME button ispressed,
the number ofseconds remainingin the tirst segment
will be shown). Duringthe lastthree seconds of the first
segment, the TIME displaywillflash three times. When
the firstsegment is completed,the second column of
indicatomwillbegin toflash, and the treadmill will auto-
maticallyadjustto the speed and inclinesettingsof the
second segment. The programwillcontinue in this man-
ner untilthe twentiethcolumnisflashing and no time
remains. The walking belt willthen slow to a stop.
Note: During the program, the difficulty level of the pro-
gram can be adjusted withthe FITNESS LEVEL but-
tons. The length of time that the program will last can
be changed with the TIME SET buttons. The prngram
can be stopped at any time with the STOP button.The
console wAIthen be in the same state as if the pro-
gram had been completed.
If desired, the diff'multylevel of the program can be
adjusted with the FITNESS LEVEL buttons (see the
drawing above). Each time the FITNESS LEVEL
increase button ispressed, the speed and incline set-
tings of all segments will increase. Each time the FIT-
NESS LEVEL decrease button is pressed, the speed
and incline settings of all segments will decrease.
Note: The d'_culty level of the prngmm can be
increased only until the highest indicator in one of the
columns is lit_and decreased only untilthe lowest indi-
cator in one of the columns is lit.
5. Adjust the program time
Note: Althoughthe difficultylevel of the program can be
adjusted, onlythe originalspeed and incline settings
will be saved in memory. If you desire to change the
originalspeed and incline settings, see HOW TO CRE-
ATE CUSTOM WORKOUT PROGRAMS on page 16.
HOW TO TURN OFF THE POWER
To turn offthe power, remove the key from the con-
sole. Store the key in a secure location.
In addition, move the on/offswitch to the "off" position,
(See the drawing near the bottomof page 10.)
18
The length of time
the program will
last can be edjust-
ed, If desired, with
the TIME SET but-
tons. Each time
one of the buttons
"-1
-,, A)
is pressed, the length of time will char_geby 20 sec-
onds. Ifone ofthe buttons is held down, the length of
time will change in increments of I minute. The pro-
gram can be set to lastfor a minimum of 5 minutes, up
to a maximum of 80 minutes. (Ifthe SEGMENT TIME
button is pressed, the TIME display will show how
many seconds each of the _4rentysegments will last.)
6. Sta_epmgmm
HOW TO SELECT THE INFORMATION MODE
The console features an information mode that keeps
track of triptime and distance, as well as the total time
and distance accumulated.
To select the informationmode, hold down the STOP
button while insertingthe key into the console. The
indicator on the SEGMENT TIME button will light,and
the tdp time and distancewill be shown in the TIME
and DISTANCE displays. (Note: If the distance
exceeds 999 miles, the thousands digits will be shown
in the SPEED display.) If desired, the trip time and dis-
lance can be reset to zero by preseing the TIME SET
decrease button.
To view the total time and distance, press the TIME
Stand on the fcot rails _ )- A- ." I-_ button. The total time and distance w IIthen be shown.
of the treadmilland F:3J t "" ) I__ The total time and distance cannot be reset.
press the PROGRAM | (, ,.0,_-_,_ _ !_
START button. The first t / .i'l_ote:The PULSE display will "_ _ -_ "_"
column of indicators will / showthe letter _ /" II
begin to flash, and the treadmill will automatically adjust t th_ssetfor an I IT _ L Jl
to thespeedandinclinesettingsofthefirstsegmenL !k infrared (cordless)pulse sensor_ L" 1
Do not press the AGE I I
SET decrease button, or . _I--
the setting will change " L
to the letter "c," for a
corded pulse sensor.
The setting can be changed back by pressing the
button again.
To exit the information mode, remove the key.
HOW TO ADJUST THE ANGLE OF THE CONSOLE
In order for the console to receive signals from the
pulse sensor, the console must be angled toward the
pulse sensor. Loosen the knobs on the ends of the
console crossbar, rotate the console to the proper
angle, and retighten the knobs.
HOW TO ADJUST THE CUSHION LEVEL
The rear legs of the t_admill _e dbs_lecl to cushion
legs can be adjUsted fo_.a finer b_s_er t_hlon
level using the knob on the r_ht side o_the treadmill.
Knob
For a firmer cushion level, turn the knob clockwise; for
a softer cushion level, turn the knob countemlockwise.
Note: The faster you run on the treadmill, the firmer
the cushionlevel should be. Ifthe cushion level istoo
soft, the treadmill will bounce excessively.
TROUBLE-SHOOTING AND STORAGE
Most treadmill problems can be solved by following the simple steps below. Rnd the symptom that
applies, and follow the steps listed. If further aeelstanca is needed, call our toll-free HELPLINE at 1-800-
736-6879, Monday through Saturday, 7 a.m. until 7 p.m. Central Time (excluding holidays).
1. SYMPTOM: THE POWER DOES NOT TURN ON
a. Make sure that the power cord is plugged into a surge protector, and that the surge protector is plugged into
a properly grounded outlet. (See HOW TO PLUG IN THE POWER CORD on page 9.) Use only a UL-listed
surge protector, rated at 15 arnps, with a 14-gauge cord of five feet or less in length.
b. After the power cord has been plugged in, make sure that the key is fully inserted intothe console. Various
indicators on the console shouldlight. (See HOW TO TURN ON THE POWER on page 10.)
c. Check the circuit breaker located on the treadmill near the
power cord. Ifthe switch protrudas as shown, the circuit break-
er has tripped. To reset the circuitbreaker, wait for five min-
utes and then press the switch back in.
d. Check the on/off switch located at the front of the treadmill
near the power cord. The switch must be in the =on" position.
"On"
Position
2. SYMPTOM: THE POWER TURNS OFF DURING USE
a. Check the circuit breaker located on the treadmill near the power cord. If the circuit breaker has tripped (see
the drawing above), wait for five minutes and then press the switchbeck in.
b. Make sure that the power _ord is plugged in.
c. Remove the key from the console. Reinsert the key fully intothe console. Various indicators on the console
should fight.
d. Check to make sure the on/off switch is in the =on"position. (See 1. d. above.)
e. If the treadmill stiltwill not run, please call our toll-free HELPLINE.
3. SYMPTOM: AN ERROR CODE ("El," "E2," "E3," "E4," OR "E5") APPEARS ON THE CONSOLE
a. If error code "El" appears in the INCLINE display, a malfunction may have occurred in the incline system.
Remove the key, wartfor ten seconds, and then reinsertthe key. Ifthe error code appears again, call our toll-
free HELPLINE. Do not operatethe treadmill untilthe problemis corrected.
b. Errorcode "E2" may appear inthe SPEED display ifthe INCREASE SPEED or PROGRAM START button is
pressedand no movement ofthewalking belt is detected withinseven seconds. Remove the key, wait for ten
seconds, and then reinsertthe key. Make sure thatyou stand on the side railsof the treedmifleach time you
startwalking bell Ifthe error code appears again, call ourtoll-free HELPLINE. Do not operate the treadmill until
the problemis corrected.
20
c. Error code "E3" may appear inthe SPEED display if the speed ofthe walking belt surges above the selected
speed setting. Remove the key,waif for ten seconds, and then reinsertthe key. If the error code appears again,
callour toll-free HELPLINE. Do not operate the treadmilluntilthe problemis corrected.
d. Error code "E4" may appear in the SPEED display ifthe walking belt is moving at a slow speed, and there is
excessivestress on the motor. Remove the key, wait for ten seconds, and then reinsert the key. If you weigh
over 200 pounds, it may be helpfulto increase the inclineofthe treadmill. Ifthe error code appears again, call
our toll-free HELPLINE. Do not operate the treadmill untilthe problem is corrected.
  • Page 1 1
  • Page 2 2
  • Page 3 3
  • Page 4 4
  • Page 5 5
  • Page 6 6
  • Page 7 7
  • Page 8 8
  • Page 9 9
  • Page 10 10
  • Page 11 11
  • Page 12 12
  • Page 13 13
  • Page 14 14
  • Page 15 15
  • Page 16 16
  • Page 17 17
  • Page 18 18
  • Page 19 19
  • Page 20 20
  • Page 21 21
  • Page 22 22
  • Page 23 23
  • Page 24 24

Image 10.6 Owner's manual

Category
Treadmills
Type
Owner's manual
This manual is also suitable for

Ask a question and I''ll find the answer in the document

Finding information in a document is now easier with AI