Philips qc 5099 User manual
- Category
- Hair trimmers & clippers
- Type
- User manual
This manual is also suitable for
Page is loading ...
Page is loading ...
Page is loading ...
Page is loading ...
Page is loading ...

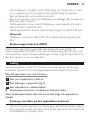
6
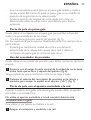
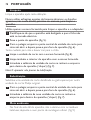
Introduction
Congratulations on your purchase and welcome to Philips! To fully benet
from the support that Philips offers, register your product at www.philips.
com/welcome.
Your new Philips 3D hair clipper adapts to the contours of the head and
enables comfortable use.
Important
Read this user manual carefully before you use the appliance and save it
for future reference.
Danger
- Make sure the adapter does not get wet.
Warning
- Check if the voltage indicated on the adapter and on the appliance
corresponds to the local mains voltage before you connect the
appliance.
- The adapter contains a transformer. Do not cut off the adapter to
replace it with another plug, as this causes a hazardous situation.
- If the adapter is damaged, always have it replaced with one of the
original type in order to avoid a hazard.
- This appliance is not intended for use by persons (including children)
with reduced physical, sensory or mental capabilities, or lack of
experience and knowledge, unless they have been given supervision
or instruction concerning use of the appliance by a person
responsible for their safety.
- Children should be supervised to ensure that they do not play with
the appliance.
Caution
- Never immerse the appliance in water or any other liquid, nor rinse it
under the tap.
- Use, charge and store the appliance at a temperature between 15°C
and 35°C.
- Only use the adapter supplied.
- Do not use a damaged adapter.
ENGLISH

- If the adapter is damaged, always have it replaced with one of the
original type in order to avoid a hazard.
- Do not charge the appliance in a pouch or cassette.
- Do not use the appliance when one of the attachments is damaged
or broken, as this may cause injury.
- This appliance is only intended for clipping human scalp hair. Do not
use it for any other purpose.
- This appliance is suitable for mains voltages from 220 to 240 volts.
General
- The adapter transforms 100-240 volts to a safe low voltage of less
than 24 volts.
This Philips appliance complies with all standards regarding
electromagnetic elds (EMF). If handled properly and according to the
instructions in this user manual, the appliance is safe to use based on
scientic evidence available today.
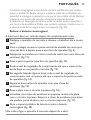
Charging
Charge the appliance for 12 hours before you use it for the rst time.
A fully charged appliance has a cordless clipping time of up to 50 minutes.
Do not charge the appliance for more than 24 hours.
1 Make sure the appliance is switched off.
2 Insert the appliance plug into the appliance (Fig. 1).
3 Insert the adapter into the wall socket.
, The charging light goes on to indicate that the battery is being
charged.
Note: The charging light does not go out or change colour when the appliance
is fully charged.
ENGLISH 7

- After you have charged the appliance for the rst time, do not
recharge it between clipping sessions. Continue using it and recharge
it only when the battery is (almost) empty.
- Discharge the battery completely twice a year by letting the motor
run until it stops.
- Do not keep the appliance plugged in continuously.
- If you have not used the appliance for a long time, recharge it for 12
hours.
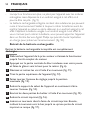
Select the small or large comb attachment, depending on the desired hair
length.
Hair length settings:
- The hair length settings are indicated in millimetres on the arms of
the comb attachment. The settings correspond to the remaining hair
length after cutting (Fig. 2).
- The small comb attachment cuts hair to a length of 3mm, 6mm, 9mm,
12mm, 15mm, 18mm or 21mm.
- The large comb attachment cuts the hair to a length of 23mm, 26mm,
29mm, 32mm, 35mm, 38mm or 41mm.
1 Slide the arms of the comb attachment into the guiding grooves of
the appliance (‘click’) (Fig. 3).
2 To set the comb attachment to the desired hair length, turn the
hair length adjustment ring to the right or to the left (Fig. 4).
3 Switch on the appliance.
- We advise you to start clipping at the highest setting of the large
comb attachment and to reduce the hair length in small steps until
you reach the desired hair length.
- If a lot of hair has accumulated in the comb attachment, remove the
comb attachment and blow and/or shake the hair out of it. Removing
ENGLISH8

the comb attachment does not change the selected hair length
setting.
- Write down the hair length settings used to create a certain hairstyle
as a reminder for future clipping sessions.
You can use the clipper without comb attachment to contour the
neckline and the area around the ears.
- To remove the comb attachment, pull it off the appliance (Fig. 5).
Never pull at the exible top of the comb attachment. Always pull at the
bottom part.
- The comb attachment keeps the cutting unit at a certain distance
from your head. This means that, if you use the clipper without the
comb attachment, your hair will be cut off very close to the skin.
You can use the precision trimmer for precise contouring and dening.
1 Push the middle part of the cutting unit upwards with your thumb
until it opens and then pull it off the appliance (Fig. 6).
Be careful that the cutting unit does not fall to the oor.
2 Place the lug of the precision trimmer into the slot and push the
unit back onto the appliance (‘click’) (Fig. 7).
Corded clipping
When the rechargeable battery is empty, you can also run the appliance
from the mains.
Do not run the appliance from the mains when the battery is fully
charged.
To use the hair clipper connected to the mains:
1 Switch off the hair clipper and connect it to the mains.
2 Wait a few seconds and then switch on the appliance.
ENGLISH 9

Cleaning
Clean the appliance every time you have used it.
Never use scouring pads, abrasive cleaning agents or aggressive liquids
such as alcohol, petrol or acetone to clean the appliance.
Only clean the appliance and the adapter with the cleaning brush
supplied.
1 Make sure the appliance is switched off and disconnected from the
mains.
2 Pull the comb attachment off the appliance (Fig. 5).
3 Push the middle part of the cutting unit upwards with your thumb
until it opens and then pull it off the appliance (Fig. 6).
Be careful that the cutting unit does not fall to the oor.
4 Clean the cutting unit with the cleaning brush supplied (Fig. 8).
5 Clean the inside of the appliance with the cleaning brush supplied.
6 Place the lug of the cutting unit into the slot and push the unit back
onto the appliance (‘click’) (Fig. 7).
Note: This appliance does not need any lubrication.
Replacement
Only replace a damaged or worn cutting unit with an original Philips
cutting unit.
1 Push the middle part of the cutting unit upwards with your thumb
until it opens and then pull it off the appliance (Fig. 6).
2 Place the lug of the new cutting unit into the slot and push the unit
back onto the appliance (‘click’) (Fig. 7).
ENGLISH10

Environment
- Do not throw away the appliance with the normal household waste
at the end of its life, but hand it in at an ofcial collection point for
recycling. (Fig. 9)
- The built-in rechargeable battery contains substances that may
pollute the environment. Always remove the battery before you
discard and hand in the appliance at an ofcial collection point.
Dispose of the battery at an ofcial collection point for batteries. If
you have trouble removing the battery, you can also take the
appliance to a Philips service centre. The staff of this centre will
remove the battery for you and will dispose of it in an
environmentally safe way (Fig. 10).
Only remove the rechargeable battery if it is completely empty.
1 Disconnect the appliance from the mains and let the appliance run
until the motor stops.
2 Push the middle part of the cutting unit upwards with your thumb
until it opens and then pull it off the appliance (Fig. 6).
3 Undo the screws and remove the metal clip with a
screwdriver (Fig. 11).
4 Pull the top part off the appliance (Fig. 12).
5 Turn the hair length adjustment ring until the comb holder is in its
highest position (Fig. 13).
6 Use some force to turn the adjustment ring still further until the
comb holder comes loose from the appliance (Fig. 14).
7 Separate the two housing parts with a screwdriver (Fig. 15).
8 Pull out the printed circuit board (Fig. 16).
9 Insert a screwdriver into the small slot in the printed circuit board.
Push the screwdriver down until part of the printed circuit board
breaks off (Fig. 17).
ENGLISH 11

10 Open the plastic battery holder and take out the rechargeable
battery (Fig. 18).
Do not connect the appliance to the mains again after you have opened
it.
If you need service or information or if you have a problem, please visit
the Philips website at www.philips.com or contact the Philips Consumer
Care Centre in your country (you nd its phone number in the
worldwide guarantee leaet). If there is no Consumer Care Centre in
your country, go to your local Philips dealer.
ENGLISH12
Page is loading ...
Page is loading ...
Page is loading ...
Page is loading ...
Page is loading ...
Page is loading ...
Page is loading ...
Page is loading ...
Page is loading ...
Page is loading ...
Page is loading ...
Page is loading ...
Page is loading ...
Page is loading ...
Page is loading ...
Page is loading ...
Page is loading ...
Page is loading ...
Page is loading ...
Page is loading ...
Page is loading ...
Page is loading ...
Page is loading ...
Page is loading ...
Page is loading ...
Page is loading ...
Page is loading ...
Page is loading ...
Page is loading ...
Page is loading ...
Page is loading ...
Page is loading ...
Page is loading ...
Page is loading ...
Page is loading ...
Page is loading ...
Page is loading ...
Page is loading ...
Page is loading ...
Page is loading ...
Page is loading ...
Page is loading ...
Page is loading ...
Page is loading ...
Page is loading ...
Page is loading ...
Page is loading ...
Page is loading ...
Page is loading ...
Page is loading ...
Page is loading ...
Page is loading ...
Page is loading ...
Page is loading ...
Page is loading ...
Page is loading ...
Page is loading ...
Page is loading ...
Page is loading ...
Page is loading ...
Page is loading ...
Page is loading ...
Page is loading ...
Page is loading ...
Page is loading ...
Page is loading ...
Page is loading ...
Page is loading ...
Page is loading ...
Page is loading ...
Page is loading ...
Page is loading ...
Page is loading ...
Page is loading ...
Page is loading ...
Page is loading ...
Page is loading ...
Page is loading ...
Page is loading ...
Page is loading ...
Page is loading ...

4203.000.5467.4
u
-
 1
1
-
 2
2
-
 3
3
-
 4
4
-
 5
5
-
 6
6
-
 7
7
-
 8
8
-
 9
9
-
 10
10
-
 11
11
-
 12
12
-
 13
13
-
 14
14
-
 15
15
-
 16
16
-
 17
17
-
 18
18
-
 19
19
-
 20
20
-
 21
21
-
 22
22
-
 23
23
-
 24
24
-
 25
25
-
 26
26
-
 27
27
-
 28
28
-
 29
29
-
 30
30
-
 31
31
-
 32
32
-
 33
33
-
 34
34
-
 35
35
-
 36
36
-
 37
37
-
 38
38
-
 39
39
-
 40
40
-
 41
41
-
 42
42
-
 43
43
-
 44
44
-
 45
45
-
 46
46
-
 47
47
-
 48
48
-
 49
49
-
 50
50
-
 51
51
-
 52
52
-
 53
53
-
 54
54
-
 55
55
-
 56
56
-
 57
57
-
 58
58
-
 59
59
-
 60
60
-
 61
61
-
 62
62
-
 63
63
-
 64
64
-
 65
65
-
 66
66
-
 67
67
-
 68
68
-
 69
69
-
 70
70
-
 71
71
-
 72
72
-
 73
73
-
 74
74
-
 75
75
-
 76
76
-
 77
77
-
 78
78
-
 79
79
-
 80
80
-
 81
81
-
 82
82
-
 83
83
-
 84
84
-
 85
85
-
 86
86
-
 87
87
-
 88
88
-
 89
89
-
 90
90
-
 91
91
-
 92
92
-
 93
93
-
 94
94


Philips qc 5099 User manual
- Category
- Hair trimmers & clippers
- Type
- User manual
- This manual is also suitable for
Ask a question and I''ll find the answer in the document
Finding information in a document is now easier with AI
in other languages
- italiano: Philips qc 5099 Manuale utente
- français: Philips qc 5099 Manuel utilisateur
- español: Philips qc 5099 Manual de usuario
- Deutsch: Philips qc 5099 Benutzerhandbuch
- Nederlands: Philips qc 5099 Handleiding
- português: Philips qc 5099 Manual do usuário
- dansk: Philips qc 5099 Brugermanual
- Türkçe: Philips qc 5099 Kullanım kılavuzu
- svenska: Philips qc 5099 Användarmanual
- suomi: Philips qc 5099 Ohjekirja
Related papers
-
Philips QC5070/00 User manual
-
Philips QC5550/15 Important information
-
Philips HP6390 User manual
-
Philips BG2024/15 Important information
-
Philips QC5770/44 Important information
-
Philips S1520/04 Important information
-
Philips QG3380/16 Important information
-
-
Philips HP6390/00 Important information
-
Philips QC5580/32 Important information
Other documents
-
Rowenta Driver TN1050F1 User manual
-
Logik LHC14E User manual
-
JBL SYNTHESIS SDP-40 User manual
-
BOMANN HSM 8006 CB Owner's manual
-
-
Clatronic HSM 3430 User manual
-
-
Remington HC5200 Owner's manual
-
 GA.MA GC542 SPORT-HF+GT527 SPORT-HF User manual
-
Remington HC5950 Owner's manual
