Sony DCR-IP210E User manual

Category
Camcorders
Type
User manual

This manual is also suitable for

3-076-898-31 (1)
©2002 Sony Corporation
Operating Instructions
Before operating the unit, please read this manual thoroughly, and retain
it for future reference.
Gebruiksaanwijzing
Lees, alvorens het apparaat in gebruik te nemen, de
gebruiksaanwijzing aandachtig door en bewaar deze voor eventuele
naslag.
DCR-IP210E/
IP220E
Digital
Video Camera
Recorder
DCR-IP220E
2
English
Welcome!
Congratulations on your purchase of this Sony
Handycam. With your Handycam you can
capture life’s precious moments with superior
picture and sound quality.
Your Handycam is loaded with advanced
features, but at the same time it is very easy to
use. You will soon be producing home video that
you can enjoy for years to come.
WARNING
To prevent fire or shock hazard, do not expose
the unit to rain or moisture.
To avoid electrical shock, do not open the
cabinet.
Refer servicing to qualified personnel only.
NOTICE ON THE SUPPLIED AC POWER
ADAPTOR FOR CUSTOMERS IN THE
UNITED KINGDOM
A moulded plug complying with BS1363 is fitted
to this equipment for your safety and
convenience.
Should the fuse in the plug supplied need to
be replaced, a 5 AMP fuse approved by ASTA
or BSI to BS1362 (i.e., marked with or
mark) must be used.
If the plug supplied with this equipment has a
detachable fuse cover, be sure to attach the
fuse cover after you change the fuse. Never
use the plug without the fuse cover. If you
should lose the fuse cover, please contact
your nearest Sony service station.
For the customers in Europe
Nederlands
Welkom
Dit apparaat bevat een vast ingebouwde batterij
die niet vervangen hoeft te worden tijdens de
levensduur van het apparaat.
Raadpleeg uw leverancier indien de batterij toch
vervangen moet worden. De batterij mag alleen
vervangen worden door vakbekwaam
servicepersoneel.
Lever het apparaat aan het einde van de
levensduur in voor recycling, de batterij zal dan
op correcte wijze verwerkt worden.
Gooi de batterij niet weg maar lever deze in als
klein chemisch afval (KCA).
Voor de klanten in Europa
Gefeliciteerd met uw aankoop van deze Sony
Handycam. Met de superieure beeld- en
geluidskwaliteit van de Handycam kunt u de
dierbare momenten in uw leven vastleggen.
Deze camcorder biedt u een scala aan
geavanceerde functies en is toch zeer eenvoudig
te bedienen, zodat u al gauw in staat zult zijn
home-video’s te maken waar u nog jaren plezier
aan beleeft.
WAARSCHUWING
Om het gevaar van brand of elektrische
schokken te voorkomen, mag het apparaat niet
worden blootgesteld aan regen of vocht.
Om elektrische schokken te voorkomen, mag
de behuizing niet worden geopend.
Laat reparaties uitsluitend door vakkundig
personeel uitvoeren.
3
ATTENTIE
Elektromagnetische velden met bepaalde
frequenties kunnen het beeld en geluid van deze
digitale camcorder beïnvloeden.
Dit product heeft in tests gebleken te voldoen aan
de eisen gesteld in de Europese EMC Bepalingen
voor het gebruik van aansluitsnoeren van minder
dan 3 meter lang.
Opmerking
Als door statische elektriciteit of
elektromagnetisme de gegevensoverdracht
wordt onderbroken (of mis gaat), start u het
applicatieprogramma dan opnieuw, of maak de
USB-kabel even los en sluit deze dan weer aan.
Alleen voor de DCR-IP220E
Hierbij verklaart Sony Corpoation dat het toestel
Handycam in overeenstemming is met de
esseniële eisen en de andere relevante bepalingen
van richtlijn 1999/5/EG.
Slechts in een beperkt aantal landen en gebieden
kunt u gebruik maken van de netwerk-
communicatie. Zie voor nadere bijzonderheden
de afzonderlijke bij uw camcorder geleverde
netwerk-gebruiksaanwijzing.
ATTENTION
The electromagnetic fields at the specific
frequencies may influence the picture and sound
of this camcorder.
This product has been tested and found
compliant with the limits set out in the EMC
regulation for using connection cables shorter
than 3 meters. (9.8 feet)
Notice
If static electricity or electromagnetism
causes data transfer to discontinue
midway (fail), restart the application or
disconnect and connect the USB cable
again.
DCR-IP220E only
Hereby, Sony Corporation, declares that this
Handycam is in compliance with the essential
requirements and other relevant provisions of
Directive 1999/5/EC.
Countries and areas where you can use network
functions are restricted. For details, refer to the
separate Network Function Operating
Instructions.
4
English
Main Features
Recording moving pictures on
tapes (p. 38)
Playing back tapes (p. 55)
Recording still images on a
“Memory Stick” (p. 63, 144)
Recording moving pictures on a
“Memory Stick” (p. 167)
•Viewing still images recorded on a
“Memory Stick” (p. 174)
Viewing moving pictures recorded
on a “Memory Stick” (p. 178)
Capturing images on your
computer
Viewing moving pictures recorded
on tapes using the i.LINK cable
(p. 196)
(The i.LINK of your camcorder
adopts the
format only. It does
not adopt the or the MPEG2
format of
.)
•Viewing images recorded on a
“Memory Stick” using the USB
cable (p. 215, 222)
Viewing moving pictures recorded
on tapes using the USB cable
(p. 209)
Capturing images on your
computer from your camcorder
using the USB cable (p. 211)
4
Recording moving pictures
or still images, and playing
them back
Main Features
5
Accessing the Internet
via a Bluetooth wireless
device (optional) (DCR-
IP220E only)
Accessing the Internet, sending/
receiving your e-mail. For details,
refer to the Network Function
Operating Instructions supplied
with your camcorder. (DCR-
IP220E only) (p. 224)
5
Other uses
Functions to adjust exposure in the recording mode
BACK LIGHT (p. 48)
NightShot/Super NightShot/Colour Slow Shutter (p. 49)
Recording with the flash (p. 65, 149)
White balance (p. 69)
PROGRAM AE (p. 81)
Adjusting the exposure manually (p. 84)
Flexible Spot Meter (p. 86)
HOLOGRAM AF (p. 151)
NightFraming (p. 153)
Functions to give images more impact
Digital zoom (p. 43) The default setting is set to OFF. (To zoom greater than 10×, select the
digital zoom power in D ZOOM in the menu settings.)
Fader (p. 73)
Picture effect (p. 76)
Digital effect (p. 78)
Title (p. 114, 120)
MEMORY MIX (p. 160)
Functions to give a natural appearance to your recordings
•PROGRAM AE (p. 81)
Sports lesson
Landscape
Manual focus (p. 88)
Expanded focus (p. 89)
Spot Focus (p. 90)
Functions to use after recording on a tape
END SEARCH (p. 54)
DATA CODE (p. 57)
Tape PB ZOOM (p. 95)
MULTI-PICTURE SEARCH (p. 97)
TITLE SEARCH (p. 102)
Main Features
Main Features
8
English
Table of contents
Main Features.......................................... 4
Introduction
– Basic operations
.............................. 12
Quick Start Guide
– Recording on a tape ............................... 14
– Recording on a “Memory Stick” .......... 16
Getting Started
Using this manual ..................................... 22
Checking supplied accessories................ 25
Step 1 Preparing the power supply ........ 26
Inserting the battery pack ................. 26
Charging the battery pack................. 27
Connecting to a wall socket .............. 30
Step 2 Setting the date and time ............. 31
Step 3 Inserting a cassette ........................ 34
Step 4 Using the touch panel ................... 36
Recording – Basics
Recording a picture................................... 38
Shooting a backlit subject
– BACK LIGHT ............................ 48
Shooting in the dark
– NightShot/Super NightShot/
Colour Slow Shutter .................... 49
Self-timer recording ........................... 52
Checking the recording
– END SEARCH ................................. 54
Playback – Basics
Playing back a tape ................................... 55
To display the screen indicators
– Display function ....................... 57
Viewing the recording on TV .................. 61
Advanced Recording Operations
Recording still images on a
“Memory Stick” in CAMERA mode
............................................................... 63
Adjusting the white balance manually
............................................................... 69
Using the wide mode ............................... 71
Using the fader function .......................... 73
Using special effects – Picture effect ...... 76
Using special effects – Digital effect ....... 78
Using the PROGRAM AE ........................ 81
Adjusting the exposure manually .......... 84
Using the spot light-metering mode
– Flexible Spot Meter ......................... 86
Focusing manually.................................... 88
Using the spot focus mode
– Spot Focus ........................................ 90
Advanced Playback Operations
Playing back a tape with picture effects
............................................................... 91
Playing back a tape with digital effects
............................................................... 93
Enlarging images recorded on tapes
– Tape PB ZOOM ............................... 95
Searching for a scene
– MULTI-PICTURE SEARCH .......... 97
Searching the boundaries of recorded
tape by title – TITLE SEARCH ....... 102
Searching a recording by date
– DATE SEARCH ............................. 103
Editing
Dubbing a tape ........................................ 105
Recording video or TV programmes ... 109
Superimposing a title ............................. 114
Making your own titles .......................... 120
The micro Cassette Memory.................. 124
“Memory Stick” Operations
Using a “Memory Stick”
– Introduction ................................... 128
Recording still images on a
“Memory Stick”
– Memory photo recording ............. 144
Recording an image from a tape as a
still image .......................................... 156
9
Table of contents
Superimposing a still image in a
“Memory Stick” on an image
– MEMORY MIX .............................. 160
Recording moving pictures on a
“Memory Stick”
– MPEG MOVIE recording ............. 167
Recording a picture from a tape as a
moving picture ................................. 170
Viewing a still image
– Memory photo playback .............. 174
Viewing a moving picture
– MPEG MOVIE playback .............. 178
Copying still images recorded on a
“Memory Stick” to a tape ................ 181
Enlarging still images recorded on a
“Memory Stick”
– Memory PB ZOOM ....................... 183
Playing back images continuously
– SLIDE SHOW ................................. 185
Preventing accidental erasure
– Image protection............................ 187
Deleting images – DELETE ................... 189
Writing a print mark
– PRINT MARK ................................ 192
Viewing Images Using your
Computer
Viewing images on your computer
– Introduction ................................... 194
Connecting your camcorder to your
computer using the i.LINK cable
(For Windows users)........................ 196
Connecting your camcorder to your
computer using the USB cable
(For Windows users)........................ 198
Viewing images recorded on a tape on
your computer – USB Streaming
(For Windows users)........................ 209
Viewing images recorded on a
“Memory Stick” on your computer
(For Windows users)........................ 215
Connecting your camcorder to your
computer using the USB cable
(For Macintosh users) ...................... 219
Viewing images recorded on a
“Memory Stick” on your computer
(For Macintosh users) ...................... 222
Using the Network function
(DCR-IP220E only)
Accessing the network ........................... 224
For the details, refer to the Network
Function Operating Instructions
supplied with your camcorder.
Customising Your Camcorder
Changing the menu settings.................. 226
Troubleshooting
Types of trouble and how to correct
trouble ................................................ 244
Self-diagnosis display............................. 251
Warning indicators and messages ........ 252
Additional Information
Usable cassettes ....................................... 264
About the “InfoLITHIUM” battery
pack .................................................... 266
About i.LINK ........................................... 268
Using your camcorder abroad .............. 270
Maintenance information and
precautions ........................................ 271
Specifications ........................................... 280
Quick Reference
Identifying the parts and controls ........ 284
Index ......................................................... 294
12
Hieronder volgen de eerste beginselen voor het
hanteren en bedienen van de camcorder.
Inschakelen en de gewenste
functie kiezen
De diverse mogelijkheden voor
stroomvoorziening van uw camcorder vindt u
onder “Stap 1: Voorbereiden van de
stroomvoorziening” op blz. 26.
(1)Druk het kleine groene knopje op de POWER
schakelaar in, schuif de schakelaar omlaag en
laat deze los.
De camcorder wordt ingeschakeld en komt in
de “CAMERA” stand, waarbij het
“CAMERA” lampje oplicht.
(2)Schuif nu opnieuw de POWER schakelaar in
de richting van de pijl. Telkens wanneer u de
schakelaar omlaag schuift, verandert de
bedieningsfunctie, als aangegeven door het
bijbehorende lampje dat oplicht.
CAMERA Gebruik deze stand voor het
maken van bandopnamen.
MEMORY/NETWORK (DCR-IP220E) of
MEMORY (DCR-IP210E)
MEMORY: Gebruik deze stand voor het
vastleggen van beelden op een
“Memory Stick” of het
weergeven of aanpassen van
beelden op een “Memory
Stick”.
NETWORK (alleen voor de DCR-IP220E):
Gebruik deze stand voor de
netwerk-communicatie. Zie
voor nadere bijzonderheden
de bijgeleverde netwerk-
gebruiksaanwijzing.
VCR Gebruik deze stand voor het
weergeven of aanpassen van
bandopnamen of beelden op een
“Memory Stick”.
Inleiding
– Basisbediening
Introduction
– Basic operations
This section describes the basic operations to
operate your camcorder.
How to turn on the power and
select the mode
To supply power for your camcorder, see “Step 1
Preparing the power supply” on page 26.
(1)Slide the POWER switch in the direction of
the arrow while pressing the small green
button, then release your finger.
Your camcorder is turned on, and then your
camcorder turns to the CAMERA mode so
that the CAMERA lamp lights up.
(2)Slide the POWER switch in the direction of
the arrow. Each time you slide it down, the
mode changes as follows and corresponding
mode lamp also lights up.
CAMERA Use this mode when you record
on a tape.
MEMORY/NETWORK (DCR-IP220E) or
MEMORY (DCR-IP210E)
MEMORY: Use this mode when you
record on a “Memory Stick,”
or play back or edit an image
in a “Memory Stick.”
NETWORK (DCR-IP220E only):
Use this mode when you use
the network function. For
details, refer to the supplied
Network Function Operating
Instructions.
VCR Use this mode when you play
back or edit an image recorded
on a tape or “Memory Stick.”
1,2
MEMORY/NETWORK
CAMERA
POWER
(CHG)
OFF
ON
MODE
VCR
13
Getting Started Voorbereidingen
Openen van het LCD scherm
(1)Klap het LCD scherm open in de richting van
de pijl.
(2)Draai het LCD scherm 180 graden linksom,
tegen de klok in.
(3)Klap het LCD scherm weer terug tegen de
camcorder aan, nu met het scherm naar buiten
gericht.
Wanneer u het LCD scherm weer wilt sluiten,
klapt u het eerst verticaal omhoog, dan keert
u het om en klapt u het dicht.
Opmerkingen
Het LCD scherm is 180 graden linksom
draaibaar, tegen de klok in en 90 graden
rechtsom, met de klok mee.
Bij gebruik van het LCD scherm in gewone
stand, dus niet in de spiegelstand (zie blz. 45),
wordt de beeldzoeker automatisch
uitgeschakeld.
Als u het LCD scherm buitenshuis in de volle
zon gebruikt
In dat geval kan de weergave op het LCD scherm
wel eens flets en onduidelijk zijn. Dan kunt u in
plaats van het scherm beter de beeldzoeker
gebruiken.
Voor instellen van de hoek van het LCD
scherm
Klapt u het LCD scherm eerst omhoog tot het
verticaal staat, dan kunt u het zijwaarts draaien
zoals in stap 2.
Inleiding – Basisbediening
How to open the LCD panel
(1)Open the LCD panel in the direction of the
arrow.
(2)Turn the LCD panel 180 degrees
anticlockwise.
(3)Close the LCD panel with the LCD screen
facing out.
When closing the LCD panel, set it vertically,
and swing it into your camcorder body.
Notes
The LCD panel rotates 180 degrees
anticlockwise and 90 degrees clockwise.
When using the LCD panel except in the mirror
mode (p. 45), the viewfinder automatically
turns off.
When you set the LCD screen outdoors in
direct sunlight
The LCD screen may be difficult to see. If this
happens, we recommend that you use the
viewfinder.
When you adjust the angle of the LCD panel
Make sure if the LCD panel is opened in the step
2 position.
Introduction – Basic operations
32
1
180°
14
English
Quick Start Guide – Recording on a tape
This chapter introduces you to the basic features to
record pictures on tapes of your camcorder. See the
page in parentheses “( )” for more information.
Inserting a cassette (p. 34)
2Push the middle
portion of the back of
the cassette into the
cassette compartment.
Insert the cassette in a
straight line deeply
with the cassette
window facing the
cassette lid.
3 Close the cassette
compartment by
pushing down the
cassette lid halfway.
After the cassette
compartment goes
down completely,
close the lid until it
clicks.
OPEN/ EJECT
Z
1 Slide OPEN/Z EJECT
in the direction of
the arrow and open
the lid.
Quick Start Guide
Connecting the mains lead (p. 30)
Use the battery pack when using your camcorder outdoors (p. 26).
OPEN/Z EJECT
Cassette window
Connect the plug with its v mark facing down.
Open the
jack cover.
AC power adaptor (supplied)
15
Recording a picture (p. 38)
Monitoring the playback picture on the LCD
screen (p. 55)
Note
Do not pick up your camcorder by
the LCD panel or the jack cover.
2Press of the touch panel to
rewind the tape.
3Press of the touch panel to start
playback.
1Remove the lens cap.
3Open the LCD panel. The
picture appears on the LCD
screen.
When you purchase your camcorder, the clock setting is not
set up yet. Set the clock setting before recording (p. 31).
Viewfinder
When the LCD panel is closed with the
LCD screen facing inwards, use the
viewfinder.
Adjust the viewfinder lens to your
eyesight (p. 41).
2Set the POWER switch
to CAMERA. The
CAMERA lamp lights
up.
MEMORY/NETWORK
CAMERA
POWER
(CHG)
OFF
ON
MODE
VCR
4Press START/STOP. Your
camcorder starts recording.
To stop recording, press
START/STOP again.
1Set the POWER switch
to VCR.
The VCR lamp lights up.
MEMORY/NETWORK
CAMERA
POWER
(CHG)
OFF
ON
MODE
VCR
Quick Start Guide
Note
When using the touch panel, press
operation buttons lightly with your finger
or the supplied stylus (DCR-IP220E only).
Do not press the LCD screen with sharp
objects other than the stylus supplied
(DCR-IP220E only).
16
Quick Start Guide –
Recording on a “Memory Stick”
Inserting a “Memory Stick” (p. 131)
Insert a “Memory Stick” in the “Memory Stick” slot as far as it can go, as illustrated below.
Connecting the mains lead (p. 30)
Use the battery pack when using your camcorder outdoors (p. 26).
This chapter introduces you to the basic features to
record on a “Memory Stick” of your camcorder. See the
page in parentheses “( )” for more information.
Quick Start Guide
Open the jack
cover.
Connect the plug with its v mark facing down.
AC power adaptor (supplied)
“Memory
Stick” slot
Open the LCD
panel and slide the
MEMORY EJECT
lever in the
direction of the
arrow.
MEMORY EJECT lever
Ejecting a “Memory Stick”
17
Recording a still image on a “Memory Stick”
(p. 144)
When you purchase your camcorder,
the clock setting is not set up yet. If
you want to record the date and time
for a picture, set the clock setting
before recording (p. 31).
Viewfinder
When the LCD panel is closed with the
LCD screen facing inwards, use the
viewfinder.
Adjust the viewfinder lens to your
eyesight (p. 41).
Monitoring the still image on the LCD screen
(p. 174)
1Set the POWER switch to MEMORY or VCR.
The MEMORY or VCR lamp lights up.
2Press PLAY or PB. The last recorded image is
displayed.
Note
Do not pick up your camcorder by
the LCD panel or the jack cover.
1Remove the lens cap.
2Set the
POWER
switch to
MEMORY.
The
MEMORY
lamp lights
up.
MEMORY/NETWORK
CAMERA
(CHG)
OFF
ON
MODE
VCR
POWER
Quick Start Guide
PLAY
PB
or
MEMORY/NETWORK
CAMERA
(CHG)
OFF
ON
MODE
VCR
POWER
When the green z mark
stops flashing, then lights up,
you can record a still image.
The image when you pressed
PHOTO deeper will be
recorded on a “Memory
Stick.”
4Press
PHOTO
lightly.
5Press
PHOTO
deeper.
3Open the LCD panel. The
picture appears on the
LCD screen.
22
In deze gebruiksaanwijzing vindt u een
beschrijving van twee verschillende uitvoeringen
van de camcorder, zoals in onderstaande tabel is
aangegeven. Controleer voor het doorlezen van
deze handleiding en het in gebruik nemen van
uw camcorder eerst even uw modelnummer, dat
aan de onderkant van de camcorder vermeld
staat. De afbeeldingen in deze
gebruiksaanwijzing tonen het model DCR-
IP220E, tenzij er bij de afbeelding een ander
modelnummer staat aangegeven. Verschillen in
bediening tussen de modellen worden in de tekst
duidelijk aangegeven, als bijvoorbeeld “alleen
voor de DCR-IP220E”.
In deze gebruiksaanwijzing worden de namen
van toetsen of regelaars en instellingen op de
camcorder in hoofdletters vermeld.
Bijvoorbeeld: Zet de POWER schakelaar in de
“CAMERA” stand.
Bij bepaalde bedieningsfuncties kunnen er één of
meer pieptonen klinken, om u op het
overschakelen te attenderen en vergissingen te
voorkomen.
— Voorbereidingen —
Omtrent deze
handleiding
The instructions in this manual are for the two
models listed in the table below. Before you start
reading this manual and operating your
camcorder, check the model number by looking
at the bottom of your camcorder. The DCR-
IP220E is the model used for illustration
purposes. Otherwise, the model name is
indicated in the illustrations. Any differences in
operation are clearly indicated in the text, for
example, “DCR-IP220E only.”
As you read through this manual, buttons and
settings on your camcorder are shown in capital
letters.
e.g. Set the POWER switch to CAMERA.
When you carry out an operation, you can hear a
beep to indicate that the operation is being
carried out.
z Provided/Voorzien
Not provided/Niet voorzien
— Getting Started —
Using this manual
Types of differences/Verschillen tussen de uitvoeringen
DCR- IP210E IP220E
Mark on the POWER switch/
MEMORY MEMORY/NETWORK
Stand van de POWER schakelaar
Network function/Netwerk-functie z
23
Getting Started Voorbereidingen
Betreffende het MICROMV
formaat
Uw camcorder werkt volgens het
MICROMV formaat. In deze camcorder kunt u
uitsluitend MICROMV videocassettes gebruiken.
Geschikt voor ongeveer 60 minuten opnemen
en afspelen, met dezelfde kwaliteit als het DV
systeem (digitale video).
Alle MICROMV videocassettes zijn voorzien
van een micro Cassette Memory geheugen.
Hiermee kan de camcorder vlot en gemakkelijk
een gewenste scène terugvinden (MULTI-
PICTURE SEARCH zoekfunctie).
Geschikt voor het MPEG2
datacompressiesysteem. Dit is hetzelfde
formaat als toegepast voor DVD discs (digitale
veelzijdige discs). Het werkt met een
opnamesnelheid van 12 Mbits per seconde,
voor een uitstekende beeldkwaliteit.
De overgang tussen het laatst opgenomen beeld
en de volgende opname wordt gevormd door
een stilstaand beeld. Dat is geen fout, zo werkt
het systeem.
Aan de markering herkent u de MICROMV
cassettes.
Verschillende televisie-
kleursystemen
Televisie-kleursystemen verschillen van land tot
land. Om de videobeelden van deze camcorder
op uw TV te bekijken, moet het TV-toestel
werken met het PAL kleursysteem.
Auteursrechten
Televisieprogramma’s, films, videobanden en
ander beeldmateriaal kunnen beschermd zijn
door auteursrechten. Het zonder toestemming
opnemen van dergelijk materiaal kan in strijd
zijn met deze auteursrechten.
Omtrent deze handleidingUsing this manual
Note on the MICROMV format
Your camcorder is based on the
MICROMV format. You can only use MICROMV
cassettes with your camcorder.
Records and plays back for about 60 minutes
with equal quality when compared to DV
(digital video).
The micro Cassette Memory feature is provided
with all MICROMV cassettes. Your camcorder
can access any scene easily using the memory
(MULTI-PICTURE SEARCH function).
Adopts the MPEG2 format as a data
compression method. This format is the same as
the one for DVD (digital versatile disc). Record
in 12Mbps bit rate to obtain a higher quality of
image.
Transition between the last scene you recorded
and the next scene is the still image. This is not
a malfunction.
The mark is indicated on the MICROMV
cassette.
Note on TV colour systems
TV colour systems differ depending on the
country or area. To view your recordings on a
TV, you need a PAL system-based TV.
Copyright precautions
Television programmes, films, video tapes, and
other materials may be copyrighted.
Unauthorised recording of such materials may be
contrary to the provision of the copyright laws.
24
Precautions on camcorder care
Lens and LCD screen/finder
The LCD screen and the finder are
manufactured using extremely high-
precision technology, so over 99.99% of the
pixels are operational for effective use.
However, there may be some tiny black
points and/or bright points (white, red, blue
or green in colour) that constantly appear on
the LCD screen and the finder. These points
are normal in the manufacturing process and
do not affect the recording in any way.
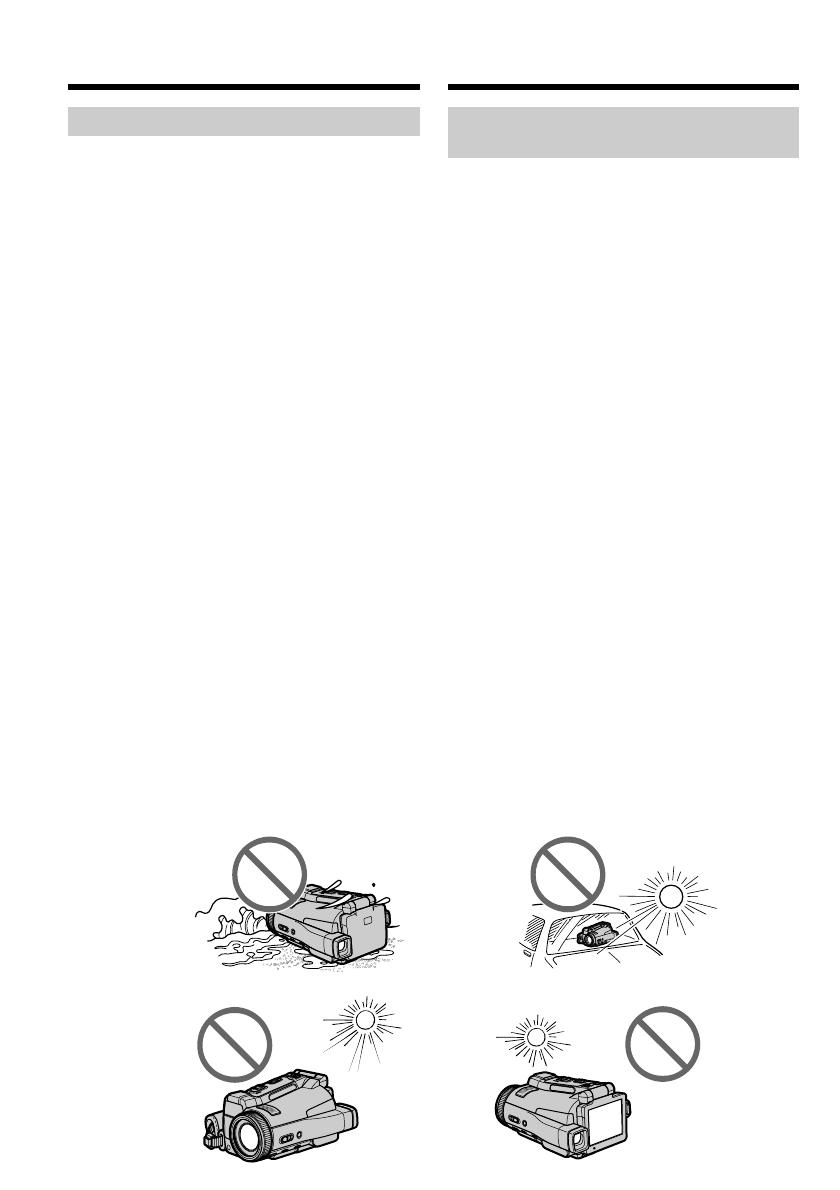
Do not let your camcorder get wet. Keep your
camcorder away from rain and sea water.
Letting your camcorder get wet may cause your
camcorder to malfunction. Sometimes this
malfunction cannot be repaired [a].
Never leave your camcorder exposed to
temperatures above 60°C (140°F), such as in a car
parked in the sun or under direct sunlight [b].
Be careful when placing the camera near a
window or outdoors. Exposing the LCD screen,
the finder or the lens to direct sunlight for long
periods may cause malfunctions [c].
Do not directly shoot the sun. Doing so might
cause your camcorder to malfunction. Take
pictures of the sun in low light conditions such
as dusk [d].
Using this manual
[a]
[d][c]
[b]
Voorzorgen bij gebruik van de
camcorder
Lens en LCD scherm/beeldzoeker
Het LCD scherm en de beeldzoeker van uw
camcorder zijn vervaardigd met precisie-
technologie, zodat minstens 99,99% van de
beeldpunten voor gebruik beschikbaar is.
Soms kunnen er op het LCD scherm en/of in
de zoeker wel eens stippen zwart blijven, of
juist in een enkele kleur (wit, rood, blauw of
groen) oplichten. Maakt u zich geen zorgen:
deze stippen duiden niet op
fabricagefouten, en ze hebben geen enkele
invloed op uw video-opnamen.
Laat de camcorder niet nat worden. Zorg dat er
geen regen of opspattend water, vooral
zeewater, op het apparaat komt. Water in de
camcorder kan storingen veroorzaken, soms
zodanig dat reparatie niet meer mogelijk is. [a]
Laat de camcorder nooit achter op plaatsen
waar de temperatuur tot boven de 60°C kan
oplopen, zoals op een vensterbank in de volle
zon of in een auto die in de zon geparkeerd
staat. [b]
Wees voorzichtig wanneer u de camcorder in
de buurt van een raam of ergens buitenshuis
neerlegt. Als er geruime tijd lang direct zonlicht
op het LCD scherm, de beeldzoeker of de lens
valt, kan er schade aan deze vitale onderdelen
ontstaan. [c]
Pas op dat u de camcorder niet op de zon richt.
Fel zonlicht kan storing in de werking van de
camcorder veroorzaken. Alleen bij
zonsondergang, als het licht niet meer zo fel is,
mag u de zon in beeld nemen. [d]
Omtrent deze handleiding
25
Getting Started Voorbereidingen
Checking supplied
accessories
* Differs from area to area.
This is supplied with European models only.
1 AC-L20A AC power adaptor (1), Mains lead
(1) (p. 27)
2 NP-FF70 battery pack (1) (p. 26, 27)
3 A/V connecting cable (1) (p. 61)
4 Wireless Remote Commander (1) (p. 290)
5 R6 (Size AA) batteries for the Remote
Commander (2) (p. 291)
6 Lens cap (1) (p. 38)
7 Lens hood (1) (p. 42)
8 “Memory Stick” (1) (p. 128)
9 USB cable (1) (p. 194)
q; CD-ROM (SPVD-008 USB Driver) (1)
(p. 198, 219)
qa CD-ROM (Movie Shaker Ver.3.1 for
MICROMV) (1) (p. 196)
qs Cleaning cloth (1) (p. 273)
qd Stylus (1) (DCR-IP220E only) (p. 225)
qf 21-pin adaptor (1) (European models only)
(p. 62)
Make sure that the following accessories are
supplied with your camcorder.
Contents of the recording cannot be
compensated if recording or playback is not
made due to a malfunction of the camcorder,
storage media, etc.
6
0
8
3
qd
qsqa
7
21
5
9
4
qf *
Controleren van het
bijgeleverd
toebehoren
* Verschillend van gebied tot gebied.
Deze uitvoering wordt alleen meegeleverd bij
de modellen voor Europa.
1 AC-L20A netspanningsadapter (1), Netsnoer
(1) (blz. 27)
2 NP-FF70 batterijpak (1) (blz. 26, 27)
3 Audio/video aansluitsnoer (1) (blz. 61)
4 Snoerloze afstandsbediening (1) (blz. 290)
5 R6 (AA-formaat) batterijen voor de
afstandsbediening (2) (blz. 291)
6 Lensdop (1) (blz. 38)
7 Zonnekap (1) (blz. 42)
8 “Memory Stick” (1) (blz. 128)
9 USB-kabel (1) (blz. 194)
q; CD-ROM (SPVD-008 USB Driver) (1) (blz. 198,
219)
qa CD-ROM (Movie Shaker Ver.3.1 for
MICROMV) (1) (blz. 196)
qs Reinigingsdoekje (1) (blz. 273)
qd Aanraakpen (1) (alleen bij de DCR-IP220E)
(blz. 225)
qf 21-polige verloopstekker (1) (alleen bij de
Europese modellen) (blz. 62)
Controleer of de volgende accessoires alle in de
verpakking van de camcorder aanwezig zijn.
Verloren gegane video-opnamen kunnen niet
worden vergoed, ook niet als er bij opnemen of
weergeven iets misgaat door een storing in de
camcorder, de videocassette e.d.
26
Aanbrengen van het batterijpak
Deze camcorder werkt alleen met het NP-FF70
batterijpak.
(1)Schuif de OPEN knop in de richting van de
pijl en open het deksel van de batterijhouder.
(2)Plaats het batterijpak in de houder, met het
aansluitvlak naar binnen toe gericht.
(3)Sluit het deksel van de batterijhouder.
Verwijderen van het batterijpak
Open het deksel van de batterijhouder, schuif het
knopje opzij en neem het batterijpak uit de
houder.
Opmerking
Deze camcorder werkt alleen met het NP-FF70
batterijpak. Het NP-FF50 batterijpak is hiervoor
niet te gebruiken.
Stap 1: Voorbereiden van de
stroomvoorziening
Inserting the battery pack
Your camcorder operates only with the NP-
FF70 battery pack.
(1)Slide OPEN in the direction of the arrow
and open the battery compartment lid.
(2)Insert the battery pack with its terminal side
facing your camcorder.
(3)Close the battery compartment lid.
To take out the battery pack
Open the battery compartment lid and slide the
lever to take out the battery pack.
Note
Your camcorder operates only with the NP-FF70
battery pack. You cannot use the NP-FF50 battery
pack.
Step 1 Preparing the
power supply
1 2 3
Lever/Uitneemknopje
27
Getting Started Voorbereidingen
Opladen van het batterijpak
Voordat u de camcorder op batterijspanning kunt
gebruiken, zult u eerst het batterijpak moeten
opladen.
Deze camcorder werkt alleen met een
“InfoLITHIUM” batterijpak (type NP-FF70).
Zie blz. 266 voor nadere informatie over het
“InfoLITHIUM” batterijpak.
(1)Open het klepje over de aansluitingen en sluit
de bij uw camcorder geleverde
netspanningsadapter aan op de DC IN
gelijkstroomingang, met het v driehoekje op
de stekker onderaan.
(2)Sluit het netsnoer aan op de
netspanningsadapter.
(3)Steek de stekker van het netsnoer in het
stopcontact.
(4)Zet de POWER schakelaar in de “(CHG) OFF”
stand.
Het CHG oplaadlampje gaat branden
wanneer het opladen begint. Nadat het
opladen voltooid is, dooft het CHG
oplaadlampje (volledig opladen).
Na opladen van het batterijpak
Maak de netspanningsadapter los van de DC IN
aansluiting van uw camcorder.
Stap 1: Voorbereiden van de
stroomvoorziening
Charging the battery pack
Charge the battery pack before using your
camcorder.
Your camcorder operates only with the
“InfoLITHIUM” battery pack (NP-FF70).
See page 266 for details of the “InfoLITHIUM”
battery pack.
(1)Open the jack cover and connect the supplied
AC power adaptor to the DC IN jack on your
camcorder with the plug’s v mark facing
down.
(2)Connect the mains lead to the AC power
adaptor.
(3)Connect the mains lead to a wall socket.
(4)Set the POWER switch to (CHG) OFF.
The battery CHG lamp lights up when the
charge begins. After charging is completed,
the battery CHG lamp goes off (full charge).
After charging the battery pack
Disconnect the AC power adaptor from the DC
IN jack on your camcorder.
Step 1 Preparing the power
supply
2
3
1
4
MEMORY/NETWORK
CAMERA
POWER
(CHG)
OFF
ON
MODE
VCR
Battery CHG lamp/
CHG batterij-oplaadlampje
To a wall socket/
Stekker in het stopcontact
28
Opmerking
Zorg dat er geen metalen voorwerpen tegen de
metalen contactvlakken van de
gelijkstroomstekker van de netspanningsadapter
komen. Dit kan kortsluiting veroorzaken en de
netspanningsadapter beschadigen.
Als tijdens het opladen van het batterijpak het
CHG lampje gaat knipperen:
Wellicht is het batterijpak niet goed
aangebracht.
Misschien is er iets mis met het batterijpak zelf.
Of de omgevingstemperatuur is erg hoog of erg
laag.
Bij gebruik van de netspanningsadapter
Plaats de netspanningsadapter in de buurt van
een goed bereikbaar stopcontact. Als er tijdens
gebruik van de netspanningsadapter iets mis
gaat, trekt u dan zo spoedig mogelijk de stekker
uit het stopcontact om de stroom af te sluiten.
De tabel toont het aantal minuten dat het
opladen van een leeg batterijpak ongeveer duurt
bij een temperatuur van 25°C.
Het opladen kan meer tijd vergen als de batterij
erg warm of koud is, bij erg hoge of lage
omgevingstemperaturen.
Dit is ongeveer het aantal minuten dat u kunt
opnemen met een volledig opgeladen batterijpak.
* Gebruiksduur in minuten bij benadering, bij
filmen met herhaaldelijk starten/stoppen van
het opnemen, in/uit-zoomen en in/
uitschakelen van de stroom. De gebruiksduur
van het batterijpak kan in de praktijk korter
uitvallen.
Stap 1: Voorbereiden van de
stroomvoorziening
Note
Prevent metallic objects from coming into contact
with the metal parts of the DC plug of the AC
power adaptor. This may cause a short-circuit,
damaging the AC power adaptor.
While charging the battery pack, the battery
CHG lamp flashes in the following cases:
The battery pack is not inserted correctly.
Something is wrong with the battery pack.
The ambient temperature is extremely high or
low.
When you use the AC power adaptor
Place the AC power adaptor near the wall socket.
If any trouble occurs with this unit, disconnect
the plug from the wall socket as soon as possible
to cut off the power.
Approximate minutes at 25°C (77°F) to charge an
empty battery pack
The charging time may increase if the battery’s
temperature is extremely high or low because of
the ambient temperature.
Approximate minutes when you use a fully
charged battery
* Approximate recording time when you repeat
recording start/stop, zooming and turning the
power on/off. The actual battery life may be
shorter.
Step 1 Preparing the power
supply
Charging time/Vereiste oplaadtijd
Battery pack/Batterijpak Full charge/Volledige lading
NP-FF70 (supplied)/(bijgeleverd) 150
Recording time/Beschikbare opnameduur
Recording with the
Recording with the LCD screen/
viewfinder/
Opnemen met het LCD scherm
Opnemen met de zoeker
Battery pack/ Backlighting on/ Backlighting off/
Batterijpak Schermverlichting aan Schermverlichting uit
Continuous/ Typical*/ Continuous/ Typical*/ Continuous/ Typical*/
Continu Gemiddeld* Continu Gemiddeld* Continu Gemiddeld*
NP-FF70
140 75 120 65 140 75
(supplied)/(bijgeleverd)
  • Page 1 1
  • Page 2 2
  • Page 3 3
  • Page 4 4
  • Page 5 5
  • Page 6 6
  • Page 7 7
  • Page 8 8
  • Page 9 9
  • Page 10 10
  • Page 11 11
  • Page 12 12
  • Page 13 13
  • Page 14 14
  • Page 15 15
  • Page 16 16
  • Page 17 17
  • Page 18 18
  • Page 19 19
  • Page 20 20
  • Page 21 21
  • Page 22 22
  • Page 23 23
  • Page 24 24
  • Page 25 25
  • Page 26 26
  • Page 27 27
  • Page 28 28
  • Page 29 29
  • Page 30 30
  • Page 31 31
  • Page 32 32
  • Page 33 33
  • Page 34 34
  • Page 35 35
  • Page 36 36
  • Page 37 37
  • Page 38 38
  • Page 39 39
  • Page 40 40
  • Page 41 41
  • Page 42 42
  • Page 43 43
  • Page 44 44
  • Page 45 45
  • Page 46 46
  • Page 47 47
  • Page 48 48
  • Page 49 49
  • Page 50 50
  • Page 51 51
  • Page 52 52
  • Page 53 53
  • Page 54 54
  • Page 55 55
  • Page 56 56
  • Page 57 57
  • Page 58 58
  • Page 59 59
  • Page 60 60
  • Page 61 61
  • Page 62 62
  • Page 63 63
  • Page 64 64
  • Page 65 65
  • Page 66 66
  • Page 67 67
  • Page 68 68
  • Page 69 69
  • Page 70 70
  • Page 71 71
  • Page 72 72
  • Page 73 73
  • Page 74 74
  • Page 75 75
  • Page 76 76
  • Page 77 77
  • Page 78 78
  • Page 79 79
  • Page 80 80
  • Page 81 81
  • Page 82 82
  • Page 83 83
  • Page 84 84
  • Page 85 85
  • Page 86 86
  • Page 87 87
  • Page 88 88
  • Page 89 89
  • Page 90 90
  • Page 91 91
  • Page 92 92
  • Page 93 93
  • Page 94 94
  • Page 95 95
  • Page 96 96
  • Page 97 97
  • Page 98 98
  • Page 99 99
  • Page 100 100
  • Page 101 101
  • Page 102 102
  • Page 103 103
  • Page 104 104
  • Page 105 105
  • Page 106 106
  • Page 107 107
  • Page 108 108
  • Page 109 109
  • Page 110 110
  • Page 111 111
  • Page 112 112
  • Page 113 113
  • Page 114 114
  • Page 115 115
  • Page 116 116
  • Page 117 117
  • Page 118 118
  • Page 119 119
  • Page 120 120
  • Page 121 121
  • Page 122 122
  • Page 123 123
  • Page 124 124
  • Page 125 125
  • Page 126 126
  • Page 127 127
  • Page 128 128
  • Page 129 129
  • Page 130 130
  • Page 131 131
  • Page 132 132
  • Page 133 133
  • Page 134 134
  • Page 135 135
  • Page 136 136
  • Page 137 137
  • Page 138 138
  • Page 139 139
  • Page 140 140
  • Page 141 141
  • Page 142 142
  • Page 143 143
  • Page 144 144
  • Page 145 145
  • Page 146 146
  • Page 147 147
  • Page 148 148
  • Page 149 149
  • Page 150 150
  • Page 151 151
  • Page 152 152
  • Page 153 153
  • Page 154 154
  • Page 155 155
  • Page 156 156
  • Page 157 157
  • Page 158 158
  • Page 159 159
  • Page 160 160
  • Page 161 161
  • Page 162 162
  • Page 163 163
  • Page 164 164
  • Page 165 165
  • Page 166 166
  • Page 167 167
  • Page 168 168
  • Page 169 169
  • Page 170 170
  • Page 171 171
  • Page 172 172
  • Page 173 173
  • Page 174 174
  • Page 175 175
  • Page 176 176
  • Page 177 177
  • Page 178 178
  • Page 179 179
  • Page 180 180
  • Page 181 181
  • Page 182 182
  • Page 183 183
  • Page 184 184
  • Page 185 185
  • Page 186 186
  • Page 187 187
  • Page 188 188
  • Page 189 189
  • Page 190 190
  • Page 191 191
  • Page 192 192
  • Page 193 193
  • Page 194 194
  • Page 195 195
  • Page 196 196
  • Page 197 197
  • Page 198 198
  • Page 199 199
  • Page 200 200
  • Page 201 201
  • Page 202 202
  • Page 203 203
  • Page 204 204
  • Page 205 205
  • Page 206 206
  • Page 207 207
  • Page 208 208
  • Page 209 209
  • Page 210 210
  • Page 211 211
  • Page 212 212
  • Page 213 213
  • Page 214 214
  • Page 215 215
  • Page 216 216
  • Page 217 217
  • Page 218 218
  • Page 219 219
  • Page 220 220
  • Page 221 221
  • Page 222 222
  • Page 223 223
  • Page 224 224
  • Page 225 225
  • Page 226 226
  • Page 227 227
  • Page 228 228
  • Page 229 229
  • Page 230 230
  • Page 231 231
  • Page 232 232
  • Page 233 233
  • Page 234 234
  • Page 235 235
  • Page 236 236
  • Page 237 237
  • Page 238 238
  • Page 239 239
  • Page 240 240
  • Page 241 241
  • Page 242 242
  • Page 243 243
  • Page 244 244
  • Page 245 245
  • Page 246 246
  • Page 247 247
  • Page 248 248
  • Page 249 249
  • Page 250 250
  • Page 251 251
  • Page 252 252
  • Page 253 253
  • Page 254 254
  • Page 255 255
  • Page 256 256
  • Page 257 257
  • Page 258 258
  • Page 259 259
  • Page 260 260
  • Page 261 261
  • Page 262 262
  • Page 263 263
  • Page 264 264
  • Page 265 265
  • Page 266 266
  • Page 267 267
  • Page 268 268
  • Page 269 269
  • Page 270 270
  • Page 271 271
  • Page 272 272
  • Page 273 273
  • Page 274 274
  • Page 275 275
  • Page 276 276
  • Page 277 277
  • Page 278 278
  • Page 279 279
  • Page 280 280
  • Page 281 281
  • Page 282 282
  • Page 283 283
  • Page 284 284
  • Page 285 285
  • Page 286 286
  • Page 287 287
  • Page 288 288
  • Page 289 289
  • Page 290 290
  • Page 291 291
  • Page 292 292
  • Page 293 293
  • Page 294 294
  • Page 295 295
  • Page 296 296

Sony DCR-IP210E User manual

Category
Camcorders
Type
User manual
This manual is also suitable for

Ask a question and I''ll find the answer in the document

Finding information in a document is now easier with AI

in other languages