Page is loading ...

1
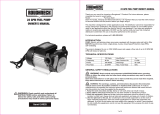
Owner’s Manual
Brave Hydra Buddy™ Hydraulic Power Pack
OPERATION AND MAINTENANCE
About Your Hydraulic Power Pack
Product Suitability and Limitations
Our self-contained hydraulic power units are compact and offer portable hydraulic power for remotely powering
hydraulic equipment. Our power units can also be mounted into equipment as a primary hydraulic power source given
the flow, pressure, reservoir capacity, and duty cycle are carefully considered. Typical applications include agriculture,
construction, trades, lifting, jacking, equipment repair, and fabrication work.
HBHR units come factory with a 4-way directional control valve with integral system relief valve. HBHR units are
equipped with ½” quick-disconnects that are installed into the work ports of the directional control valve. HBHS units
come factory with a system relief valve.
The HBHS units can also be field retrofitted to include optional bulkhead mounted ½” quick-disconnects with
appropriate plumbing kit, and a single 4-way directional control valve with integral relief valve.
The HBHS units driven by the Honda GX630 V-Twin engine can also be field retrofitted with a return line heat
exchanger for applications that run more continuous and require additional cooling of the hydraulic fluids. The return
line heat exchanger kit comes with a mounting bracket assembly, 12 VDC fan cooler, appropriate plumbing, wire
harness, and hardware.
Each unit has a specific flow and pressure rating that should be carefully reviewed to ensure the power pack will provide
adequate system flow, pressure, & reservoir capacity for the given application being considered.
Only the HPHS units with the Honda V-Twin engine can support the 12 Volt heat exchanger (cooler) due to the required
amp draw from the 12 VDC fan and on-board charging system of the Honda GX630 engine.
Power packs without a return cooler should not be used in applications where hydraulic oil temperatures exceed 180
degrees F for any amount of time. If the hydraulic system reaches 180 degrees F. the system should be shut down
immediately and the application should be reviewed.
Contact Brave Customer Service at 1-800-350-8739 about the appropriate use of this Hydraulic Power Pack, optional
accessories or any other questions.
Hydraulic Hose and Fitting Requirements
The rated working pressure of hydraulic hoses must be equal to or higher than the maximum pressure rating of the
hydraulic unit. Each of the HBHR and HBHS units have a unique pressure rating they are capable of achieving. Please
refer to the specific assembly flow and pressure rating and size hydraulic hose and fittings appropriately.
½” quick-disconnects can be provided for each HBHS unit upon request. If the couplers provided do not interchange
with the powered equipment, replace with couplers that match. Brave recognizes that couplers are a necessity for
quickly connecting and disconnecting equipment however feel that if the self-contained power pack is mounted into a
piece of equipment for final assembly that quick-disconnects, adapter fittings, and hydraulic hose plumbing are carefully
reviewed to maximize the performance of the hydraulic system. Adding unnecessary couplers, adapter fittings, etc. will
increase pressure drop in a hydraulic system and reduce the efficiency of the hydraulic system.
MHBHR280A
Model Number: HBHR280GX, HBHR350GX,
HBHS300GX, HBHS310GX, HBHS600GXE,
HBHS610GXE, HBHS620GXE

2
Warranty Registration
Please fill in the warranty registration information in the back of this manual and have it on hand when you call in about
a warranty claim or for replacement parts you may need.
Renting or Loaning
NOTICE: Make Owner’s Manual Available
All persons to whom you rent/loan the Hydraulic Power Pack must have access to and read this manual. Keep
this owner’s manual with the Hydraulic Power Pack at all times and advise all persons who will operate the
machine to read it. You must also provide instruction on how to safely operate the Hydraulic Power Pack and
remain available to answer any questions a renter/borrower might have.
Any Questions, Comments, Problems, or Parts Orders
Call your dealer or Brave Customer Service 1-800-350-8739

3
Table of Contents
About Your Hydraulic Power Pack............................................................................................................................................. 1
Receiving and Transporting ......................................................................................................................................................... 4
Machine Component Identification ........................................................................................................................................... 5
Specifications ..................................................................................................................................................................................... 6
Safety .................................................................................................................................................................................................... 7
Safety Decal Locations .................................................................................................................................................................... 8
Safety Decals ...................................................................................................................................................................................... 9
Operation ......................................................................................................................................................................................... 10
Starting and Warm-up Before Use .......................................................................................................................................... 12
Using Hydraulic Motor Implement ......................................................................................................................................... 13
Using Hydraulic Cylinder Implement..................................................................................................................................... 15
Refueling .......................................................................................................................................................................................... 17
Storing ............................................................................................................................................................................................... 18
Maintenance & Repair ................................................................................................................................................................. 20
Troubleshooting ............................................................................................................................................................................ 22
Summary of Important Safety Information ......................................................................................................................... 24
Special Safety Information on Static Electricity ................................................................................................................. 28
HBHR350GX & HBHR280GX Exploded View – Rev A ........................................................................................................ 29
HBHR350GX & HBHR280GX Parts List - Rev A ................................................................................................................... 30
HBHS300GX & HBHS310GX Exploded View – Rev A ......................................................................................................... 31
HBHS300GX & HBHS310GX Parts List - Rev A..................................................................................................................... 32
HBHS600GXE, HBHS610GXE, & HBHS620GXE Exploded View – Rev A ...................................................................... 33
HBHS600GXE, HBHS610GXE, & HBHS620GXE Parts List - Rev A ................................................................................. 34
Limited Warranty Policy ............................................................................................................................................................ 35
California Proposition 65 Information……………………………………………………………………………………………………...38

4
Receiving and Transporting
Initial Inspection: Regardless of the source, immediately inspect the Hydraulic Power Pack for damage or any
missing components. See the “Machine Component Identification” section of this manual for a diagram of the
Hydraulic Power Pack and its components.
Your purchase will result in delivery through one of the following sources:
Truck Delivery
Note: Shipping damage claims are not covered by Brave warranty.
For any shipping damage, make sure the delivery driver acknowledges the
damage and notes the damage on the shipping documents.
Some assembly may be required with truck delivery. This is detailed in the
“Operation: Pre-Start Checklist” section.
Store Purchase
Some assembly may be required. This is detailed in the “Operation: Pre-Start
Checklist” section.
From a Dealer
Your unit should have been delivered completely assembled and ready to
run.
Read the “Operation: Pre-Start Checklist” section and verify that the unit has
been properly ‘prepped’ before initial use.
Transporting: The Hydraulic Power Pack should be secured to prevent rolling and tipping when transporting
in a vehicle or trailer.
Any Questions, Comments, Problems, or Parts Orders
Call your dealer or Brave Customer Service 1-800-350-8739

5
Machine Component Identification
Reference
Part Description
1
Hydraulic Tank
2
Hydraulic Fill Cap
3
Control Valve Handle (HBHR only)
4
Return Line Filter
5
Control Valve (HBHR only)
6
Hydraulic Pump
7
*Engine
8
Sight Gauge
9
Fuel Tank
10
Engine On/Off Switch
11
Nameplate/serial number
4
1
8
4
6
6
7
7
7
2
3
10
5
^6
1
9
10
HBHS300GX and HBHS310GX
11
11
2
HBHS600GXE, HBHS610GXE, and HBHS620GXE
2
1
*See Engine Manual for Engine Component Identification
^Pump is located in tank
4
HBHR280GX and HBHR350GX
8
8
9
9
10
11

6
Specifications
HBHR280GX
HBHR350GX
HBHS300GX
HBHS310GX
HBHS600GXE
HBHS610GXE
HBHS620GXE
Engine
Honda GX270
Honda GX390
Honda GX390
Honda GX390
Honda GX630
Honda GX630
Honda GX630
Engine Oil Type
Use Engine Manufacturer’s Recommended Oil
Pump Capacity
5.5 GPM
7 GPM
5 GPM
7 GPM
9 GPM
12 GPM
14 GPM
Pump Displacement
.36 CIR
.51 CIR
.36 CIR
.51 CIR
.66 CIR
.88 CIR
1.02 CIR
Hydraulic Fluid Type
AW32 or ISO 32 Recommended. ISO 46 can be used in warmer climate applications
Hydraulic Tank Volume
(nominal, actual, useable)
8, 7.3, 5.4
15, 13.6, 10.3
9.7, 8.5, 5.75
9.7, 8.5, 5.75
19.2, 17.5, 13.5
19.2, 17.5, 13.5
19.2, 17.5, 13.5
Hydraulic Tank Material
12 gauge steel
Hydraulic Relief Setting
2000 PSI
2000 PSI
3000 PSI
2000 PSI
3000 PSI
2250 PSI
2000 PSI
Hydraulic Valve Type
3-position, 4-way spring to center
direction control valve with integral
adjustable main relief valve
N/A (kits available)
Connection Ports
ISO 7241-1
Series A
interchange
ISO 7241-1
Series A
interchange
Return, Female
-12 SAE ORB;
Supply, Male -8
JIC
Return, Female
-12 SAE ORB;
Supply, Male -8
JIC
Return, Female
-20 SAE ORB;
Supply, Male -8
JIC
Return, Female
-20 SAE ORB;
Supply, Male -8
JIC
Return, Female
-20 SAE ORB;
Supply, Male -8
JIC
Filter Replacement Part
Number
1090490
1090490
1090169
1090169
1090368
1090368
1090368
Overall Dimensions
38.25” L x 19”
W x 20” H
44.50” L x 24.5”
W x 20” H
44” L x 24.5”
W x 26” H
44” L x 24.5”
W x 26” H
48” L x 24.5”
W x 43” H
48” L x 24.5”
W x 43” H
48” L x 24.5”
W x 43” H
Dry Weight
155 lbs.
198 lbs.
240 lbs.
240 lbs.
368 lbs.
368 lbs.
368 lbs.

7
Safety
Hazard Signal Word Definitions
This is the safety alert symbol. It is used to alert you to
potential personal injury hazards. Obey all safety
messages that follow this symbol to avoid possible
injury or death.
DANGER
DANGER (red) indicates a hazardous situation, which if
not avoided, will result in death or serious injury.
WARNING
WARNING (orange) indicates a hazardous situation,
which if not avoided, could result in death or serious
injury.
CAUTION
CAUTION (yellow), used with the safety alert symbol,
indicates a hazardous situation, which if not avoided,
could result in minor or moderate injury.
CAUTION
CAUTION (yellow), without the safety alert symbol, is
used to address practices not related to personal injury.
NOTICE
NOTICE is used to address practices not related to
personal injury.

8
HBHS600GXE, HBHS610GXE, and HBHS620GXE
Safety Decal Locations
WARNING
ALWAYS make sure safety labels are in place and in good condition. If a safety label is missing or not legible,
order new labels from Brave Customer Service at 1-800-350-8739.
Ref#
Part#
Part Description
Model
1
800119
Control Handle
HBHR280GX, HBHR350GX
2
788937
Carbon Monoxide Warning
HBHR280GX, HBHR350GX,
HBHS300GX, HBHS310GX
3
787387
Fire Hazard Warning
All
4
786635
Muffler Warning
All
5
787637
Inspect Lubricate
All
6
800069
Hydraulic Fill
All
7
787395
Hydraulic Fluid Warning
All
8
799546
Proposition 65
All
9
800249
Gasoline Only
HBHS600GXE, HBH610GXE,
HBH620GXE
HBHS300GX and HBHS310GX
3
4
6
7
HBHR280GX and HBHR350GX
6
7
8
1
2
4
6
7
8
3
5
5
8
2
9
3
4
5

9
Safety Decals
WARNING
ALWAYS make sure safety labels are in place and in good condition. If a safety label is missing or not legible,
order new labels.
Any Safety Questions, Comments or Problems
Call your dealer or Brave Customer Service 1-800-350-8739
3
4
5
6
7
1
2
1
8
9
1

10
Operation
Pre-Start Checklist
CAUTION: No Oil in Engine Crankcase
Add the correct amount of oil to engine crankcase or engine will be damaged beyond repair and not covered by
warranty.
CAUTION: No Hydraulic Oil in Tank
Add the correct amount of hydraulic oil to the reservoir before use.
1. All HBHS600 series units will require the fuel system to be mounted to the fuel tank bracket; all
HBHS300 series units will require the oil filter head and canister be installed; all HBHR units will
require the valve handle be mounted and quick connect fittings be installed (if desired).
2. Check / add engine crankcase oil
3. Check / add hydraulic oil
4. Inspect hydraulic system (with engine off)
5. Check Implement Hydraulic System
6. Fill engine gasoline tank (upper tank)
7. Inspect fuel system for leaks (with engine off)
These procedures are discussed in detail below:
1. See separate assembly instruction insert applicable to your unit.
2. Check / add engine crankcase oil
• Check the oil level daily using the dipstick and add oil as needed.
• Using a funnel, add oil up to the FULL mark on the dipstick with the recommended oil type for your
engine and expected ambient conditions.
• Replace engine crankcase fill cap to finger tight.
• (See engine Owner’s Manual for oil type and capacity, and more detailed oil check/fill instructions.)
3. Check / add hydraulic oil
• Verify that the oil is at the top of the gauge on the hydraulic reservoir.
• If hydraulic oil level is low: Remove hydraulic tank fill cap and add 10 wt. AW32, ASLE H-150, or
ISO 32 oil up to the top of the gauge.
• Replace hydraulic tank fill cap.
WARNING: Hot Oil Hazard
NEVER remove the hydraulic oil fill cap when the engine is running or hot. Hot oil can escape causing severe
burns. Allow the Hydraulic Power Pack to cool completely before removing hydraulic oil fill cap.
NOTICE: Attached Implement Hydraulic Oil: Refer to the attached implement owner’s manual for its recommended
oil. If you are using an implement that requires different oil, it may be incompatible with the above recommended oil,
contact Brave.
4. Inspect hydraulic system (with engine off)
• Visually inspect all Hydraulic Power Pack hoses, tubing, clamps/fittings, pump, and cylinder for
cracks, fraying, kinks, or other damage.
• Check all components for oily residue, which may indicate a leak.
• Do NOT operate the Hydraulic Power Pack if there is any indication of damage or oily residue.

11
Operation (Continued)
5. Check implement hydraulic system
Check hydraulic system and lines of the implement to be attached to the Hydraulic Power Pack. Small
leaks in hydraulic lines can be an indication of catastrophic failure in the near future. The life of
hydraulic hoses may be from a few months to a few years, depending on use and storage patterns.
WARNING: Pressurized Fluid Hazard
High fluid pressures and temperatures are developed in Hydraulic Power Packs.
NEVER check for leaks with your hand. Leaks can be located by holding a piece of cardboard or wood (at least
two feet long) with your hand at one end and passing the other end over the suspected area (wear eye
protection). Look for discoloration on the cardboard or wood.
STOP the engine, disconnect the spark plug, and move all control valve handles back and forth to relieve
pressure before changing or adjusting hydraulic system components such as hoses, tubing, fittings, or other
components.
NEVER adjust the pressure setting of the pump or valve
Hydraulic fluid escaping through a pin-sized opening can burn or puncture skin, resulting in wounds that could
cause blood poisoning, infection, disability, gangrene, amputation, or death.
If injured by escaping fluid, no matter how small the wound is, see a doctor at once. A typical injection injury
may be a small puncture wound that does not look serious. However, severe infection or reaction can result if
proper medical treatment is not administered immediately by a doctor who is familiar with injection injuries.
6. Fill engine gasoline tank (the upper tank)
• Check gasoline tank level.
• Fill tank with fresh unleaded gasoline from a UL approved portable container.
WARNING: Gasoline Vapor Hazard While Fueling
Gasoline is highly flammable and explosive. Heat, sparks, and flames can ignite gasoline vapors which spread
over a large area during fueling. A flash fire ignition and/or explosion will likely result in serious injury or death.
The following conditions could result in gasoline ignition/explosion:
Refueling and refueling spills
Gas vapor collection inside enclosures
Static electric sparks
Sparks from electric wiring, batteries, or running engines
Sources of heat (such as a hot engine exhaust)
Open flames, including pilot lights
7. Inspect fuel system for leaks (with engine off)
Inspect the entire fuel system. Look for signs of: leaks or deterioration; chafed or spongy fuel hose; loose
connections; loose or missing fuel hose clamps; damaged gasoline tank; or a defective gasoline shut-off
valve.
WARNING: Fuel Leak Hazard
A leaking fuel line or spilled fuel no matter how small can be the source of a fire or explosion when starting or
operating the engine.
If Hydraulic Power Pack is in an enclosed area and you smell gas, DO NOT start engine! DO NOT light a
match. DO NOT flip on an electrical switch.
Exit area immediately leaving doors open and call fire department.

12
Starting and Warm-up Before Use
1. If the hydraulic power unit is equipped with a directional control valve, place the Hydraulic
valve handle in the neutral position. If unit not equipped with a directional control valve,
skip directly to step 6.
CAUTION: HBHS users without installed directional control valve
If the unit is not equipped with a directional control valve, please ensure the power unit is properly plumbed to
the powered equipment prior to attempting to start the engine. Unit cannot be run without implement attached.
Damage to engine and hydraulic components can occur.
2. Start the engine per the manufacturer’s instructions.
3. Once the engine has started, move the throttle down to the mid-range position and allow the
engine to run for ten (10) minutes to warm engine and hydraulic oil.
4. Turn engine off.
5. Clear line pressure by moving the Hydraulic Power Pack valve (if equipped) to the forward
position for four (4) or five (5) seconds, then to the reverse position for four (4) or five (5)
seconds to relieve pressure.
6. Attach implement’s hydraulic hoses (if applicable).
Your Hydraulic Power Pack is now ready for attachment to an implement.
For units that are plumbed directly to equipment, without a valve on the power pack, see the following
diagrams which show the supply and return ports and what type of connection is provided at these ports.
Remove port plugs/caps in order to attach to these ports.
WARNING: Personal Protective Equipment
Never use the Hydraulic Power Pack or any powered equipment without proper protective equipment, such as
eye protection.
HBHS300GX and HBHS310GX
HBHS600GXE, HBHS610GXE, and HBHS620GXE
Return, Female
-12 SAE ORB
Return, Female
-20 SAE ORB
Supply, Male -8 JIC
Supply, Male -8 JIC

13
Using Hydraulic Motor Implement
NOTICE: Match Quick Disconnect Couplers
If necessary, replace coupler fittings with implement-matching couplers. Brave does not recommend using
multiple adapters; they may restrict flow and limit operation.
1. Connect Hoses (Engine Off)
• Before connecting your implement hoses to the Hydraulic Power Pack, you must determine which hose
is the pressure or forward acting hose. Consult your implement owner’s manual or labels to determine
which hose is the “SUPPLY” hose.
• Models HBHR are equipped with a spring to center 3 position 4-way hydraulic valve. The handle will
center itself to neutral when the operator removes his hand from the valve. This type of valve can cycle
both hydraulic cylinders and hydraulic motors. Refer to the diagram below to determine what port is
supply and return when the handle is shifted in either direction. Exercise caution when powering
equipment where damage can occur if the oil flow is reversed. Understand the flow of oil with respect
to the handle operation on your power unit if equipped with a directional control valve.
• Models HBHS can be ordered with quick coupler plumbing kits, directional control valve plumbing
kits, and HBHS600 units can be equipped with a return line heat exchanger kit. Please refer to the kit
directions to determine the supply & return ports of the directional control valve or quick coupler
plumbing kit.
2. Start Engine:
• If equipped with control valves, confirm the valve handle is in the neutral position.
• If equipped without a control valve, confirm supply and return lines are properly plumbed to the driven
equipment safely and securely.
• Start engine per manufacturer’s instructions.
• Place the engine throttle control lever in the fast position.
3. Normal Operation Mode:
• Forward-Reverse operations are activated when the operator cycles the spring to center valve (if
equipped) on the power unit. If the power unit isn’t equipped with a directional control valve, please
refer to the power equipment owner’s manual for proper operation of the power equipment.
CAUTION: Reverse Operation Equipment Damage
The Hydraulic Power Pack has a bidirectional valve that allows you to reverse the direction of an implement
motor (or pump). Before using the reverse feature, consult your implement owner’s manual to make sure the
motor (or pump) can be reversed. Using reverse oil flow in a non-reversing pump or motor can result in damage
to your implement.
Forward
Port A
Port B
Reverse
Port A
Flow
Port B
• Port B is Supply and Port A is Return when lever
is actuated in the Forward direction.
• Port A is Supply and Port B is Return when lever
is actuated in the Reverse direction.

14
Using Hydraulic Motor Implement (Continued)
4. Stopping or Removing Attached Implement with Hydraulic Motor:
• To turn off the engine, verify the valve handle is in the center (neutral) position which should cause the
hydraulic motor to come to a complete stop.
• Turn the engine off using on/off switch located on engine.
• Confirm the hydraulic motor has come to a complete stop.
• Operate any switches or valves in the system to relieve pressure.
• Move the Hydraulic Power Pack valve handle to the forward position for four (4) to five (5) seconds,
then to the reverse position for four (4) to five (5) seconds to relieve pressure.
• Operate any other valves or switches on accessory items to relieve pressure.
• If hoses are connected with quick disconnects, disconnect the hoses.

15
Using Hydraulic Cylinder Implement
NOTICE: Match Quick Disconnect Couplers
If necessary, replace coupler fittings with implement-matching couplers. Brave does not recommend adapters;
they may restrict flow and limit operation.
1. Connect Hoses (Engine Off)
• Before connecting your implement hoses to the Hydraulic Power Pack, you must determine which hose
is the pressure or forward acting hose. Consult your implement owner’s manual or labels to determine
which hose is the “SUPPLY” hose.
• Models HBHR are equipped with a spring to center 3 position 4-way hydraulic valve. The handle will
center itself to neutral when the operator removes his hand from the valve. This type of valve can cycle
both hydraulic cylinders and hydraulic motors. Refer to the diagram below to determine what port is
supply and return when the handle is shifted in either direction. Exercise caution when powering
equipment where damage can occur if the oil flow is reversed. Understand the flow of oil with respect
to the handle operation on your power unit if equipped with a directional control valve.
• Models HBHS can be ordered with quick coupler plumbing kits, directional control valve plumbing
kits, and HBHS600 units can be equipped with a return line heat exchanger kit. Please refer to the kit
directions to determine the supply & return ports of the directional control valve or quick coupler
plumbing kit.
WARNING: Crush Hazard
The Hydraulic Power Pack valve does not have a positive locking device to hold the cylinder in position. Always
use a mechanical lock to prevent the cylinder from creeping/drifting.
WARNING
Applications with large cylinders can excessively deplete the Hydraulic Power Pack’s hydraulic tank.
DO NOT use this unit in applications where more than 75% of the hydraulic fluid is purged from the hydraulic
tank or with a cylinder storing a larger oil reserve than the Hydraulic Power Pack.
DO NOT attempt to add more hydraulic fluid during operation to extend the hydraulic capacity.
Failure to follow these warnings could result in damage to property/equipment, personal injury, and death in
serious cases.
Forward
Port A
Port B
Reverse
Port A
Port B
• Port B is Supply and Port A is Return when lever
is actuated in the Forward direction.
• Port A is Supply and Port B is Return when lever
is actuated in the Reverse direction.

16
Using Hydraulic Cylinder Implement (Continued)
2. Start Engine:
• Confirm the valve handle is in the neutral position (all units used to run cylinders should have a valve
present in the system).
• Confirm supply and return lines are properly plumbed to the driven equipment safely and securely.
• Start engine per manufacturer’s instructions.
• Place the engine throttle control lever in the fast position.
3. Normal Operation:
• To raise the cylinder, push the handle in the forward direction until the desired height is reached, then
release the handle (it will automatically return to the center position). Important: block or lock the
implement at the desired height. If the implement is not locked into position, the Hydraulic Power
Pack will allow the cylinder to drift.
• To lower the cylinder, push the handle in the reverse direction until the desired height is reached, then
release the handle (it will automatically return to the center position).
4. To Stop or Remove Attached Implement with Hydraulic Cylinder(s):
• To remove the unit, first place the implement cylinder in the fully retracted position (so the rod is inside
the cylinder barrel).
• Then, verify the valve handle is in the center (neutral) position.
• Turn the engine off using on/off switch located on engine.
• Move the valve handle to the forward position for four (4) to five (5) seconds, then to the reverse
position for four (4) to five (5) seconds to release system pressure.
• If hoses are connected with quick disconnects, disconnect the hoses.

17
Refueling
WARNING: Fire Hazard
Allow the engine to cool for at least five (5) minutes before refueling, moving to storage or transporting. A hot
engine can be a fire hazard.
Refueling at Work Sites:
• Before removing gas cap, turn engine off and allow to cool for at least FIVE (5) minutes.
• Remove gasoline cap
• Use only a UL-approved portable gasoline container to transfer the gasoline to the Hydraulic Power
Pack’s gas tank
• Add gasoline through the fill opening
• Clean up gasoline spills /splashes immediately
• Replace gasoline cap securely
• If possible, move the Hydraulic Power Pack away from spilled gasoline on the ground
• Wipe up spilled gasoline and wait five (5) minutes for excess gasoline to evaporate before starting
engine
• Gasoline soaked rags are flammable and should be disposed of properly
• If gasoline is spilled on your skin or clothes, wash skin and change clothes immediately
• Store extra gasoline in a cool, dry place in a UL listed, tightly sealed container
Refueling at Gas Stations:
WARNING: Static Electric Spark Hazard
A static electric spark can explosively ignite gasoline vapor, resulting in a flash fire that could cause serious
injury or death. See “Special Safety Information on Static Electricity” at end of this manual.
• Use only a UL listed portable gasoline containers
• Never fill the gasoline tank directly from the fuel pump. The tank is not grounded and high velocity
flow from the pump can cause static electricity build-up.
• Use a portable container made of metal or conductive plastic. This is preferred because it dissipates
static charge to ground more readily.
• ALWAYS place container on the ground to be filled. Never fill a portable gasoline container while it
is sitting inside a vehicle, trailer, trunk, or pick-up truck bed.
• Keep nozzle in contact with container while filling. Do not use a nozzle lock-open device.

18
Storing
Allow engine to cool before inspecting and storing
1. Inspect for worn or damaged parts
2. Choose a covered storage location
3. Start engine every 4 weeks;
-OR-
4. Prepare engine for long-term (seasonal) storage if needed.
1. Inspect for worn or damaged parts:
Inspect the Hydraulic Power Pack for worn or damaged parts and tighten any nuts or screws that may have
become loose. Check for any fuel or hydraulic system leaks.
2. Choose a covered storage location:
Store the Hydraulic Power Pack in a location that is:
• Clean and dry.
• Away from sources of heat, open flames, sparks, and pilot lights, even if the gas tank is empty.
(Residual gasoline fumes can still ignite)
• Away from extreme high or low temperatures.
• Cover for extra protection.
WARNING: Stored Gasoline Vapor Fire Hazard
Gasoline is highly flammable and explosive. Drain the fuel into an approved container OUTDOORS and far
away from open flame.
NEVER store an engine with fuel in the tank indoors or in poorly ventilated spaces where fuel vapor can come in
contact with:
Static electric sparks;
Sparks from electric wiring, batteries, or running engines;
Sources of heat (such as hot engine or exhaust);
Open flames, including pilot lights.
3. Start engine every 4 weeks:
For future easy starting and to minimize maintenance requirements, the Hydraulic Power Pack should be
started at least every four weeks and run for 10 to 15 minutes.
Monthly exercising of the engine will dry out any moisture that has accumulated, lubricate cylinders, and clean
out old gas in the carburetor. Moisture, old gas, and dry mechanical parts cause deterioration in stored engines.
CAUTION: HBHS users without installed directional control valve
If the unit is not equipped with a directional control valve, please ensure the power unit is properly plumbed to
the powered equipment prior to attempting to start the engine. Unit cannot be run without implement attached.
Damage to engine or hydraulic components can occur.

19
Storing (Continued)
4. Prepare engine for long-term (seasonal) storage if needed:
If you will not be able to start the engine regularly, you must prepare the engine for long term storage to
prevent gum deposits from forming and causing malfunction of the engine.
Prepare engine for long-term storage by either removing all gasoline from the tank and carburetor, OR by
adding fuel stabilizer to the gasoline. Follow fuel stabilizer manufacturer’s instructions, which usually include
these steps:
• Ensure gas tank is full.
• Add fuel stabilizer to fuel tank.
• Run engine at least 10 minutes after adding stabilizer to allow it to enter the fuel system.
• Shut off engine.
• Disconnect spark plug wire and remove spark plug.
• Add one teaspoon oil through spark plug hole.
• Place rag over spark plug hole and turn starter (or pull the recoil) a few times to lubricate the
combustion chamber.
• Replace spark plug, but do not reconnect the spark plug wire.

20
Maintenance & Repair
Regular Maintenance
Perform regular maintenance to keep the Hydraulic Power Pack in safe and functional working condition.
WARNING
ALWAYS shut off the engine, make sure the engine is cool, and disconnect the spark plug before cleaning,
adjusting, or servicing the Hydraulic Power Pack.
1. Follow safety rules:
Turn off the Hydraulic Power Pack. To prevent accidental starting, always turn off the Hydraulic Power
Pack and remove spark plug or spark plug wire.
Avoid burns. Muffler, crankcase oil and hydraulic oil will remain hot for several minutes even after unit is
stopped. Allow to cool before servicing.
2. Perform periodic engine maintenance:
Perform engine maintenance as specified in the engine owner’s manual. Engine maintenance items include:
• Oil and oil filter changing
• Air filter check/replacement
• Spark plug cleaning and replacement
• Fuel filter check/replacement
• Fuel tank cleaning
3. Inspect fuel system/check for leaks:
Inspect the fuel system and check for leaks on a regular basis.
Look for: signs of leaks or deterioration, chafed or spongy fuel hose, loose connections, loose or missing fuel
hose clamps, damaged gasoline tank, or defective gasoline shut-off valve.
WARNING: Fuel Leak Hazard
A leaking fuel line no matter how small can be the source of a fire or explosion when starting or operating the
engine.
4. Inspect hydraulic system/check for leaks:
The hydraulic system (hoses and pump) should be carefully inspected before each use. Also inspect the
mechanical parts at the same time. Make sure all hoses, clamps, nuts, bolts, fittings, etc., are properly installed
and tightened.
Always replace frayed, kinked, or cracked hoses and/or other damaged hydraulic components with Brave
authorized parts and components specified in the “Parts List” section of this manual.
Should it become necessary to loosen or remove any hydraulic fitting or hose, be sure to relieve all hydraulic
pressure by shutting off the engine, removing spark plug wire, and moving the valve control handle back and
forth several times.
WARNING: Hot Oil Hazard
NEVER remove the hydraulic oil fill cap when the engine is running or hot. Hot oil can escape causing severe
burns. Allow the Hydraulic Power Pack to cool completely before removing hydraulic oil fill cap.
/