Page is loading ...

IMPORTANT NOTE
This Pyroclassic fire is tested to AS/NZS4012 and 4013
and should be installed in accordance to AS/NZS 2918:2001.
We strongly recommend that an approved qualified installer is used to install your Pyroclassic fire.
Under no circumstances should any modification be made, or parts removed.
Doing so will result in voiding the fire’s warranty.
Pyroclassic Fires Ltd
PO Box 14057, Hastings, 4159
Showroom: 917 Karamu Rd, Hastings, 4122
Ph: (06) 877 0175 or 0800 479 762
www.pyroclassic.co.nz
PLEASE ENSURE THIS SET OF INSTRUCTIONS REMAINS WITH THE OWNER TO READ
INSTALLATION INSTRUCTIONS
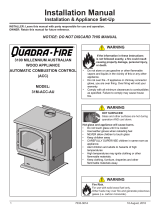
Model: Pyroclassic® IV Wood Burner
Model: Pyroclassic® Mini Wood Burner

Pyroclassic Fires Installation Instructions | Updated June 2017 | 2
TIPS ON INSTALLATION
POSITION THE FIRE
Using the technical specification sheets identify where the Pyroclassic fire is to be situated.
Note: We can supply 2 x 10mm steel rods upon request. Push the rods through the two 11mm
holes located in the front plate and engage the corresponding 11mm holes in the rear plate.
The projecting ends of both rods can now be used as carry rods.
To make the whole unit lighter, the top cooking plate can be carefully removed
.
Replace the
cook top when fire is in position.
INSULATING HEARTH (NOT SUPPLIED BY PYROCLASSIC)
Pyroclassic Fires must sit on an insulating hearth with a minimum distance of 369mm in front of
the heater when the hearth is installed flush with the surrounding combustible floor. The width
of the floor protector shall extend not less than 200mm each side of any ash-removal or fuel
loading openings unless the floor protector forms an abutment with a wall or heat shield at a
lesser distance
. If the fire is centered on the hearth then this would be a minimum width of
680mm. The seismic restraints supplied will need to be installed when using this type of
hearth.
PYROCLASSIC RAISED HEARTH
Using the raised hearth allows the above mentioned 369mm distance at the front of the fuel
loading and ash removal opening to be reduced
.
The Pyroclassic Hearth is raised 250mm from
the floor thus reducing the distance at the front of the door opening to 300mm
.
The Pyroclassic Hearth has a marking hole located on top of the hearth that indicates the exact
centre of the flue, you can use the measurements shown on our technical specifications pages
to help position the hearth prior to installing the fire
.
Place the hearth into position and bolt or
screw into floor in 4 places, (Fixings not supplied, installer to supply suitable fixings) using the
mounting holes provided in the hearth
. Please use the provided black caps to cover the fixing
holes once the hearth has been installed.
Also note that there are 4 cups on the top of the hearth, these cups are used to locate the
adjustable feet on the fire. Split pins are provided for the rear feet only to allow the fire to be
anchored to the hearth, these act as the earthquake restraints meaning you don’t need to use
the fixing slots and brackets in the back plate.
PYROCLASSIC WOODBIN
The woodbin supplied is designed to slide under the Pyroclassic Hearth
.
If the woodbin is used
with a wooden or concrete floor we have supplied carpet squares which should be stuck to the
underside of the woodbin, avoid sticking them too close to the edges as they can then be
easily seen.
PYROCLASSIC SMALL RAISED TABLE AND WOODBIN
If the smaller option of woodbin is being used on a combustible surface then a continuous
layer of non-combustible material must be used underneath to the minimum dimensions
shown in the technical specifications, if required a powdercoated steel plate with fixing slots is
available for this.

Pyroclassic Fires Installation Instructions | Updated June 2017 | 3
POWDER COATED PANELS
Insert the side panels before the front and rear panels.
The front and rear panel are supplied
either inside the fire chamber or on the lower heat shield behind the side panels.
Note: Please ensure that the Powdercoated screens, panels and corner strips are wiped clean
of any fingerprints etc. before the fire is used.
FIXING FLUE TO THE FIRE
Please use screw provided to attach flue to fire spigot.
Please do not use a rivet as this makes it quite difficult to easily remove the flue from fire for
cleaning. Sealant is not required as this joint has a 105mm restrictor hole. If sealant must be
used, apply sparingly to inside of spigot to avoid sealant overflowing.
UNPROTECTED WALLS
Minimum unscreened clearances are 350mm from the back of the Pyroclassic fire to the wall
and 480mm from the side of the fire to any side wall
.
For a corner installation with the
Pyroclassic angled at 45 degrees to the wall the minimum unscreened clearance from the walls
is 370mm, measured from the rear corners of the heater to the wall.
PYROCLASSIC STANDARD WALL SCREEN
Please see ‘Pyroclassic Fires Wall Screen Installation Instructions’ provided with your wall
screen or online at http://www.pyroclassic.co.nz/resources/downloads/.
CORNER WALL SCREENS
Please see ‘Pyroclassic Fires Wall Screen Installation Instructions’ provided with your wall
screen or online at http://www.pyroclassic.co.nz/resources/downloads/.
EARTHQUAKE RESTRAINTS
Two steel restraints that measure 50mm x 50mm with 2 8x20mm bolts which are supplied are
to be used when the Pyroclassic fire is not installed on the combination Hearth. These are
fitted to the two slots provided along the back plate of the Pyroclassic fire and then attached
to the floor with suitable fixings.
OPTIONAL WETBACK
See separate instructions which will be attached to your wetback or online at
http://www.pyroclassic.co.nz/resources/downloads/.
WARNING: IF YOU HAVE NOT CONNECTED YOUR WETBACK TO
YOUR WATER CYLINDER-
DO NOT LIGHT THE FIRE

Pyroclassic Fires Installation Instructions | Updated June 2017 | 4
END OF JOB CHECKLIST
This list is for you to use as a quick reference to ensure all jobs have been completed prior to
you leaving the site, please ensure that all the following tasks have been done;
Ceiling insulation reinstated if installed
Wall Screens fitted where required and wiped clean
Flue sections cleaned where required
Hearth secured to floor if installed
All instruction sheets left for customer/operator
Powder coated panels fitted to fire and wiped clean
Fire secured to hearth
All warranty paperwork completed, both copies
Retaining screw from top plate to flue fitted
Here at Pyroclassic Fires, we would like to thank you for completing this installation of one of
our fires to the highest standards. We appreciate the time you have taken to ensure this fire
will give its new owner many years of service. Your efforts will help ensure a clean and healthy
future for all New Zealanders.
/