Page is loading ...

GLOSSARY CONTENT LIST
4x Wall Brackets
4x Panels
16x Inner Pots
12x 5mm Wall Plugs
12x 5mm Screws
1x 4mmx10m Poly Tube
1x Inline Dripper
1x End Dripper
1x Drip Faucet
1x Screw in Hose Adaptor
1. LOCATION
2. DESIGN
6. ATTACHING THE PANELS
TAP TIMER TROUBLE SHOOTING WARRANTY
3. MARKING THE LOCATION 4. DRILLING THE LOCATION
If the Pixel Pot is going on a solid wall such as
brick or concrete we suggest using a 6mm
masonry bit to drill the holes.
5. HANGING THE BRACKETS
Regularly check that the water is reaching the
plants in the lower panels. For even watering you
need to ensure that water is owing through every
hole and is reaching every pot.
If a pot is not receiving water try unblocking the
holes that the water runs through.
7. TESTING THE IRRIGATION
8. CONNECTING THE POTS
We suggest installing a Holman Tap Timer to automat-
ically and accurately water your GreenWall. Schedule
the tap timer to meet your required watering, this will
then ensure your plants remain hydrated and healthy
and encourage the best result for the growth of your
GreenWall.
Drippers are not working properly
Keeping your plants hydrated
If some drippers are not working well, you can
unscrew them and ush them.
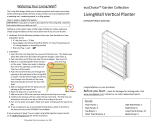
GW1016 PIXEL POT
VERTICAL PLANTING KIT
with Watering Kit included
HOLMAN GreenWall
Pixel Pot w/ Watering Kit included
Product Code: GW1016
We will honour all statutory guarantees that this
product is of acceptable quality.
(Including that it is t for purpose)
HOLMAN INDUSTRIES
11 Walters Drive,
Osborne Park, WA 6017
Ph: 1300 716 188
www.holmanindustries.com.au
Thank you for purchasing
a Holman Pixel Pot Vertical
Garden.
Please keep your receipt
as proof of purchase to
validate the 1 year product
warranty.
Please read this
instruction manual prior
to use.
For tips and tricks on watering and plant
selection visit our website.
https://www.holmanindustries.com.au/products/greenwall-pixel-pot-vertical-planting-kit/
Drip Faucet
Screw in Hose Adaptor
Inline Dripper
Inner Pots
Panels
End Dripper
Wall Brackets 5mm Wall Plugs 5mm Screws
The location of the Pixel Pot determines its
success. For the best results we recommend
installing your Pixel Pot on North and West facing
walls as they generally receive the most light and
heat.
However also consider your plant variation as this
will also determine your ideal location.
Determine how many panels you want to install to
achieve your design. The panels can be assem-
bled along the wall running horizontally or vertically.
For the integrated watering system to work with
added Pixel Pot kits we suggest introducing drip
line every 2nd row.
This will prevent the system getting blocked and
will ensure even watering through out the entire
GreenWall.
Hold the bracket to the wall to decide the location.
Ensure the bracket is level. With a marker mark the
wall through the three holes in the bracket. These
marks are your drilling guides.
Repeat this step with every bracket.
Insert the plastic wall plugs then x the stainless
steel brackets to the wall using the 5mm screws.
Hang the panels onto the brackets.
1) Connect a garden hose or poly pipe to the
hose adaptor.
2) Connect a Holman Tap Timer to your tap for
automatic watering.
3) Attach the other end of the garden hose to the
Tap Timer.
4) Turn on the water and test the drippers.
TIP - Plant the pots before connecting them on the
panel.
Each pot has a slot for a hook. Place the pot in the
panel then turn the pot to “lock” it into postition.
Example: 3 extra Pixel Pot Kits with
drip line.
/