Page is loading ...

High Temperature Infrared
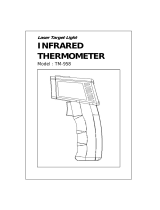
THERMOMETER
+ Type K/J/T/E/R
Model : TM-939

TABLE OF CONTENTS
1. FEATURES............................................................... 1
2. SPECIFICATIONS.....................................................
.
2
3. FRONT PANEL DESCRIPTION....................................6
3-1 Display............................................................ 6
3-2 Power On/Off Button........................................6
3-3 Sensor Button ( Left Button )............................ 6
3-4 REL Button ( Down Button )..............................6
3-5 Hold Button ( Back-light Button )......................
.
6
3-6 REC Button...................................................... 6
3-7 蚓/蚌 Button ( Up Button )................................6
3-8 Emissivity Button ( Laser Button ).....................
.
6
3-9 RS232 Output Socket.......................................
.
6
3-10 Battery Compartment/Cover..............................6
3-11 Thermocouple (Type J/K/T/E/R) Input Socket....
.
6
3-12 IR Sensing Head...............................................6
3-13 Laser Guide......................................................6
4. IR MEASURING PROCEDURE....................................
.
7
4-1 General IR Measurement....................................
.
8
4-2 Laser Target Guide.............................................8
4-3 Measurement Field/Distance...............................
.
9
4-4 Disturbance.......................................................
.
9
4-5 Emissivity Adjustment.........................................10
4-6 Offset Value Adjustment.....................................11
4-7 Others...............................................................12
5. THERMOCOUPLE ( Type K/J/T/E/R )
MEASURING PROCEDURE.........................................12
6. DATA HOLD, RECORD, RELATIVE,
LCD BACK-LIGHT, AUTO POWER OFF DISABLE..........13
7. BATTERY REPLACEMENT..........................................15
8. RS232 PC SERIAL INTERFACE...................................15
9. OPTIONAL ACCESSORIES & PROBES.........................17

1. FEATURES
* High temperature infrared thermometer, non-contact
temperature measurement, wide range -20 蚓 to 650 蚓
( -4 蚌 to 1112 蚌 ),
* 2 in 1, Infrared thermometer + Thermocouple ( Type
K/J/T/E/R ) thermometer.
* Microcomputer circuit with excellent performance.
* Build in 蚓 & 蚌 select button on the front panel.
* 0.1 degree resolution for type K/J/T/E.
* Data hold function for storing the desired value on display.
* Memory function to record the maximum & minimum
reading.
* Build in a REL button, useful for relative measurement.
* LCD display with back light, easy readout.
* Sensor select button on the front panel, easy to change
different type probe.
* Emissivity adjustment for IR thermometer.
* Laser guide for IR temperature measurement.
* Thermocouple probe accept 5 different types : type K,
type J, type T, type E, type R.
* RS 232 data output, easily connect with computer.
* Optional data acquisition software for data record.
* Auto power off saves battery life.
* Built-in low battery indicator.
* Heavy duty & compact housing case with stand.
* Powered by 006P DC 9V battery.
1

2. SPECIFICATIONS
2-1 General Specifications
Display 51 mm x 32 mm supper large LCD display,
15 mm ( 0.6" ) digit size.
Sensor
1. Infrared thermometer
Type ( Non contact temperature measurement )
2. Thermocouple probe
@ Thermocouple type K
@ Thermocouple type J
@ Thermocouple type T
@ Thermocouple type E
@ Thermocouple type R
Functions 蚓, 蚌, Data hold, Memory ( Max., Min. ),
Relative measurement,
Emissivity adjustment (IR thermometer).
Resolution 0.1 degree or 1 degree.
Circuit Exclusive microcomputer circuit, the
software build in linearity correction function
instead of the traditional hardware circuit.
Emissivity Range : 0.20 to 1.00.
Adjustment Adjustment by pushing button on front panel.
Laser Guide Red laser light, less than 1 mW,
Meet EN60825
Probe Input
Thermocouple couple probe :
Socket Standard 2 pin thermocouple socket.
2

Sampling Time Approx. 1 second.
Hold Function To freeze the display reading value.
Memory Recall Memorize the Maximum, Minimum
reading.
Offset Available for IR thermometer, &
Adjustment Thermocouple thermometer Adjustment by
pushing button on front panel.
Over Indication Show " - - - - ".
Data Output RS232 PC serial interface.
Power Supply Alkaline or heavy duty type,
DC 9V battery, 006P, MN1604 ( PP3 )
or equivalent.
Power Approx. DC 11 mA ( w/o laser light on ).
Consumption Approx. DC 16 mA ( with laser light on ).
*
Above consumption value is caculated unde
r
the function of IR thermometer & without LC
D
back light.
Operating 0 to 50 蚓 (32 to 122 蚌).
Temperature
Operating Less than 80% RH.
Humidity
Size HWD 200 x 68 x 30 mm ( 7.9 x 2.7 x 1.2 inch ).
Weight 220 g/0.48 LB.
Standard Operational manual..... 1 PC.
Accessory
Optional
Thermocouple couple ( Type K ) probe :
& accessories Model : TP-01, TP-02A, TP-03, TP-04.
Temp. Probe
RS232 cable
Model : UPCB-02
(Refer page 17)
Application software, windows version.
Model : SW-U801-WIN
3

2-2 Electrical Specifications
A. Infrared Thermometer
Resolution/ 1蚓 - 20 蚓 to 650 蚓
ranges 1蚌 -4 蚌 to 1202 蚌
Accuracy
< 400 蚓
3 % of reading or 3蚓 ( 5 蚌),
which ever is greater.
400 蚓
3 % of reading.
*
Accuracy test under the measurement
range less than 300 蚓 ( 572 蚌 ).
* Meter operating Temp. within 23 5 蚓
& the emissivity value of measurement
target set to 0.95.
* Spec. tested with the 20 cm Dia. black
body, the measuring distance from the
probe sensing head is 30 cm.
* Spec. tested under the environment
RF Field Strength less than 3 V/M &
frequency less than the 30 MHz only.
Temp. Sensor Thermocouple pie.
Emissivity
* By push button.
Setting
Setting range : 0.20 to 1.00.
* Factory preset emissivity value to 0.95,
which will cover 90% of a typical
application.
Measurement 6 to 12 micro meter.
Wave length
Region
Distance Factor D/S : Approx. 7:1.
D - Distance, S - Spot.
4

B. Thermocouple ( type K/J/T/E/R )
Thermometer
Sensor Reso- Range Accuracy
Type lution
Type K 0.1 蚓 -50.0 to 1300.0 蚓 ( 0.2 % + 0.5 蚓 )
-50.1 to -100.0 蚓 ( 0.2 % + 1 蚓 )
0.1 蚌 -58.0 to 2372.0 蚌 ( 0.2 % + 1 蚌 )
-58.1 to -148.0 蚌 ( 0.2 % + 1.8 蚌 )
Type J 0.1 蚓 -100.0 to 1150.0 蚓 ( 0.2 % + 0.5 蚓 )
-50.1 to -100.0 蚓 ( 0.2 % + 1 蚓 )
0.1 蚌 -58.0 to 2102.0 蚌 ( 0.2 % + 1 蚌 )
-58.1 to -148.0 蚌 ( 0.2 % + 1.8 蚌 )
Type T 0.1 蚓 -50.0 to 400.0 蚓 ( 0.2 % + 0.5 蚓 )
-50.1 to -100.0 蚓 ( 0.2 % + 1 蚓 )
0.1 蚌 -58.0 to 752.0 蚌 ( 0.2 % + 1 蚌 )
-58.1 to -148.0 蚌 ( 0.2 % + 1.8 蚌 )
Type E 0.1 蚓 -50.0 to 900.0 蚓 ( 0.2 % + 0.8 蚓 )
-50.1 to -100.0 蚓 ( 0.2 % + 1 蚓 )
0.1 蚌 -58.0 to 1652.0 蚌 ( 0.2 % + 1.5 蚌 )
-58.1 to -148.0 蚌 ( 0.2 % + 1.8 蚌 )
Type R 1 蚓 0 to 600 蚓 ( 1 % + 5 蚓 )
601 to 1700 蚓 ( 1.5 % + 5 蚓 )
1 蚌 32 to 1112 蚌 ( 1 % + 10 蚌 )
1113 to 3092 蚌 ( 1.5 % + 10 蚌 )
Remark :
a. Accuracy value is specified for the meter only.
b. Accuracy is tested under the meter's environment
temperature within 23 5蚓.
c. Linearity Correction :
Memorize the thermocouple's curve into the intelligent
CPU circuit,
5

3. FRONT PANEL DESCRIPTION
Fig. 1
3-1 Display 3-7 蚓/蚌 Button
3-2 Power On/Off Button ( Up Button )
3-3 Sensor Button 3-8 Emissivity Button
( Left Button ) ( Laser Button )
3-4 REL Button 3-9 RS232 Output Socket
( Down Button ) 3-10 Battery Compartment/Cover
3-5 Hold Button 3-11 Thermocouple
( Back light Button ) (Type K/J/T/E/R) Input Socket
3-6
H
REC Button 3-12 IR Sensing Head
3-13 Laser Guide
6

4. IR MEASURING PROCEDURE
4-1 General IR Measurement
Measuring consideration of the " Emissivity "
All objects emit invisible energy. The amount of energy
is emitted proportional to the object's temperature & its
ability to emit energy. This ability is called emissvity
based upon the material that object is made of and its
surface roughness. Emissivity values range from 0.1 for a
very reflective object to 1.00 for a black body.
The probe of this IR THERMOMETER senses
energy and calculates the temperature based on the
amount of IR energy it receives and a factory set
emissivity value is 0.95, which will cover 90% of
the typical applications. However if the emissivity
value of the measured material is not 0.95, then
should adjust the " Emissivity Value ".
The procedure of the emissivity adjustment,
please refer to " 4-5 How to Calculate & Adjust
the Emissivity, page 10 "
1)Power On :
Power on the meter by pressing the " Power Off/On Button "
( 3-2, Fig. 1 ).
The display will count down from " 99999 ", " 88888 ", .......
to " 00000 ", then show the IR temperature value ( approx.
room temperature value ) & the emissivity value on the
right bottom corner of the LCD.
7

蚓
IR 0.95
Remark : Suppose the approx. room temperature
is 21 蚓
2)Select the " 蚓 " " 蚌 " display unit by pressing " 蚓/蚌 Button "
( 3- 7, Fig. 1 ).
3)Hold the meter, point the " IR Sensing Head " ( 3-12,
Fig. 1 ) to the measured object. The meter will display
the spot's temperature values.
Consideration :
a
)
The displayed value may fluctuate if the meter is
shaken or suddenly stretched etc. during measurement.
b
)
The device automatically compensates with tempearture
of the sensor influenced by the ambient temperature.
When carry out the standard measurement, the device
can be measured quickly for normal environment
Temp. changes with 23 5蚓. For more accurate
measurement, keep it approx. 30 min. in the new
temperature.
c) When low temperature objects are measured directly
after high temperature objects, some time is required
for the display to stabilize.
4-2 Laser Target Guide
Press the " Laser Button " ( 3-8, Fig. 1 ) once will
activate the laser light from the " Laser Guide " ( 3-13, Fig. 1 ).
The Laser Target Guide is a useful tool to approximately
locate the measured target of IR thermometer.
8

4-3 Measurement Field Distance/Spot ( D/S ) value
The object must large than spot size calculated by the
measurement Distance/Spot ratio ( Distance Factor, refer to
page 4 ). For accurate measurement, a 1.5 times distance/spot
size is recommended.
Careful collimating is required when the object is not
large enough, if the temperature of the object or a part of
it is higher ( or lower ) than the ambient temperature.
After the direction of the probe ( little move the probe ),
the ideal collimating is obtained the display registers the
maximum ( or minimum ) reading. However the emissivity
of the object and its ambient must be roughly the same.
4-4 Disturbance
Objects with low emissivity or objects with a low
temperature but high emissivity, emit little infrared energy.
Fi
g
. 2
9

For this reason, measurement of these objects is
effected by powerful infrared energy radiated from nearby
objects with high emissivity or high temperature.
For example, when such objects are measured in sunlight,
erratic measurement happened because of powerful
radiated energy from the sun and reflected by the surface of
the object and received by the sensor.
4-5 Emissivity Adjustment
A factory set emissivity value is 0.95, which will cover
90% of the typical applications. However to match the
correct emissivity with the specific value of the object is
important in order to obtain the true temperature. When
the emissivity of the object is known & its value is not 0.95.
It is necessary to adjust the emissivity value again. The
adjustment procedures are listed as following :
a)Press the " Emissivity Button " ( 3-8, Fig. 1 )
continuously for at least 2 seconds. The emissivity value
will flash, then release the button.
b)Use the " Down Button " ( 3-4, Fig. 1 ), " Up Button "
( 3-7, Fig. 1 ) or the " Left Button " ( 3-3, Fig. 1 ) to adjust
the required emissivity value.
Press the " Emissivity Button " continuously for at least 2
seconds again. The emissivity value will stop flashing.
Release the button, the adjustment procedures are
completely finished.
10

4-6 Offset Value adjustment
Caused by the environment temperature change or
other reasons.... the measuring value may drift few degrees
( 1, 2 or 3 degrees ).
If you found the measuring values exist little deviation
especially when measuring the low temperature, then offset
value adjustment will make the compensation & let the
measurement more precise.
The offset value adjustment procedures are as following :
a)Use two fingers to press the " Hold Button " ( 3-5, Fig. 1 )
& " REC Button " ( 3-6, Fig. 1 ) together & not release.
The small digit ( right bottom corner of LCD )
will show the same value of main LCD ( big digit ).
For example :
蚓
IR 21
b)Still hold on the " Hold Button " & the " REC Button ",
use the " Down Button " ( 3-4, Fig. 1 ), " Up Button "
( 3-7, Fig. 1 ) to adjust the big display until the required
exact environment Temp. value appears.
For example :
蚓
IR 21
11

Then release all buttons, the small digit display ( right
bottom corner of LCD ) will disappear, the offset
adjustment procedures are completely finished.
For example :
蚓
IR 0.95
4-7 Others
a
)
If the meter seems to be giving incorrect reading. Then
the object may exist the not correct emissivity value (0.95),
then it is necessary to make the right emissivity
correction. procedures ( refer 4-5 ).
b)If the surface for measuring is covered by frost or
other material, clean it expose the surface.
c) If the surface for measuring is highly reflective, apply
masking tape or apply the known " block body paint "
( such as emissivity 0.95 ).
5. THERMOCOUPLE ( Type K/J/T/E/R )
MEASURING PROCEDURE
1)After power on the meter, select the sensor type ( Type
K/J/T/E/R ) by pressing " Sensor Button " ( 3-3, Fig. 1 ).
The display will show the symbol of K, J, T, E, R.
2)Insert the temp. probe plug into the " Thermocouple
Input Socket " ( 3-11, Fig. 1 ).
3)Select the " 蚓 " " 蚌 " display unit by pressing " 蚓/蚌 Button "
( 3- 7, Fig. 1 ).
12

4)Display will show the temperature reading that measured
from the probe.
5) Offset Value adjustment :
Same as 4-6, refer to page 11.
Consideration
:
* When insert the probe plu
g
into the Temp. input socket,
please pay attention to the correct polarity.
* When the probe plu
g
is inserted into the thermometer
socket, or when replace a new probe, the plu
g
must
be allowed to stabilize until the temperature same as
the socket because this is a thermal contact cold
j
unction compensation device.
This will take a couple of minutes and only applies when the
probe plu
g
has previously been exposed to an ambient
temperature that is different from the thermometer socket.
6. DATA HOLD, RECORD, RELATIVE,
LCD BACK LIGHT and AUTO POWER OFF
DISABLE
6-1 Data Hold
1)During the measurement, pressing the " Hold Button "
( 3-5, Fig. 1 ) will hold the measured value & the LCD
will show " HOLD " symbol.
2)Press the " Hold Button " again to exit the data hold
function
13

6-2 Data Record ( Maximum, Minimum reading )
1)The DATA RECORD function displays the maximum
and minimum readings. To start the DATA RECORD
function by pressing the " REC Button " ( 3-6, Fig. 1 )
once. " REC " symbol will appear on the LCD display.
2)With the " REC " symbol on the display :
(a) Press the " REC Button " ( 3-6, Fig. 1 )
once, the " Max " symbol along with the maximum
value will appear on the display.
(b) Press the " REC Button " again, the " Min "
symbol along with the minimum value will appear
on the display.
(c) To exit the memory record function, press the
" REC Button " for at least 2 seconds and then
the display will revert to the current reading.
6-3 Relative measurement
1)During the measurement, the circuit will memorize the
last measured value when press the " REL Button " ( 3-4,
Fig. 1 ) once, and display will show zero value & a " REL "
symbol appears on the LCD.
2)The new measured temperature values will deduct above
memorized " Last measured values " automatically.
3)It will cancel the relative measurement function if the
" REL Button " be pressed again and at same time the " REL "
marker will disappear.
Considering :
When meter in the " Data Hold " & " Data Record "
condition, the relative function can't be activated.
14

6-4 LCD Back-light
Press the " Back Light Button " ( 3-5, Fig. 1 ) for 2 seconds
at least. The " Back-light " of LCD will light 10 seconds
approximate and then off automatically.
6-5 Auto Power Off disable
The instrument build-in " Auto Power Off " function in
order to prolong battery life. The meter will switch off
automatically if none of the buttons are pressed for
approx. 10 minutes.
To disable this feature, Select the memory record
function during measurement, by pressing the
" REC Button " ( 3-6, Fig. 1 ).
7. BATTERY REPLACEMENT
1)When the left top corner of LCD display show " ",
it is necessary to replace the battery.
However within specification measurement may still be
made for several hours after low battery indicator appears
2)Open the " Battery Cover " ( 3-10, Fig. 1 ) away from the
instrument and remove the battery.
3)Install a 9 V battery ( Alkaline or Heavy duty type ) and
reinstate the cover.
8. RS232 PC SERIAL INTERFACE
The instrument features an RS232 output via 3.5 mm
terminal ( 3-9, Fig. 1 ).
The connector output is a 16 digit data stream which
can be utilized by the user for specific application.
15

A RS232 lead with the following connection will
be required to link the instrument with the PC
serial input.
Meter PC
(3.5 mm
j
ack plu
g
) (9W 'D" Connector)
Center Pin................................ Pin 4 Pin 2
2.2
K
Ground/shield..............................Pin 2 Pin 5 resister
The 16 digit data stream will be displayed in the
following format :
D15 D14 D13 D12 D11 D10 D9 D8 D7 D6 D5 D4 D3 D2 D1 D0
Each digit indicate the following status :
D0 End Word
D1 & D8 Display readin
g
, D1 = LSD, D8 = MSD
For example :
If the display readin
g
is 1234, then D8 to D1 is :
0000123
4
D9 Decimal Point(DP), position from ri
g
ht to the left
0 = No DP, 1= 1 DP, 2 = 2 DP, 3 = 3 DP
D10 Polarity
0 = Positive 1 = Ne
g
ative
D11 & D12 Annunciator for Display
蚓
= 01
蚌
= 02
D13 1
D14 4
D15 Start Word
RS232 FORMAT : 9600, N, 8, 1
16

9. OPTIONAL ACCESSORIES & PROBES
Thermocouple Model : TP-01
Probe * Measure Rage : -40 蚓 to 250 蚓, -40 蚌
( Type K ) to 482 蚌.
* Ultra fast response naked-bead
thermocouple, general purpose
application.
Thermocouple Model : TP-02A
Probe * Measure Range : -50 蚓 to 900 蚓, -50 蚌
( Type K ) to 1650 蚌.
* Dimension: 10 cm tube, 3.2 mm Dia.
Thermocouple Model : TP-04
Probe * Measure Range : -50 蚓 to 400 蚓, -50 蚌
( Type K ) to 752 蚌.
Surface Probe * Dimension: 10 cm tube, 8 mm Dia.
Thermocouple Model : TP-03
Probe * Measure Range : -50 蚓 to 1200 蚓,
-50蚌 to 2200 蚌.
( Type K ) * Size : Temp. sensing head - 15 mm Dia.
Probe length : 120 mm.
RS232 cable Model : UPCB-02
* RS232 cable for connecting between the
meter & the computer.
Software Model : SW-U801-WIN, Windows version.
* Software apply as the performance of data
logging system & data recorder...
Carrying Case Model : CA-03, Vinyl soft carrying case.
Carrying Case Model : CA-06, Hard carrying case.
17
0310-TM-939
/